
はじめに
ListView の並びは変えずにアイテムを一番上に表示したいな~ ということでやってみました。
やり方
ListViewのScrollViewPosプロパティとGetItemRectメソッドを使います。
var
  itemRect:TRectF;
begin
  itemRect :=  ListView1.GetItemRect(対象アイテムのインデックス);
  ListView1.ScrollViewPos := ListView1.ScrollViewPos + itemRect.Top;
end;
GetItemRectメソッドは、ListViewの現在のスクロール位置からの相対位置を返すので、対象アイテムがリストの上側に隠れている場合は負の値になります。
その為、現在のスクロール位置にアイテム位置を足し算してあげればOKです。
更に、FloatAnimationを組み合わせれば、スクロールする様子をユーザーに見せることもできます!
なお、ScrollViewPosの最大値を超えてはスクロールしない為、最後の方のアイテムはリストの先頭には表示できません。
その他、ScrollToメソッドもあります。こちらは対象のアイテムが画面内に無い場合に、そのアイテムが表示されるまでスクロールしてくれます。(ここでは詳しく扱いません)
サンプル
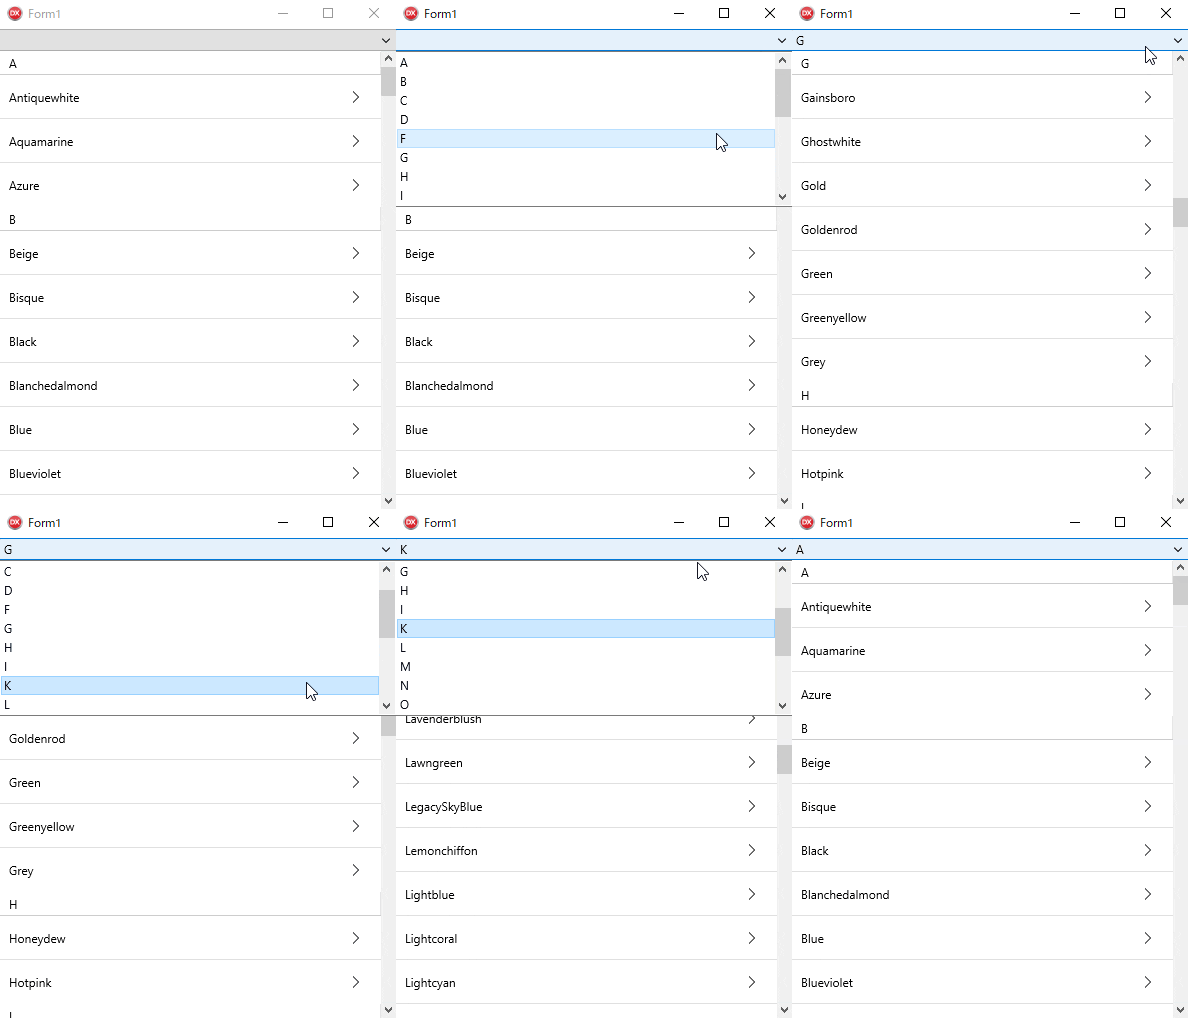
例として、リストアイテムのヘッダーを頭出しするプログラムを作ってみました。
手順1 コンポーネント配置
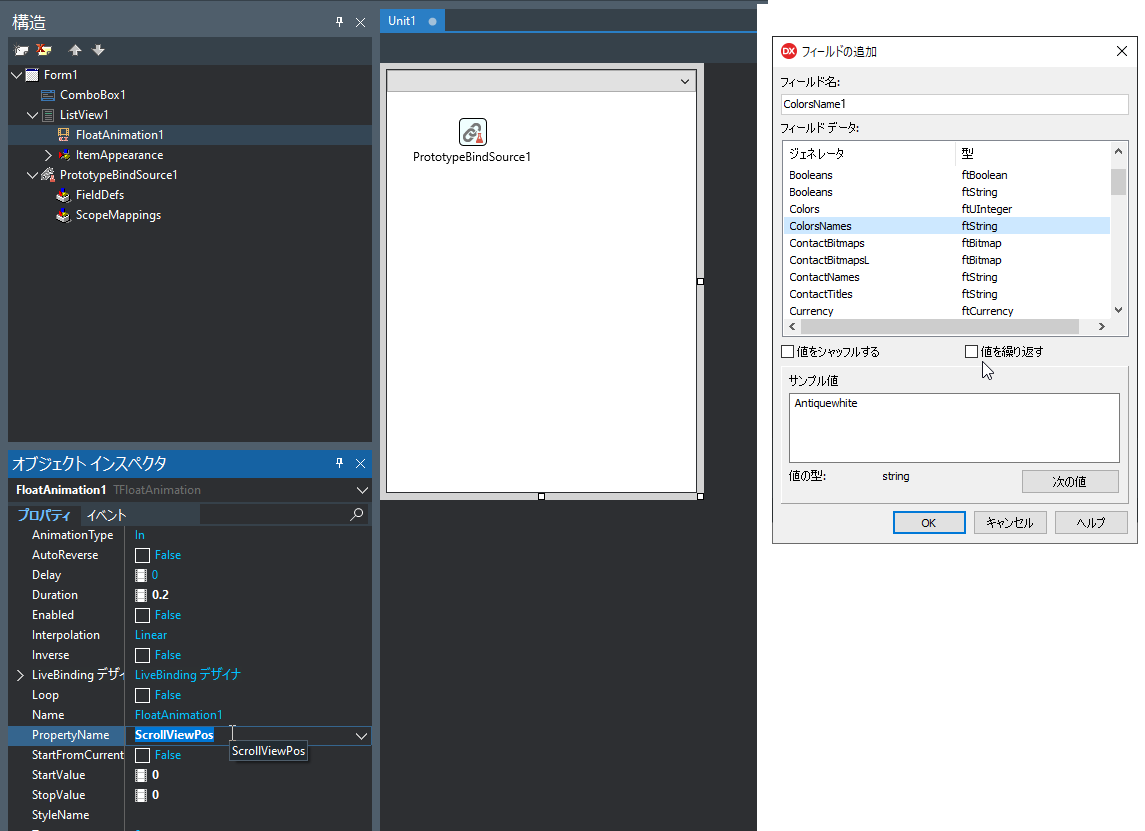
- フォームに
TComboBox、TListView、TProtoTypeBideSourceを配置します。 -
ComboBox1はAlign:Top、ListView1はAlign:Clientに設定します。 -
ProtoTypeBindSource1はColorsNamesフィールドを追加します。その際、値のシャッフルと繰り返しはチェックを外します。 -
TFloatAnimationをListView1の子になるよう配置します。PropertyNameフィールドに、ScrollViewPosを設定します。
手順2 バインディング
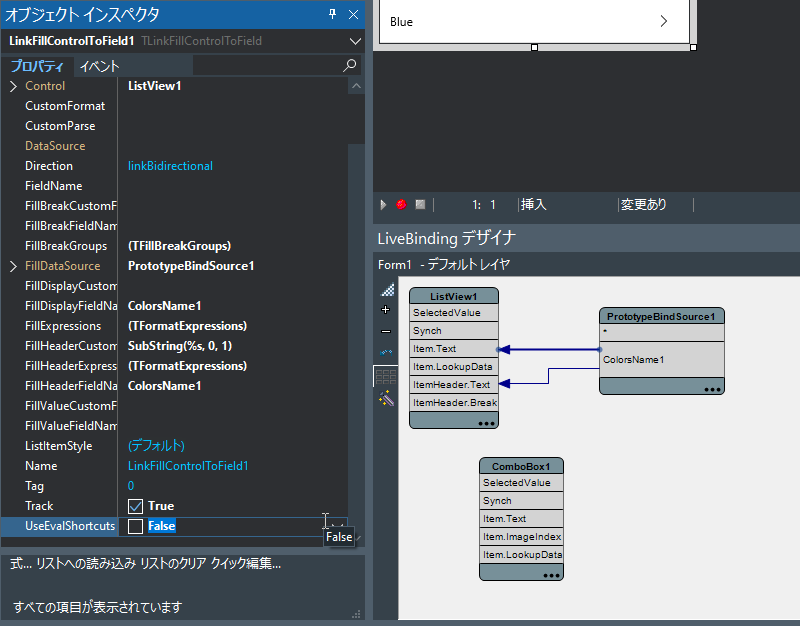
- デザイナ上で
ListView1を右クリック→ビジュアルにバインドを選択します(LiveBindingデザイナが表示されます)。 - LiveBindingデザイナ上で、
ProtoTypeBindSource1のColorsName1からListView1のItem.Textへドラッグします(矢印が引かれます)。同様に、ColorsName1からItemHeader.Textに矢印を引きます。 - オブジェクトインスペクタにて、
LinkFillControlToField1のFillHeaderCustomFormatにSubString(%s, 0, 1)を設定します(選択肢に出てきます)。
また、UseEvalShortCutをFalseにします。
手順3 イベント処理記述
オブジェクトインスペクタにて、LinkFillControlToField1 のイベントOnFilledListをダブルクリックし、以下のようにコードを記述します。
内容は、ComboBox1にListView1内のヘッダーアイテムを登録しています。
procedure TForm1.LinkFillControlToField1FilledList(Sender: TObject);
var
  i:integer;
  item:TListViewItem;
begin
  ComboBox1.Clear;

  for I := 0 to ListView1.ItemCount -1 do
  begin
    item := ListView1.Items[i];
    if item.Purpose = TListItemPurpose.Header then
      ComboBox1.Items.AddObject(item.Text, item);
  end;
end;
次に、ComboBox1のOnChangeイベントに以下を記述します。
リストのスクロール位置の取得とアニメーションの設定・開始を行っています。
procedure TForm1.ComboBox1Change(Sender: TObject);
var
  item:TListViewItem;
  itemRect:TRectF;
begin
  if ComboBox1.ItemIndex > -1 then
  begin
    item := ComboBox1.Items.Objects[ComboBox1.ItemIndex] as TListViewItem;
    itemRect := ListView1.GetItemRect(item.Index);

    FloatAnimation1.StartValue := ListView1.ScrollViewPos;
    FloatAnimation1.StopValue := ListView1.ScrollViewPos+itemRect.Top;
    FloatAnimation1.Start;
  end;
end;
完成
コンパイルして、動作確認してみましょう!
応用
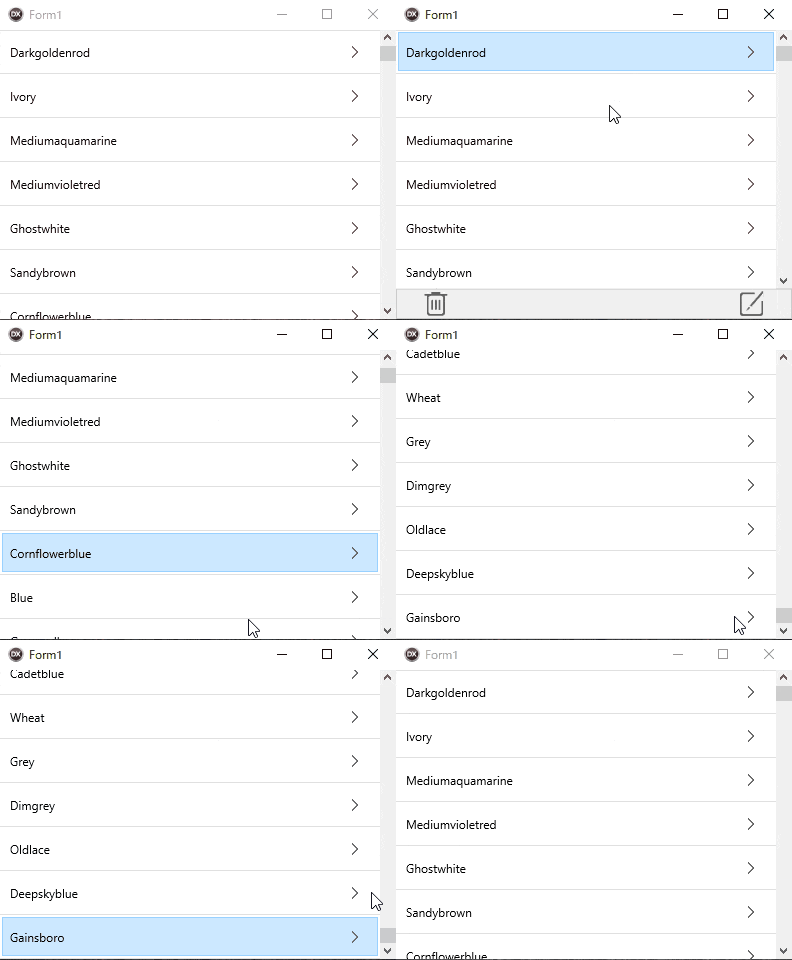
こんな感じのインターフェースも簡単に作れます!(操作パネルによってアイテムが隠れないようにスクロールする処理)
やり方
フォームデザイン
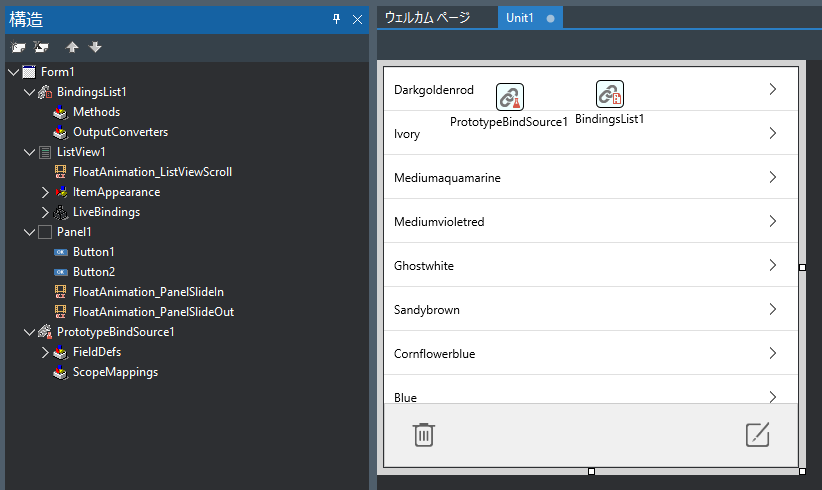
各コントロールを以下のように設定します(デフォルト値から変えた部分のみ)。
ListView1
 Align:Client
FloatAnimation_ListViewScroll
 PropertyName:ScrollViewPos
 StartFromCurrent:True
Panel1
 Align:Bottom
 Height:好みの大きさ
FloatAnimation_PanelSlideIn
 PropertyName:Height
 StartFromCurrent:True
FloatAnimation_PanelSlideOut
 Delay:3.0
 PropertyName:Height
 StartFromCurrent:True
(Button1、Button2は飾りなので適当に)
ソースコード
Form1 のOnCreateイベントと、ListView1 の OnItemClickイベントを作成します。
procedure TForm1.FormCreate(Sender: TObject);
begin
  OriginPanelHeight := Panel1.Height;
  Panel1.Height := 0;
end;

procedure TForm1.ListView1ItemClick(const Sender: TObject;
  const AItem: TListViewItem);
var
  itemRect:TRectF;
  overlapped:Single;
begin

  itemRect := ListView1.GetItemRect(AItem.Index);
  overlapped := itemRect.Bottom - (ListView1.Height - OriginPanelHeight);

  if overlapped > 0 then
  begin
    FloatAnimation_ListViewScroll.StopValue := ListView1.ScrollViewPos + overlapped;
    FloatAnimation_ListViewScroll.Start;
  end;

  FloatAnimation_PanelSlideIn.StopValue := OriginPanelHeight;

  FloatAnimation_PanelSlideIn.Start;
  FloatAnimation_PanelSlideOut.Start;
end;
以上です。
おわりに
Delphi (*´ω`*) ハヤル!