はじめに
本記事は、3年前に書いた以下の記事を大幅に見直して書き改めたものです。
PrismとReactivePropertyで簡単MVVM!
上記の記事は、私の古い認識のもとに書き上げられました。
私の当時の認識で、Prismの機能のごく一部を使ってWPFアプリケーションを構成することが「簡単」だと思っていましたが、時が過ぎ、その認識が変化しました。
即ち、Prismの機能にもう少し乗っかった方が、結果的に「簡単」だと思い直したのです。
また、当時の未熟さから、誤った考えのもとに書かれた部分も見受けられます。
古い記事に「いいね」をいただく度、そのことをお伝えし直したいという気持ちになっていましたが、この度、執筆するやる気を確保できましたので、本記事を投稿するに至りました。
Prismの機能は多彩ですが、本記事では覚えておくと開発が簡単になる、効果の高い部分のみをピックアップしてお伝えできればなと思います。
.NET Core 3.0
今まで、WPFは.NET Framework固有のものでした。
しかし、2019年秋にリリースされるであろう.NET Core 3.0には、新たにWPFの機能が乗せられており、.NET Frameworkと同じようにWPFアプリケーションを作成できるようになります。
世間では、Javascriptを中心に、新たなGUIフレームワークが台頭しつつありますが、まだWPFの人口も残っているのではないでしょうか。
本記事の執筆時点では正式リリースがまだですが、以下では.NET Core 3.0-previewを使用し、簡単なWPFのサンプルアプリの作成を通して、PrismとReactivePropertyの使用方法をご紹介します。
本記事の開発環境
- Windows 10 Home
- dotnetcore-sdk 3.0.100-preview5-011568
- Prism.Unity 7.2.0.1233-pre
- ReactiveProperty 5.5.1
- Visual Studio Code
GitHub
各ライブラリについて
Prismについて
Nugetを見ると、Prism関連のパッケージがたくさんあります。
ここで、各パッケージの意味を見てみましょう。
| パッケージ名 | 説明 |
|---|---|
| Prism.Core | 前提パッケージ |
| Prism.Wpf | WPF用パッケージ |
| Prism.Forms | Xamarin用パッケージ |
| Prism.Autofac | WPF用(Autofac使用) |
| Prism.DryIoc | WPF用(DryIoc使用) |
| Prism.Mef | WPF用(Mef使用) |
| Prism.Ninject | WPF用(Ninject使用) |
| Prism.StructureMap | WPF用(StructureMap使用) |
| Prism.Unity | WPF用(Unity使用) |
| Prism.Autofac.Forms | Xamarin用(Autofac使用) |
| Prism.DryIoc.Forms | Xamarin用(DryIoc使用) |
| Prism.Unity.Forms | Xamarin用(Unity使用) |
Prism.Coreは前提パッケージで、プラットフォーム共通の機能が入っています。
Prism.WpfとPrism.Formsは、それぞれWPF用とXamarin用です。
その下の6つのパッケージはWPF用で、DIコンテナとしてそれぞれの外部パッケージを使用するものです。
最後の3つはXamarin用で、DIコンテナとしてそれぞれの外部パッケージを使用します。
WPFアプリを作るうえでは、WPF用でコンテナありの6つの中から選択することになります。
今回は、.NET Core対応ありで公式サンプルにも使用されている、Prism.Unityを使用します。
Prism.UnityはPrism.Wpfに依存し、Prism.WpfはPrism.Coreに依存するので、Prism.Unityだけインストールすれば大丈夫です。
Unityについて
UnityはDI(依存性の注入)ライブラリです。
Unityという同名のゲームエンジンが存在しますが、全く関係はありません。
DIライブラリは沢山ありますが、C#においてはこのUnityが有名どころです。
Prism.UnityはUnityに依存するので、Prism.Unityだけインストールするようにしましょう。
Prism-Samples-Wpf
Prism.Unityを使用した、公式サンプルです。
29種類のサンプルがあり、各サンプルは非常に小さなプロジェクトから構成されているので、簡単に機能の把握ができます。
正直、このサンプルを見れば本記事で説明することはあまりありませんが、本記事では、重要な機能をかいつまんでご紹介するようにします。
Prismの機能概観
| 機能 | 名前空間 |
|---|---|
| DIコンテナの補助 | Prism.Ioc, Prism.Unity |
| Region | Prism.Regions |
| Navigation | Prism.Navigation |
| EventAggregator | Prism.Events |
| Dialog | Prism.Services.Dialogs |
| MVVMの補助 | Prism.Mvvm |
| Module | Prism.Modularity |
-
DIコンテナの補助
- 外部のDIライブラリを使用し、自動的にクラスをコンテナに登録したり、コンストラクタインジェクション、セッターインジェクションを行ないます。
-
Region
- 名前をつけたViewの領域に、別のViewを追加するなどの管理ができます。
-
Navigation
- Regionのヒストリ機能や、ライフサイクル管理ができます。
- 本記事では扱いません。
-
EventAggregator
- ViewModelやViewのイベントをPubSubパターンで統合管理します。
-
Dialog
- ダイアログの作成と呼び出しを行ないます。
-
Prism 7.2からの機能です。 - 本記事では扱いません。
-
MVVMの補助
-
INotifyPropertyChangedの実装補助、コマンドの実装補助、バリデーションの実装補助を行ないます。 - 本記事では扱いません(
BindableBaseクラスが登場するのみ)。
-
-
Module
- 別のアセンブリにあるクラスを
Prismアプリケーションに含めるために使用します。 - 本記事では扱いません。
- 別のアセンブリにあるクラスを
ReactivePropertyについて
前章の「MVVMの補助」の部分は、PrismよりもReactivePropertyに任せるほうが簡単だという認識です。
Reactiveとは、Observerパターンによる、時系列データ(イベントなど)の監視、およびそのデータ群に対する演算(LINQのような)を扱うものです。
System.Reactiveという外部ライブラリに依存しています。
GUIアプリはイベントに対処しなくてはならないので、このReactiveの考え方は有効です。
ReactivePropertyは、主にMVVMにおけるViewModelのプロパティとコマンドを、Reactiveに扱うことを可能とします。
サンプルプロジェクトの概要
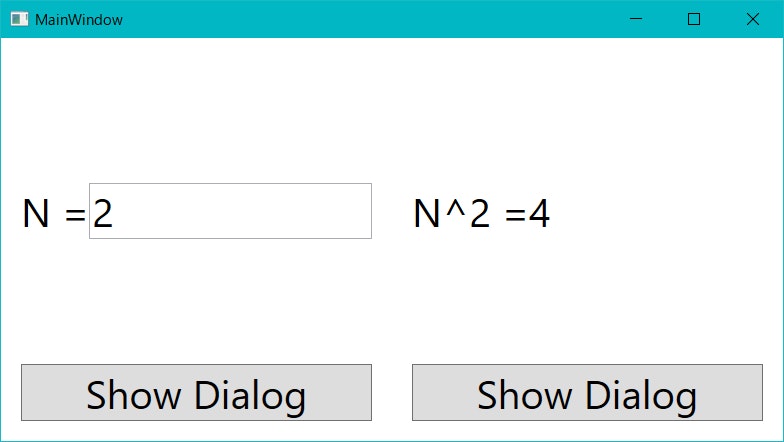
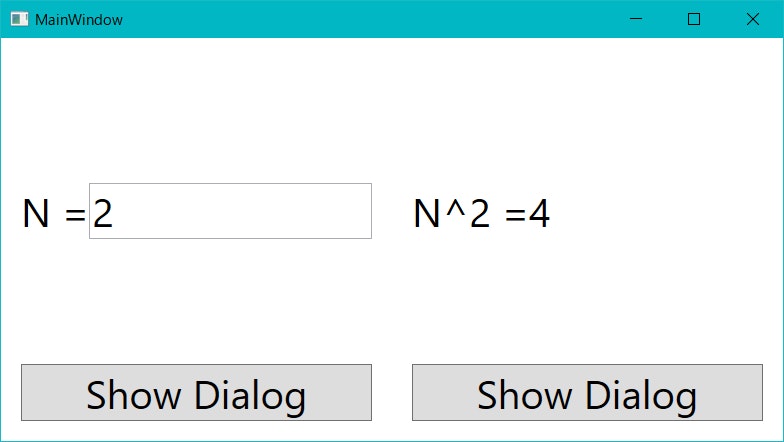
これから作るアプリの画面を以下に示します。
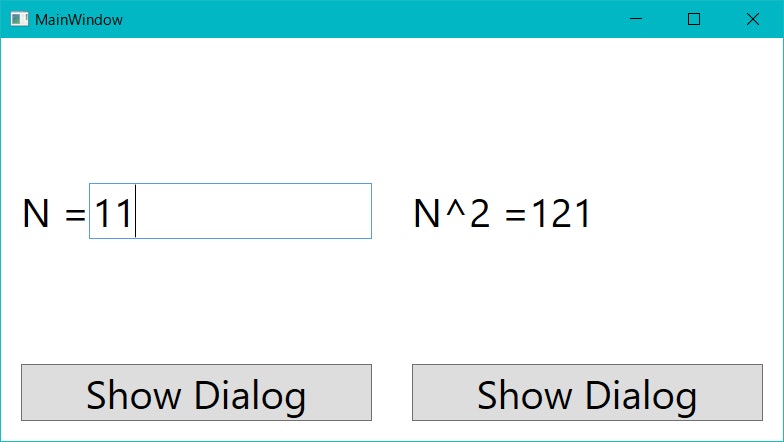
数値を入力すると、2乗を計算するアプリです。
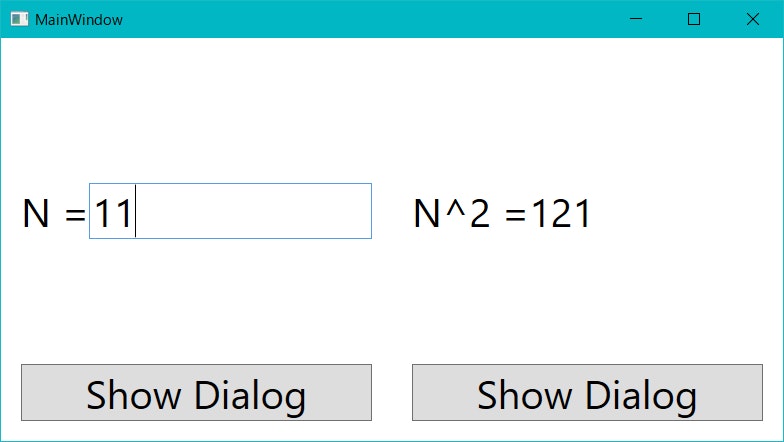
入力は即座に反映されます。
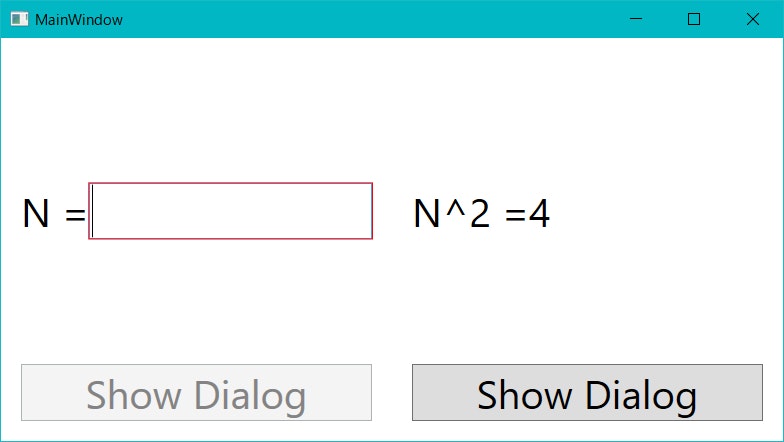
入力のバリデーションも行います。
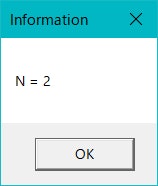
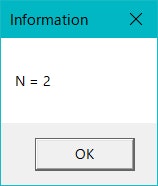
ボタンを押すと、ダイアログが表示されます。
プロジェクトの構造
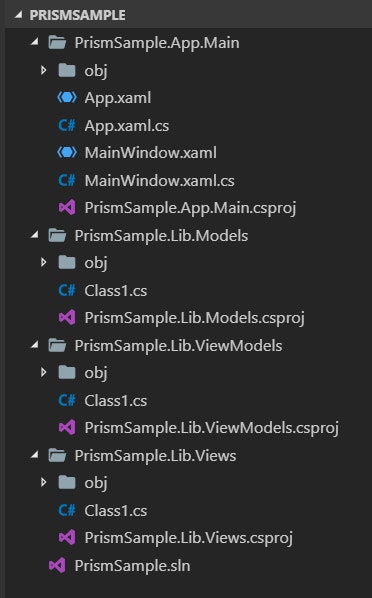
プロジェクト群を以下のように作成しました。
プロジェクトを小分けにしない方が作るのは簡単ですが、今回は分けて作成しました。
# ディレクトリの作成
> mkdir PrismSample
> cd PrismSample

# プロジェクト群の作成
> dotnet new sln
> dotnet new wpf -o PrismSample.App.Main
> dotnet new classlib -o PrismSample.Lib.Views
> dotnet new classlib -o PrismSample.Lib.ViewModels
> dotnet new classlib -o PrismSample.Lib.Models

# ソリューションへの追加
> dotnet sln add .\PrismSample.App.Main\ .\PrismSample.Lib.Views\ .\PrismSample.Lib.ViewModels\ .\PrismSample.Lib.Models\

# プロジェクト参照の追加
> dotnet add .\PrismSample.App.Main\ reference .\PrismSample.Lib.Views\
> dotnet add .\PrismSample.App.Main\ reference .\PrismSample.Lib.ViewModels\
> dotnet add .\PrismSample.Lib.ViewModels\ reference .\PrismSample.Lib.Views\
> dotnet add .\PrismSample.Lib.ViewModels\ reference .\PrismSample.Lib.Models\

# パッケージの追加
> dotnet add .\PrismSample.App.Main\ package Prism.Unity -v 7.2.0.1233-pre
> dotnet add .\PrismSample.Lib.Views\ package Prism.Unity -v 7.2.0.1233-pre
> dotnet add .\PrismSample.Lib.ViewModels\ package Prism.Unity -v 7.2.0.1233-pre
> dotnet add .\PrismSample.Lib.ViewModels\ package ReactiveProperty
.csprojの修正
.NET Core 3.0に対応させるため、下記のように修正しました。
<Project Sdk="Microsoft.NET.Sdk.WindowsDesktop"> <!--修正-->

  <!--修正-->
  <PropertyGroup>
    <TargetFramework>netcoreapp3.0</TargetFramework>
    <UseWPF>true</UseWPF>
  </PropertyGroup>

  <ItemGroup>
    <PackageReference Include="Prism.Unity" Version="7.2.0.1233-pre" />
  </ItemGroup>

</Project>
<Project Sdk="Microsoft.NET.Sdk">

  <!--修正-->
  <PropertyGroup>
    <TargetFramework>netcoreapp3.0</TargetFramework>
  </PropertyGroup>

  <ItemGroup>
    <PackageReference Include="Prism.Unity" Version="7.2.0.1233-pre" />
    <PackageReference Include="ReactiveProperty" Version="5.5.1" />
  </ItemGroup>

  <ItemGroup>
    <ProjectReference Include="..\PrismSample.Lib.Models\PrismSample.Lib.Models.csproj" />
  </ItemGroup>

</Project>
<Project Sdk="Microsoft.NET.Sdk">

  <!--修正-->
  <PropertyGroup>
    <TargetFramework>netcoreapp3.0</TargetFramework>
  </PropertyGroup>

</Project>
実行方法
> dotnet run -p .\PrismSample.App.Main\
ビルドの警告が出なければ成功です。
Prismアプリケーション
以下では、Visual Studio Codeにより編集を行ないます。
執筆時点では、C#の拡張機能に不具合があり、シンタックスエラーの赤が表示される場合がありますが、コンパイルが通れば問題ありません。
また、XAMLの編集機能は現時点で無いため、便利に開発したい場合はVisual Studioを使用した方が良いかもしれません。
App.xamlの編集
- <Application x:Class="PrismSample.App.Main.App"
+ <prism:PrismApplication x:Class="PrismSample.App.Main.App"
             xmlns="http://schemas.microsoft.com/winfx/2006/xaml/presentation"
             xmlns:x="http://schemas.microsoft.com/winfx/2006/xaml"
+              xmlns:prism="http://prismlibrary.com/"
             xmlns:local="clr-namespace:PrismSample.App.Main"
-              StartupUri="MainWindow.xaml">
    <Application.Resources>

    </Application.Resources>
- </Application>
+ </prism:PrismApplication>
標準のApplicationクラスをPrismApplicationクラスに置き換えています。
また、StartupUriが不要になっています。
この作業により、ビルド時に自動生成されるAppクラスがPrismApplicationを継承するように変化します。
App.xaml.csの編集
- using System;
- using System.Collections.Generic;
- using System.Configuration;
- using System.Data;
- using System.Linq;
- using System.Threading.Tasks;
using System.Windows;
+ using Prism.Ioc;
+ using Prism.Unity;

namespace PrismSample.App.Main
{
    /// <summary>
    /// Interaction logic for App.xaml
    /// </summary>
-     public partial class App : Application
+     public partial class App : PrismApplication
    {
+         protected override Window CreateShell()
+         {
+             return Container.Resolve<MainWindow>();
+         }
+
+         protected override void RegisterTypes(IContainerRegistry containerRegistry)
+         {
+         }
    }
}
標準のApplicationではなく、Prism.Unity.PrismApplicationを継承します。
CreateShellメソッドは、アプリケーション開始時に起動するWindowを返す必要があります。
コンテナからMainWindowを生成して返しておきます。
ここで、何もしていないのにMainWindowがDIコンテナに登録されているのがポイントです。
同じアセンブリ(プロジェクト)内のViewとViewModelが自動的に登録されるのです。
Prismの便利さの本質はここに集約されるのではないでしょうか。
その下にあるRegisterTypesメソッドは、コンテナに手動でクラスやインスタンスを登録する際に使用します。
実行
> dotnet run -p .\PrismSample.App.Main\
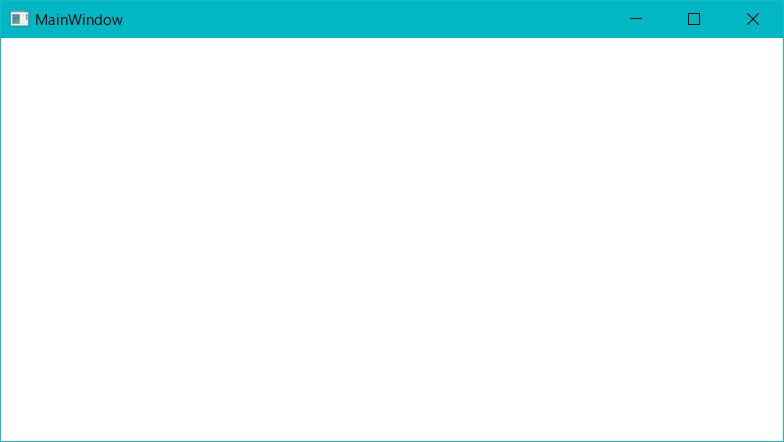
うまくMainWindowが表示されました。
プロジェクトをまたいだクラスの登録
View
PrismSample.App.MainのMainWindow.xamlとMainWindow.xaml.csを削除します。
PrismSample.Lib.Viewsに、以下のMainWindow.xamlとMainWindow.xaml.csを作成します。
<Window x:Class="PrismSample.Lib.Views.MainWindow"
        xmlns="http://schemas.microsoft.com/winfx/2006/xaml/presentation"
        xmlns:x="http://schemas.microsoft.com/winfx/2006/xaml"
        xmlns:d="http://schemas.microsoft.com/expression/blend/2008"
        xmlns:mc="http://schemas.openxmlformats.org/markup-compatibility/2006"
        xmlns:prism="http://prismlibrary.com/"
        xmlns:local="clr-namespace:PrismSample.Lib.Views"
        mc:Ignorable="d"
        prism:ViewModelLocator.AutoWireViewModel="True"
        Title="MainWindow" Width="800" Height="450" FontSize="40">
    <Grid>
        <TextBlock Text="{Binding Text.Value}"/>
    </Grid>
</Window>
using System.Windows;

namespace PrismSample.Lib.Views
{
    public partial class MainWindow : Window
    {
        public MainWindow()
        {
            InitializeComponent();
        }
    }
}
Viewのprism:ViewModelLocator.AutoWireViewModel="True"という記述は、関連付けられたViewModelがDIコンテナ内に存在する場合、自動的にDataContextとして登録することを指定しています。
これを行なうのはViewModelLocatorというものです。
ViewのTextBlock.TextのBindingをText.Valueとしている点に注意してください。
以下で登場するReactivePropertyから値を取得するには、Valueプロパティを参照する必要があります。
ViewModel
PrismSample.Lib.ViewModelsに、以下のMainWindowViewModel.csを作成します。
using Prism.Mvvm;
using Reactive.Bindings;

namespace PrismSample.Lib.ViewModels
{
    public class MainWindowViewModel : BindableBase
    {
        public ReactiveProperty<string> Text { get; } = new ReactiveProperty<string>("Hello, Prism!");
    }
}
ViewModelにはPrism.Mvvm.BindableBaseを継承させるのを忘れないでください。
TextはReactive.Bindings.ReactiveProperty型にしています。
ReactivePropertyはINotifyPropertyChangedを実装しているため、双方向バインディングが可能です。
App
App.xaml.csに以下の記述を追加します。
using System.Windows;
using Prism.Ioc;
+ using Prism.Mvvm;
using Prism.Unity;
+ using PrismSample.Lib.Views;
+ using PrismSample.Lib.ViewModels;

namespace PrismSample.App.Main
{
    public partial class App : PrismApplication
    {
        protected override Window CreateShell()
        {
            return Container.Resolve<MainWindow>();
        }

        protected override void RegisterTypes(IContainerRegistry containerRegistry)
        {
        }

+         protected override void ConfigureViewModelLocator()
+         {
+             base.ConfigureViewModelLocator();
+
+             ViewModelLocationProvider.Register<MainWindow , MainWindowViewModel>();
+         }
    }
}
ConfigureViewModelLocatorメソッド内で、ViewとViewModelを関連付けています。
実行
> dotnet run -p .\PrismSample.App.Main\
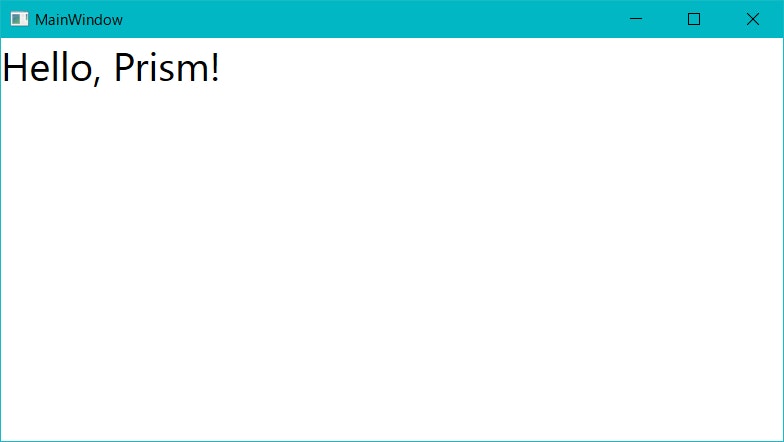
MainWindowとMainWindowViewModelが関連付けられています。
Regionの表示
View
前述のN^2を求めるための表示領域を用意します。
Nの値を入力するほうをOperandView、計算結果を表示するほうをAnswerViewとします。
<UserControl x:Class="PrismSample.Lib.Views.OperandView"
        xmlns="http://schemas.microsoft.com/winfx/2006/xaml/presentation"
        xmlns:x="http://schemas.microsoft.com/winfx/2006/xaml"
        xmlns:d="http://schemas.microsoft.com/expression/blend/2008"
        xmlns:mc="http://schemas.openxmlformats.org/markup-compatibility/2006"
        xmlns:prism="http://prismlibrary.com/"
        xmlns:local="clr-namespace:PrismSample.Lib.Views"
        mc:Ignorable="d"
        prism:ViewModelLocator.AutoWireViewModel="True">
    <Grid>
        <Grid.RowDefinitions>
            <RowDefinition/>
            <RowDefinition Height="Auto"/>
        </Grid.RowDefinitions>
        <Grid Grid.Row="0">
            <Grid.ColumnDefinitions>
                <ColumnDefinition Width="Auto"/>
                <ColumnDefinition/>
            </Grid.ColumnDefinitions>
            <TextBlock Grid.Column="0" Text="N ="
                HorizontalAlignment="Left" VerticalAlignment="Center"/>
            <TextBox Grid.Column="1"
                HorizontalAlignment="Stretch" VerticalAlignment="Center"
                Text="{Binding Operand.Value, Mode=TwoWay, UpdateSourceTrigger=PropertyChanged}"/>
        </Grid>
        <Button Grid.Row="1" Content="Show Dialog"
            Command="{Binding ShowDialogCommand}"/>
    </Grid>
</UserControl>
using System.Windows.Controls;

namespace PrismSample.Lib.Views
{
    public partial class OperandView : UserControl
    {
        public OperandView()
        {
            InitializeComponent();
        }
    }
}
<UserControl x:Class="PrismSample.Lib.Views.AnswerView"
        xmlns="http://schemas.microsoft.com/winfx/2006/xaml/presentation"
        xmlns:x="http://schemas.microsoft.com/winfx/2006/xaml"
        xmlns:d="http://schemas.microsoft.com/expression/blend/2008"
        xmlns:mc="http://schemas.openxmlformats.org/markup-compatibility/2006"
        xmlns:prism="http://prismlibrary.com/"
        xmlns:local="clr-namespace:PrismSample.Lib.Views"
        mc:Ignorable="d"
        prism:ViewModelLocator.AutoWireViewModel="True">
    <Grid>
        <Grid.RowDefinitions>
            <RowDefinition/>
            <RowDefinition Height="Auto"/>
        </Grid.RowDefinitions>
        <Grid Grid.Row="0">
            <Grid.ColumnDefinitions>
                <ColumnDefinition Width="Auto"/>
                <ColumnDefinition/>
            </Grid.ColumnDefinitions>
            <TextBlock Grid.Column="0" Text="N^2 ="
                HorizontalAlignment="Left" VerticalAlignment="Center"/>
            <TextBlock Grid.Column="1"
                HorizontalAlignment="Left" VerticalAlignment="Center"
                Text="{Binding Answer.Value}"/>
        </Grid>
        <Button Grid.Row="1" Content="Show Dialog"
            Command="{Binding ShowDialogCommand}"/>
    </Grid>
</UserControl>
using System.Windows.Controls;

namespace PrismSample.Lib.Views
{
    public partial class AnswerView : UserControl
    {
        public AnswerView()
        {
            InitializeComponent();
        }
    }
}
ViewModel
上で作成したViewに対応するViewModelを作成します。
using System;
using System.ComponentModel.DataAnnotations;
using Prism.Mvvm;
using Reactive.Bindings;

namespace PrismSample.Lib.ViewModels
{
    public class OperandViewModel : BindableBase
    {
        [Required, Range(-10000, 10000)]
        public ReactiveProperty<string> Operand { get; }

        public OperandViewModel()
        {
            Operand = new ReactiveProperty<string>("2")
                .SetValidateAttribute(() => Operand);
        }
    }
}
using Prism.Mvvm;
using Reactive.Bindings;

namespace PrismSample.Lib.ViewModels
{
    public class AnswerViewModel : BindableBase
    {
        public ReactiveProperty<string> Answer { get; }

        public AnswerViewModel()
        {
            Answer = new ReactiveProperty<string>("4");
        }
    }
}
まだ計算機能はありません。
SetValidateAttributeメソッドは、System.ComponentModel.DataAnnotationsの属性から、対応するエラーが存在するかどうかを検出可能にします。
MainWindowにRegionを確保
先程のViewを表示するためのRegionをMainWindowに作成します。
<Window x:Class="PrismSample.Lib.Views.MainWindow"
        xmlns="http://schemas.microsoft.com/winfx/2006/xaml/presentation"
        xmlns:x="http://schemas.microsoft.com/winfx/2006/xaml"
        xmlns:d="http://schemas.microsoft.com/expression/blend/2008"
        xmlns:mc="http://schemas.openxmlformats.org/markup-compatibility/2006"
        xmlns:prism="http://prismlibrary.com/"
        xmlns:local="clr-namespace:PrismSample.Lib.Views"
        mc:Ignorable="d"
        prism:ViewModelLocator.AutoWireViewModel="True"
        Title="MainWindow" Width="800" Height="450" FontSize="40"
        Loaded="OnLoaded">
    <Grid>
        <Grid.ColumnDefinitions>
            <ColumnDefinition/>
            <ColumnDefinition/>
        </Grid.ColumnDefinitions>
        <ContentControl Grid.Column="0" Margin="20"
            prism:RegionManager.RegionName="OperandRegion"/>
        <ContentControl Grid.Column="1" Margin="20"
            prism:RegionManager.RegionName="AnswerRegion"/>
    </Grid>
</Window>
prism:RegionManager.RegionNameにRegionの名前を指定します。
RegionにViewを追加
MainWindowのコードビハインドを修正します。
using System.Windows;
using Prism.Ioc;
using Prism.Regions;
using Unity.Attributes;

namespace PrismSample.Lib.Views
{
    public partial class MainWindow : Window
    {
        [Dependency]
        public IContainerExtension ContainerExtension { get; set; }

        [Dependency]
        public IRegionManager RegionManager { get; set; }

        public MainWindow()
        {
            InitializeComponent();
        }

        public void OnLoaded(object sender, RoutedEventArgs e)
        {
            RegionManager.AddToRegion("OperandRegion", ContainerExtension.Resolve<OperandView>());
            RegionManager.AddToRegion("AnswerRegion" , ContainerExtension.Resolve<AnswerView>());
        }
    }
}
Regionの追加に必要なPrism.Ioc.IContainerExtensionとPrism.Regions.IRegionManagerを、DIにより取得しています。
これは、セッターインジェクションという手法で、Unity.Attributes.Dependency属性をセッターに付加することで実現します。
ViewとViewModelの関連付け
先程と同様に、App.xaml.csのConfigureViewModelLocatorメソッドでViewとViewModelを関連付けを行ないます。
        protected override void ConfigureViewModelLocator()
        {
            base.ConfigureViewModelLocator();

            ViewModelLocationProvider.Register<MainWindow , MainWindowViewModel>();
+             ViewModelLocationProvider.Register<OperandView, OperandViewModel   >();
+             ViewModelLocationProvider.Register<AnswerView , AnswerViewModel    >();
        }
実行
> dotnet run -p .\PrismSample.App.Main\
Regionに2つのViewが表示されました。
EventAggregatorによるViewModel間通信
ViewModel
EventAggregatorは、PubSubパターンでイベントの通知と購読を管理することで、ViewModel間の通信を実現します。
EventAggregatorは、ViewModelが自動生成される際にDIにより取得可能です。
先程と同様、セッターインジェクションで取得できますが、ここではコンストラクタインジェクションで取得してみましょう。
OperandViewModelとAnswerViewModelを改変します。
using System;
using System.ComponentModel.DataAnnotations;
using System.Reactive.Linq;
using Prism.Events;
using Prism.Mvvm;
using Reactive.Bindings;

namespace PrismSample.Lib.ViewModels
{
    public class OperandViewModel : BindableBase
    {
        [Required, Range(-10000, 10000)]
        public ReactiveProperty<string> Operand { get; }

        public OperandViewModel(IEventAggregator eventAggregator)
        {
            Operand = new ReactiveProperty<string>("2")
                .SetValidateAttribute(() => Operand);

            Observable.WithLatestFrom
            (
                Operand,
                Operand.ObserveHasErrors,
                (o, e) => (o, e)
            )
            .Where(z => !z.e)
            .Subscribe(z =>
            {
                eventAggregator
                    .GetEvent<PubSubEvent<double>>()
                    .Publish(double.Parse(z.o));
            });
        }
    }
}
using Prism.Events;
using Prism.Mvvm;
using Reactive.Bindings;
using Unity.Attributes;

namespace PrismSample.Lib.ViewModels
{
    public class AnswerViewModel : BindableBase
    {
        public ReactiveProperty<string> Answer { get; }

        public ReactiveCommand<object> ShowDialogCommand { get; }

        public AnswerViewModel(IEventAggregator eventAggregator)
        {
            Answer = new ReactiveProperty<string>("4");

            eventAggregator
                .GetEvent<PubSubEvent<double>>()
                .Subscribe(CalculateAnswer);
        }

        private void CalculateAnswer(double operand)
        {
            Answer.Value = (operand * operand).ToString();
        }
    }
}
コンストラクタの引数にEventAggregatorが注入されます。
GetEvent<PubSubEvent<double>>メソッドにより、double型のイベントを取得し、Publishで値を発行、Subscribeで発行された値を購読します。
ここではdouble型を使用していますが、EventAggregatorは複数のViewModelで共有されるため、通信用に独自の型を定義した方が良いかもしれません。
このSubscribeはちょっとくせ者で、購読メソッドを弱参照するという特徴があります。
なぜなら、強参照を持ってしまうと参照の依存関係が生じ、後々解放する必要が出てくるからです。
弱参照にしておけば、その手間が省けるのですが、代わりに注意すべきことがあります。
以下のように、
eventAggregator
    .GetEvent<PubSubEvent<double>>()
    .Subscribe(o => Answer.Value = (o * o).ToString(););
と、ラムダ式を使って購読した場合、このラムダ式はこの場で生成され、誰も参照を持っていない宙ぶらりんの状態になります。
そうすると、GCにより回収の対象になってしまいます。
結果、イベントが通知されない! ということになります。
ですから、ここはラムダ式を使わず、メソッドへの参照を直接指定しましょう。
eventAggregator
    .GetEvent<PubSubEvent<double>>()
    .Subscribe(CalculateAnswer);
実行
> dotnet run -p .\PrismSample.App.Main\
ViewModel間で値のやり取りができています。
Modelの追加
Model
N^2の計算をModelに持たせるようにしてみましょう。
テスト可能なコードにするために、インターフェイスも用意しておきます。
namespace PrismSample.Lib.Models
{
    public interface IModel
    {
        double Calculate(double operand);
    }
}
namespace PrismSample.Lib.Models
{
    public class Model : IModel
    {
        public double Calculate(double operand)
        {
            return operand * operand;
        }
    }
}
App
IModelとModelを関連付けておきましょう。
        protected override void RegisterTypes(IContainerRegistry containerRegistry)
        {
+             containerRegistry.Register<IModel, Model>();
        }
ViewModel
IModelをインジェクションします。
+        [Dependency]
+        public IModel Model { get; set; }

+         private void CalculateAnswer(double operand)
+         {
+             Answer.Value = Model.Calculate(operand).ToString();
+         }
実行
> dotnet run -p .\PrismSample.App.Main\
Modelによる計算ができています。
Dialog
Dialogの表示に関しては、Prism 7.2以降ではPrism.Services.Dialogs.IDialogServiceを使用します。
しかし、メッセージダイアログをちょっと表示したいだけ、という場合、使い勝手は良くないです(DialgのViewとViewModelを自分で書かなくてはいけない)。
本記事では利便性を重視して、WPF標準のMessageBoxを使用する方法をご紹介します。
View
using System.Windows;

namespace PrismSample.Lib.Views
{
    public enum DialogButton
    {
        OK          = MessageBoxButton.OK,
        OKCancel    = MessageBoxButton.OKCancel,
        YesNo       = MessageBoxButton.YesNo,
        YesNoCancel = MessageBoxButton.YesNoCancel
    }

    public enum DialogImage
    {
        None        = MessageBoxImage.None,
        Information = MessageBoxImage.Information,
        Question    = MessageBoxImage.Question,
        Warning     = MessageBoxImage.Warning,
        Error       = MessageBoxImage.Error
    }

    public enum DialogResult
    {
        None   = MessageBoxResult.None,
        OK     = MessageBoxResult.OK,
        Cancel = MessageBoxResult.Cancel,
        Yes    = MessageBoxResult.Yes,
        No     = MessageBoxResult.No
    }

    public interface IDialogHelper
    {
        DialogResult ShowDialog
        (
            string message,
            string caption      = "Information",
            DialogButton button = DialogButton.OK,
            DialogImage  image  = DialogImage.None
        );
    }
}
using System.Windows;

namespace PrismSample.Lib.Views
{
    public class DialogHelper : IDialogHelper
    {
        public DialogResult ShowDialog
        (
            string message,
            string caption,
            DialogButton button,
            DialogImage  image
        )
        {
            return (DialogResult)MessageBox.Show
            (
                message,
                caption,
                (MessageBoxButton)button,
                (MessageBoxImage )image
            );
        }
    }
}
Dialogの表示は思いっきり副作用なので、インターフェイスを定義しておきます。
今回はPrismSample.Lib.Views内に上記2つを定義しましたが、インターフェイスを別プロジェクトに分けることで、ViewModelsからViewsへの参照を無くすることもできます。
ViewModel
Dialogを表示するコマンドを、Reactive.Bindings.ReactiveCommandを使用して書きます。
        [Dependency]
        public IDialogHelper DialogHelper { get; set; }

        public ReactiveCommand<object> ShowDialogCommand { get; }

        // コンストラクタ内
        ShowDialogCommand = new ReactiveCommand(Operand.ObserveHasErrors.Select(x => !x))
                .WithSubscribe(_ => DialogHelper.ShowDialog($"N = {Operand.Value}"));
        [Dependency]
        public IDialogHelper DialogHelper { get; set; }

        public ReactiveCommand<object> ShowDialogCommand { get; }

        // コンストラクタ内
        ShowDialogCommand = new ReactiveCommand()
                .WithSubscribe(_ => DialogHelper.ShowDialog($"N^2 = {Answer.Value}"));
OperandViewModel内でReactiveCommandのコンストラクタに渡しているのは、IObservable<bool>です。
これは、WPFのICommandにおけるCanExecuteとCanExecuteChangedを制御し、コマンドが実行可能かどうかを自動的に反映するようにしてくれるものです。
AnswerViewModelでは、ReactiveCommandのコンストラクタに引数を渡していませんが、これは常に実行可能なコマンドを生成します。
App
IDialogHelperとDialogHelperの関係性を登録します。
        protected override void RegisterTypes(IContainerRegistry containerRegistry)
        {
+             containerRegistry.Register<IDialogHelper, DialogHelper>();
            containerRegistry.Register<IModel, Model>();
        }
実行
> dotnet run -p .\PrismSample.App.Main\
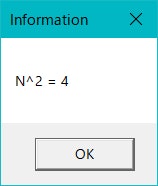
Dialogが表示できました。
まとめ
無駄に長文になってしまいました。
本記事の内容をまとめます。
-
Prism.UnityとReactivePropertyをインストール。 -
App.xamlを、prism:PrismApplicationを使用するように変更。 -
App.xaml.csのCreateShellでMainWindowを返す。 -
App.xaml.csのRegisterTypesでDIコンテナに型を登録。 -
App.xaml.csのConfigureViewModelLocatorでViewとViewModelの関連を登録。 - ViewModelには
BindableBaseを継承させる。 - DIコンテナからインスタンスを生成する場合、コンストラクタインジェクションまたはセッターインジェクションで、登録された型のインスタンスを取得可能。
- EventAggregatorを使用してViewModel間の通信が可能。
- EventAggregatorは、コールバックを弱参照することに注意。
- Dialogの表示を
Prismでやるのは大変なので、ヘルパークラスを定義。 -
ReactivePropertyとReactiveCommandで、ViewModelのプロパティを便利に管理。
以上です。
ありがとうございました。
