はじめに
今回は、以前から気になっていたHonoを触ってみた記事になります。
環境構築から簡易的にGET、POST、DELETEを行うまでを記事にしていきます。
使用する技術
- Hono
- bun
- TypeScript
やること
- HonoでGET、POST、DELETEを行う
- zodを用いてスキーマを定義する
- スキーマからOpenAPI Swaggerドキュメントを自動生成
やらないこと
- DBとの接続
- デプロイ
環境構築
今回はbunを使ってみることも目的の一つなので、bunをインストールします。
私はHomebrewを使用しましたが、npmやcurlを使用してもインストールできます。(参照: https://bun.sh/docs/installation)
$ brew install oven-sh/bun/bun
& bun --version
> 1.1.20
次にHonoのプロジェクトを作成します。hono-testの箇所はプロジェクト名なのでも構いません。
$ bun create hono@latest hono-test
> create-hono version 0.10.0
✔ Using target directory … hono-test
? Which template do you want to use? bun
✔ Cloning the template
? Do you want to install project dependencies? yes
? Which package manager do you want to use? bun
✔ Installing project dependencies
🎉 Copied project files
Get started with: cd hono-test
いくつかの質問に答えます。
Which template do you want to use? -> bun
Do you want to install project dependencies? -> yes
Which package manager do you want to use? -> bun
完了したら、ディレクトリを移動してローカルでサーバーを立ち上げます。
cd hono-test
bun dev
> bun run --hot src/index.ts
Started server http://localhost:3000
http://localhost:3000 を開いて、以下画像のような表示がされれば環境構築は完了です!
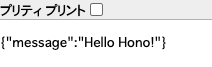
Honoを書いてみる
ここからは実際に実装をしていきます。
スキーマを作成
今回は、Qiitaのような記事一覧を持つアプリがあると仮定しarticleというスキーマを定義します。
スキーマの定義には@hono/zod-openapiというミドルウェアを使用するのでインストールを行います。
bun install @hono/zod-openapi
今回使用するスキーマを一気に定義します。
import { z } from "@hono/zod-openapi";

// 記事のスキーマを定義
export const Article = z.object({
  id: z.number(),
  title: z.string(),
  content: z.string(),
});

export const Articles = z.array(Article);

export const ArticleCreate = z.object({
  title: z.string(),
  content: z.string(),
});

export const ArticlePram = z.object({
  articleId: z.string().openapi({
    param: {
      in: "path",
      required: true,
      description: "ArticleのID",
    },
    example: "1",
  }),
});
ルーティングを定義
次に、ルーティングを定義します。
今回は、openAPIドキュメントも自動生成したいのでcreateRouteを用いてルートを定義します。
これまたミドルウェアを使用するので、インストールを行います。
bun i @hono/swagger-ui
import { createRoute } from "@hono/zod-openapi";
import { Article, ArticleCreate, ArticlePram, Articles } from "./schema";

export const articlesRoute = createRoute({
  method: "get",
  path: "/articles",
  responses: {
    200: {
      content: {
        "application/json": {
          schema: Articles,
        },
      },
      description: "記事一覧",
    },
    400: {
      description: "Bad Request",
    },
  },
});

export const articleRoute = createRoute({
  method: "get",
  path: "/articles/:articleId",
  request: {
    params: ArticlePram,
  },
  responses: {
    200: {
      content: {
        "application/json": {
          schema: Article,
        },
      },
      description: "記事詳細",
    },
  },
});

export const articleCreateRoute = createRoute({
  method: "post",
  path: "/articles",
  request: {
    body: {
      content: {
        "application/json": {
          schema: ArticleCreate,
        },
      },
    },
  },
  responses: {
    201: {
      description: "記事作成",
      content: {
        "application/json": {
          schema: ArticleCreate,
        },
      },
    },
    400: {
      description: "Bad Request",
    },
  },
});

export const articleDeleteRoute = createRoute({
  method: "delete",
  path: "/articles/:articleId",
  request: {
    params: ArticlePram,
  },
  responses: {
    200: {
      description: "記事削除",
    },
  },
});
ルートを使えるようにする
最後に定義したルートを使えるようにします。
import { OpenAPIHono } from "@hono/zod-openapi";
import {
  articleCreateRoute,
  articleDeleteRoute,
  articleRoute,
  articlesRoute,
} from "./route";

const articles = [
  {
    id: 1,
    title: "Title1",
    content: "Content1",
  },
  {
    id: 2,
    title: "Title2",
    content: "Content2",
  },
  {
    id: 3,
    title: "Title3",
    content: "Content3",
  },
];

const app = new OpenAPIHono();

app.get("/", (c) => {
  return c.json({
    message: "Hello Hono!",
  });
});

app.openapi(articlesRoute, async (c) => {
  return c.json([...articles]);
});

app.openapi(articleRoute, async (c) => {
  const { articleId } = c.req.valid("param");
  return c.json(articles.find((a) => a.id === Number(articleId)));
});

app.openapi(articleCreateRoute, async (c) => {
  try {
    const { title, content } = await c.req.json();
    const article = {
      id: articles.length + 1,
      title,
      content,
    };
    articles.push(article);
    return c.json(articles);
  } catch (e) {
    return c.json({ message: "Bad Request" }, { status: 400 });
  }
});

app.openapi(articleDeleteRoute, async (c) => {
  const { articleId } = c.req.valid("param");
  const index = articles.findIndex((a) => a.id === Number(articleId));
  if (index === -1) {
    return c.json({ message: "Not Found" }, { status: 404 });
  }
  articles.splice(index, 1);
  return c.json(articles);
});

export default app;
ここまでできたらターミナル上でcurlコマンドを使用して実際にEPを叩けるか試していきます。
 $ curl "http://localhost:3000/articles"
>[
  {"id":1,"title":"Title1","content":"Content1"},
  {"id":2,"title":"Title2","content":"Content2"},
  {"id":3,"title":"Title3","content":"Content3"}
 ]%

$ curl "http://localhost:3000/articles/1"
> {"id":1,"title":"Title1","content":"Content1"}%

$ curl -X POST -H "Content-Type: application/json" -d '{"title":"テストタイトル", "content":"テストテスト"}' "http://localhost:3000/articles"
>[
  {"id":1,"title":"Title1","content":"Content1"},
  {"id":2,"title":"Title2","content":"Content2"},
  {"id":3,"title":"Title3","content":"Content3"},
  {"id":4,"title":"テストタイトル","content":"テストテスト"}
 ]%

$ curl -X DELETE -H "Content-Type: application/json" "http://localhost:3000/articles/2"
>[
  {"id":1,"title":"Title1","content":"Content1"},
  {"id":3,"title":"Title3","content":"Content3"},
  {"id":4,"title":"テストタイトル","content":"テストテスト"}
 ]%
GET、POST、DELETEいずれもうまくいきました!
openAPIドキュメントの自動生成
最後に、swaggerUIを自動生成してみたいと思います。
以下のコードをindex.tsに書き加えます。
app.doc31("/doc", {
  openapi: "3.1.0",
  info: {
    version: "1.0.0",
    title: "My API",
  },
});

app.get("/ui", swaggerUI({ url: "/doc" }));
ブラウザでhttp://localhost:3000/uiを開いてみると...

このようにルート定義の部分で作成したルートが自動で生成されています。
定義とAPI仕様書が同時に書けるのはとても便利ですね!
おわりに
Honoを初めて触った感想としては、まず環境を整えるまでの速さが印象に残りました。
最初に"Hello Hono!"を表示するまで何も詰まりませんでしたし、難しくもなかったです。
また、やはりTSで書けるというのが良いですね。FEと型を共通化できるという点も強みに感じます。
ルートの定義などは@hono/zod-openapiを使用したこともあり、若干の書きづらさがありましたが、ほぼ定型なので慣れればなんともなさそうです。
Bunも初めて使用しましたがパッケージのインストールが爆速でしたね...
今後、何かAPIを作成したくなったら、Honoを使って実装して見たいと思います!