【参考】こちらを参考にしました。
https://vue-native.io/docs/installation.html
https://qiita.com/nitaking/items/5c6fb6990d3bdb5769cc
必要なライブラリをインストールする
vue-nativeのCLI と react-native をインストールします。
npm install -g vue-native-cli
npm install -g create-react-native-app
シミュレータを使うために exp もインストールします。
npm install exp --global
アプリを作る
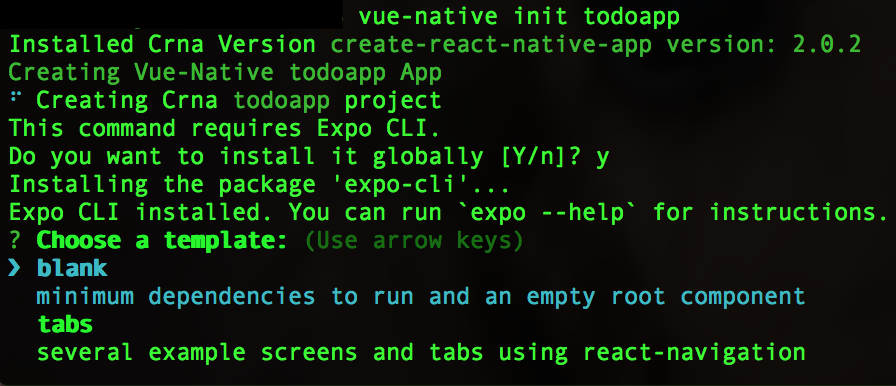
vue-native init todoapp
vue-native init アプリ名
というコマンドでプロジェクトを作成します。
するとこのようにテンプレートが blank か tabs を選べます(j と k を押すとカーソルが上下する)。 ここではblankを選びます。 blankを選んでEnter。
Expo というのはスマホアプリのシミュレータ環境を提供するものっぽい?
Vue-Native は React-NativeとExpo をラップしているものみたいなので 実質は, React-Native.
これで todoapp (アプリ名)というディレクトリができたので、
cd todoapp
そのディレクトリに移動します。
パッケージのバージョンを変更する
現在の Vue-Native, React-Native, Expo のバージョンが実はそのまま使うと、エラーがでてしまいます。組み合わせがよくないので下記リンクを参考にしてバージョンの変更を行っていきます。
では package.json を編集していきます。
Vue-Native を 0.55.4 に調整するのですが、それには他のパッケージも変えなければならないので以下のバージョンに変更します。
・expo のバージョンを 29.0.0に変更します。
"expo" : "^29.0.0"
・vue-native を 0.55.4 に変更します。
"react-native": "0.55.4"
・babel-preset-expo を 4.0.0 に変更します。
"babel-preset-expo": "^4.0.0",
まとめると以下のようになりました。
{
  "main": "node_modules/expo/AppEntry.js",
  "scripts": {
    "start": "expo start",
    "android": "expo start --android",
    "ios": "expo start --ios",
    "eject": "expo eject"
  },
  "dependencies": {
    "expo": "^29.0.0",
    "react": "16.5.0",
    "react-native": "0.55.4",
    "vue-native-core": "0.0.8",
    "vue-native-helper": "0.0.9"
  },
  "devDependencies": {
    "babel-preset-expo": "^4.0.0",
    "vue-native-scripts": "0.0.14"
  },
  "private": true
}
次は、app.json を編集します。
"sdkVersion":"29.0.0"
に変更します。
変更後のファイルは以下のようになりました。
{
  "expo": {
    "name": "todoapp",
    "slug": "todoapp",
    "privacy": "public",
    "sdkVersion": "29.0.0",
    "platforms": [
      "ios",
      "android"
    ],
    "version": "1.0.0",
    "orientation": "portrait",
    "icon": "./assets/icon.png",
    "splash": {
      "image": "./assets/splash.png",
      "resizeMode": "contain",
      "backgroundColor": "#ffffff"
    },
    "updates": {
      "fallbackToCacheTimeout": 0
    },
    "assetBundlePatterns": [
      "**/*"
    ],
    "ios": {
      "supportsTablet": true
    },
    "packagerOpts": {
      "config": "rn-cli.config.js"
    }
  }
}
アプリを起動する
npm start
以下のような画面が出ます。

iOSシミュレータを起動してみる
コマンドラインをみてみるとQRコードが出て, 入力待ちになっているはずなので
i
を入力します。最初は時間がかかります。
もしくは ブラウザに表示されたインターフェースでもできる. 左側のRun on iOS simulator をクリックしてもOK
何にもでないなーって思ったときは Dock を見てみよう. シミュレータが起動しているかも?
以下のような画面が表示されると起動できています。
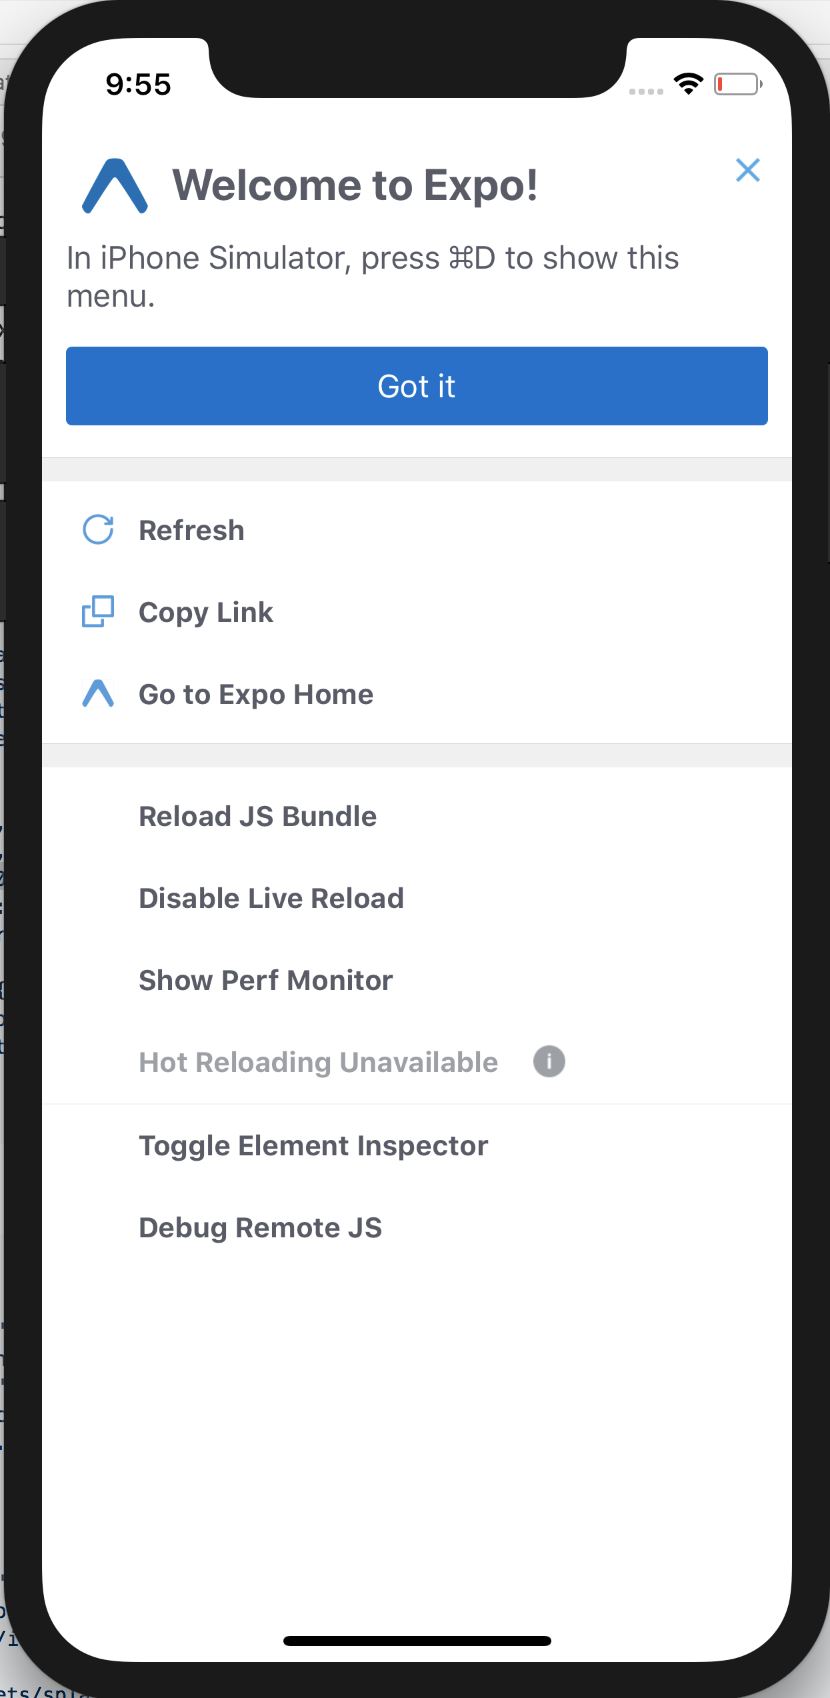
Got it をクリックしすると・・・
編集してみよう
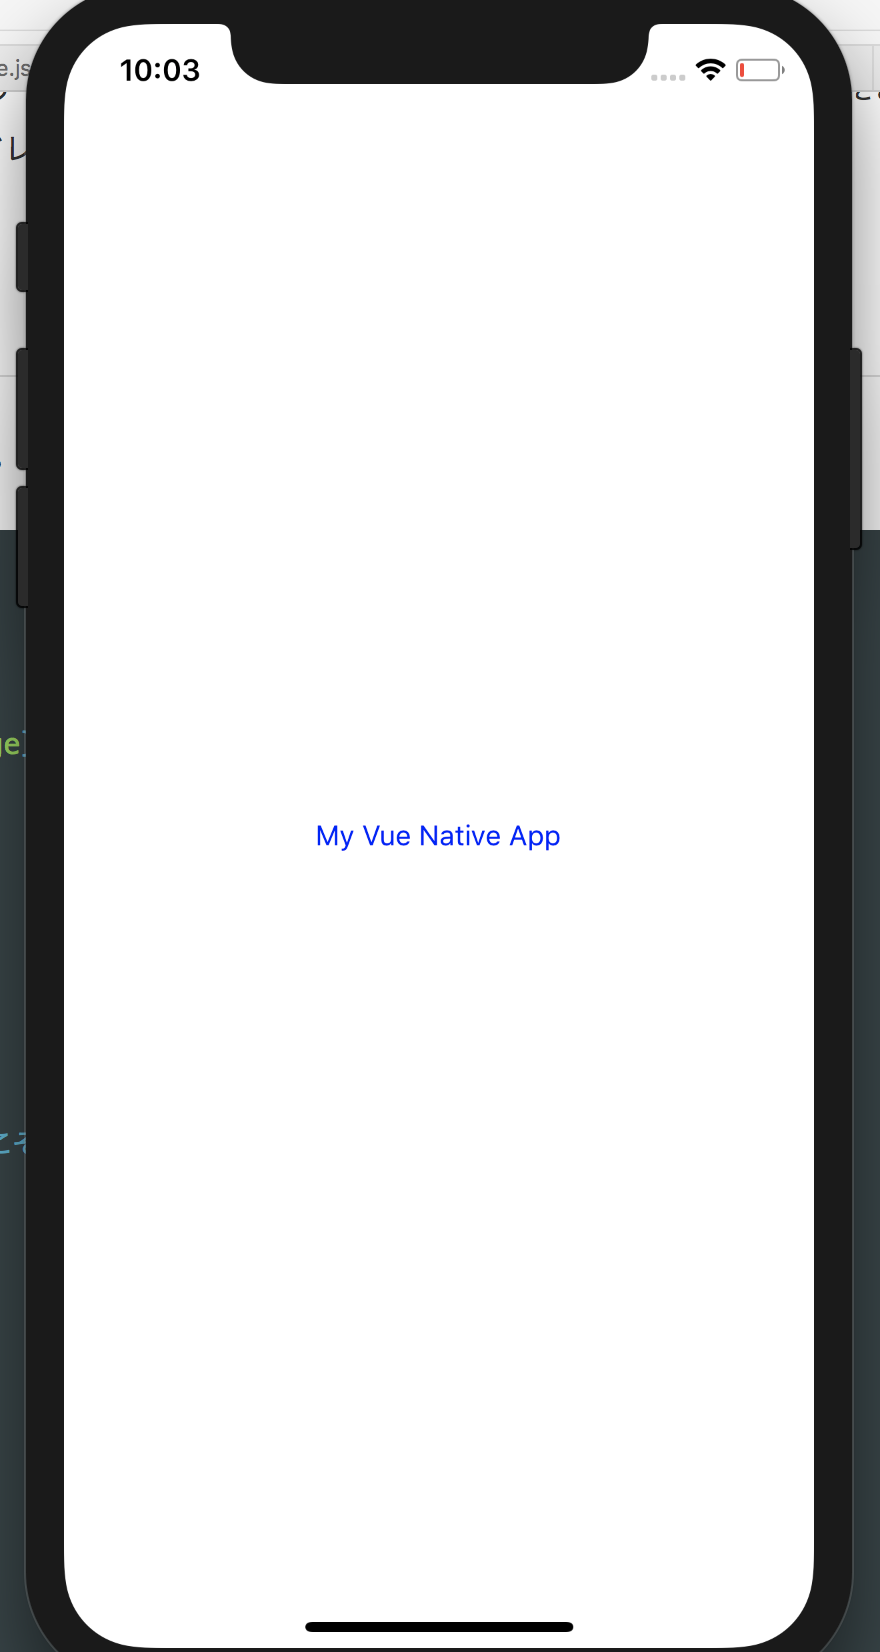
App.vueをみてみよう.
<template>
  <view class="container">
    <text class="text-color-primary">My Vue Native App</text>
    </view>
</template>

<style>
.container {
  background-color: white;
  align-items: center;
  justify-content: center;
  flex: 1;
}
.text-color-primary {
  color: blue;
}
</style>
text-color-primary の color を red に変えてみるとシミュレータの方でも色が変わりました。
Todo アプリに必要な入力するテキストボックスを作る
テキストボックスになるコンポーネントを作ります。
src ディレクトリを作って
src/TodoInput.vue を作ります。
以下のように書きました。
<template>
    <view class="container">
        <text-input class="text-input" />
        <touchable-opacity class="button">
            <text class="button-text">追加</text>
        </touchable-opacity>
    </view>
</template>

<script>
    export default {}
</script>

<style>
.container {
    flex-direction: row;
    padding: 20px;
}
.text-input {
    background-color: white;
    margin-right: 5px;
    flex: 3;
}
.button {
    flex: 1;
    background-color: #008080;
    margin-left: 5px;
    align-items: center;
    justify-content: center;
    padding-top: 10px;
    padding-bottom: 10px;
}
.button-text {
    color: white;
    font-weight: normal;
}
</style>
vue-native は React をラップしているのでコンポーネント名は キャメルケース(TestCase のように単語の初めを大文字)ではなくケバブケース(test-case ハイフンで単語をつなぐ) を使って命名するらしいのでそうしました。
では, 作った src/TodoInput.vue を App.vue に読み込みます。
App.vue に以下のように記述します。
<template>
  <view class="container">
    <view class="main">
      <!-- 3. ケバブケースでコンポーネントを配置 -->
      <text-input />
    </view>
  </view>
</template>

<script>
// 1. script で TodoInputからTextInput を読み込む.
  import TextInput from './src/TodoInput';
  // 2. コンポーネントとしてTextInputを定義
  export default {
    components: {
      TextInput
    }
  }
</script>

<style>
.container {
  background-color: #333;
  flex: 1;
  padding-top: 40px;
  align-items: center;
}
.main {
  flex: 1;
  max-width: 400px;
  align-items: center;
}
</style>
流れ
- script で TodoInputからTextInput を読み込む
- コンポーネントとしてTextInputを定義する
- ケバブケースでコンポーネントを配置する
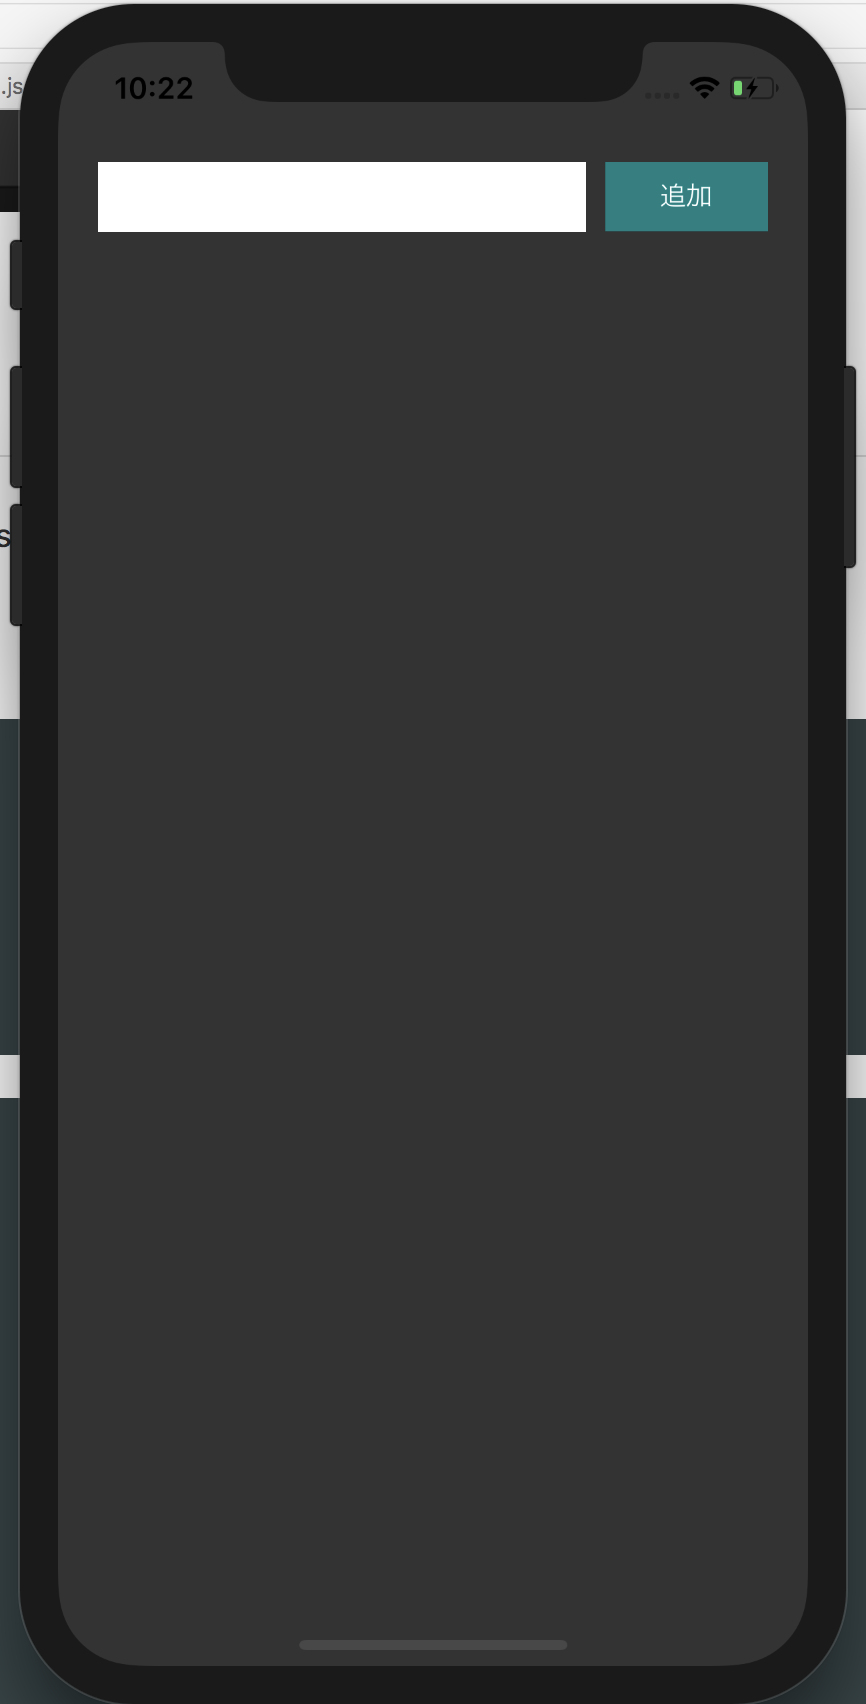
という流れでやってみて、シミュレータを見てみます。
下記のように表示されていたらOKです。
コンソールログについて
デバッグなどでも使うコンソールログは, vue native では ターミナルに表示されます。やってみます。
テキストを入力してボタンを押すとコンソールに表示されるようにしてみます。
まず, コンソールに表示する関数 _onPress を作ります。
App.vue の script の部分を以下のように書き直します( methods を追加します ).
  import TextInput from './src/TodoInput';
  export default {
    components: {
      TextInput
    },
    methods: {
      _onPress : (text) => {
        console.log(text);
      },
    }
  }
引数で text を受け取ってそれをそのままコンソールログで表示します。
では TodoInput.vue を変更します。
まずinput 部分にv-modelを追加します。
<text-input class="text-input" v-model="newText" />
これで newText という変数とこのコンポーネントがバインドされます。
次はボタン部分を書き換えます。
<touchable-opacity class="button" :on-press="addTodo">
    <text class="button-text">追加</text>
</touchable-opacity>
:on-press のところが追記部分です。クリックされたら addTodo を呼び出します。addTodo は以下で実装します。
次はボタンが押されたらどういう処理をするかを決めるaddTodo関数を作ります。
しかし、具体的に何をするのかは、後から(TodoInput.vueの外から)決められるようにする(そうすればあとから使いまわせる)ために props で関数を作っておいてそれを呼び出します。
(説明がわからないときは下のコードを見た方が良いかもしれません)
つまり、以下のように script タグの中を書き直します。
<script>
    export default {
        props: {
            onAdd: Function
        },
        data: {
            newText: ""
        },
        methods: {
            addTodo: function(){
                this.onAdd(this.newText)
            },
        }
    }
</script>
props で onAdd という関数を持つことを書いておきます( あとで App.vue で :on-add="~" でこのプロパティに具体的な関数を設定します。)
addTodo の処理を書いていきます。
【流れ】
- ボタンが押される
- addTodoが呼ばれる
- onAdd が呼ばれて処理を実行する(onAdd はファイル外から設定されるので 便利です。 外のコンポーネントへのアクセスなどができる)
では次は App.vue を編集します。onAdd を設定します。
text-inputの部分を以下のように変更します.
<text-input :on-add="_onPress"/>
先ほど作ったon-add (onAdd, ※ケバブケースで書く) に関数を設定します。 _onPress は以下のようにscriptタグの中で定義します。
 <script>
  import TextInput from './src/TodoInput';
  export default {
    components: {
      TextInput
    },
    methods: {
      _onPress : (text) => {
        console.log(text);
      },
    }
  }
</script>
では、入力欄にテキストを入力してボタンを押せばターミナルに結果が出力されているはずです。
これで基礎的なことは終わりです。
今後は Vue っぽくアプリを作っていけばOK!(たぶん)
おしまいおしまい。