自作の VSCode 拡張機能を作って公開する機会があったので,手順をまとめておきたいと思います。
公開すると,VSCode 上で自分の拡張機能を見つけることができます。

気分がいいですね!
VSCode 拡張機能を作る
ツールの準備
Your First Extensionを参考にして必要なものをインストールします。
$ npm install -g yo generator-code
雛形の作成
$ yo code
とすることで,対話的に雛形を作成します。
以下のように表示されました。
     _-----_     ╭──────────────────────────╮
    |       |    │   Welcome to the Visual  │
    |--(o)--|    │   Studio Code Extension  │
   `---------´   │        generator!        │
    ( _´U`_ )    ╰──────────────────────────╯
    /___A___\   /
     |  ~  |
   __'.___.'__
 ´   `  |° ´ Y `

? What type of extension do you want to create? New Extension (TypeScript)
? What's the name of your extension? nextword
? What's the identifier of your extension? nextword
? What's the description of your extension? Suggest next English words.
? Initialize a git repository? Yes
? Which package manager to use? npm
   create nextword/.vscode/extensions.json
   create nextword/.vscode/launch.json
   create nextword/.vscode/settings.json
   create nextword/.vscode/tasks.json
   create nextword/src/test/runTest.ts
   create nextword/src/test/suite/extension.test.ts
   create nextword/src/test/suite/index.ts
   create nextword/.vscodeignore
   create nextword/.gitignore
   create nextword/README.md
   create nextword/CHANGELOG.md
   create nextword/vsc-extension-quickstart.md
   create nextword/tsconfig.json
   create nextword/src/extension.ts
   create nextword/package.json
   create nextword/tslint.json


I'm all done. Running npm install for you to install the required dependencies. If this fails, try running the command yourself.


npm notice created a lockfile as package-lock.json. You should commit this file.
npm WARN nextword@0.0.1 No repository field.
npm WARN nextword@0.0.1 No license field.

added 121 packages from 582 contributors and audited 288 packages in 12.164s

14 packages are looking for funding
  run `npm fund` for details

found 0 vulnerabilities


Your extension nextword has been created!

To start editing with Visual Studio Code, use the following commands:

     cd nextword
     code .

Open vsc-extension-quickstart.md inside the new extension for further instructions
on how to modify, test and publish your extension.

For more information, also visit http://code.visualstudio.com and follow us @code.
今回は nextword という拡張機能を作ることにしたので,カレントディレクトリに nextword というディレクトリが生成されました。
コードを書く
TypeScript を使ってコードを書きます。
最低限編集する必要のあるファイルは,
- src/extension.ts
- package.json
です。
Microsoft の GitHub に書き方のサンプルが大量にあるので,このリポジトリを参考にしつつ,ソースコードを書いていきます。
microsoft/vscode-extension-samples
今回は英語の入力補完をするプラグインを書きたかったので,completions-sample を参考にしました。
package.json は Extension Manifest に必要な情報が載っていたので,
既存の拡張機能の package.json を参考にしながら書きました。
activationEvents をちゃんと書かないと,拡張機能がちゃんと起動しない!ということが起こるので,正しく書くのがポイントだと思います。
ということで,以下のように拡張機能を書きました。
動作させる
F5 を押してデバッグを開始すると VSCode の新しいウインドウが起動します。
このウインドウは編集中の拡張機能が有効になっているので,動作検証ができます。
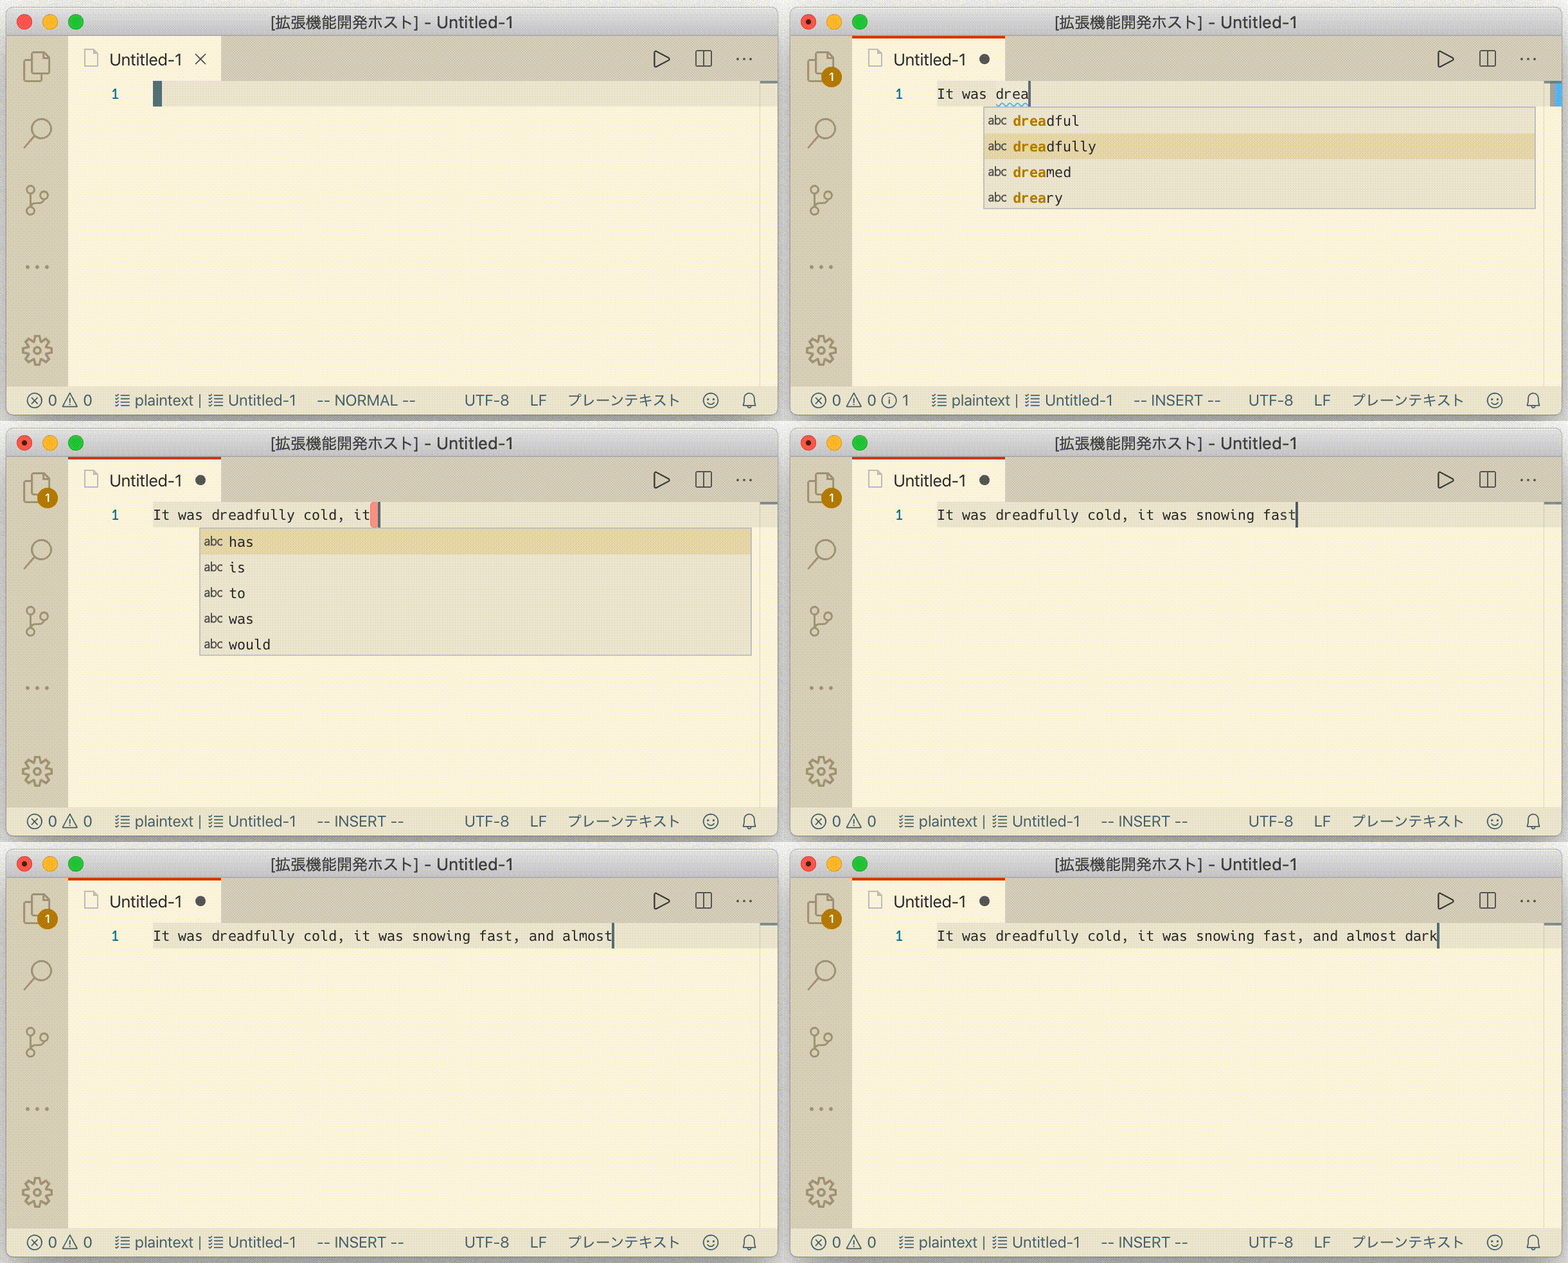
今回は以下のように正しく動作していることが確認できました。
公開する
必要なものは
- Azure DevOpt organization の Personal Access Token
- vsce
です。
Publish Extensionsを参考に進めていきます。
順に見ていきましょう。
Personal Access Token の取得
私は Azure に全然詳しくないので,Publish Extensionsを参考に適当に進めました。
まず,Microsoft アカウントがなかったので,これを作成しました。
次に Azure DevOps organization を作成しました。
それから Personal access token を発行します。
発行の際に token の権限をいくつかつけないといけなかったので,記事を参考に権限を与えました。
あれこれすると Personal access token が手に入るので,クリップボードにコピーしておきましょう。
vsce を使った操作
vsce を入手します。これは拡張機能のパッケージングや公開に使うためのコマンドラインツールのようです。
$ npm install -g vsce
publisher の作成
Marketplace に公開できる人のことを publisher と呼ぶそうです。これを作成します。
$ vsce create-publisher high-moctane
high-moctane は私の名前です。
途中で先程作った personal access token を聞かれるので入力します。
これで完了です。
拡張機能をパッケージ化する
以下のコマンドを叩きます。
$ vsce package
終わりです。
公開する
以下のコマンドを叩きます。
$ vsce publish
終わりです。
あっけなく公開ができてしまいました!
まとめ
- 雛形をつくる
- コードを書く
- Publisher の登録をする
- 公開する
の手順で自作 VSCode Extension を公開することができてしまいました。
思ったよりも簡単だったので是非 Extension を公開してみてください!
今回例にした自作 Extension はこちらです。
Nextword - Visual Studio Marketplace
英語の入力が楽々になるので是非使ってみてください。
