概要
ContentfulとHugoを連携させてサイト公開を行う方法の三回目。(今回のソース)
前々回Hugoの設定、前回Contentfulの設定を説明したのでいよいよ両者の連携について解説する。
Contentful Hugoのインストール
公式の説明に従い作業を行う。
まず作成済みのHugoのサイトのルートにてインストールを実行
npm install contentful-hugo
そしてcontentful-hugoを初期化
contentful-hugo --init
上記が行うのは以下のファイル生成である
- contentful-hugo.config.js
- layouts/shortcodes/contentful-hugo/*.html
package.jsonに以下を追加しておく
{
    "name": "Blonde",
    "scripts": {
        "dev": "contentful-hugo --preview && hugo server",
        "build": "contentful-hugo && hugo --minify"
    },
そうすると開発サーバの起動は
npm run dev
ビルドは
npm run build
で実行可能となる。
もちろん、この状態ではContentfulとの接続設定ができていないのでHugoがデフォルトの状態で起動・ビルドするだけである。
Contentful Hugoの設定
設定は環境変数の登録と設定ファイルのカスタマイズからなる
環境変数の設定
まずContentful側のAPIトークンを取得する
画面上部のメニューからSettings>API Keys>Add API keyを実行、Nameは適当につける。
そうするとこんな感じで発行される。
Hugoサイトのルートに.envを作成して上記の値を貼り付ける。
プレビュートークンはオプションになっているのでどちらでもよい(私は使っていない)
.env(取得した値を記述すること)
CONTENTFUL_SPACE = '<space-id>'
CONTENTFUL_TOKEN = '<content-accessToken>'

# optional but required for preview mode
CONTENTFUL_PREVIEW_TOKEN = '<preview-accessToken>'
確認
curlが実行できるならこの段階で確認できる。
CONTENTFUL_TYPE_IDはモデル設計時に作成したid。私の場合はhugoContentfulPostでやってみた。
curl "https://cdn.contentful.com/spaces/<CONTENTFUL_SPACE>/entries?order=-sys.createdAt&content_type=<CONTENTFUL_TYPE_ID>&access_token=<CONTENTFUL_TOKEN>"
結果(先頭のみ抜粋)
{
  "sys": {
    "type": "Array"
  },
設定ファイルのカスタマイズ
環境変数の登録が終われば設定ファイルのカスタマイズを行う。
とさらっと書いたが正直ここがキモ
ドキュメントにサンプルがあるけども、Hugoのlayout設計とContentfulのモデル設計の両方加味しながら設定しなければいけないのでコピペだけではうまく動作しない。
もちろん、上記サンプルは非常に参考になるので少しポイント解説をする。
ポイント解説
ロケール
locales: ['en-US', 'fr-FR'],
今回は設定しないがHugo自体がi18n対応しているので多言語化はしやすい。
Contentful API Tokenの設定
    contentful: {
        // defaults to CONTENTFUL_SPACE env variable
        space: 'space-id',
        // defaults to CONTENTFUL_TOKEN env variable
        token: 'content-deliver-token',
        // defaults to CONTENTFUL_PREVIEW_TOKEN env variable
        previewToken: 'content-preview-token',
        // defaults to "master"
        environment: 'master',
    },
設定ファイルに直書きする場合のみ必要な項目で今回は.envで設定するため上記記述は不要。
コンテンツの処理
    singleTypes: [
        ...
    ],

    repeatableTypes: [
        ...
    ],
singleTypesが固定ページ、repetableTypesがリスト形式のコンテンツ。
もっと平たく言えば前者がサイトのトップページやAbout、Contact Usのような単一ページで後者がブログのような複数ページと考えればよい。
今回は後者のみ設定する。
今回のcontentful-hugo.config.jsの設定
今回の設定は以下のようにした。
// contentful-hugo.config.js
module.exports = {
    repeatableTypes: [
        {
            id: 'hugoContentfulPost',             // (1) model id for blog post
            directory: 'content/post',            // (2) output directory for hugo
            mainContent: 'body',                  // (3) filed id for content
            resolveEntries: [
                {
                    field: 'categories',          // (4) field id for taxonomy, category
                    resolveTo: 'fields.title',    // (5) reference filed for the above
                },
                {
                    field: 'tags',                // (6) field id for taxonomy, tag
                    resolveTo: 'fields.title',    // (7) reference filed for the above
                },
            ],
            overrides: [
                {
                    field: 'eyecatch',                    // (8) field id for image
                    options: {
                        fieldName: 'image',               // (9) replace field name
                        valueTransformer: (value) => {
                            return value.fields.file.url; // (10) value for the above
                        },
                    },
                },
            ],
        },
        {
            id: 'hugoContentfulCategory',         // (11) model id for blog category
            directory: 'content/categories',      // (12) output directory for hugo
            isTaxonomy: true,
        },
        {
            id: 'hugoContentfulTag',              // (13) model id for blog category
            directory: 'content/tags',            // (14) output directory for hugo
            isTaxonomy: true,
        }
    ],
    staticContent: [
        {
            inputDir: 'static',
            outputDir: 'content',
        },
    ],
};
上記コメントのところを順次解説するが、その前に以前説明したようにブログの構成としてブログ本文(HugoCoentetfulPost)、カテゴリー(HugoCoentetfulCategory)、タグ(HugoCoentetfulTag)というコンテンツモデルを作った。
そしてコンテンツモデルのIDやフィールド名を使うけども、はまりポイントとしてはIDとNameを混同してしまうこと。
下図はHugoCoentetfulPostのモデル設計のスクリーンショットだが画面右にあるCONTENT TYPE IDに記載されているhugoContentfurlPostがIDでありHugoCoentetfulPostはNameである。
もちろんモデル設計時に同じ名前にしておけば問題ないが、Nameを登録すると自動的にIDが記入されるのでそのまま登録すると異なる場合が多い。
と前置きが長くなったがコメントアウトしている箇所について解説する
- ブログコンテンツのモデルID
- 上記Hugo側の出力ディレクトリ(*1)
- ブログ本文のフィールド名、今回はbody(上記スクショ参照)
- ブログコンテンツの参照設定であるカテゴリーのフィールド名
- 上記モデルの参照する値(*2)
- ブログコンテンツの参照設定であるタグのフィールド名
- 上記モデルの参照する値(*2)
- カバー写真のフィールド名として設定したeyecatchを指定
- 上記をHugo側のテーマレイアウトで設定されているimageに置換
- 画像ファイルのurlを値として割り当てる(*3)
- ブログのカテゴリーのモデルID
- 上記Hugo側の出力ディレクトリ(*4)
- ブログのタグのモデルID
- 上記Hugo側の出力ディレクトリ(*4)
(*1) Blondeテーマを使う場合はこの設定でよい。しかしHugoのテーマによってはcontent/postsだったりcontent/blogだったりするから注意が必要
(*2) カテゴリーやタグではtitleというフィールドのみ設定したのでこの場合はfields.titleとなる
(*3) ContenfulのAssetsの属性としてassetType,url,title,description,width,heightを返す。
今回はurlのみ必要なのでvalue.fields.file.urlを返すようにしているが、Hugoのレイアウトによってはいろいろ使える。
(*4) これもHugoのレイアウトによっては変更すべき値ではあるがレアケースである。基本的にはこのままでよい。
これで準備終了。
その前にHugoのcontentフォルダにあるpost,categories,tagsをさくっとディレクトリごと削除しておく。
ついでにgitの監視下から外す。つまりコンテンツは動的にContentfulから取得するのでHugoのソースでは管理しないということ。
.gitignore(追記)
content/categories
content/post
content/tags
起動
設定が完了したので開発サーバを起動する
npm run dev
> Blonde@0.0.1 dev
> contentful-hugo --preview && hugo server

[contentful hugo] Copying static content...

---------------------------------------------
   Pulling Preview Data from Contentful...
---------------------------------------------

   hugoContentfulCategory - 2 items
   hugoContentfulPost - 2 items
   hugoContentfulTag - 2 items

---------------------------------------------


                   | JA
-------------------+-----
  Pages            | 32
  Paginator pages  |  0
  Non-page files   |  1
  Static files     |  6
  Processed images |  0
  Aliases          | 14
  Sitemaps         |  1
  Cleaned          |  0

Built in 5245 ms
Watching for changes in /home/foo/hugo/hugo-blonde-contentful/{archetypes,content,data,layouts,static,themes}
Watching for config changes in /home/foo/hugo/hugo-blonde-contentful/config.toml
Environment: "development"
Serving pages from memory
Running in Fast Render Mode. For full rebuilds on change: hugo server --disableFastRender
Web Server is available at http://localhost:1313/ (bind address 127.0.0.1)
Press Ctrl+C to stop
Pulling Preview Data from Contentful...の箇所でContenfulからデータ取得しているのがわかる。
上記以外にエラーのようなものが表示されている場合はHugoのレイアウト設計を含めた設定ファイルcontentful-hugo.config.jsの記述ミスだと思われるのでよく見直してほしい。
特にNot foundのようなメッセージはAPIトークンが正しく設定されていない場合に見受けられる。
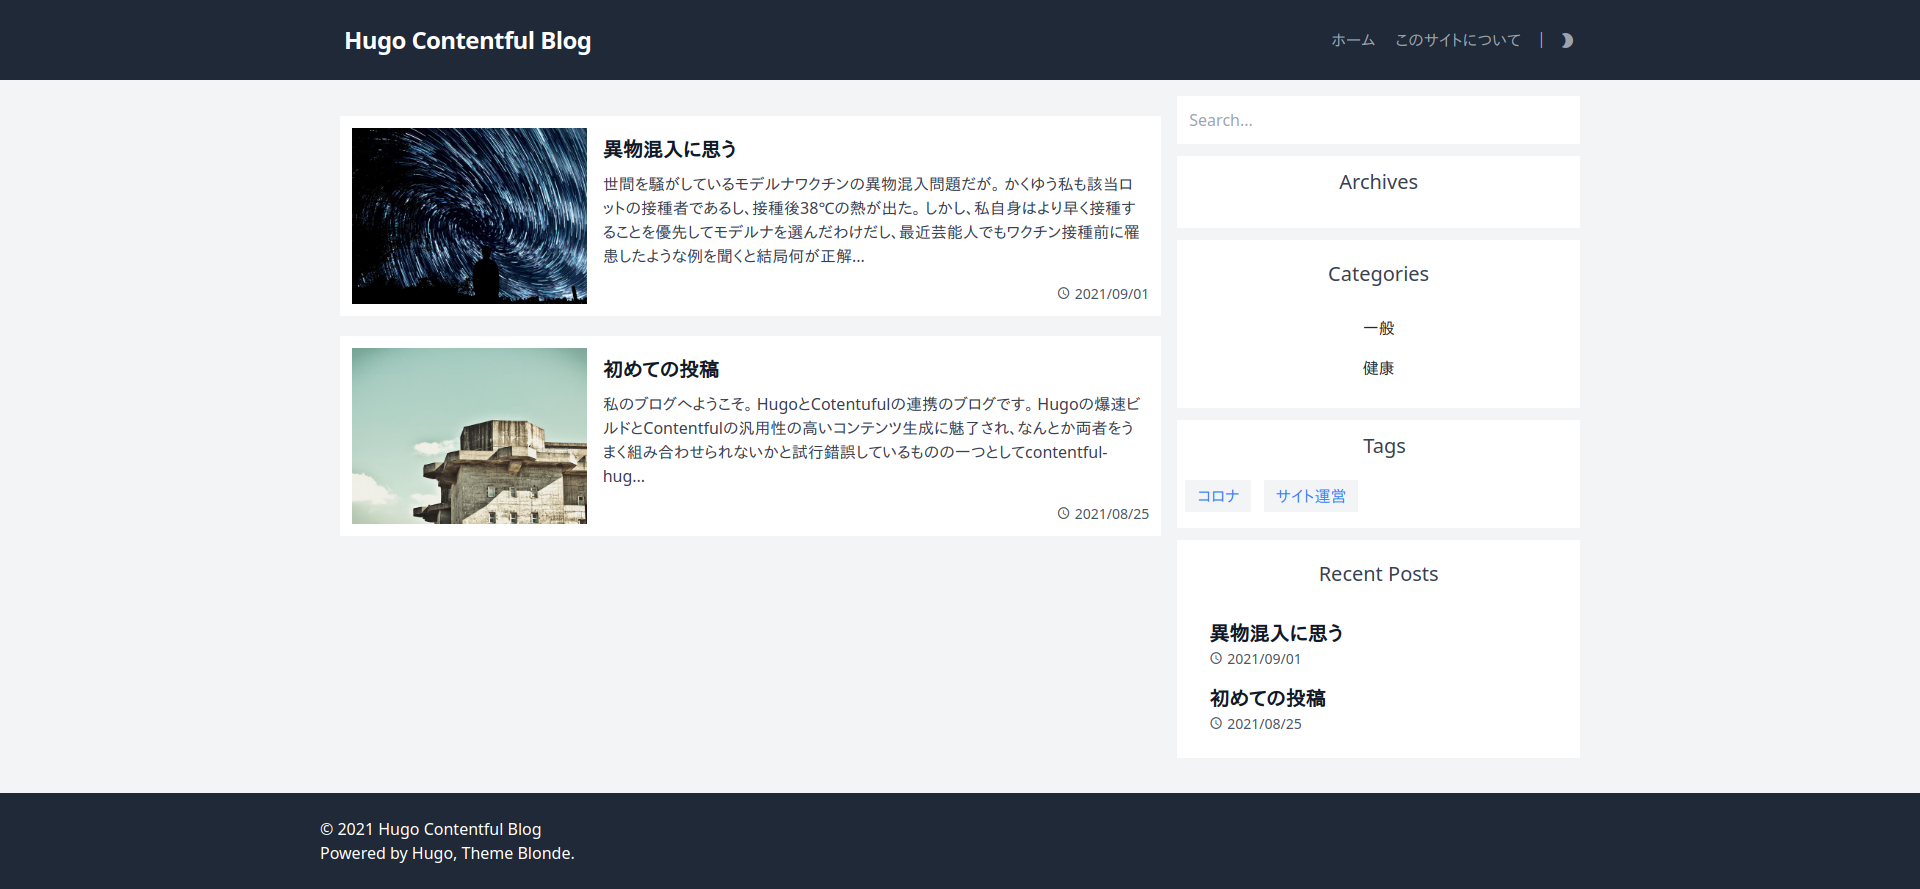
上記で生成されたサイト
ついでの設定
このままで特に問題ないが、場合によってはリスト形式で表示した場合の序文の長さをカスタマイズしたい場合がある。
Hugoではデフォルトで70文字で切り詰めるけども日本語の処理というかカウントがきちんとできていない。
なのでconfig.tomlに以下を追加する。
hasCJKLanguage = true
summaryLength = 30 # これは好み
まとめ
ContentfulをHugoと連携の三回目は以上。
前回まではContentfulやHugo単独の話だったのでウェブ上にいくつも情報がある内容である。しかし今回のcontentfu-hugoの使い方についてはあまり具体例が無く当初いろいろ苦労したので参考になれば幸いである。
このままでもほぼ実用的かとは思うけども、Contentfulでコンテンツ作成後にHugoのビルドを手動で行う必要がある。
次回、Github Actionsで自動ビルド→Github Pages公開の流れについて説明する。


