はじめに
Rhinoceros/Grasshopperで立体トラスを作成します。
その際に用いる作業がデータ構造の理解につながると感じたのでここでシェアしたいと思います。 作成の流れは使用するコンポーネントとキャンバスの画像にて説明します。
データ構造の操作は、全体の流れの解説の後に、遡りながら説明しています。

全体の流れ
流れは以下になります。
サーフェスの作成→サーフェスの分割→法線の取得→データの整理→部材の作成
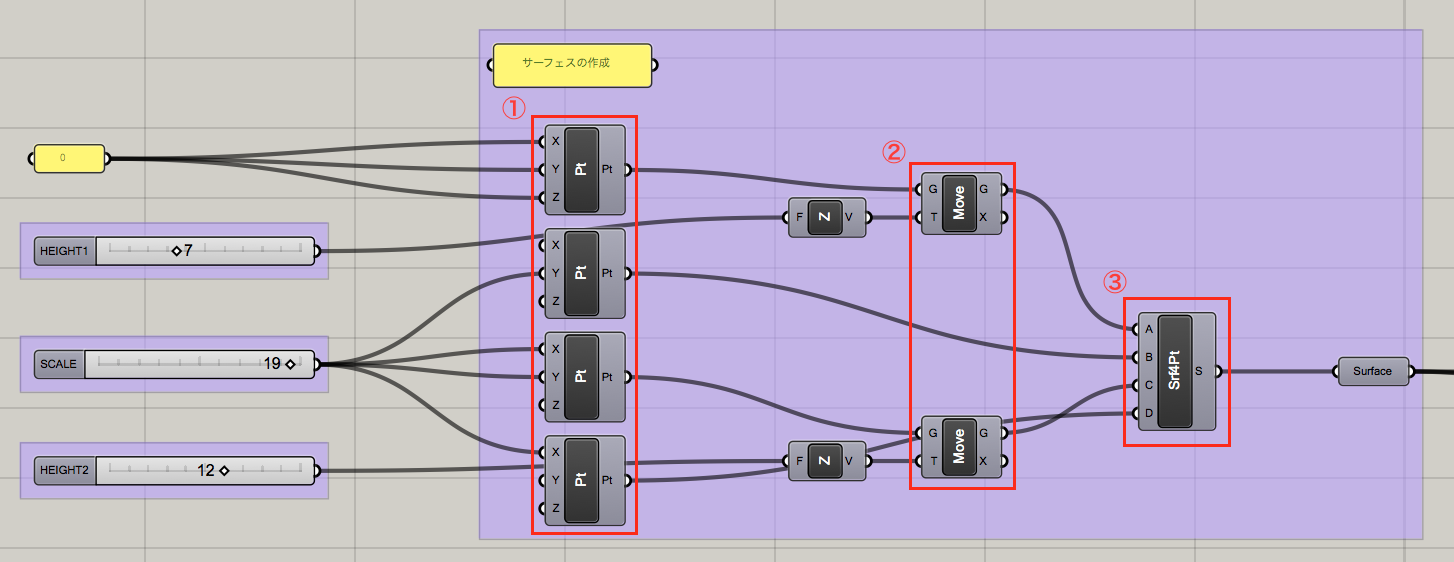
サーフェスの作成
 <使用するコンポーネント>
Construct point
Move
UnitZ
Number slider
4PointSurface
Surface
Panel
サーフェスの分割
 <使用するコンポーネント>
Divide domain^2
isotrim
Deconstruct Brep
法線の取得
 <使用するコンポーネント>
Evalute Surface(inputSはreparametarize)
Line
End points
Point(inputはFlatten)
MD slider
Number slider
データの整理
 <使用するコンポーネント>
Partition list
Points list
Number slider
部材の作成
 <使用するコンポーネント>
Interpolate curve
Flip
Pipe
PipeのRには直径を指定するNumber sliderを入力しています。
記述全体
最後に作成したPipeとサーフェスをgeometryに格納し、カスタムプレビューに接続したら完成。colour swatchでプレビュー色を変更できます。
<使用するコンポーネント>
Geometry
Colour swatch
Custom preview
データ操作について
この立体トラスの中の要となる部分は、部材の作成の中のLineコンポーネントに繋ぐところです。途中にEvalute Surfaceをreparametarizeしたり、pointコンポーネントをFlattenに設定したデータ操作がこのような形態を導いています。
(長くなったので、詳しくは別途記事を作成します。)
終わりに
いかがでしたでしょうか。
grasshopperなどを用いたデジタルデザインは、今回作成したトラスのような反復した操作を用いる表現に向いています。
