SaaSのドキュメントなどでは、「特定のユーザーにのみ見せたいドキュメント・コンテンツ」が発生します。
その場合、表示するMarkdownファイルを変更するなど、プログラム側で処理を行うケースが多いのではないでしょうか。
Markdocで条件分岐付きのドキュメントを書く
Markdocを利用した場合、ifやelseタグをMarkdown内に記述できます。
# Private page example

{% if $isLogin %}
## Secret topics

Here is a secret content area.
{% else /%}
You need to sign in at first.
{% /if %}
これはMarkdocのbuild-in tags機能で、{% else $isPaidUser %}のようにelse ifも記述できます。
Markdocのif ~ elseタグを使った条件分岐を処理する
Markdocでif ~ elseタグを利用した条件分岐を動かすには、transfrom時にMarkdown内で指定した変数を渡す必要があります。
import Markdoc from '@markdoc/markdoc'

const markdownContent = `
# Private page example

{% if $isLogin %}
## Secret topics

Here is a secret content area.
{% else /%}
You need to sign in at first.
{% /if %}
`
const ast = Markdoc.parse(markdownContent);
const content = Markdoc.transform(ast, {
    variables: {
        isLogin: true,
    }
});
Markdoc.transformの第二引数内に、variables.[変数名]で指定しましょう。
Markdocは、この値を利用してMarkdown内のコンテンツを変換します。
Reactで動かすサンプル
Reactでif ~ elseを動かすサンプルコンポーネントを用意しました。
import React, { useEffect, useState, FC } from 'react';
import Markdoc, { RenderableTreeNode } from '@markdoc/markdoc';


export const PrivateContent: FC = () => {
  const [isLogin, setIsLogin] = useState(false)
  const [markdocContent, setMarkdocContent] = useState<RenderableTreeNode | null>(null)
  useEffect(() => {
    const markdownContent = `
# Private page example

{% if $isLogin %}
## Secret topics

Here is a secret content area.
{% else /%}
You need to sign in at first.
{% /if %}
`
    const ast = Markdoc.parse(markdownContent);
    const content = Markdoc.transform(ast, {
        variables: {
            isLogin
        }
    });
    setMarkdocContent(content)
  },[isLogin])
  return (
    <div>
        <h1>Demo content </h1>
        <button onClick={() => setIsLogin(!isLogin)}>{isLogin ? 'Logout' : 'Login'}</button>
        {markdocContent ? Markdoc.renderers.react(markdocContent, React) : null}
    </div>
  )
}
このサンプルでは、isLoginのステートを見て表示するコンテンツを出し分けます。
variablesの値が変わるたびにtransformする必要がありますので、コードをシンプルにするためuseEffect内でMarkdocによる変換を行なっています。
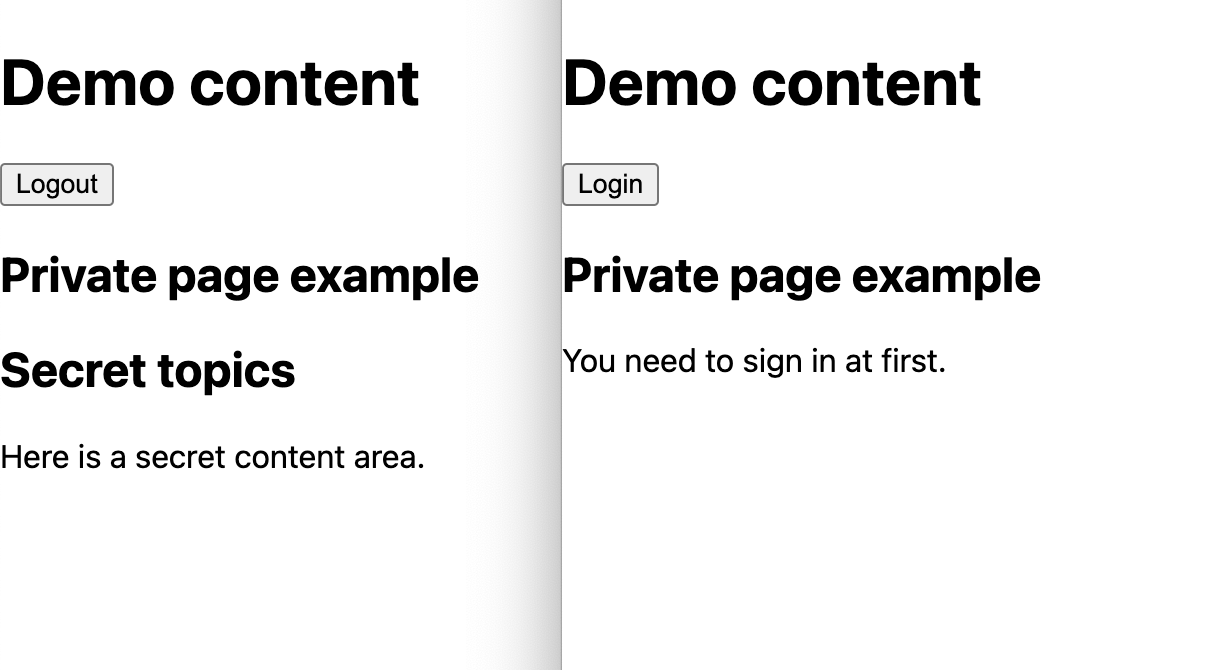
動かしてみる
Reactアプリを動かしてみましょう。
エラーが出なければ、下のスクリーンショットのように、ボタンクリックで表示内容が切り替わるページが出ます。
[Tips]: Markdocのtransform処理を別コンポーネントに切り出すアイディア
実際に利用する場合は、以下のような変換用コンポーネントを用意することも検討しましょう。
import React, { FC } from 'react';
import Markdoc, { Node } from '@markdoc/markdoc';
const MarkdocContent:FC<{
    markdocContent?: Node | string;
    variables?: {
        [key: string]: string | boolean
    }
}> = ({ markdocContent, variables }) => {
    if (!markdocContent) return null;
    const ast = typeof markdocContent === 'string' ? Markdoc.parse(markdocContent) : markdocContent;
    const content = Markdoc.transform(ast, {
        variables
    });
    return <>{Markdoc.renderers.react(content, React)}</>
}
variablesと一緒にnodesやfunctionsなどを設定しておくと、独自タグや関数も利用できます。
作成したComponentでは、markdocContentに表示したいMarkdownやパース済みのASTを渡しましょう。
<MarkdocContent
  markdocContent={`
# Private page example

{% if $isLogin %}
## Secret topics

Here is a secret content area.
{% else /%}
You need to sign in at first.
{% /if %}`}
  variables={{
    isLogin
   }}
/>
基本的には文字列(string)で渡す方が効率的です。
Next.jsやGatsbyなど、サーバー側でMarkdownファイルの読み込みやASTへの変換を行いたい場合は、ASTを渡すとよいでしょう。
[PR] Stripe開発者向け情報をQiitaにて配信中!
- [Stripe Updates]:開発者向けStripeアップデート紹介・解説
- ユースケース別のStripe製品や実装サンプルの紹介
- Stripeと外部サービス・OSSとの連携方法やTipsの紹介
- 初心者向けのチュートリアル(予定)
など、Stripeを利用してオンラインビジネスを始める方法について週に2〜3本ペースで更新中です。