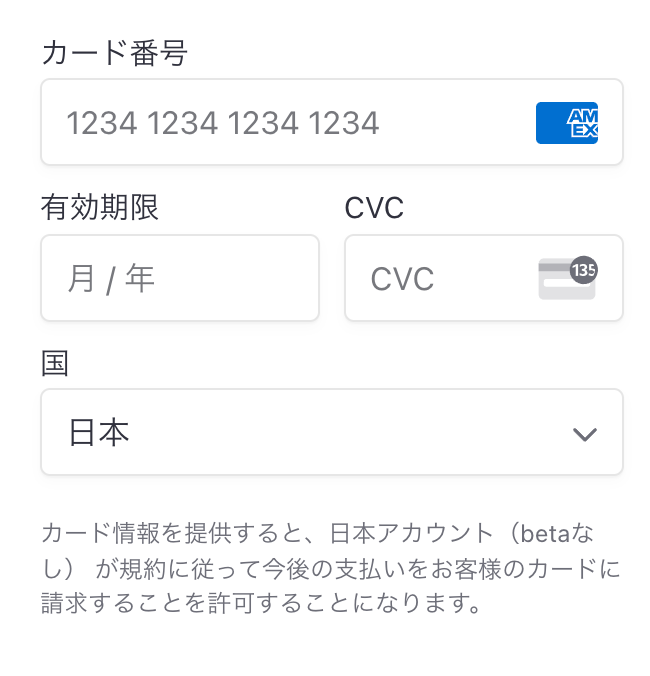
サービスによっては、決済を行う前にクレジットカード情報を入力してもらう動線を作りたい場合があります。
StripeのSetupIntent APIとElementのconfirmSetupメソッドを利用し、Reactでカード登録フォームを実装する方法を紹介します。
前準備
このサンプルでは、Next.jsを利用します。これはSetupIntentの作成にREST APIが必要なため、APIとReactアプリを両方まとめて管理できるためです。
Next.jsでのアプリ起動は、create-next-appを利用します。
% npx create-next-app
.envファイルでStripeのAPIキーを環境変数経由で利用できるようにします。
.env.local
NEXT_PUBLIC_STRIPE_PUBLISHABLE_KEY=pk_test_xxx
STRIPE_SECRET_KEY=sk_test_xxxx
また、実装で利用するライブラリを追加でインストールしましょう。
% npm install stripe @stripe/stripe-js @stripe/react-stripe-js
Step1: Next.jsでSetupIntentを作成するAPIを用意する
支払い方法を保存する場合は、setupIntentAPIを利用します。
import Stripe from 'stripe'

const stripe = new Stripe(process.env.STRIPE_SECRET_KEY as string, {
  apiVersion: '2020-08-27'
})
...
const response = await stripe.setupIntents.create({...})

{
  ...
  "client_secret": "seti_xxxxxxxl"
}
保存した決済方法を後から利用できるようにするため、顧客(Customer)データの作成も行いましょう。
  const customer = await stripe.customers.create()
  const response = await stripe.setupIntents.create({
    customer: customer.id,
    payment_method_types: ['card']
  })
Next.jsの場合、ファイル名がそのままAPIパスになりますので、以下のようなファイルを用意しましょう。
pages/api/setup-intent.js
import Stripe from 'stripe'
const stripe = new Stripe(process.env.STRIPE_SECRET_KEY)

export default async function handler(
  req,
  res
) {
  if (req.method.toLocaleLowerCase() !== 'post') {
    return res.status(405).end()
  }
  const customer = await stripe.customers.create({
    metadata: {
      app_username: req.body.username
    }
  })
  const response = await stripe.setupIntents.create({
    customer: customer.id,
    payment_method_types: ['card']
  })
  return res.status(200).json({
    client_secret: setupIntent.client_secret,
    customer_id: customer.id,
  })
})
customers.createで設定しているmetadataは、アプリ側でなにかしらのユーザー管理機能がある場合を想定した設定です。
Stripeの顧客情報からアプリのユーザー情報を取得・アクセスしたい場合などにこのメタデータを利用すると便利です。
Step2: Reactでカード情報入力フォームを用意する
続いてSetupIntentを利用してカード情報を入力するフォームを実装します。
pages/index.jsx
import { loadStripe } from "@stripe/stripe-js";
import { Elements, PaymentElement } from "@stripe/react-stripe-js";
import { useEffect, useState } from 'react';

const stripePromise = loadStripe(process.env.NEXT_PUBLIC_STRIPE_PUBLISHABLE_KEY);

const Home = () => {
  const [intent, setIntent] = useState(null)
  useEffect(() => {
    fetch('/api/setup-intent', {
      method: 'post'
    }).then(res => res.json())
    .then(data => {
       setIntent(data)
       if (data.customer_id) {
         window.localStorage.setItem('customer_id', data.customer_id)
       }
    })
    .catch(e => {
      console.log(e)
    })
  },[setIntent])

  if (!intent || !intent.client_secret) return <p>loading</p>
  const options = {
    appearance:{
      theme: 'stripe',
    },
    clientSecret: intent.client_secret,
  }
  return (
    <Elements stripe={stripePromise} options={options}>
      <PaymentElement  />
    </Elements>
  )
}

export default Home
useEffectを利用し、ページが表示されたタイミングでSetupIntentとCustomerを作成しています。
その後、取得したSetupIntentデータをuseStateでStateに格納し、@stripe/react-stripe-jsライブラリのElementsコンポーネントに渡しています。
また、CustomerのIDの保存にブラウザのlocalStorageを利用しました。あくまでデモ用途ですので、実装時にはfirebaseやCognitoなどのmetadataに保存することをお勧めします。
Step3: 表示を一度確認する
ここまでで一度表示を確認してみましょう。
$ yarn dev -p 3000
yarn run v1.22.17
$ next dev -p 3000
ready - started server on 0.0.0.0:3000, url: http://localhost:3000
info  - Loaded env from /Users/hideokamoto/sandbox/element-demo/.env.local
event - compiled client and server successfully in 376 ms (171 modules)
エラーが出ていなければ、カード情報を入力するフォームが表示されます。
Step4: 入力したカード情報を保存する
ここからは表示させたカード情報入力フォームのデータを保存する処理を実装します。
pages/index.jsxにPaymentコンポーネントを追加しましょう。
import {
 Elements, PaymentElement,
+ useElements, useStripe
} from "@stripe/react-stripe-js";
import { useEffect, useState } from 'react';

const stripePromise = loadStripe(process.env.NEXT_PUBLIC_STRIPE_PUBLISHABLE_KEY);

 const Payment = () => {
  const stripe = useStripe();
  const elements = useElements();
  return (
    <form onSubmit={async e => {
      e.preventDefault()
      if (!stripe || !elements) return;
      await stripe.confirmSetup({
        elements,
        confirmParams: {
          return_url: 'http://localhost:3000'
        }
      })
    }}>
        <PaymentElement  />
        <button type="submit">Submit</button>
    </form>
  )
}
その後、Homeコンポーネントを以下のように変更します。
    <Elements stripe={stripePromise} options={options}>
-        <PaymentElement  />
+        <Payment  />
    </Elements>
フォームsubmit時の処理に利用するuseStripeとuseElementsは、Elementsの子孫要素でしか利用できません。
そのため、少し手間ですがElementsを利用しているコンポーネントとは別のコンポーネントで実装する必要があります。
Step5: テストカード情報を入力してみる
あとは実際にフォームを動かして動作を確認してみましょう。
テストモードのAPIキーを利用していれば、4242424242424242や5555555555554444などのテスト用カード番号と、現在の日付より未来の年月、ランダムな3桁の数字の3種類でカード情報を入力できます。
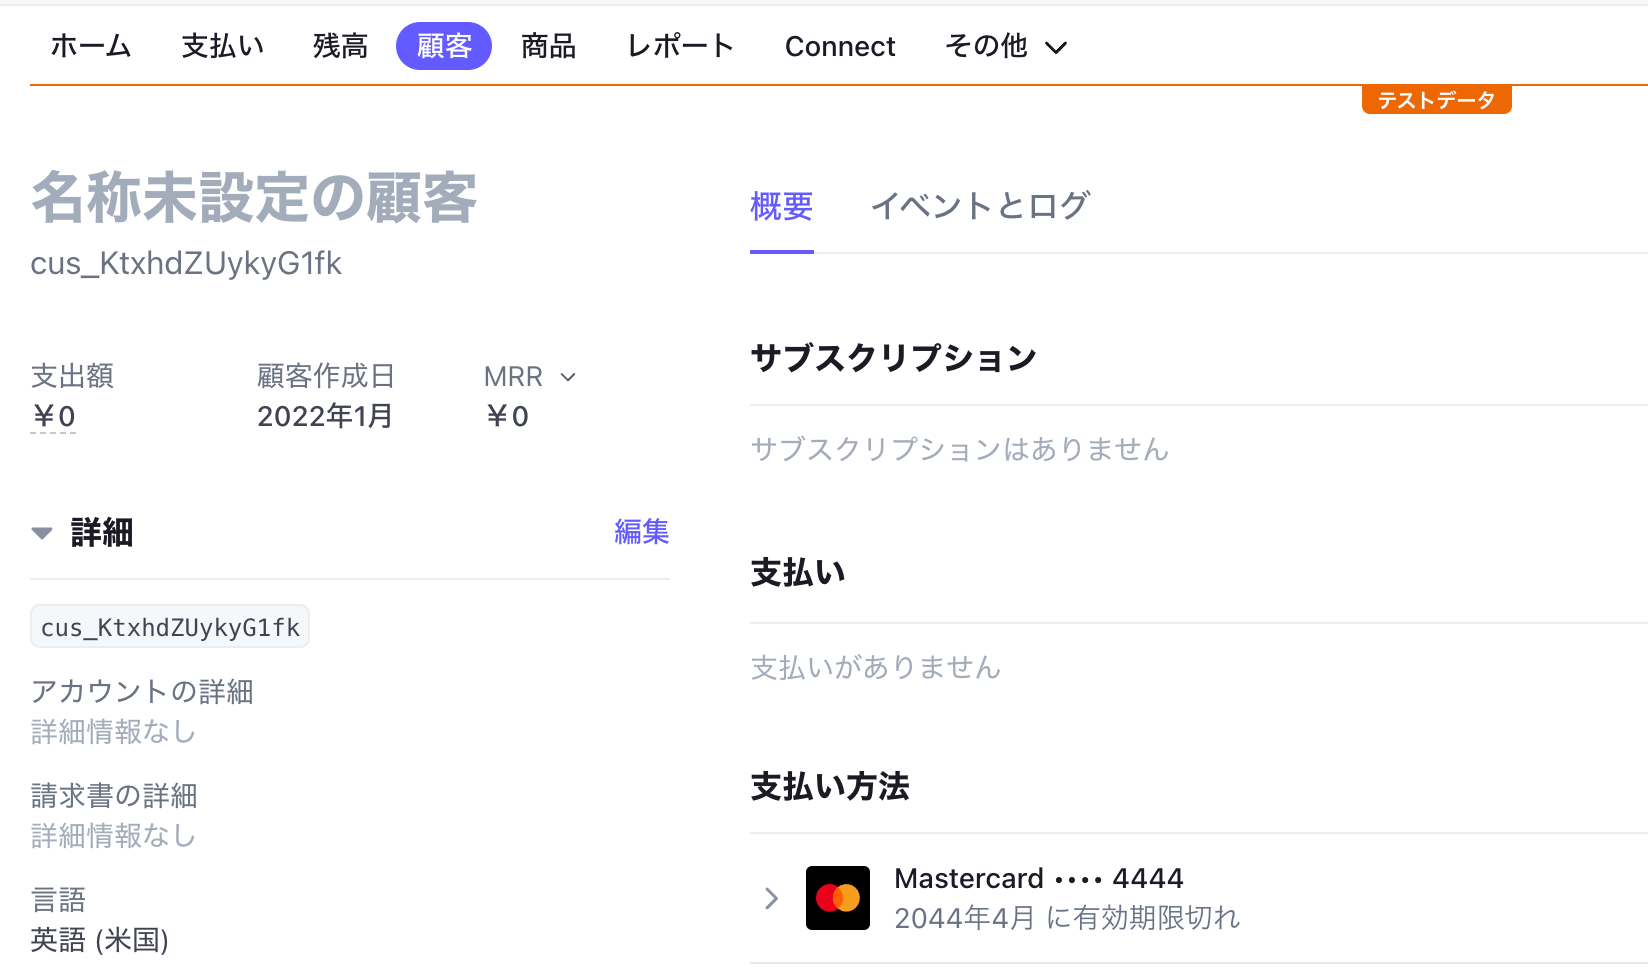
保存に成功すれば、Stripe Dashboardで顧客データを確認できます。
Tips: Customerデータの更新・登録タイミング
ユーザー名やEmailなどの顧客情報をStripeのCustomerに登録したい場合、今回のサンプルではSetupIntentの作成APIにデータを送信する必要があります。
pages/index.jsx
    fetch('/api/setup-intent', {
      method: 'post',
      body: {
        username: getCurrentUsername(),
        email: getCurrentUserEmail(),
      }
    }).then(res => res.json())
pages/api/setup-intent.js
  const customer = await stripe.customers.create({
+   name: req.body.username,
+   email: req.body.email,
    metadata: {
      app_username: req.body.username
    }
  })
もしカード情報の入力フォームと一緒に情報を入力させたい場合は、confirmSetupより先にAPIを呼び出すことをお勧めします。
await fetch('/api/update-customer', {
  method: 'post',
  body: {
   ...
  }
})
await stripe.confirmSetup(...)
Appendix: 保存後のリダイレクトについて
stripe.confirmSetupで保存処理を実行する際、return_urlに指定したURLへのリダイレクトが実行されます。
そしてリダイレクト後のURlには、以下のクエリ文字列が追加されています。
- setup_intent
- setup_intent_client_secret
- redirect_status
Stripe JS SDKでretrieveSetupIntentを実行したい場合などに利用できます。
Next.jsのuseRouterなどを使って取得しましょう。
[PR] Stripe開発者向け情報をQiitaにて配信中!
2021年12月よりQiitaにて、Stripe開発者のためのブログ記事更新を開始しました。
- [Stripe Updates]:開発者向けStripeアップデート紹介・解説
- ユースケース別のStripe製品や実装サンプルの紹介
- Stripeと外部サービス・OSSとの連携方法やTipsの紹介
- 初心者向けのチュートリアル(予定)
など、Stripeを利用してオンラインビジネスを始める方法について随時更新してまいります。

