Payment Links(支払いリンク)のAPIリリースと同時に、Webhookイベントについても受信できるようになりました。
今回はWebhook連携のユースケースとして、「設定漏れ項目の通知・自動リカバリー」を紹介します。
サポートしているWebhookイベント
-
payment_link.created: 支払いリンクが作成された時に実行されます -
payment_link.updated: 支払いリンクが更新された時に実行されます
Webhookのユースケース(例)
Webhookを利用することで、以下のような連携が期待できます。
- [Connect]子アカウントがリンクを作成したことをSlackに通知する
- 支払いリンクを無効化したことをユーザーにメールで通知する
- Taxの設定など、設定を必須としたい項目の設定漏れを検知する
今回は3つ目の「設定漏れ検知」のサンプルを紹介します。
Stripe CLIでWebhookをローカルテストする
Webhook設定画面に移動すると、[ローカル環境でテスト]ボタンが表示されています。

クリックすると、Stripe CLIを利用したテスト方法が紹介されているページが開きます。
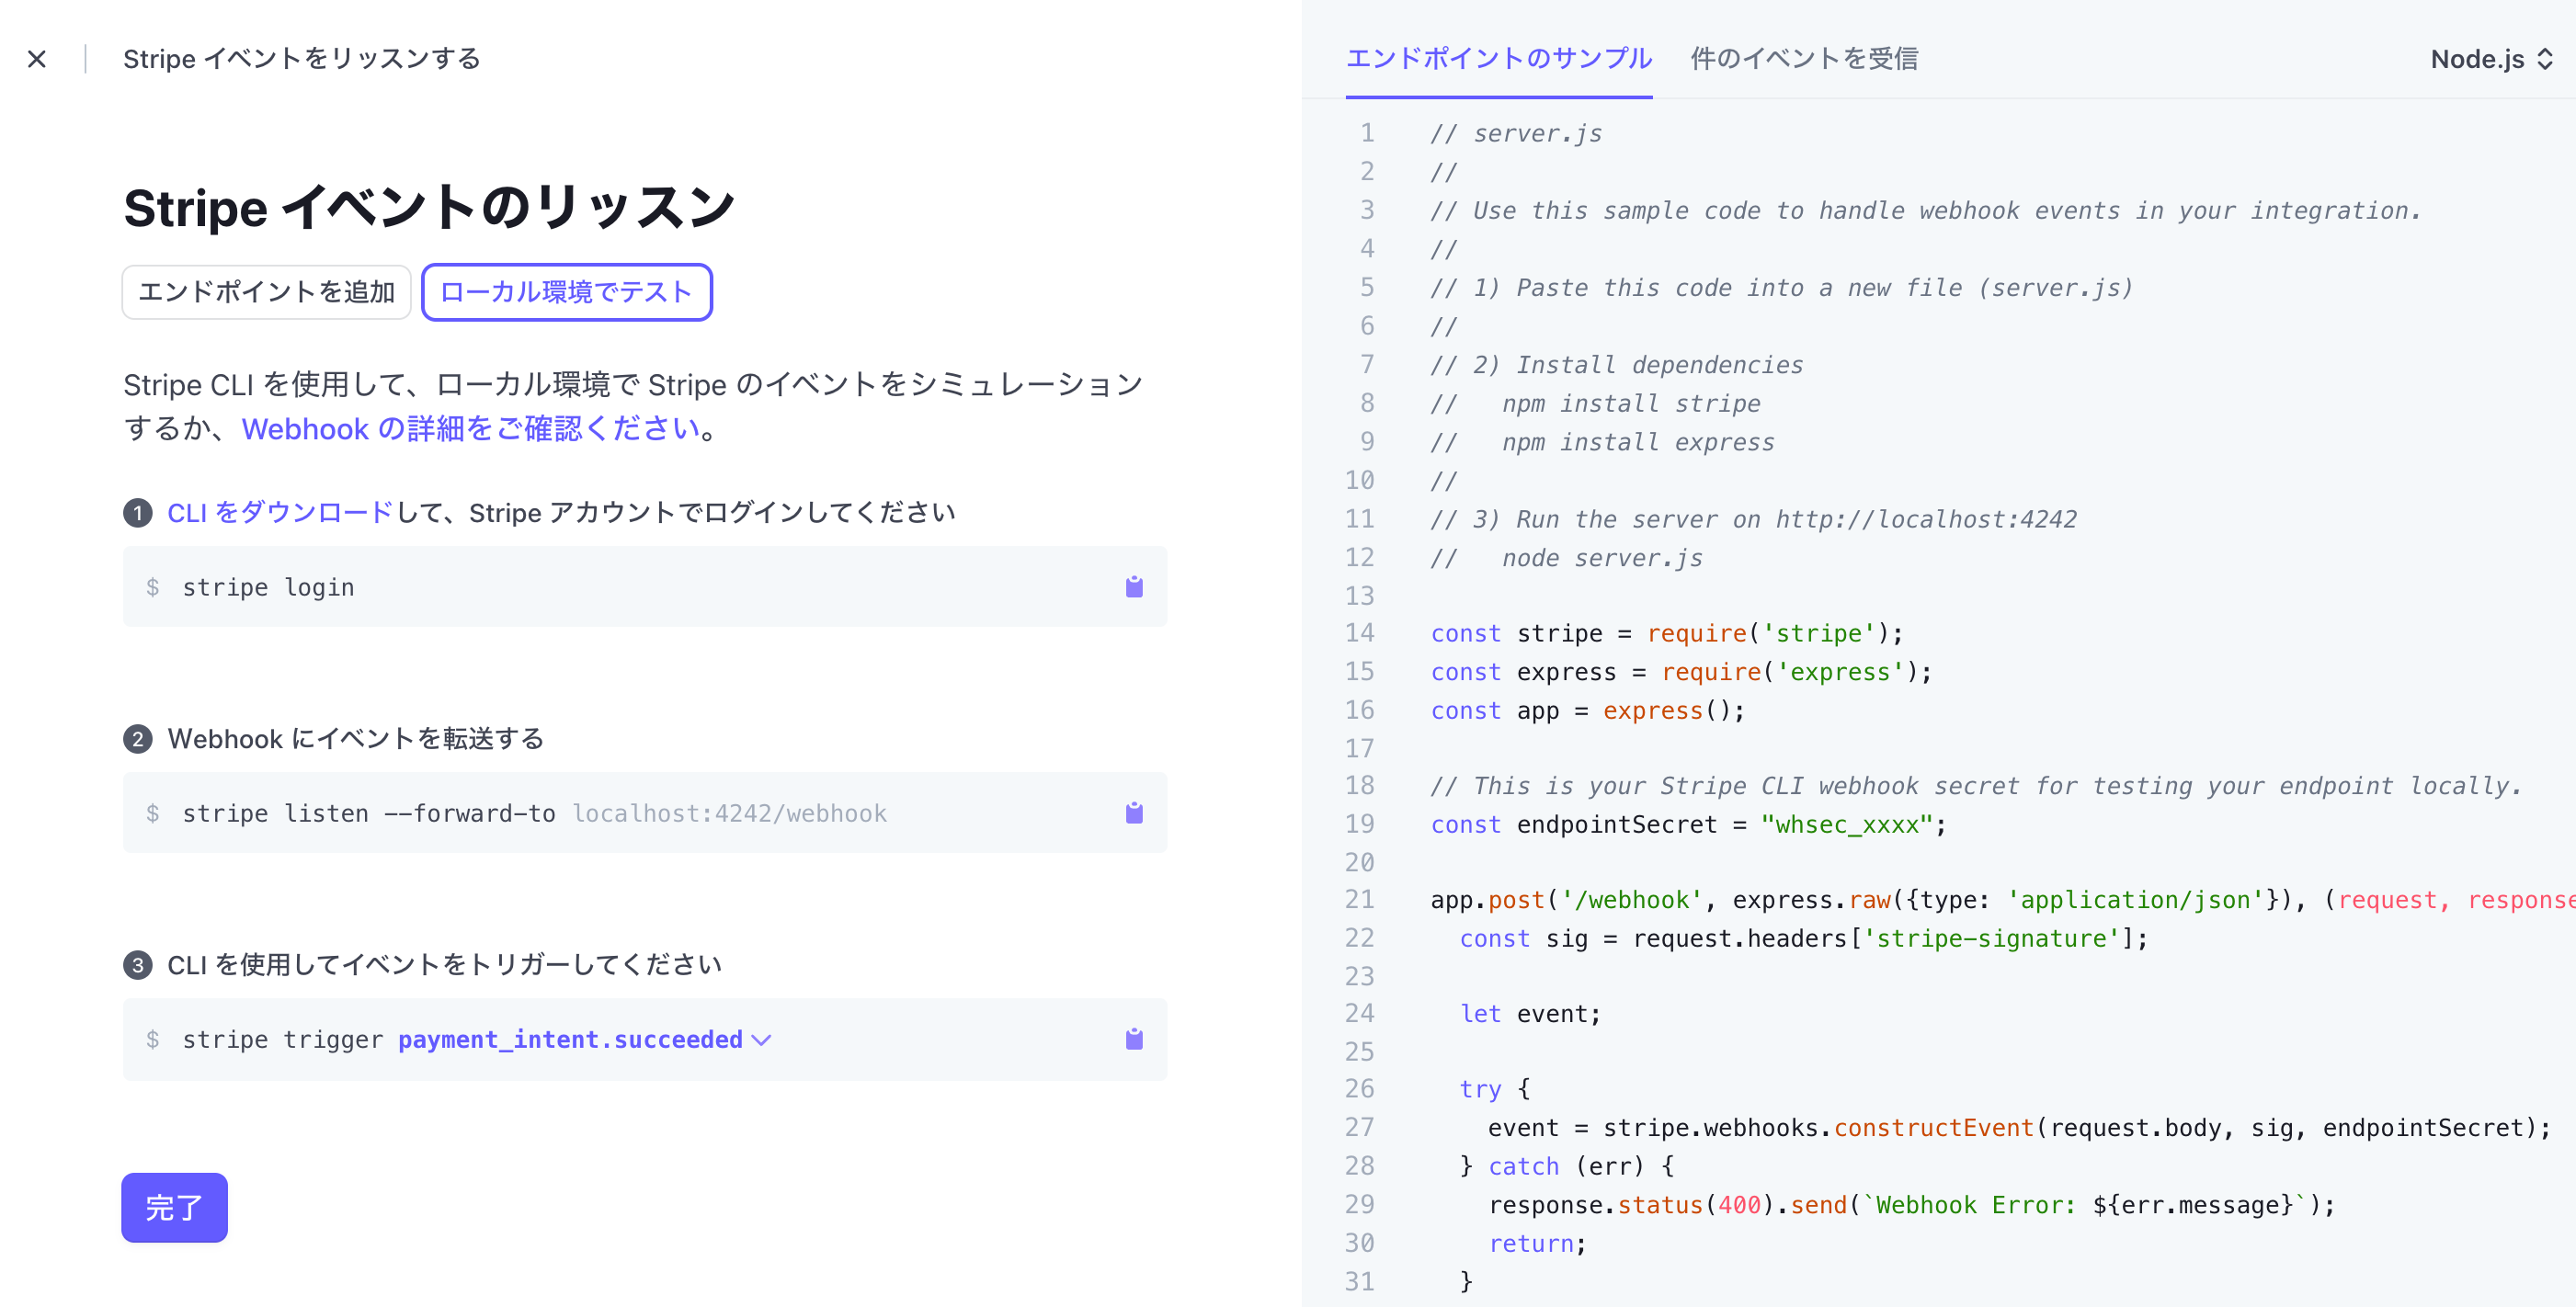
画面に表示された方法に従って、Stripe CLIでWebhookをローカルテストできるようにしましょう。
% stripe listen --forward-to localhost:4242/webhook
ExpressでStripe Webhookイベントを受信するローカルAPIを起動する
Webhook設定ページ右側に表示されていたコードを利用して、Expressのアプリを用意しましょう。
index.js
const stripe = require('stripe')('YOUR_SECRET_API_KEY');
const express = require('express');
const app = express();

// This is your Stripe CLI webhook secret for testing your endpoint locally.
const endpointSecret = "whsec_xxxxxxx";

app.post('/webhook', express.raw({type: 'application/json'}), async (request, response) => {
  const sig = request.headers['stripe-signature'];

  let event;

  try {
    event = stripe.webhooks.constructEvent(request.body, sig, endpointSecret);
  } catch (err) {
    response.status(400).send(`Webhook Error: ${(err as Error).message}`);
    return;
  }

  // PaymentLinks以外のイベントをハンドルしない
  if (![
      'payment_link.created',
      'payment_link.updated'
  ].includes(event.type)) {
    response.send();
    return;
  }
  const paymentLink = event.data.object

  console.log(paymentLink)

  // Return a 200 response to acknowledge receipt of the event
  response.send();
});

app.listen(4242, () => console.log('Running on port 4242'));
セットアップ・サーバー起動コマンド
% npm init -y
% npm install express stripe
% node index.js
支払いリンクの設定漏れの検知とリカバリーを行う
続いて支払いリンクの中身をチェックし、必要に応じてリカバリーするコードを追加しましょう。
今回はサンプルとして、「クーポンコード入力欄を、必ず有効化する」を検証します。
const stripe = require('stripe')('YOUR_SECRET_API_KEY');
const express = require('express');
const app = express();

// This is your Stripe CLI webhook secret for testing your endpoint locally.
const endpointSecret = "whsec_xxxxxxx";

app.post('/webhook', express.raw({type: 'application/json'}), async (request, response) => {
  const sig = request.headers['stripe-signature'];

  let event;

  try {
    event = stripe.webhooks.constructEvent(request.body, sig, endpointSecret);
  } catch (err) {
    response.status(400).send(`Webhook Error: ${(err as Error).message}`);
    return;
  }
  /**
   * Payment Links以外のイベントを処理しない
   **/
  if (!['payment_link.created', 'payment_link.updated'].includes(event.type)) {
    response.send();
    return;
  }
  const paymentLink = event.data.object

  /**
   * クーポンコードの設定が無効化されているかをチェック
   */
  if (!paymentLink.allow_promotion_codes) {
    /**
     * 強制的に有効化する
     */
    await stripe.paymentLinks.update(paymentLink.id, {
      allow_promotion_codes: true
    })
  }
  // Return a 200 response to acknowledge receipt of the event
  response.send();
});

app.listen(4242, () => console.log('Running on port 4242'));
event.data.objectの中身が支払いリンクの設定内容です。
そこでその内容をチェックし、意図しない設定になっている場合は、APIを利用して強制的に設定を変更するようにしました。
実際の運用では、強制的な更新ではなく「Slackへの通知」や「無効化処理を行う」などの対応になるケースもあるかもしれません。
このように、WebhookとAPIを利用することで、より柔軟かつトラブルの起きにくい運用を行うことができるようになります。
まだまだユースケースはあると思いますので、ぜひ皆さんでお試しください!
関連ドキュメント・リンク
[PR] Stripe開発者向け情報をQiitaにて配信中!
2021年12月よりQiitaにて、Stripe開発者のためのブログ記事更新を開始しました。
- [Stripe Updates]:開発者向けStripeアップデート紹介・解説
- ユースケース別のStripe製品や実装サンプルの紹介
- Stripeと外部サービス・OSSとの連携方法やTipsの紹介
- 初心者向けのチュートリアル(予定)
など、Stripeを利用してオンラインビジネスを始める方法について随時更新してまいります。