この記事は、AWS AmplifyとAWS×フロントエンド Advent Calendar 2022 3日目の記事です。
AWS Amplifyを利用することで、SaaSサービス・アプリケーションのフロントエンドを手早く構築することができます。
その中でも、AmplifyのAuth機能(Cognito User Pools)とStripeの顧客データの連携方法について紹介します。
StripeのCustomerデータを作成するタイミング(Amplify編)
AWS AmplifyとStripeを連携させる場合、「サブスクリプションなどを紐づける顧客(Customer)データをどのタイミングで作成・紐付けするか」を検討する必要があります。
Customerデータの作成タイミングは、大きく分類するとおよそ以下のパターンが考えられます。
| タイミング | 作成方法 |
|---|---|
| Cognito User Poolsにユーザー情報を作成した時 | CognitoのTrigger Lambda |
| サブスクリプションや決済処理に入る前 | アプリケーション -> API Gw + Lambda |
| サブスクリプションや決済が完了した後 | Stripe Webhook -> API Gw/Lambda |
それぞれメリットデメリットがありますが、今回はCognitoのTriggerを使って作成する方法を紹介します。
CognitoのUser metadataにCustomerデータを保存する
Cognitoのトリガーでは、次のような構造でデータが送られてきます。
{
  version: '1',
  region: 'us-east-1',
  userPoolId: 'us-east-1_1234',
  userName: 'john',
  callerContext: {
    awsSdkVersion: 'aws-sdk-unknown-unknown',
    clientId: '23445663'
  },
  triggerSource: 'PostAuthentication_Authentication',
  request: {
    userAttributes: {
      sub: 'd8482dbc-1234-abcd-8acc-10f568b6a792',
      'cognito:user_status': 'CONFIRMED',
      email: 'test@example.com'
    },
    newDeviceUsed: true
  },
  response: {}
}
この値を利用して、Stripe SDKのカスタマー作成処理を呼び出しましょう。
import Stripe from 'stripe';
const stripe = new Stripe('sk_testから始まるAPIキー');

export const handler = async(event) => {
    const customerParams = {
      name: event.userName,
    };
    if (event.request.userAttributes.email) {
        customerParams.email = event.request.userAttributes.email
    }
    await stripe.customers.create(customerParams);

    return event;
};
この際、CognitoのユーザーにStripeのCustomer IDを設定すると、ログイン中のユーザーの顧客情報が取得しやすくなります。
    const customerParams = {
      name: event.userName,
+      metadata: {
+        cognitoUsername: event.userName,
+      },
    };
Cognitoのユーザー情報からStripeのデータを参照できるようにする
CognitoのユーザーIDなどからStripe内の顧客情報を取得するために、作成したCustomer IDをユーザーのmetadataに保存できます。
+import { CognitoIdentityProviderClient, AdminUpdateUserAttributesCommand } from "@aws-sdk/client-cognito-identity-provider";
import Stripe from 'stripe';
const stripe = new Stripe('sk_testから始まるAPIキー');

+const client = new CognitoIdentityProviderClient({
+  apiVersion: '2016-04-18',
+  region: 'ap-northeast-1'
+});

export const handler = async(event) => {
    const customerParams = {
      name: event.userName,
    };
    if (event.request.userAttributes.email) {
        customerParams.email = event.request.userAttributes.email
    }
-    await stripe.customers.create(customerParams);
+    const customer = await stripe.customers.create(customerParams);

+    const command = new AdminUpdateUserAttributesCommand({
+      UserPoolId: '利用しているUser PoolのID',
+      Username: event.userName,
+      UserAttributes: [{
+        Name: 'customerId',
+        Value: customer.id
+      }],
+    });
+    await client.send(command);
    return event;
};
取得したcustomer idを利用して、API側の処理などでStripeとデータを連携させましょう。
Cognito User Poolsでトリガーを追加する
作成したLambda関数のトリガーへの設定は、Cogniti User Poolsの管理画面からも行えます。
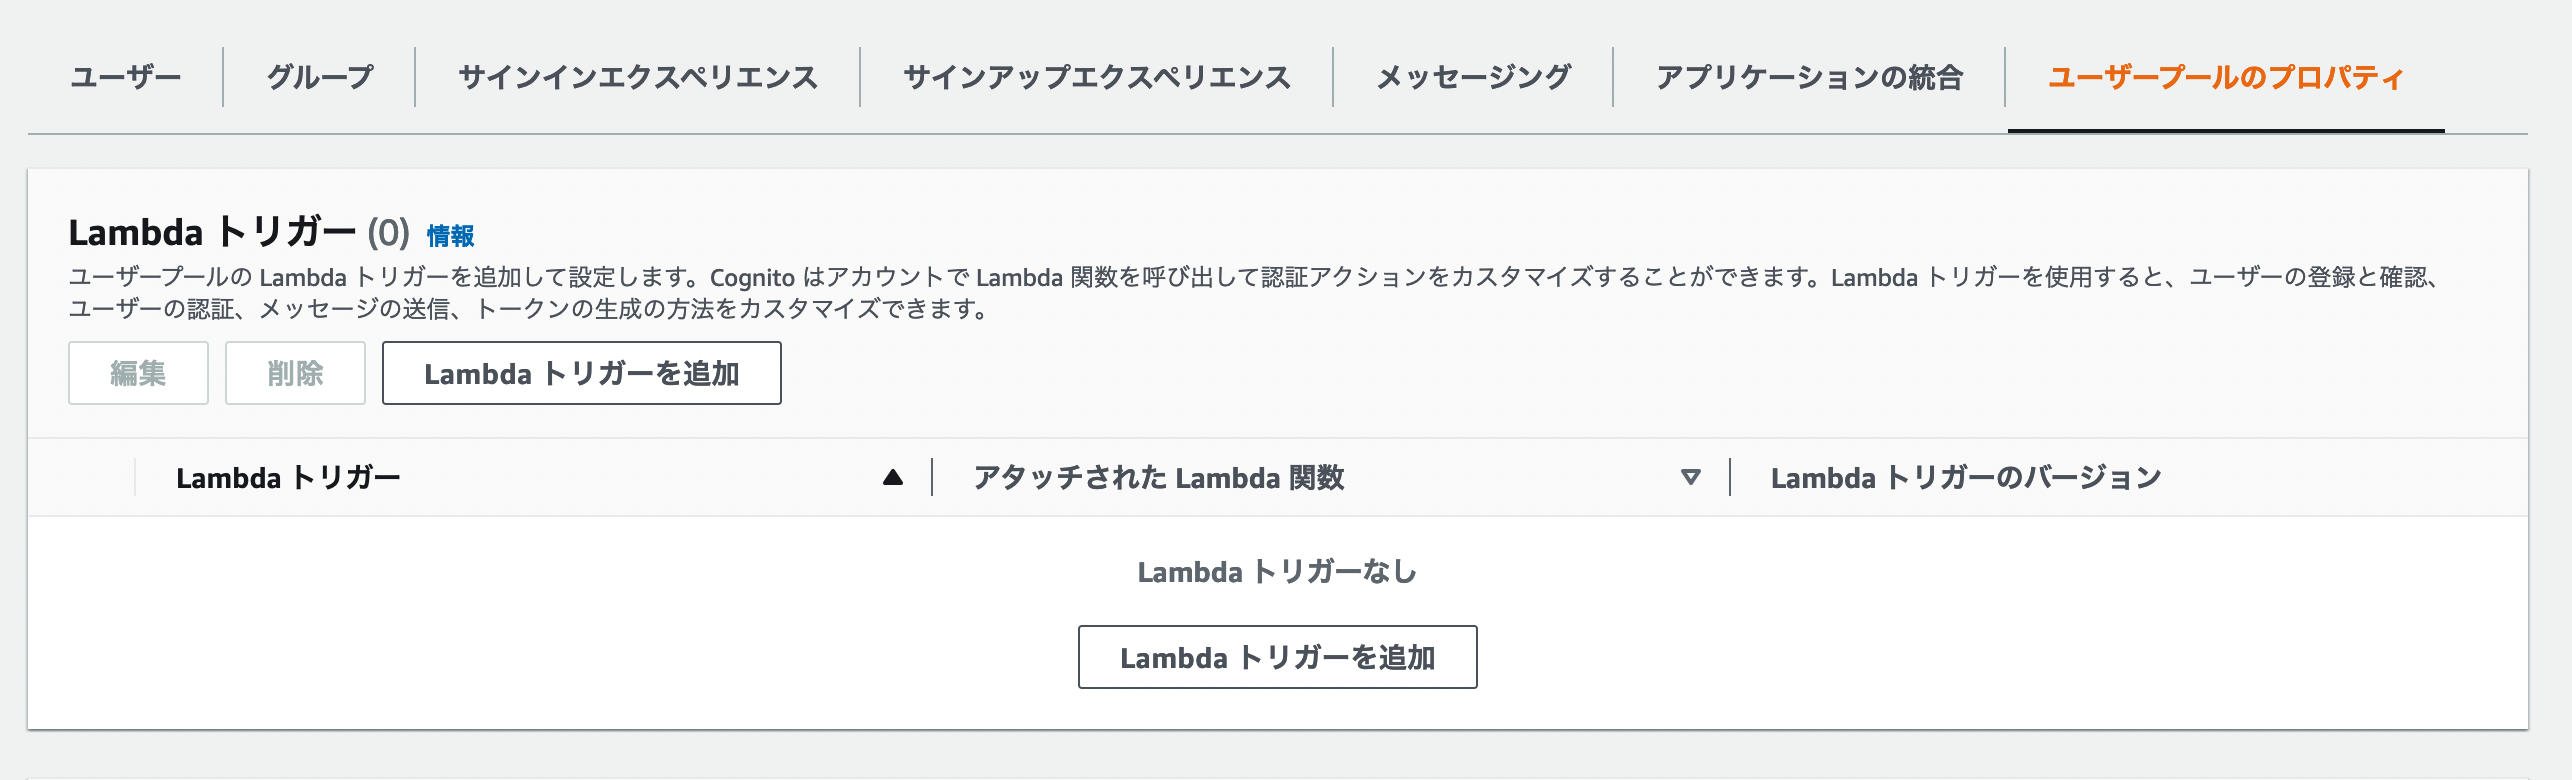
Cognito User PoolsのTriggerでは、「確認後の Lambda トリガー」を利用します。
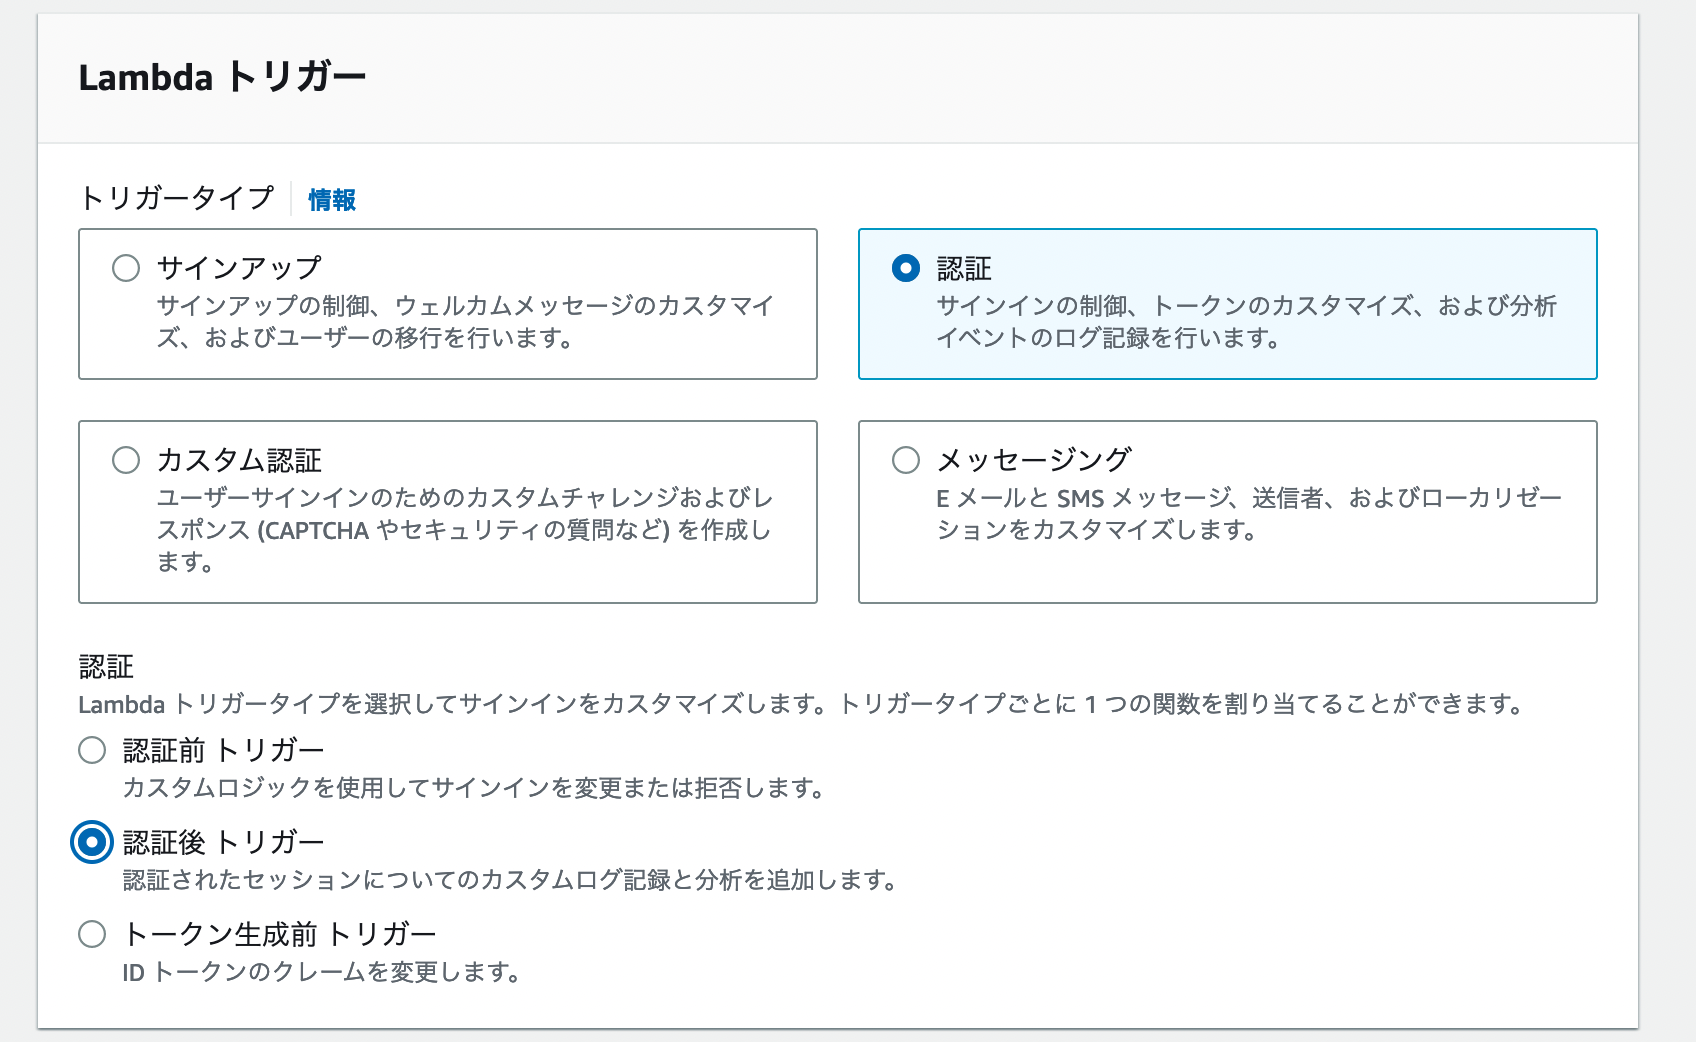
「サインアップ前の Lambda トリガー」でも可能ですが、メールなどでの確認ステップが完了していないステータスのため、アクティブではないユーザーのCustomerデータが作成されてしまいます。