商品を販売する際、顧客に追加の情報入力を求めたいケースがあります。
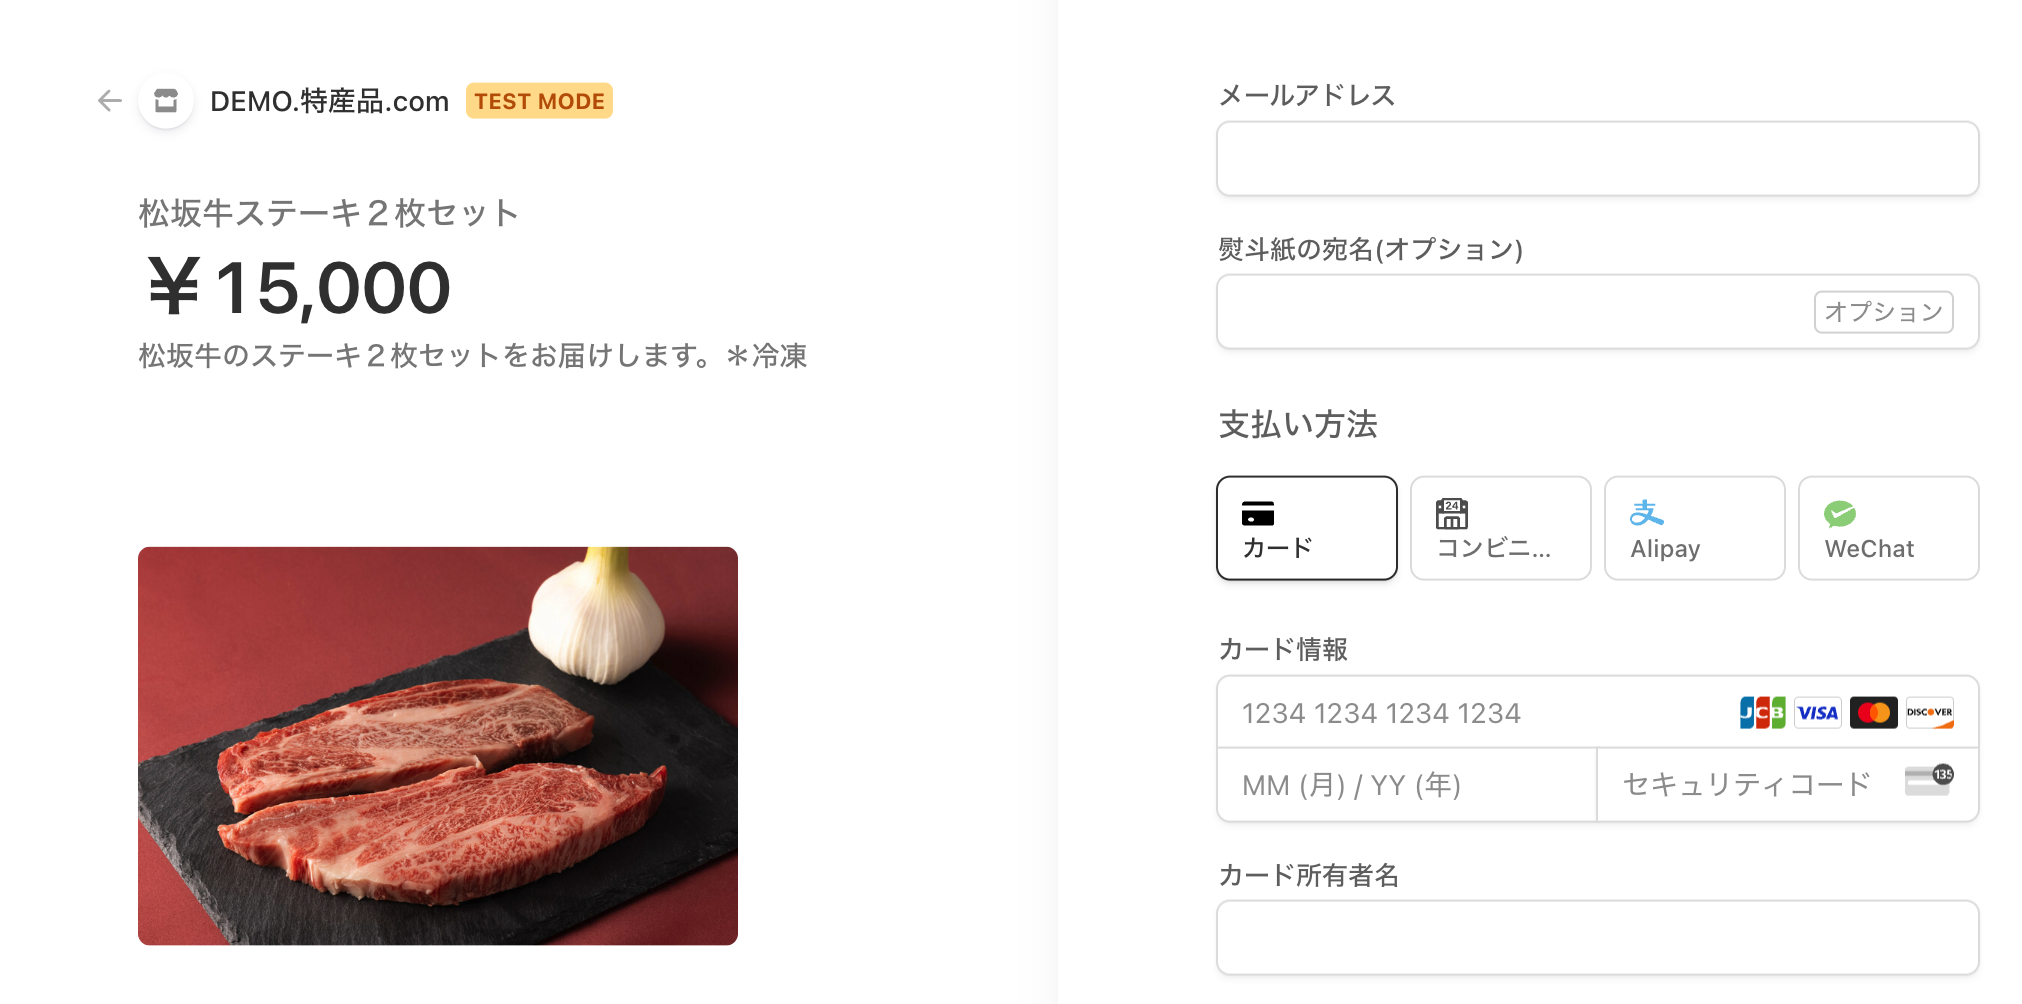
例えばギフト商品を販売するECでは、「熨斗紙の宛名書き」の入力フォームを追加したくなります。
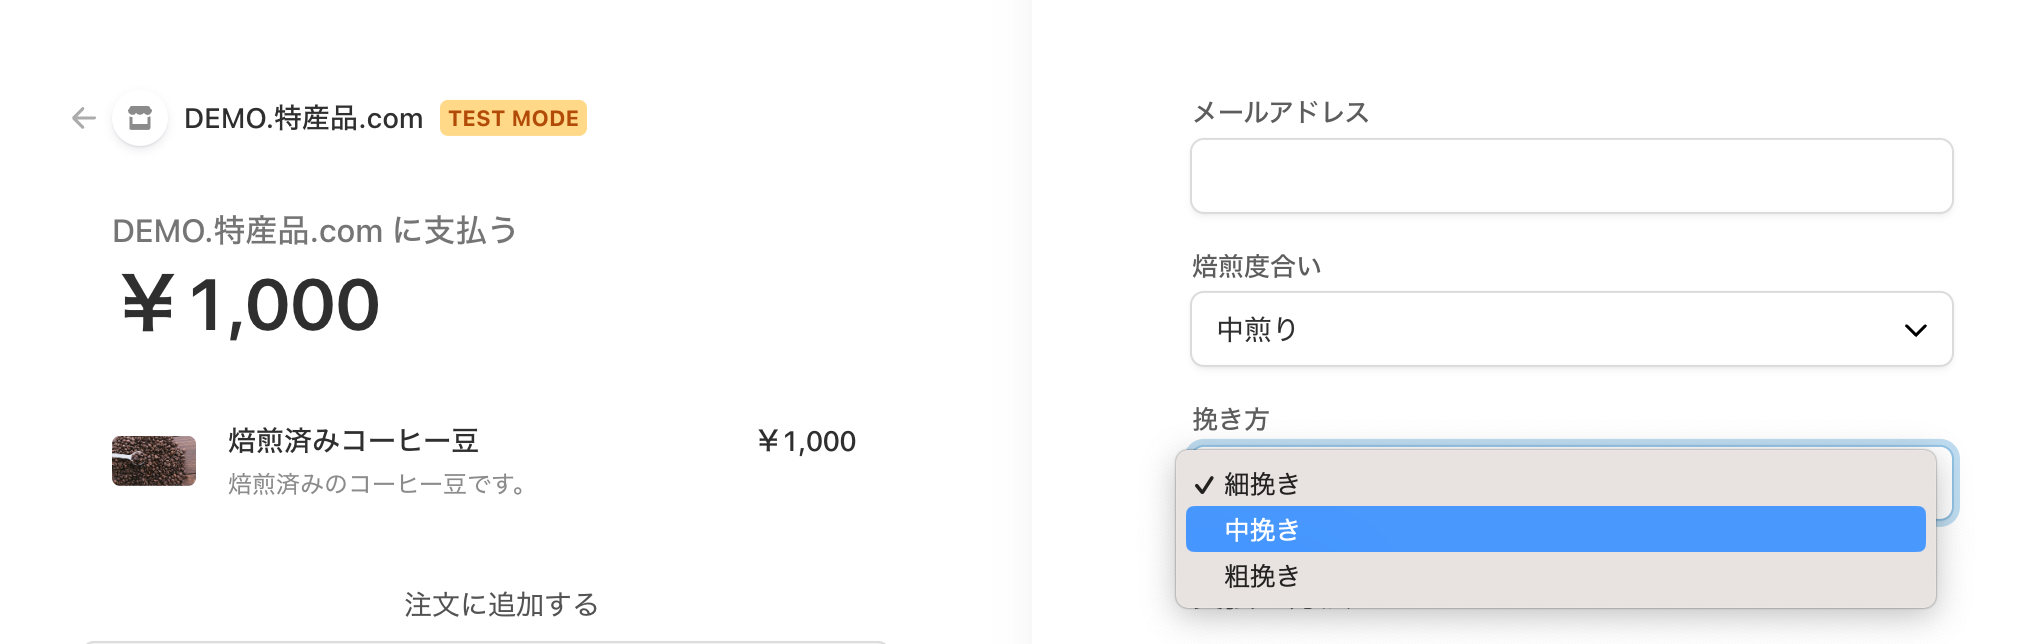
またコーヒー豆を販売する際には、「焙煎度合い」や「挽きの細かさ」などを顧客が選べると、顧客の満足度が高まる可能性が上がります。
Stripeで「カスタムフィールド」を設定する
Stripeでは、リンク型(Payment Links)やリダイレクト型(Checkout)の決済フォームで簡単にカスタムフィールドを追加できます。
テキストフィールドを追加する
「熨斗紙の宛名」など、顧客にテキスト入力を求めたい場合は、type: 'text'でフィールドを指定します。
	const session = await stripe.checkout.sessions.create({
		mode: 'payment',
		success_url: 'https://example.com/success',
		cancel_url: 'https://example.com/cancel',
		line_items: [{
			price: 'price_xxxx',
			quantity: 1
		}],
+		custom_fields: [
+		  {
+			key: 'noshigami',
+			label: {
+				type: 'custom',
+				custom: '熨斗紙の宛名(オプション)'
+			},
+			optional: true,
+			type: 'text',
+		  },
+		],
	})
選択式のフィールドを追加する
焙煎度合いなど、こちらが提示した選択肢を選んでもらう場合には、type: 'dropdown'を指定しましょう。
	const session = await stripe.checkout.sessions.create({
		mode: 'payment',
		success_url: 'https://example.com/success',
		cancel_url: 'https://example.com/cancel',
		line_items: [{
			price: 'price_xxx',
			quantity: 1
		}],
+		custom_fields: [
+		  {
+			key: 'roasing',
+			label: {
+				type: 'custom',
+				custom: '焙煎度合い'
+			},
+			dropdown: {
+				options:[{
+					label: '浅煎り',
+					value: 'light'
+				}, {
+					label: '中煎り',
+					value: 'midium',
+				}, {
+					label: '深煎り',
+					value: 'city'
+				}]
+			},
+			type: 'dropdown',
+		  }
+		],
	})
一度に登録できるフィールドは、2つまで
custom_fieldsの配列には、2つまでフィールドを設定できます。
	const s = await stripe.checkout.sessions.create({
		mode: 'payment',
		success_url: 'https://example.com/success',
		cancel_url: 'https://example.com/cancel',
		line_items: [{
			price: 'price_xxx',
			quantity: 1
		}],
		custom_fields: [
		  {
			key: 'roasing',
			label: {
				type: 'custom',
				custom: '焙煎度合い'
			},
			dropdown: {
				options:[{
					label: '浅煎り',
					value: 'light'
				}, {
					label: '中煎り',
					value: 'midium',
				}, {
					label: '深煎り',
					value: 'city'
				}]
			},
			type: 'dropdown',
		  }, {
			key: 'grind',
			label: {
				type: 'custom',
				custom: '挽き方'
			},
			dropdown: {
				options: [{
					label: '細挽き',
					value: 'light'
				}, {
					label: '中挽き',
					value: 'midium',
				}, {
					label: '粗挽き',
					value: 'city'
				}]
			},
			type: 'dropdown'
		  }
		],
	})
dropdownのオプションは、200個まで指定できます。
また、オプションごとのラベルは、100文字まで設定できます。
101文字を超えると、Invalid string: xxx; must be at most 100 charactersのように、エラーが発生しますのでご注意ください。
Payment Linksでの設定方法
Payment Linksでカスタムフィールドを設定するには、ダッシュボードの設定画面を利用します。
[オプション]に[カスタムフィールドを追加]がありますので、オンにしましょう。
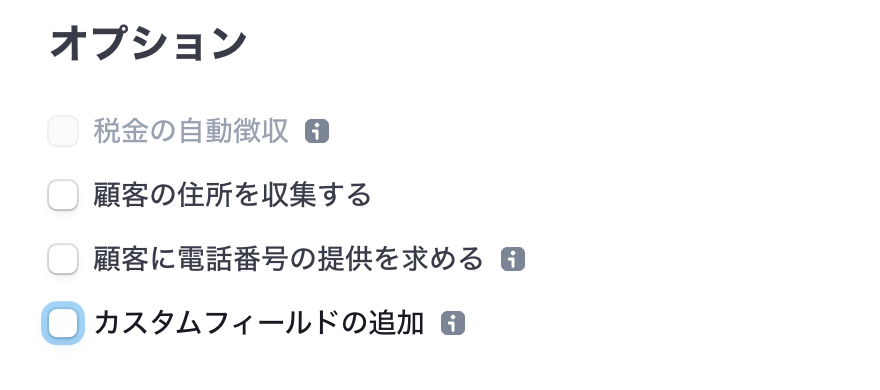
フィールドのラベルやオプションなどを設定すれば、追加完了です。

APIを利用する場合は、Checkout同様custom_fieldsパラメータを設定しましょう。
	const pl = await stripe.paymentLinks.create({
		line_items: [{
			price: 'price_xxxxxx',
			quantity: 1
		}],
+		custom_fields: [
+		  {
+			key: 'noshigami',
+			label: {
+				type: 'custom',
+				custom: '熨斗紙の宛名(オプション)'
+			},
+			optional: true,
+			type: 'text',
+		  },
+		],
	})
入力した情報の確認方法
入力されたカスタムフィールドの情報は、ダッシュボードやAPI・Webhookから取得できます。
ダッシュボードでは、[支払い]ページから
もっとも簡単に確認できるのは、ダッシュボードです。
Checkoutでの決済履歴は、[支払い]ページから確認できます。
詳細ページに移動して、[Checkoutサマリー]を表示させましょう。

顧客情報に加えて、カスタムフィールドの項目が表示されています。
APIからカスタムフィールドを取得する
Checkout Sessionのデータから、カスタムフィールドの情報を取得できます。
1回きりの注文では、checkout.sessions.retrieveを使う
CheckoutのセッションIDから、カスタムフィールドの情報を取得できます。
	const result = await stripe.checkout.sessions.retrieve('cs_test_xxx')
    const custom_fields = result.custom_fields
    console.log(custom_fields)
サブスクリプションでは、checkout.sessions.listを使う
サブスクリプションでは、checkout.sessions.listでサブスクリプションIDから情報を取得しましょう。
	const result = await stripe.checkout.sessions.list({
		subscription: 'sub_xxxx'
	})
    const custom_fields = result.data[0].custom_fields
    console.log(custom_fields)
[Appendix] 必要な情報だけ抽出する方法
選択肢の情報なども含まれていますので、「キー」と「選択された値」だけを取得したい場合には次のような処理を追加します。
	const customFieldData: {
		[key: string]: string;
	} = {}
	custom_fields.forEach((field) => {
		const { key, type } = field
		switch (type) {
			case 'dropdown': {
				if (field.dropdown?.value) {
					customFieldData[key] = field.dropdown?.value
				}
				return
			}
			case 'text': {
				if (field.text?.value) {
					customFieldData[key] = field.text?.value
				}
				return
			}
			default:
				return
		}
	})
Webhookでは、checkout.session.completedイベントを利用する
発送システムやCRMなどと連携する場合は、Webhookでデータを連携しましょう。
checkout.session.completedイベントを利用すると、次のようなデータが送信されます。
{
  "id": "evt_1Ep24XHssDVaQm2PpwS19Yt0",
  "object": "event",
  "api_version": "2022-11-15",
  "created": 1664928000,
  "data": {
    "object": {
      "id": "cs_test_MlZAaTXUMHjWZ7DcXjusJnDU4MxPalbtL5eYrmS2GKxqscDtpJq8QM0k",
      "object": "checkout.session",
      "cancel_url": "https://example.com/cancel",
      "custom_fields": [{
        "key": "engraving",
        "label": {
          "type": "custom",
          "custom": "Personalized engraving"
        },
        "optional": false,
        "type": "text",
        "text": {
          "value": "Jane",
        }
      }],
      "mode": "payment",
      "success_url": "https://example.com/success"
    }
  },
  "livemode": false,
  "pending_webhooks": 1,
  "request": {
    "id": null,
    "idempotency_key": null
  },
  "type": "checkout.session.completed"
}
まとめ
Stripeが提供するリダイレクト型決済フォームのCheckoutやPayment Linksを利用することで、カスタムな情報を顧客に入力してもらうことも簡単にできます。
ただし在庫管理や商品画像のバリエーションに応じた変更などができませんので、SKUを持つ商品バリエーションなどに使うことは要注意です。
関連ドキュメント