この記事では、保存したクレジットカード情報などを利用したオンライン決済フローにおける3Dセキュア認証の対応方法を、Stripeを例に紹介します。2025年3月に義務化される3Dセキュア認証への対応方法を知るため、そしてよりユーザー・開発者のどちらにもシンプルでセキュアな決済フローを実現するための方法を、サンプルコードを使って解説します。
StripeのSetup Intents APIでクレジットカード情報を保存する
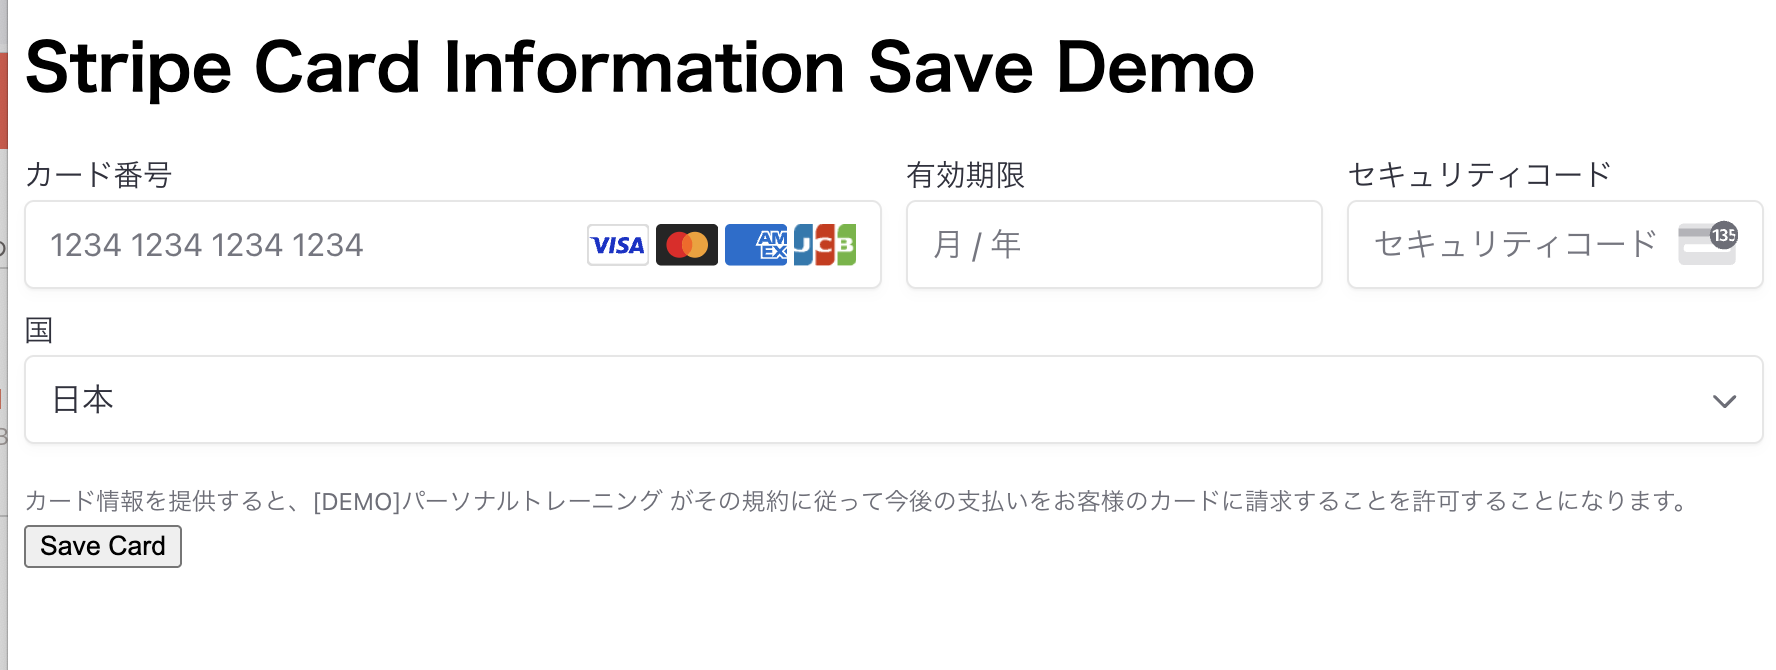
クレジットカード情報を安全に保存・利用するためには、安全な決済フォームの提供と保存場所の確保が必要です。Stripeを利用する場合、Setup Intents APIを利用した決済フォームを提供することで、これらを実現できます。
Honoを利用している場合は、次のようなコードでカード情報を保存するフォームが用意できます。
import { Hono } from 'hono'
import { Stripe } from 'stripe'
import { env } from 'hono/adapter'

const app = new Hono()


app.get('/save-card', async c => {
  const { STRIPE_PUB_API_KEY, STRIPE_SECRET_API_KEY } = env(c)
  const stripe = new Stripe(STRIPE_SECRET_API_KEY, {
    apiVersion: '2024-04-10'
  })
  const { id: customerId } = await stripe.customers.create()
  const setupIntent = await stripe.setupIntents.create({
    customer: customerId,
  })
  return c.html(`
  <!DOCTYPE html>
  <html>
  <head>
    <title>Stripe Card Information Save Demo</title>
    <script src="https://js.stripe.com/v3/"></script>
  </head>
  <body>
    <h1>Stripe Card Information Save Demo</h1>
    <form id="payment-form">
      <div id="payment-element"></div>
      <button id="submit-button">Save Card</button>
      <div id="error-message"></div>
    </form>

    <script>
      const stripe = Stripe('${STRIPE_PUB_API_KEY}');

      // Stripe Elementsを初期化
      const elements = stripe.elements({
        clientSecret: "${setupIntent.client_secret}"
      });
      const paymentElement = elements.create('payment');
      paymentElement.mount('#payment-element');

      // フォームの送信イベントを処理
      const form = document.getElementById('payment-form');
      form.addEventListener('submit', async (event) => {
        event.preventDefault();
        // Use the clientSecret and Elements instance to confirm the setup
        const result = await stripe.confirmSetup({
          elements,
          confirmParams: {
            return_url: 'http://localhost:8787/save-card',
          },
        });

        console.log(result)
        if (result.error) {
          const errorMessage = document.getElementById('error-message');
          errorMessage.textContent = result.error.code + ':' + result.error.message;
        }
      });
    </script>
  </body>
  </html>`)
})

export default app
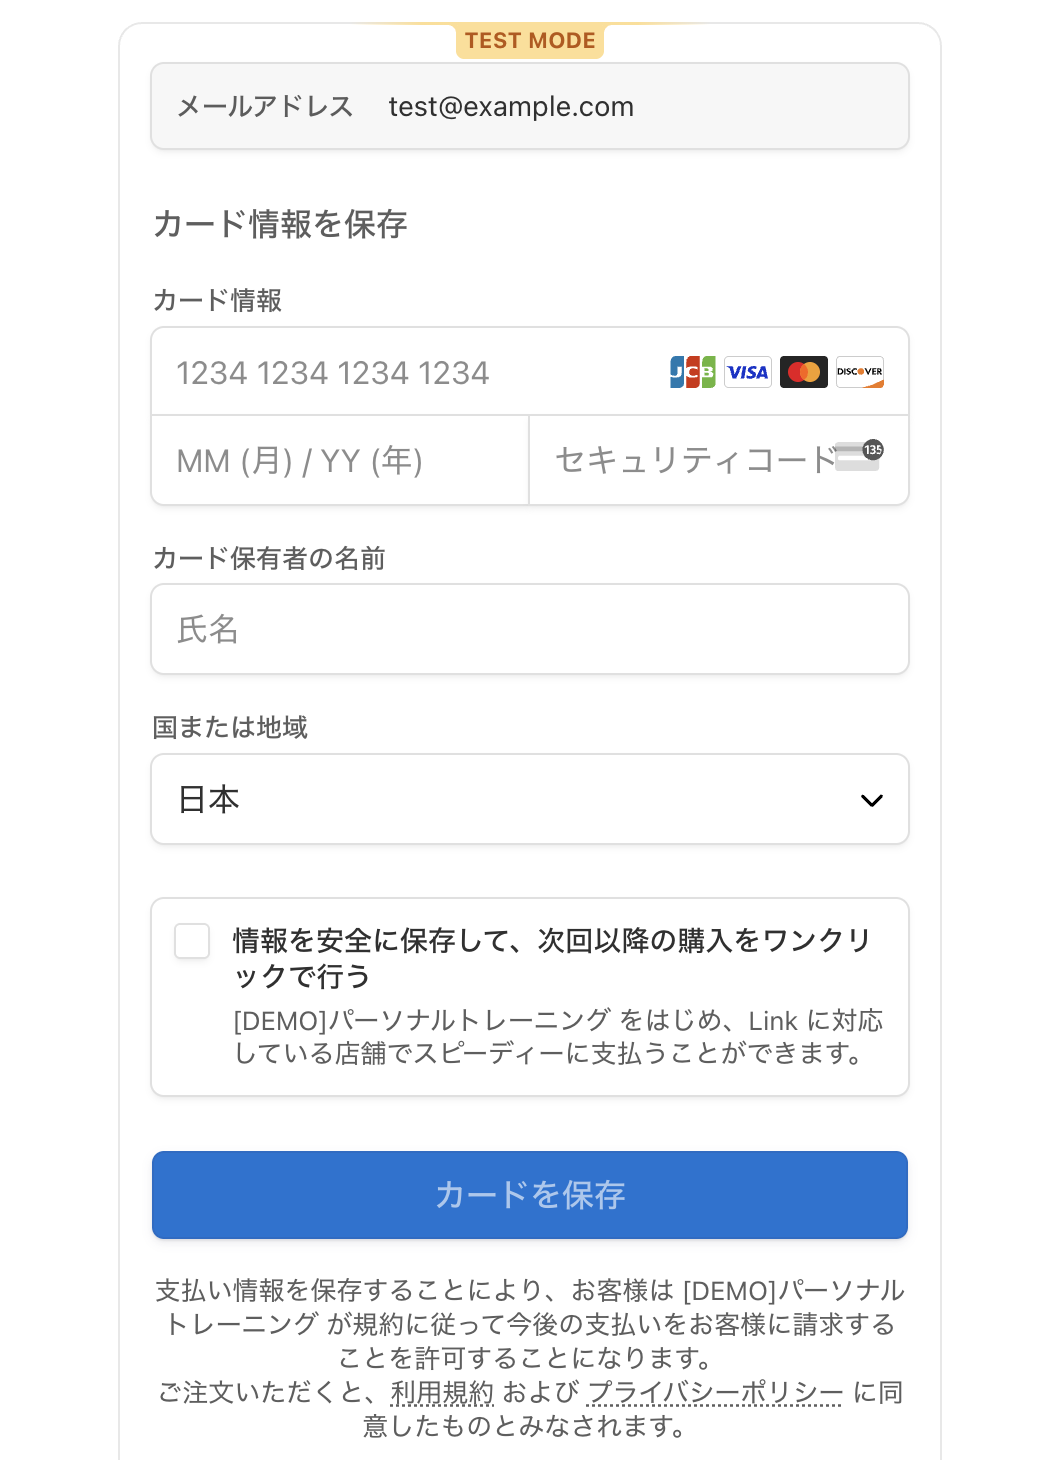
より簡単な方法として、Stripe Checkoutのsetupモードを使うこともできます。アプリケーションに決済フォームを埋め込むこともできますので、より決済周りの実装コードを減らせます。
import { Hono } from 'hono'
import { Stripe } from 'stripe'
import { env } from 'hono/adapter'

const app = new Hono()


app.get('/save-card', async c => {
  const { STRIPE_PUB_API_KEY, STRIPE_SECRET_API_KEY } = env(c)
  const stripe = new Stripe(STRIPE_SECRET_API_KEY, {
    apiVersion: '2024-04-10'
  })
  const { id: customerId } = await stripe.customers.create()
  const currentUrl = new URL(c.req.url)
  const baseUrl = `${currentUrl.protocol}//${currentUrl.host}`
  const checkoutSession = await stripe.checkout.sessions.create({
    customer: customerId,
    mode: 'setup',
    ui_mode: 'embedded',
    currency: 'jpy',
    return_url: `${baseUrl}/save-card`
  })

  return c.html(`
  <!DOCTYPE html>
  <html>
  <head>
    <title>Stripe Card Information Save Demo</title>
    <script src="https://js.stripe.com/v3/"></script>
  </head>
  <body>
    <h1>Stripe Card Information Save Demo</h1>
    <form id="payment-form">
      <div id="payment-element"></div>
      <button id="submit-button">Save Card</button>
      <div id="error-message"></div>
    </form>

    <script>
      const stripe = Stripe('${STRIPE_PUB_API_KEY}');

      // Stripe Elementsを初期化
      stripe.initEmbeddedCheckout({
        fetchClientSecret: async () => "${checkoutSession.client_secret}"
      }).then(elements => {
        elements.mount('#payment-element');
      })
    </script>
  </body>
  </html>`)
})

export default app
保存したカード情報を利用して決済処理を行う方法
ElementsやCheckoutを利用して保存したクレジットカード情報は、Payment Methodsリソースとして扱えます。保存したカードの一覧を取得するには、サーバー側で次のようなコードを実行しましょう。取得した決済手段の一覧をユーザーに提示することで、顧客が支払いに利用するカード情報を指定するUIを作ることができます。
const paymentMethods = await stripe.paymentMethods.list({
   customer: customerId,
   type: 'card'
 })
利用したい決済手段の有効性チェックや、誤って別の顧客が登録したクレジットカードを利用してしまわないため、事前にPayment Method APIでリソースの取得を行うことをおすすめします。
async function retrieveCustomerPaymentMethod(customerId, paymentMethodId) {
  try {
    const pm = await stripe.customers.retrievePaymentMethod(customerId, paymentMethodId)
    return pm
  } catch (e) {
    if (e.statusCode === 404) {
      throw new Error("No such payment method")
    }
    throw new Error("Internal server error")
  }
}
顧客IDと決済手段のIDが取得できれば、あとはPayment Intent APIを利用して決済処理を実行します。サーバー側で決済する場合、confirmパラメータをtrueにし、3Dセキュアの追加認証などが必要な場合に備えて、return_urlも設定しましょう。
    const pm = await retrieveCustomerPaymentMethod(customerId, paymentMethodId)
    const paymentIntent = await stripe.paymentIntents.create({
      confirm: true,
      amount: 100,
      currency: 'jpy',
      payment_method: pm.id,
      customer: customerId,
      return_url: 'https://example.com'
    })
    if (!paymentIntent.next_action) {
      return c.json({
        message: '支払い処理が完了しました',
        paymentIntentId: paymentIntent.id
      })
    }
    return c.json({
      message: '追加の認証処理が必要です',
      nextAction: paymentIntent.next_action,
      paymentIntentId: paymentIntent.id
    })
この処理で支払いが完了した場合は、追加の処理は必要ありません。しかしもしAPIレスポンスのnext_actionがnullではない場合は、まだ決済が完了していません。3Dセキュアの認証など、ユーザー側で追加のアクションが必要な状態ですので、メールやアプリケーション上の通知UIなどを利用して、追加操作を依頼しましょう。
追加認証は、リダイレクトまたはSDKで対応する
作成したPayment Intentのnext_actionには、2種類のデータが含まれます。Payment Intentを作成した際にreturn_urlを設定した場合は、type=redirect_to_urlのNext Actionオブジェクトが含まれます。この場合オブジェクトに含まれるリダイレクトURLを利用した追加認証フローをリクエストされています。顧客にメールやSMS・LINEなどで追加操作を依頼する際、オブジェクトに含まれるurlへアクセスするように伝えましょう。urlへアクセスし、追加認証処理が完了した場合、顧客はreturn_urlのURLへリダイレクトされます。
{
    "redirect_to_url": {
      "return_url": "https://example.com",
      "url": "https://hooks.stripe.com/3d_secure_2/hosted?merchant=xxxxxx"
    },
    "type": "redirect_to_url"
  }
return_urlを設定しなかった場合は、Stripe.js SDKを利用した追加認証ページを用意します。もしreturn_urを削除したことでエラーが発生した場合は、利用しているAPIバージョンが最新版ではないか、Stripeの提供する「動的な決済手段」が有効化されていない可能性があります。Stripe Docsの手順を確認して、動的な決済手段を有効にしましょう。
    const paymentIntent = await stripe.paymentIntents.create({
      confirm: true,
      amount: 1000,
      currency: 'jpy',
      payment_method: pm.id,
      customer: customerId,
-     return_url: 'https://example.com'
    })
この場合は、next_action.typeがuse_stripe_sdkに設定されています。
{
    "type": "use_stripe_sdk",
    "use_stripe_sdk": {
      "directory_server_encryption": {
        "algorithm": "RSA",
        "certificate": "-----BEGIN CERTIFICATE----
        ...
}
どちらの方法で決済されるかが不明なケースでは、next_action.typeの値を利用してどちらも対応できるように実装しましょう。
if (!paymentIntent.next_action) {
  return;
}
if (paymentIntent.next_action.type === 'use_stripe_sdk') {
  // Stripe.jsで使用するため、client_secretを取得する
  const paymentIntentClientSecret = paymentIntent.client_secret
  // 独自の追加認証ページへの案内を行う。
} else if (paymentIntent.next_action.type === 'redirect_to_url') {
  const redirectUrl = paymentIntent.next_action.redirect_to_url.url
  // URLへのアクセスを依頼するメールなどを送信する
}
use_stripe_sdkに固定したい場合
ネイティブアプリ( React Native / Capacitorなどを含む )もユーザーに提供する場合、アプリ内で動線を完結させるためにリダイレクトによる認証を回避することをお勧めします。この場合、Payment Intent APIでuse_stripe_sdkパラメータをtrueに設定しましょう。
    const paymentIntent = await stripe.paymentIntents.create({
      confirm: true,
      amount: 1000,
      currency: 'jpy',
      payment_method: pm.id,
      customer: customerId,
+      use_stripe_sdk: true,
      return_url: 'https://example.com'
    })
これによって、return_urlが設定されている場合でも、next_action.typeがuse_stripe_sdkに固定されます。
SDKを利用して追加認証を実行する
next_action.typeがuse_stripe_sdkの場合、追加認証操作を行うページが必要です。追加認証を実行する場合は、Stripe.jsが提供するhandleNextAction関数を実行するページを用意しましょう。以下はシンプルなHTMLとJavaScriptを利用した実装サンプルです。サーバー側で作成されたPayment Intentのclient_secretを利用して、3Dセキュアなどの追加認証を実行します。
  <!DOCTYPE html>
  <html>
  <head>
    <script src="https://js.stripe.com/v3/"></script>
  </head>
  <body>
    <div id="error-message"></div>
    <script>
      const stripe = Stripe('{pk_からはじまるStripe公開可能キー}');

      stripe.handleNextAction({
        clientSecret: "{PAYMENT_INTENTのclient_secret}"
      })
        .then(() => window.alert("認証が完了しました"))
        .catch(error => {
          console.table(error)
          const errorMessage = document.getElementById('error-message');
          errorMessage.textContent = error.code + ':' + error.message;
        })
    </script>
  </body>
  </html>
実際のコードでは、handleNextActionを実行する前にPayment Intentのnext_actionがnullではないかを検証しましょう。もしすでに認証が完了してるPayment IntentでhandleNextActionを実行すると、handleNextAction: The PaymentIntent supplied is not in the requires_action state.エラーが発生します。
また、顧客以外のユーザーがこのPayment Intentを利用して認証処理を行わないために、このページにも認証処理やPayment Intentがアクセスしているユーザーであるかどうかの検証も行いましょう。
payment_intent.requires_actionWebhookイベントで処理をよりシンプルに
ここまでのサンプルコードでは、決済処理を実行した後に追加認証の有無などの判定も実装していました。コードの量や保守性をより高めるためには、決済処理と追加認証処理を分離することをお勧めします。
Stripe Webhookを使った場合、次のような条件分岐をWebhook APIへ設定します。
const event = await stripe.webhooks.constructEventAsync(
  body,
  signature,
  STRIPE_WEBHOOK_SECRET,
);
switch(event.type) {
  case 'payment_intent.requires_action': {
    const paymentIntent = event.data.object
    if (!paymentIntent.next_action) {
      console.log("追加アクションなし")
      break
    }
    if (paymentIntent.next_action.type === 'use_stripe_sdk') {
      // Stripe.jsで使用するため、client_secretを取得する
      const paymentIntentClientSecret = paymentIntent.client_secret
      console.log("Stripe.jsを使った追加認証処理をユーザーに案内する")
      break
    }
    if (paymentIntent.next_action.type === 'redirect_to_url') {
      const redirectUrl = paymentIntent.next_action.redirect_to_url.url
      // URLへのアクセスを依頼するメールなどを送信する
      console.log("URLへのアクセスを依頼するメールなどを送信する")
      break
    }
    break
  }
  default:
      break
}
このWebhook実装を追加すると、決済処理側から追加認証に関する処理を取り除くことができます。これによって、アプリケーションや関数、コードが記載されたファイルの責務がより明確になり、コードの複雑性をなくすことができます。
    const pm = await retrieveCustomerPaymentMethod(customerId, paymentMethodId)
    const paymentIntent = await stripe.paymentIntents.create({
      confirm: true,
      amount: 100,
      currency: 'jpy',
      payment_method: pm.id,
      customer: customerId,
      return_url: 'https://example.com'
    })
-    if (!paymentIntent.next_action) {
-      return c.json({
-        message: '支払い処理が完了しました',
-        paymentIntentId: paymentIntent.id
-      })
-    }
-    return c.json({
-      message: '追加の認証処理が必要です',
-      nextAction: paymentIntent.next_action,
-      paymentIntentId: paymentIntent.id
-    })
また、Webhookを利用することで、将来別の決済フローを導入する必要が出た場合にも、追加認証に関する実装をコピーアンドペーストで転用する必要がなくなります。例えばサブスクリプション決済での3Dセキュア認証でも、payment_intent.requires_actionイベントがトリガーされます。
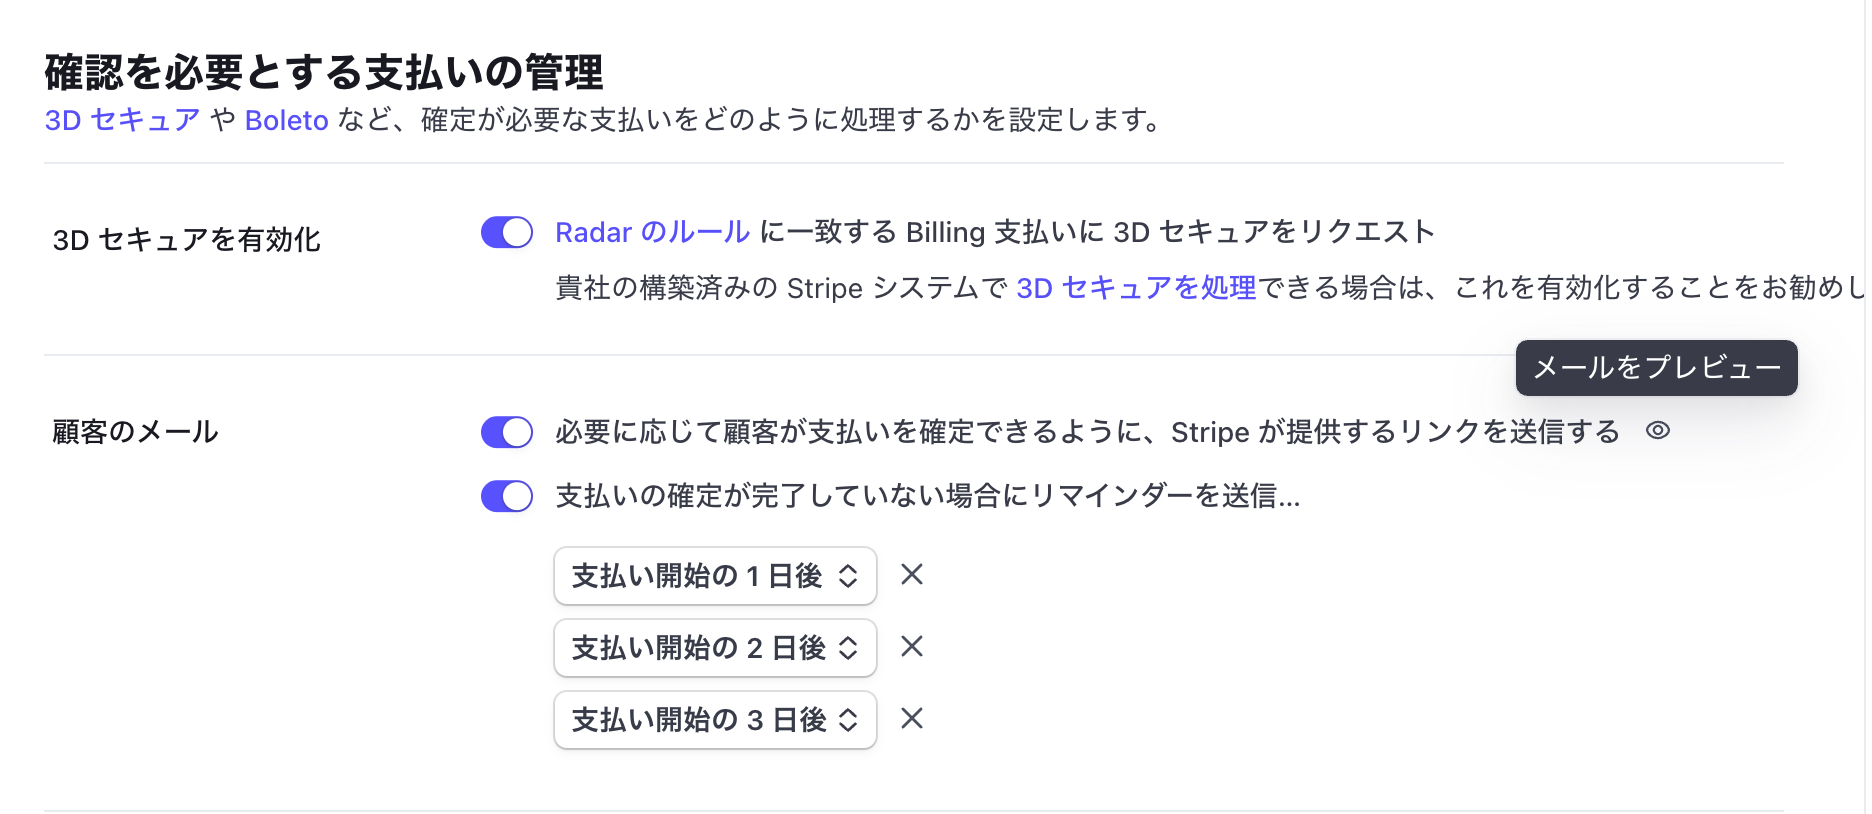
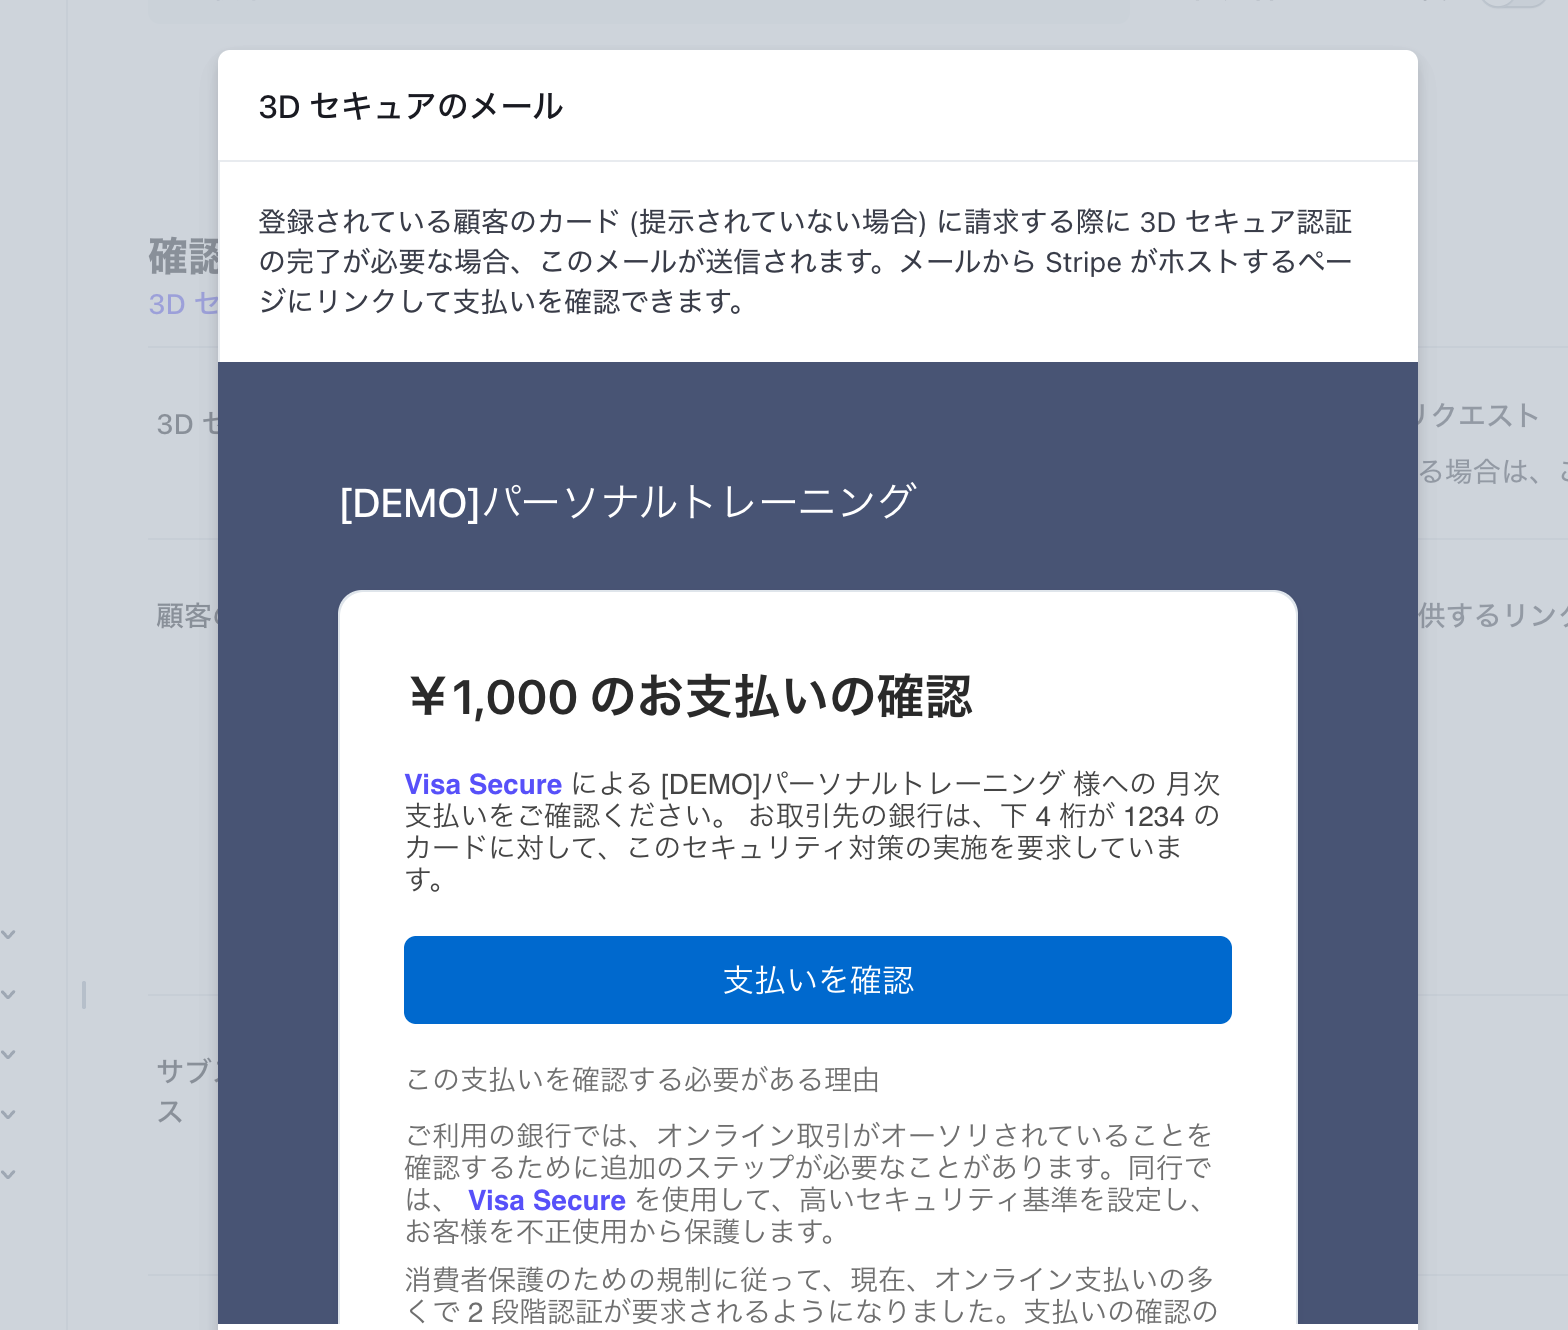
サブスクリプションや請求書では、ダッシュボードの設定にて、Stripeから追加認証をリクエストするメールを送信することもできます。利用しているサービスのコスト削減やインテグレーションをシンプルにされたい場合は、Stripeが提供する機能をご活用ください。
Stripeからメールを配信する場合、デザインや文言のカスタマイズ範囲が限定されます。そのため、サービスから送信するメールのデザインなどを統一されたい場合は、今回紹介したWebhook連携をご活用ください。
まとめ
ユーザーの利便性とセキュリティを高めるため、ECサイトなどにおいてユーザーのクレジットカード情報を保存する仕組みは欠かせません。保存したクレジットカード情報を決済に利用することで、顧客の手間を減らすだけでなく、決済フォームを改ざんしてクレジットカード情報を窃取されるリスクも軽減できます。
しかし一方で保存したクレジットカード情報を決済へ利用するには、3Dセキュアのような決済プロバイダーやカードネットワークが要求する追加認証フローをシステムに実装する必要があります。決済処理時にアプリケーションが受け取った追加認証リクエストをどのようにユーザーへ通知し、認証を実施するか。場合によってはリダイレクト処理も発生するため、注意深く要件定義やテストを行わなければなりません。
Stripeでは、サーバー側・フロントエンド向けそれぞれのSDKを活用することで、できるだけ少ない追加コードでこのような追加認証処理を実装できます。handleNextAction関数のような便利なSDK機能を活用して、セキュアでユーザーが感じるストレスの少ない決済フローを実現しましょう。
Stripeでの3Dセキュア義務化対応について知りたい方は、こちらもどうぞ
2025年3月より始まる3Dセキュア義務化に関する記事を複数用意しております。現在対応方法をお探し中の方は、ぜひこちらの記事もご覧ください。


