この記事は、Riot.js Advent Calendar 2022 4日目の記事です。
Riot.jsはシンプルなUIライブラリの1つで、バンドルの軽量さやカスタム要素などの機能を提供しています。
2022/11月時点で、Riot.jsでStripe.jsを利用するためのライブラリは公開されていない様子でした。
ここでは、Stripe.jsをRiot.jsで利用する方法を紹介します。
Riot.jsプロジェクトを立ち上げる
まずはRiot.jsのプロジェクトを作成します。
$ mkdir riot-demo && cd riot-demo
$ npm init riot
対話形式で、package.jsonの各項目について聞かれます。
package name: (riot) demo-stripe-riotjs
version: (1.0.0)
description:
entry point: (index.js)
test command:
git repository:
keywords:
author:
license: (ISC)
About to write to /Users/sandbox/riot/package.json:

{
  "name": "demo-stripe-riotjs",
  "version": "1.0.0",
  "description": "",
  "main": "index.js",
  "scripts": {
    "test": "echo \"Error: no test specified\" && exit 1"
  },
  "author": "",
  "license": "ISC"
}
続いて、テンプレートを選択する画面が表示されます。
? Please select a template …
❯ Webpack Project Template
  Parcel Project Template
  Rollup Project Template
  Simple Component
  SPA (Webpack) Project Template
  Custom Template (You will need to provide a template path to your template zip file)
今回はWebpack Project Templateを選択しました。
以下のように、完了メッセージが表示されればOKです。
✔ Downloading the template files
✔ Unzipping the file downloaded
✔ Deleting the zip file
✔ Copying the template files into your project
✔ Deleting the temporary folder
✔ Template successfully created!
最後に、テンプレートから作成したプロジェクトのライブラリをインストールします。
$ npm install
npm startを実行すると、初期状態のアプリが起動します。

Stripe.jsを読み込む
ここからはStripe.jsの組み込みを行います。
ライブラリのインストール
まずは必要なライブラリを追加しましょう。
$ npm i @stripe/stripe-js
Riotのライフサイクルで、Stripe.jsを読み込みする
続いて、Riotのライフサイクル内でライブラリを読み込みます。
DOMへのアクセスが発生するため、ここではonMountedを利用します。
<my-component>
  <p>{ props.message }</p>
  <form>
    <div id="payment-element"></div>
    <button type="submit">Pay now</button>
  </form>

  <script>
    import { loadStripe } from "@stripe/stripe-js"

    export default {
      onMounted(props, state) {
        // Stripe Dashboardから「公開可能キー」を取得して設定する
        loadStripe("pk_test_xxxxxx")
          .then(stripe => {
            this.update({
              stripe
            })
          })
      },
    }
  </script>
</my-component>
決済フォームのSubmit処理などでloadStripeの戻り値を利用するため、Stateに格納しました。
APIを呼び出して、Payment Intentを取得する
Stripe.jsのカード要素を表示するには、事前にPayment IntentまたはSetup Intent(カード情報などの保存のみする場合)を作成します。
StripeドキュメントのクイックスタートなどでAPIを用意しましょう。
取得したPayment Intentで、決済フォームを表示する
Riot側では、onMountedでそのまま読み込みまで行います。
      onMounted(props, state) {
        loadStripe("pk_test_xxxxx")
          .then(stripe => {
            this.update({
              stripe
            })
+            return fetch("http://localhost:3100/stripe", {
+                 method: "POST"
+             })
+          })
+          .then(data => data.json())
+          .then(result => {
+            const elements = stripe.elements({
+              appearance: {
+                theme: "stripe"
+              },
+              clientSecret: result.client_secret // クイックスタートの場合、「result.clientSecret」
+            })
+            this.update({
+              elements
+            })
+            const paymentElement = elements.create("payment")
+            paymentElement.mount("#payment-element")
          })
      },
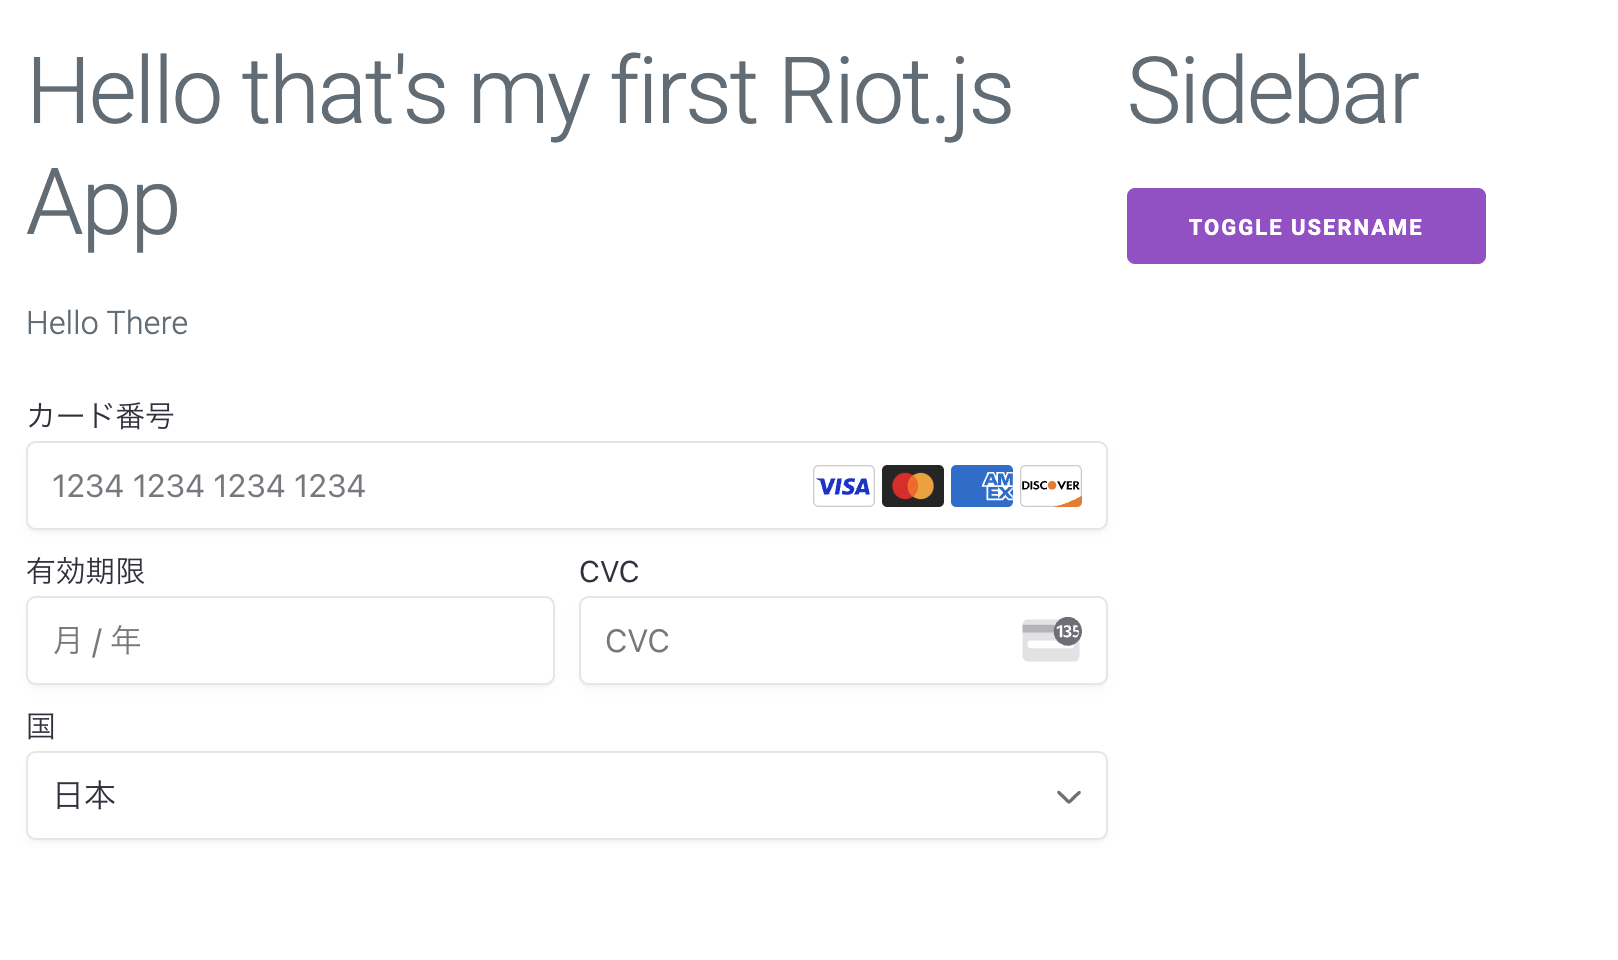
これで決済フォームが表示されます。
なお、SSRが利用できる場合、サーバー側でPayment Intentを作成する方法も可能です。
フォームのSubmit処理を実装しよう
最後に、カード情報を入力した後のSubmit処理を追加します。
まずはformにonsubmitイベントを設定しましょう。
-  <form>
+  <form onsubmit={ submit }>
その後、scriptタグ内にてSubmit処理を実装します。
    export default {
+      submit(e) {
+        e.preventDefault()
+        const { stripe, elements } = this.state
+        if (!stripe || !elements) return
+        stripe.confirmPayment({
+          elements,
+          confirmParams: {
+            return_url: "http://localhost:3000"
+          },
+          redirect: "if_required"
+        }).then(({ error, ...result }) => {
+          if (error) {
+            console.log(error)
+            window.alert("Error")
+          } else {
+            console.log(result)
+            window.alert("Success")
+          }
+        })
+      },
      onMounted(props, state) {
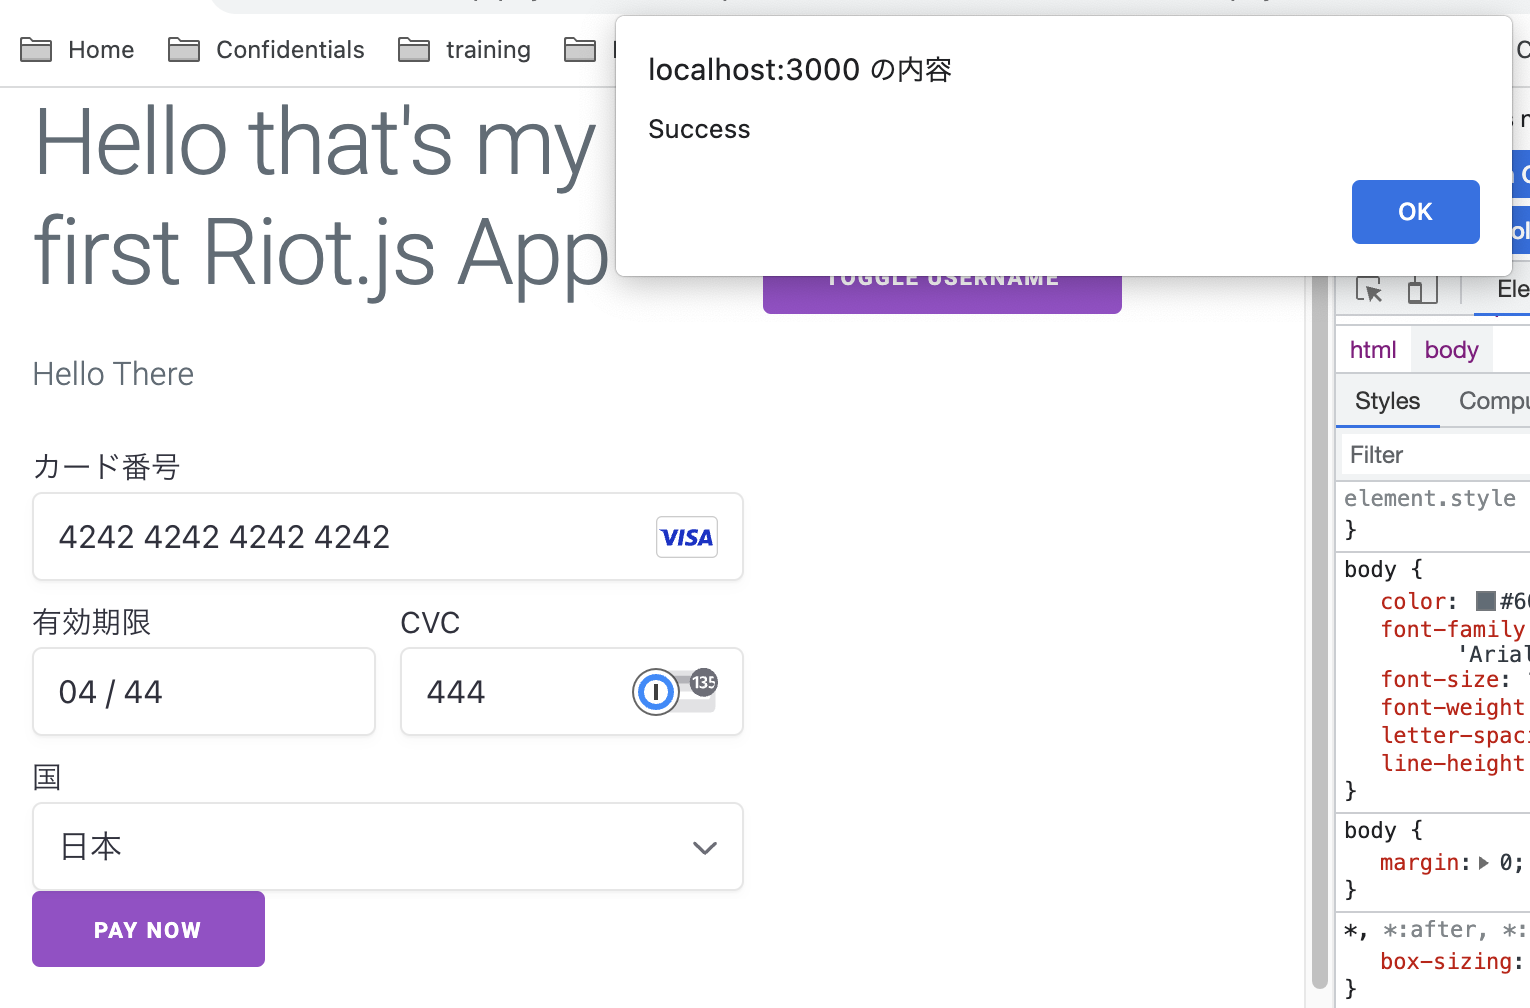
Stripeが用意している「テストカード番号」を利用して、決済をテストしましょう。
Successが表示されれば、実装完了です。
金額を親要素から渡したい場合は、propsを利用する
ECのカート機能などの金額が変化するケースでは、propsを利用して金額等を動的に設定できます。
      onMounted(props, state) {
        loadStripe("pk_test_xxxxx")
          .then(stripe => {
            this.update({
              stripe
            })
            return fetch("http://localhost:3100/stripe", {
                 method: "POST",
+                     body: JSON.stringify({
+                         amount: Number(props.amount)
+                     })
             })
          })
あとは<div is="my-component">や<my-component>などのコンポーネントタグに、amountプロパティを設定すればOKです。
-        <div is="my-component" data-riot-component message="Hello There">
+
        <div is="my-component" data-riot-component message="Hello There" amount="1000">
決済フォームを表示させた後に金額を変更する場合は、Payment IntentをUpdateして金額を変更する必要がある点にご注意ください。