会社や個人事業を営む中で、欠かすことのできない業務の1つが「請求業務」です。
請求書を発行して顧客に送付し、入金ができたかの確認や支払い方法の変更相談に対応する、etc...
これらの業務を効率化するために、システムを利用したり開発している方も多いのではないでしょうか。
今回の記事では、Stripe APIを利用した請求書の作成・送付方法について紹介します。
請求書を発行するコードの実装方法
まずは請求書を作成する部分のコードです。
Step1: Customerデータを作成する
まずはStripeに顧客データを登録します。
このとき、以下の情報が最低限必要です。
| データ | 必須 | 用途 |
|---|---|---|
| 必須 | 請求書のメール送付などに利用します | |
| 請求先住所 | Taxを使っている場合必須 | Taxによる税額計算に利用します |
    const customer = await stripe.customers.create({
      email: 'text@example.com',
      // Stripe Taxを利用する場合追加する
      address: {
        country: 'JP',
        postal_code: '163-8001',
        state: '東京都',
        city: '新宿区',
        line1: '西新宿',
        line2: '2-8-1'
      }
    })
この際、テスト環境では、emailをStripeダッシュボードにログインするアドレスに設定しましょう。
テスト環境では、ログインメールアドレス以外への請求書メール送付が禁止されていますので、ご注意ください。
Step2: 請求明細データを作成する
続いて請求したい明細データを作成します。
先ほど作成したCustomerのIDと、料金ID・数量の3つを指定しましょう。
    await stripe.invoiceItems.create({
      customer: customer.id,
      price: 'price_xxxx',
      quantity: 1,
    })
    await stripe.invoiceItems.create({
      customer: customer.id,
      price: 'price_yyy',
      quantity: 2,
    })
Step3: 請求書を作成する
明細データを登録したら、請求書を作成しましょう。
  const invoice = await stripe.invoices.create({
    customer: customer.id,
    collection_method: 'send_invoice',
    days_until_due: 30,
    // Stripe Taxを利用する場合追加する
    automatic_tax: {
      enabled: true,
    }
  })
銀行振込とカードを明示的にサポートする
請求書を作成する際に、利用できる決済方法の指定ができます。
payment_settingsを利用して、銀行振込とカードでの支払いを受け付ける設定にしましょう。
  const invoice = await stripe.invoices.create({
    customer: customer.id,
    collection_method: 'send_invoice',
    days_until_due: 30,
+    payment_settings: {
+      payment_method_options: {
+        customer_balance: {
+          funding_type: 'bank_transfer',
+          bank_transfer: {
+            type: 'jp_bank_transfer',
+          },
+        }
+      },
+      payment_method_types: [
+        'card',
+        'customer_balance'
+      ]
+    }
  })
請求書を確定・送付する
請求書のPDFデータや請求メールを送付したい場合、sendInvoiceAPIを利用します。
const sendInvoice = await stripe.invoices.sendInvoice(invoice.id)
メールで送付したくない場合は、finalizeInvoiceAPIで請求書の確定だけを行います。
const finalizedInvoice = await stripe.invoices.finalizeInvoice(invoice.id)
確定・送付した請求書のPDFデータや支払いURLを取得する
finalizeInvoiceやsendInvoiceAPIの戻り値は、retrieveAPIと同じ内容です。
そのため、レスポンスに含まれているhosted_invoice_urlやinvoice_pdfに含まれるURLを利用して、顧客に請求書PDFや支払いページURLの共有ができます。
      footer: null,
      hosted_invoice_url: 'https://invoice.stripe.com/i/acct_xxxxxx/test_xxxxxx',
      invoice_pdf: 'https://pay.stripe.com/invoice/acct_xxxxx/test_xxxxx',
Webhookまたはメールで支払い完了通知を受け取る
請求書が先方に送付され、正しく決済されたかを確認するには3つの方法があります。
1つはダッシュボードで確認する方法ですが、これは定期的にダッシュボードにログインする必要があります。
ここでは決済があった場合に通知を受け取る方法2つを紹介します。
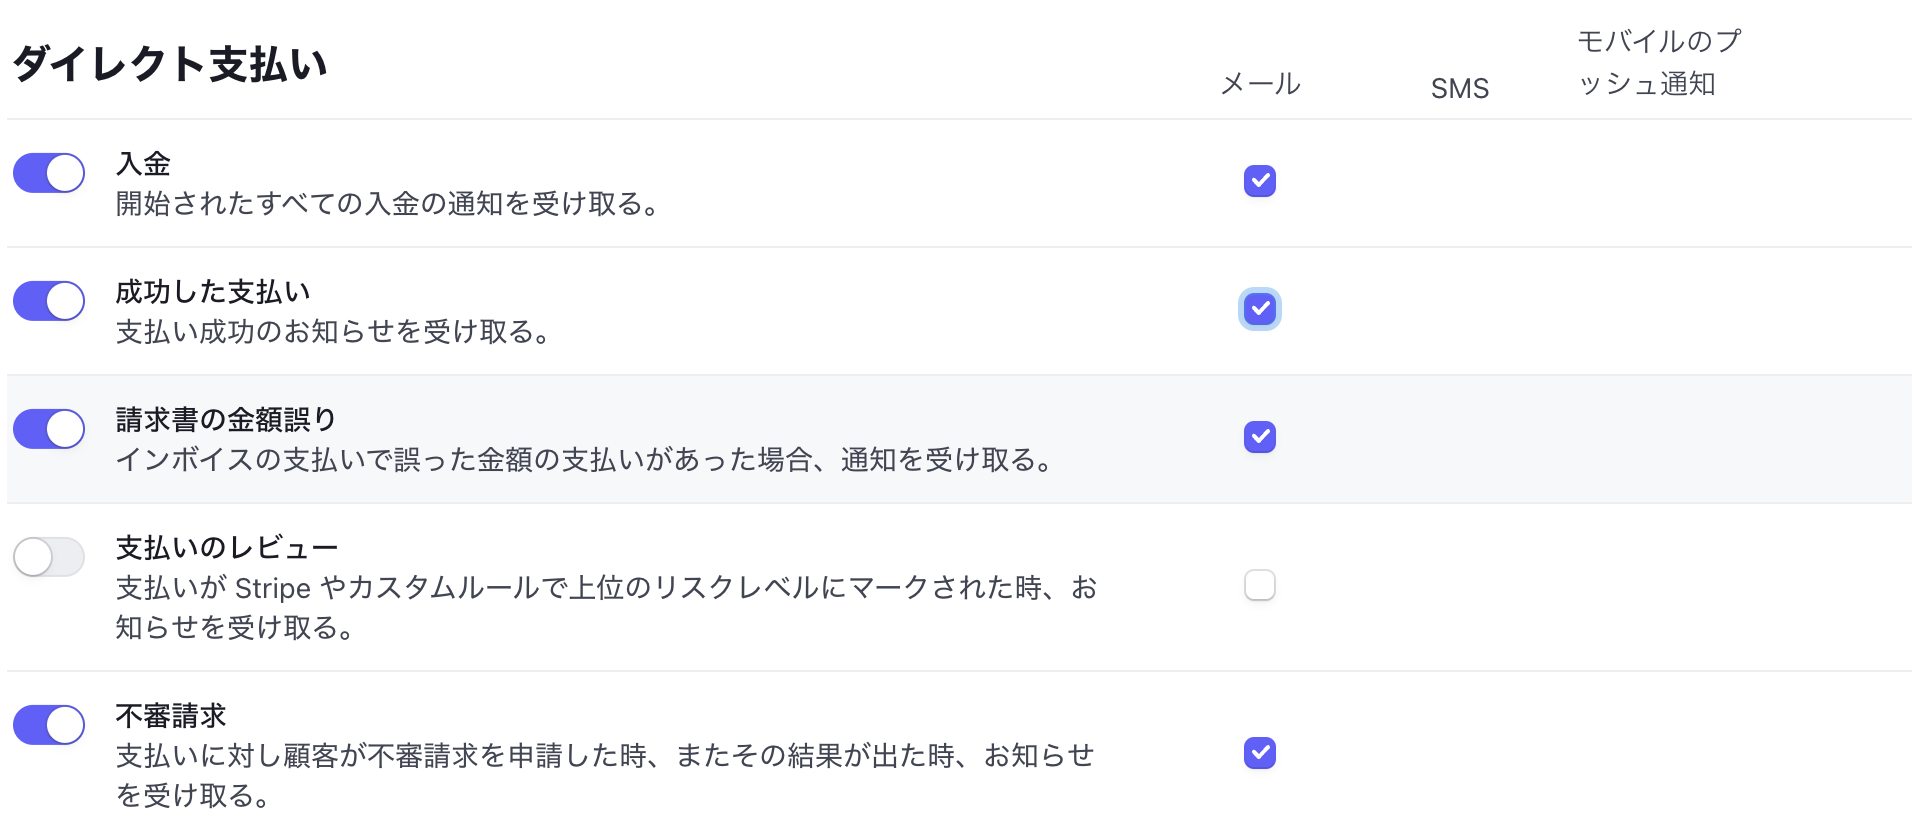
ユーザー設定からメール通知をオンにする
Stripeダッシュボードにログインすると、Stripeから受け取る通知メールを設定できます。
ここで、「成功した支払い」の通知をオンにすると、請求書やオンライン決済が完了した場合に通知を受け取ることができます。
Webhookのinvoice.paidとinvoice.payment_failedイベントで支払い完了・未払い通知を受け取る
システムと連携させたい場合は、invoice.paidとinvoice.payment_failedのWebhookイベントを受け取ります。
paidが支払い完了、payment_failedが期日超過などで支払いに失敗した場合です。
// This is your real test secret API key.
const stripe = require('stripe')('sk_test_xxxxx);

// Replace this endpoint secret with your endpoint's unique secret
// If you are testing with the CLI, find the secret by running 'stripe listen'
// If you are using an endpoint defined with the API or dashboard, look in your webhook settings
// at https://dashboard.stripe.com/webhooks
const endpointSecret = 'whsec_...';

const express = require('express');
const app = express();

app.post('/webhook', express.raw({type: 'application/json'}), (request, response) => {
  let event = request.body;
  // Only verify the event if you have an endpoint secret defined.
  // Otherwise use the basic event deserialized with JSON.parse
  if (endpointSecret) {
    // Get the signature sent by Stripe
    const signature = request.headers['stripe-signature'];
    try {
      event = stripe.webhooks.constructEvent(
        request.body,
        signature,
        endpointSecret
      );
    } catch (err) {
      console.log(`⚠️  Webhook signature verification failed.`, err.message);
      return response.sendStatus(400);
    }
  }

  // Handle the event
  switch (event.type) {
    case 'invoice.paid':
      const invoice = event.data.object;
      // Then define and call a method to handle the succeeded payment of an Invoice.
      // handlePaidInvoice(invoice);
      break;
    case 'invoice.payment_failed':
      const invoice = event.data.object;
      // Then define and call a method to handle the failed payment of an Invoice.
      // handleFailedInvoice(invoice);
      break;
    default:
      // Unexpected event type
      console.log(`Unhandled event type ${event.type}.`);
  }

  // Return a 200 response to acknowledge receipt of the event
  response.send();
});

app.listen(4242, () => console.log('Running on port 4242'));
どちらもinvoice.retrieveAPIのレスポンスとほぼ同じデータがWebhookから送信されますので、このデータを使って後続の処理を実行しましょう。
おわりに
Stripeの請求書を利用すると、銀行振込の入金確認とカード決済の成功確認・コンビニなどその他の決済の全てをほぼ同じ処理で対応できます。
システムの組み込みが必要な場合でも、シンプルなコードで対応できますので、ぜひさまざまなケースでお試しください。
Documents