Stripe Sessions 2022で発表されたStripe Apps、その開発方法を簡単に紹介します。
Stripe Appsとは?
Stripe Appsは、「Stripe管理画面に、独自または3rd partyのアプリケーションを追加するシステム」です。
Dashboard上にウィジェットを追加し、独自のワークフローを実行したり、外部サービスとのデータ連携を簡単に行うことができます。
Stripe Appsのユースケース
ワークフローの自動化・効率化
請求業務や顧客サポートで、Dashboardの複数ページを移動するタスクがある場合に、Appsを活用できます。
Appsでアプリを開発することで、1つのページ・1つのクリックで複雑なワークフローを完了させることが可能です。
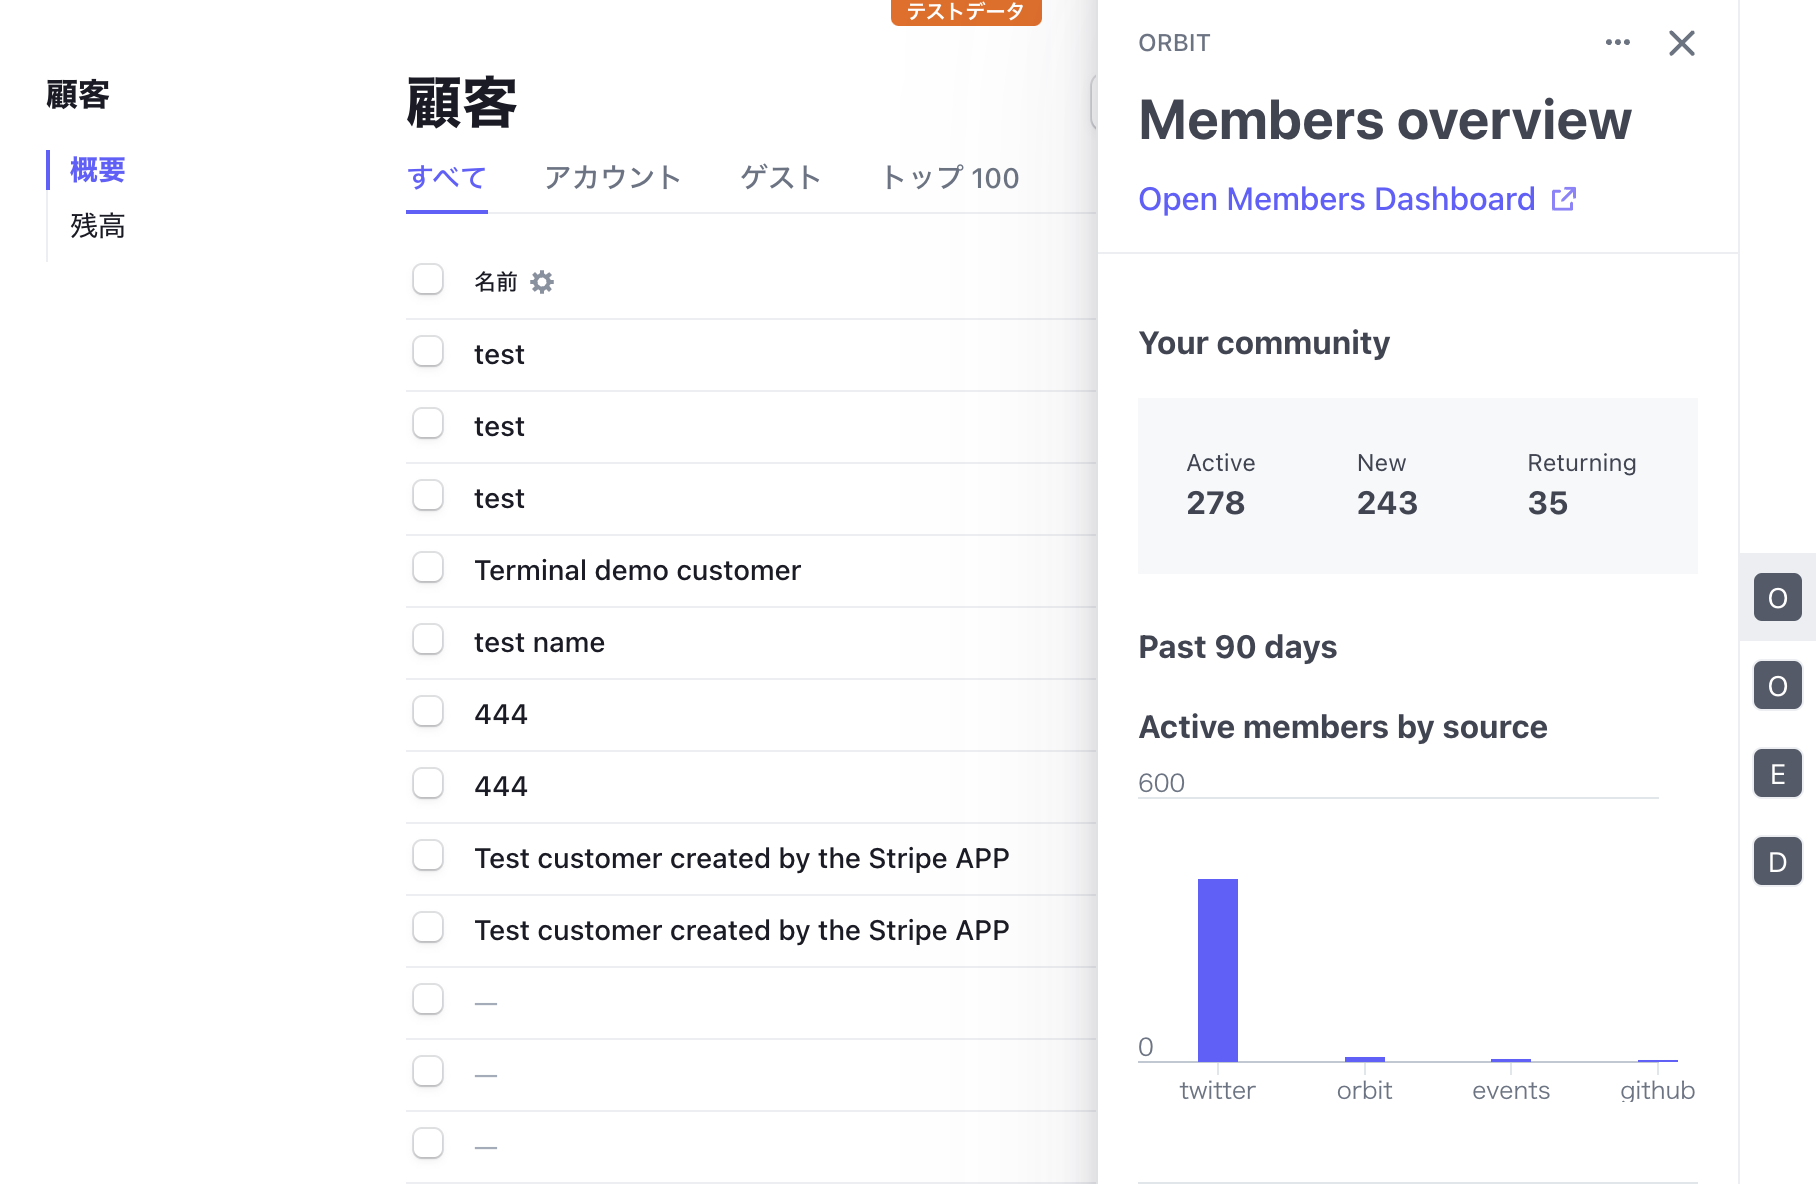
グラフやフォーム機能も用意されていますので、よく確認するデータの簡易チェックウィジェットや、顧客ごとのTODOリストなども作成できます。
外部サービスとの連携
Appsから外部のAPIを呼び出すことも可能です。
また、APIキーの保存やOAuthでの連携にも対応していますので、オンラインビジネスに欠かせない様々なSaaSとStripeを連携できます。
連携の例:
- HubSpotと連携し、注文情報の連携や取引履歴の確認を行う
- 未払いや請求書の送付をZendesk経由で行う
- SendGridやLINEで顧客にマーケティングメールなどを送付する
- 要対応の顧客・支払いについて、Backlogでチケットを立てる
- microCMSやAlgoliaに登録した商品・料金データを同期させる
- etc...
Stripe Appsを開発する
Stripe Appsは、React / TypeScriptとStripe CLIを利用して開発します。
Stripe CLIでセットアップ
アプリのセットアップはStripe CLIを利用します。
まず、stripe loginで設定したいStripeアカウントとCLIを連携させましょう。
% stripe login
もしCLIのバージョンが1.8.11よりも古い場合は、CLIの更新が必要です。
% stripe version
# 1.8.11 or later
ログインと更新が終われば、Stripe Appsを利用するためのプラグインを追加しましょう。
% stripe plugin install apps
最後に、stripe apps create [アプリ名]でアプリをセットアップします。
% stripe apps create helloworld
「アプリのID」と「表示名」の入力が求められます。
ここでは「App ID」は[Enterキー]をクリックしてデフォルト名を利用しましょう。
Display nameにはHello Worldを入れましょう。
🖊️ Enter details of your new Stripe app (these can be changed later)
✔ App ID: █om.example.nonpertinent-unkindredly

✗ Display name: █
入力が終わると、npm/yarnでのライブラリインストールが始まります。
以下のメッセージが表示されればセットアップ完了です。
🙌 Created  Hello World  at  /Users/stripe/examples/helloworld
Inside that directory, you can run several commands:

$ stripe apps start
Start a development server locally for viewing your app in the Stripe dashboard

$ stripe apps add view
Add a new view to your app

$ stripe apps upload
Upload your app to be submitted for review

To get started, try starting the development server from the app directory:

$ cd helloworld
$ stripe apps start
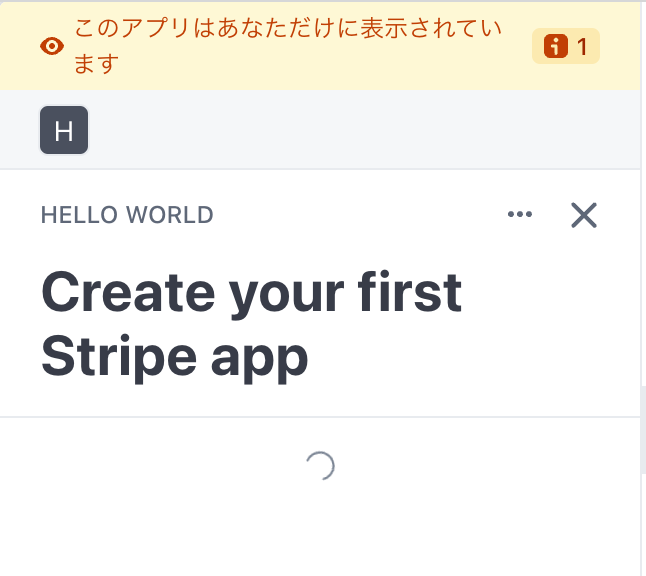
アプリを起動させてみる
入力したアプリ名でディレクトリができますので、その中でstripe apps startを実行しましょう。
% cd helloworld
% stripe apps start
以下のように、「[Enterキー]を押してダッシュボードに移動しよう」とメッセージが表示されます。
[16:13:01] compiled successfully
💻 Running development server on http://localhost:4242 (^C to quit)
✨ You can now preview Hello World in your Stripe account.

🌐 Press Enter to open the Stripe dashboard
Stripe Dashboardが開き、有効化の確認画面が表示されます。
[続行]をクリックすると、Dashboardのトップページに移動し、画面右側にウィジェットが追加されます。
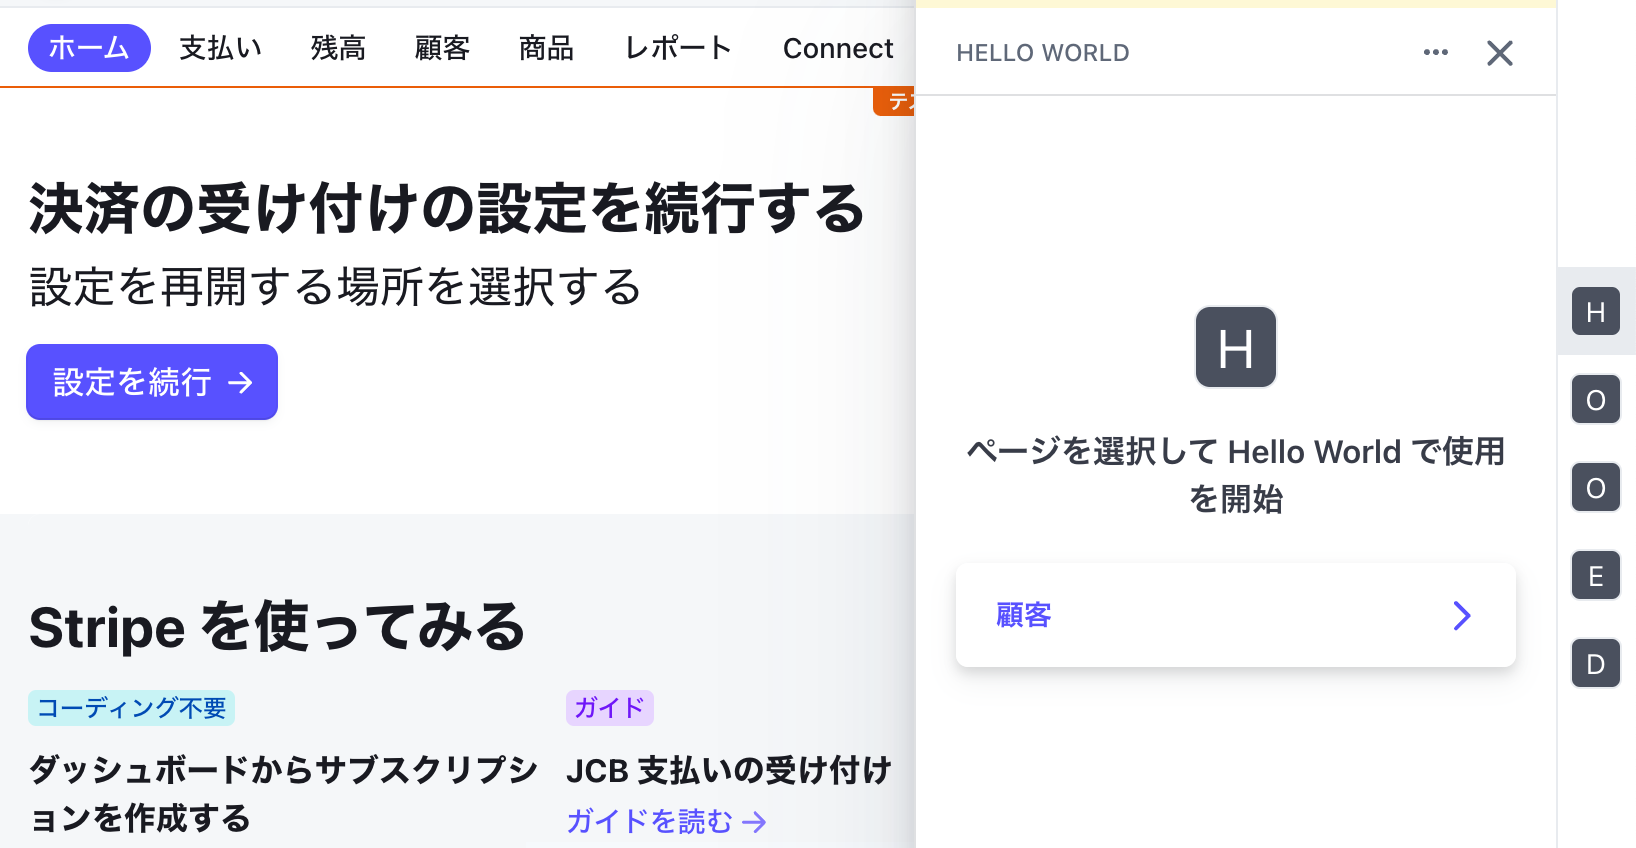
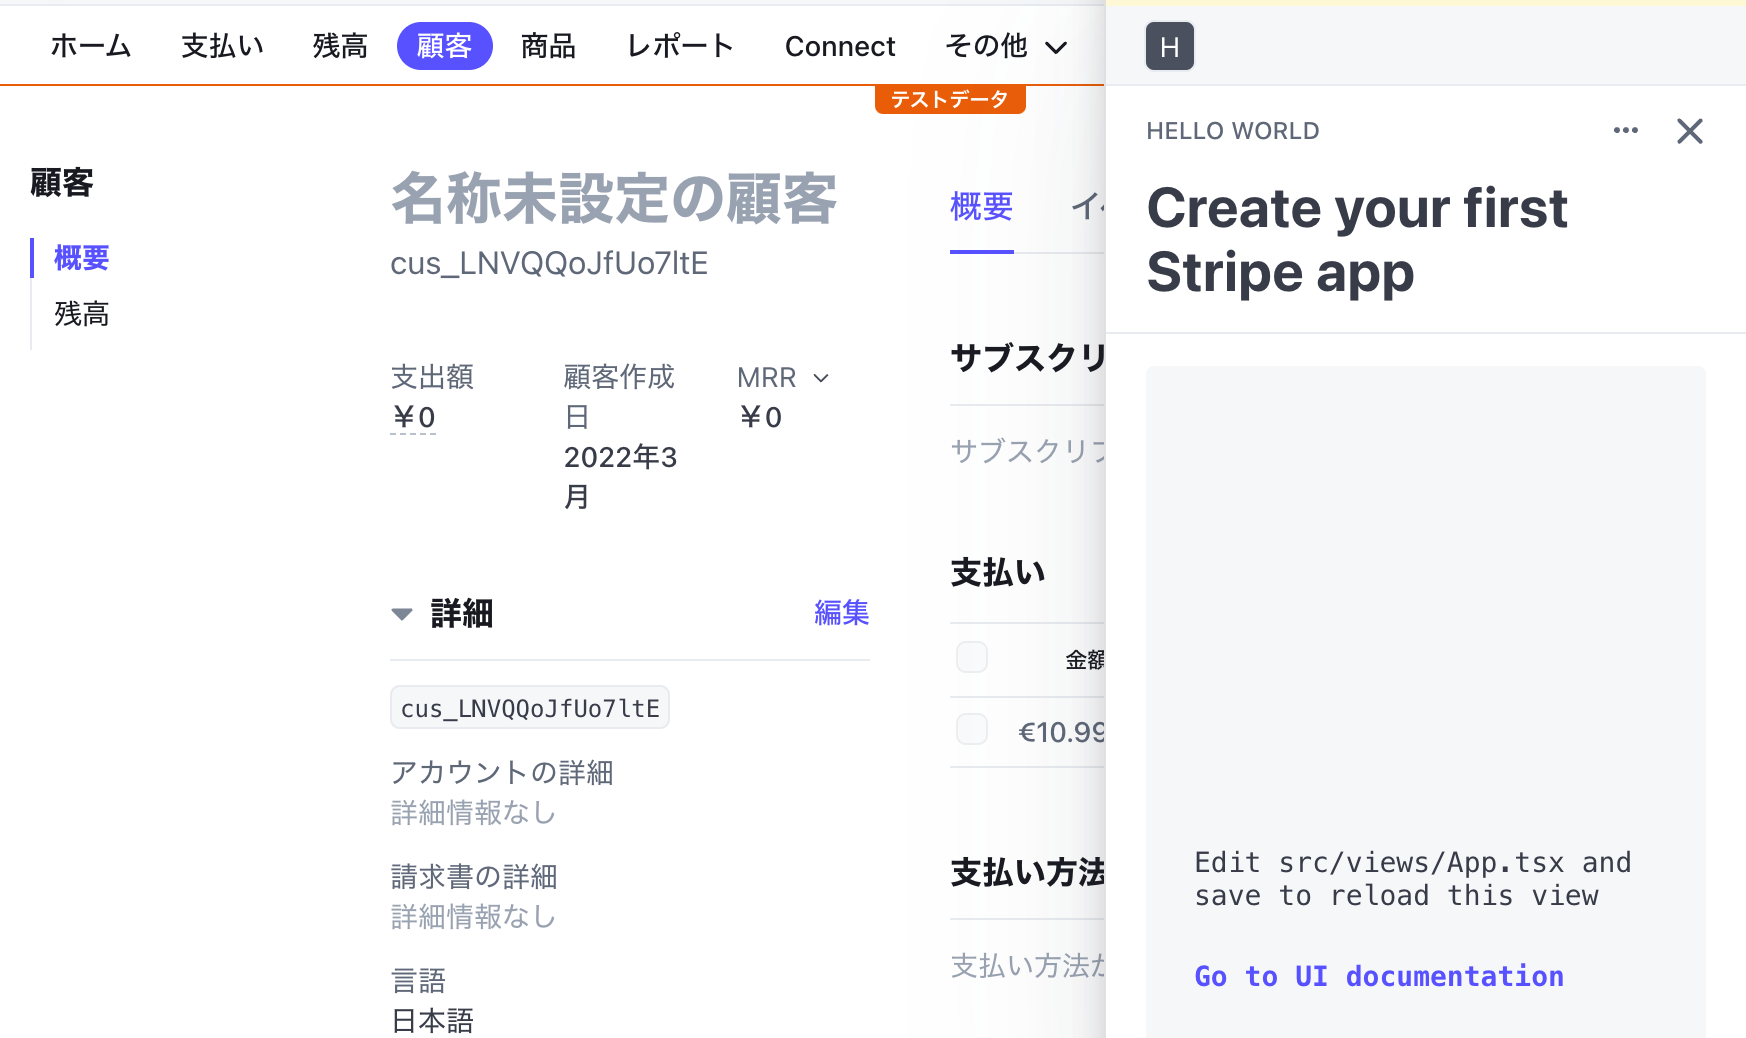
デフォルトでは顧客詳細ページに画面が用意されています。
顧客を作成し、詳細ページに移動すると、画面が切り替わります。
React / TypeScriptでUIをカスタマイズ
アプリの開発は、ReactとTypeScriptを利用します。
src/views/Apps.tsxを開くと、顧客詳細ページで表示しているコードが確認できます。
import {
  Box,
  ContextView,
  Link,
} from '@stripe/ui-extension-sdk/ui';
import type { ExtensionContextValue } from '@stripe/ui-extension-sdk/context';

const App = ({userContext, environment}: ExtensionContextValue) => {
  return (
	<ContextView title="Create your first Stripe app">
      <Box
        css={{
          padding: 'large',
          backgroundColor: 'container',
          fontFamily: 'monospace',
          borderRadius: 'small',
        }}
      >
        <Box css={{paddingY: 'xxlarge', marginY: 'xxlarge'}} />
        <Box css={{paddingTop: 'large', marginBottom: 'large'}}>
          Edit src/views/App.tsx and save to reload this view
        </Box>
        <Box css={{paddingBottom: 'xlarge'}}>
          <Link
            href="https://stripe.com/docs/stripe-apps/ui-toolkit/components"
            target="stripe-ui-docs"
          >
            Go to UI documentation
          </Link>
        </Box>
        <Box css={{paddingY: 'xxlarge', marginY: 'xxlarge'}} />
      </Box>
	</ContextView>
  );
};

export default App;
src/views/App.tsxを以下のコードに変更してみましょう。
import {
  Box,
  ContextView,
  Spinner,
} from '@stripe/ui-extension-sdk/ui';
import type { ExtensionContextValue } from '@stripe/ui-extension-sdk/context';

const App = ({userContext, environment}: ExtensionContextValue) => {
  return (
    <ContextView title="Create your first Stripe app">
      <Box
        css={{
          alignX: 'center',
          layout: 'column',
        }}
      >
        <Spinner />
      </Box>
    </ContextView>
  );
};

export default App;
保存するとアプリの表示が以下のように変わります。
このように、Stripe Appsでは、@stripe/ui-extension-sdk/uiに含まれるコンポーネントを利用して、UIを実装します。
注意: pやdivなどのHTMLタグは利用できません
Reactアプリのように開発が可能ですが、ReactのようにHTMLタグが利用できるわけではないことに注意です。
以下のように、「@stripe/ui-extension-sdk/uiにないコンポーネント」を利用すると、エラーが発生します。
    <ContextView title="Create your first Stripe app">
      <div>
        <h1>Hello</h1>
      </div>
    </ContextView>
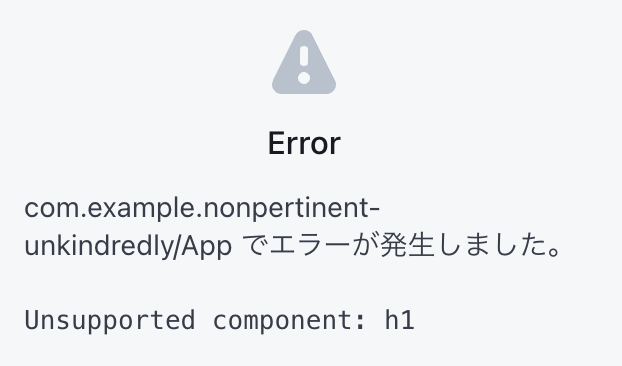
かならずUIコンポーネント集に含まれるコンポーネントを使うようにしましょう。
Stripe APIを呼び出してみる
Appsで作成したアプリは、Stripe APIを利用することができます。
CLIでAPIの呼び出し権限を設定する
APIを呼び出すには、事前に権限の設定が必要です。
stripe apps grant [権限名] [利用する理由]のようにCLIを実行しましょう。
% stripe apps grant permission customer_read "Get customer data"
✔ Granted permission customer_read
-> 設定可能な権限の一覧
変更した権限の許可
権限を変更した場合、アプリのプレビューを再実行する必要があります。
https://dashboard.stripe.com/apps/enable-previewにアクセスして、再度プレビューを有効化しましょう。
Stripe SDKのセットアップ
Stripe APIを呼び出すためのSDKやAPIキーは、@stripe/ui-extension-sdkから取得できます。
src/views/App.tsxに以下のコードを追加しましょう。
import Stripe from 'stripe';
import { createHttpClient, STRIPE_API_KEY } from '@stripe/ui-extension-sdk/http_client';

export const stripeClient = new Stripe(STRIPE_API_KEY, {
  httpClient: createHttpClient() as Stripe.HttpClient,
  apiVersion: '2020-08-27',
});
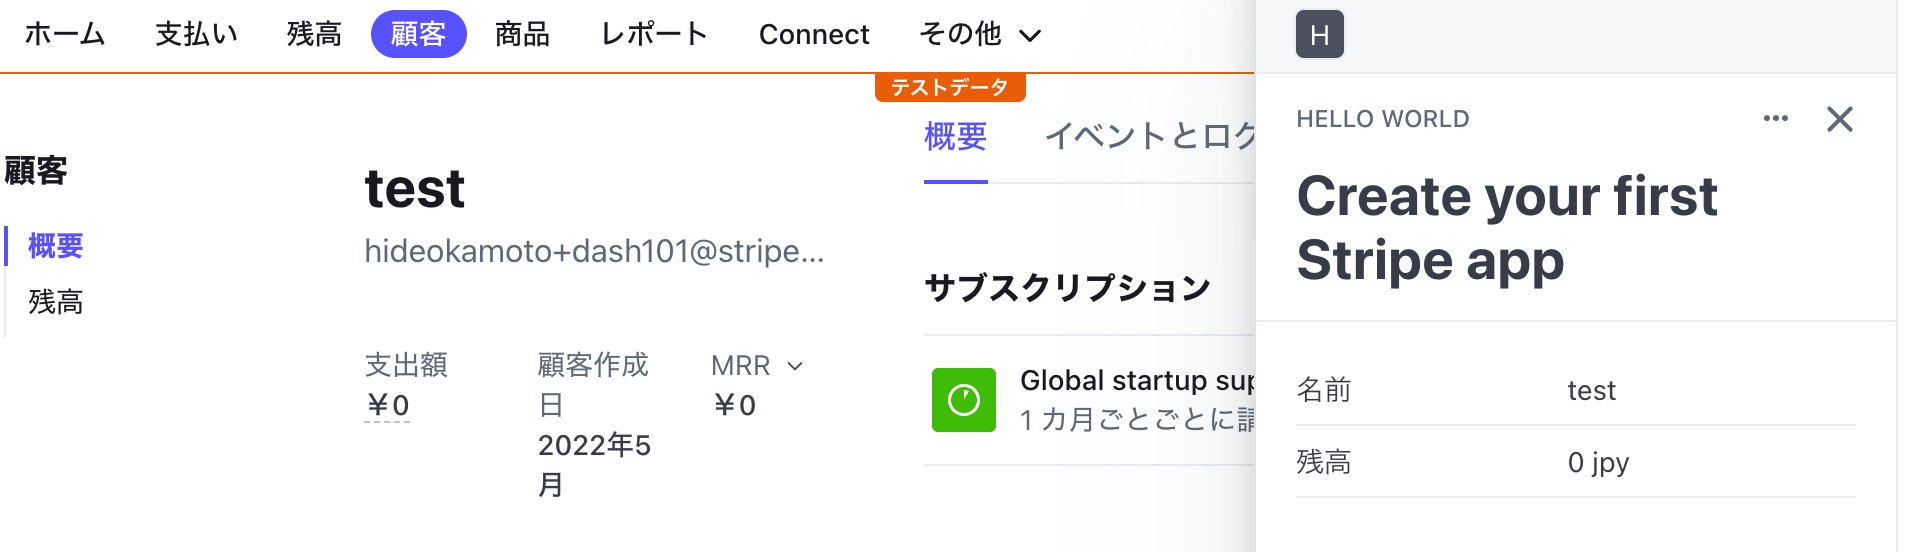
顧客情報を取得・表示する
あとはReactでREST APIを呼び出す時のように実装するだけです。
src/views/App.tsxを以下のように変更しましょう。
import {
  Box,
  ContextView,
  Table,
  TableBody,
  TableCell,
  TableRow,
} from '@stripe/ui-extension-sdk/ui';
import type { ExtensionContextValue } from '@stripe/ui-extension-sdk/context';
import Stripe from 'stripe';
import { createHttpClient, STRIPE_API_KEY } from '@stripe/ui-extension-sdk/http_client';
import { useEffect, useState } from 'react';

export const stripeClient = new Stripe(STRIPE_API_KEY, {
  httpClient: createHttpClient() as Stripe.HttpClient,
  apiVersion: '2020-08-27',
});

const App = ({environment}: ExtensionContextValue) => {
  const customerId = environment.objectContext?.id
  const [customer, setCustomer] = useState<Stripe.Customer | null>(null)
  useEffect(() => {
    if (!customerId) return;
    stripeClient.customers.retrieve(customerId)
    .then(response => {
      if (response.deleted) return;
      setCustomer(response)
    })
  }, [setCustomer, customerId])
  return (
    <ContextView title="Create your first Stripe app">
      {customer ? (
        <Table>
          <TableBody>
            <TableRow>
              <TableCell>名前</TableCell>
              <TableCell>{customer.name}</TableCell>
            </TableRow>
            <TableRow>
              <TableCell>残高</TableCell>
              <TableCell>{customer.balance} {customer.currency}</TableCell>
            </TableRow>
          </TableBody>
        </Table>
      ): (
        <Box>No customer data</Box>
      )}
    </ContextView>
  );
};

export default App;
アプリのウィジェット内でも、顧客データを取得・表示できるようになりました。
Stripe Appのカスタマイズ
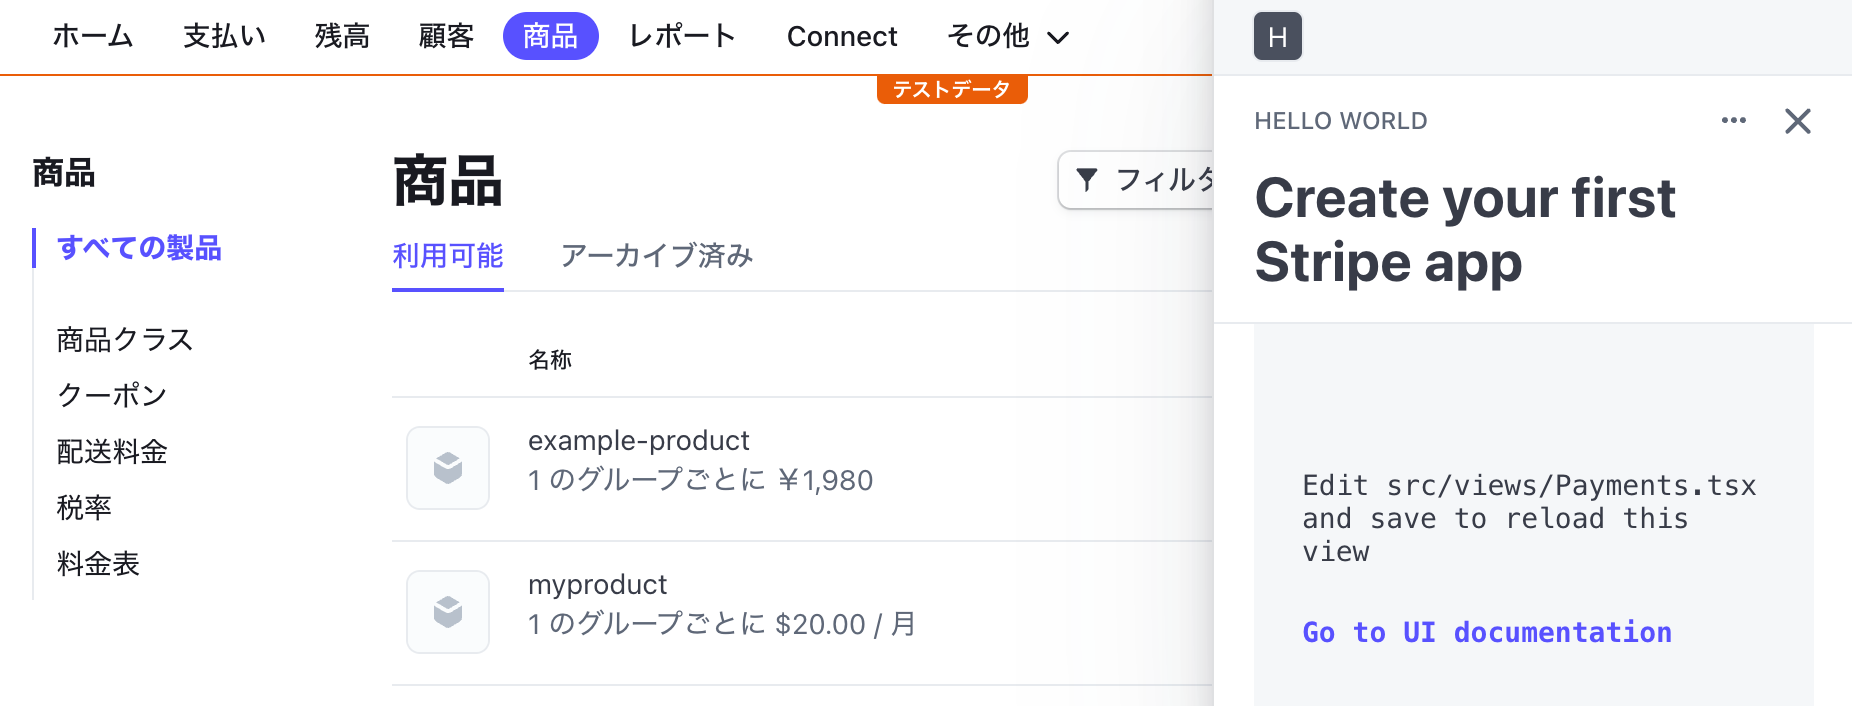
アプリはDashboardの複数ページに追加できます。
stripe apps add views [ページ名]を実行すると、指定したページに画面を追加します。
% stripe apps add view Products --viewport stripe.dashboard.product.list
✔ stripe.dashboard.product.list
✔ Added view Products
src/views/[ページ名].tsxとsrc/views/[ページ名].test.tsxが生成されます。
ページを追加・変更した場合も、https://dashboard.stripe.com/apps/enable-previewにアクセスして、再度プレビューを有効化しましょう。
有効化すると、設定したページにもウィジェットが表示されます。
注意点
開発にあたって注意が必要な点をいくつか紹介します。
環境変数を使わず、SDKが用意する値と関数を利用する
Stripe Appsで作成したアプリには、環境変数が設定できません。
環境・ユーザーに関する情報をUI Extension SDKから取得できますので、この値を利用しましょう。
外部APIはフルパス指定で許可しないとダメ
Stripe Appsアプリから直接外部のAPIを呼び出す場合、「APIのフルパス」に対してGrantする必要があります。
stripe apps grant connect-src "https://*.api.example.com/path/" "Send data to example service..."
動的なパスを含むAPIを利用したい場合、Expressなどで固定パスのProxy APIを用意して利用しましょう。
学習リソース
UIや実装サンプル(GitHub / Figma)
OAuthでの認証
Secret store