静的なウェブサイトを構築する方法の1つとして、Astroへの注目が高まっています。

今回は、このAstroを使ったサイトにて、Stripeを利用した決済フォームを組み込む方法を紹介します。
3つの組み込み方
Astroで構築したサイトにStripeの決済フォームを組み込むには、3つの方法があります。
- 1: リンクまたは埋め込みコードで実装する
- 2: リダイレクト型の決済セッションを作成する
- 3: 埋め込み型の決済フォームを実装する
1がもっとも簡単に組み込みができる反面、デザインのカスタマイズ性などは3に軍配があがります。
それぞれの実装方法を見ていきましょう。
1: リンクまたは埋め込みコードで実装する方法
もっとも簡単な方法は、Stripe上で発行した決済リンクや埋め込みコードを使うことです。
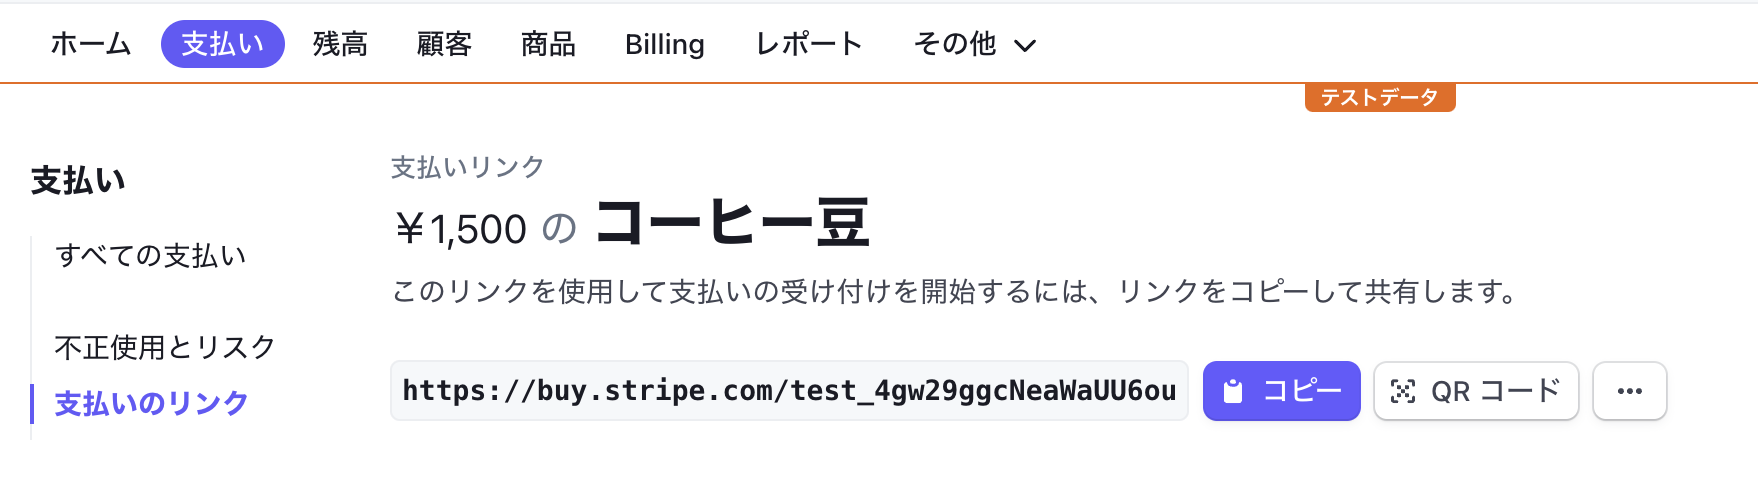
Payment Linksで発行したURLを利用する
StripeのPayment Linksを使うことで、決済ページへのURLを発行できます。

発行したURLまたはQRコードを、サイトのリンクや画像として埋め込みましょう。
---
import Layout from '../layouts/Layout.astro';
import Card from '../components/Card.astro';

---

<Layout title="Welcome to Astro.">
	<main>
		<ul role="list" class="link-card-grid">
			<Card
				href="https://buy.stripe.com/test_xxxxxx"
				title="コーヒー豆を注文する"
				body="おすすめのコーヒー豆をお届けします。(税込1,500円)"
			/>
Astro側で注文ボタンなどを用意するだけで、決済やサブスクリプションの申し込みフローを実装できます。

料金表を作成して埋め込む
プランによって提供する機能が変わる場合などでは、料金表を作成して埋め込むこともできます。

発行されたコードを、そのままAstroのコードに追加しましょう。
---
import Layout from '../layouts/Layout.astro';
import Card from '../components/Card.astro';
---

<Layout title="Welcome to Astro.">
	<main>
		<h1>Welcome to <span class="text-gradient">Astro</span></h1>
		<script async src="https://js.stripe.com/v3/pricing-table.js"></script>
		<stripe-pricing-table pricing-table-id="prctbl_1xxxxxxx"
		publishable-key="pk_test_xxxxxx">
		</stripe-pricing-table>
		<ul role="list" class="link-card-grid">
これだけで料金表と決済フォームへの遷移が実装できます。

2: リダイレクト型の決済セッションを作成する方法
2つ目・3つ目の方法では、サーバー側のAPIが必要となります。
そのため、Stripeのドキュメントサイトにあるクイックスタートを利用して、ローカル環境にAPIを用意しましょう。
Astro側では、formタグを利用して、クイックスタートが提供するPOSTのAPI(/create-checkout-session)に遷移する実装を追加します。
---
import Layout from '../layouts/Layout.astro';
---

<Layout title="Welcome to Astro.">
	<main>
		<h1>Welcome to <span class="text-gradient">Astro</span></h1>
		<form action='http://localhost:4200/create-checkout-session' method='post'>
			<button type='submit'>Checkout</button>
		</form>
これでCheckoutボタンをクリックすると、決済フォームへリダイレクトされるようになります。

3: 埋め込み型の決済フォームを実装する方法
3つ目の方法では、2つ目とまた異なるサーバー側のAPIを用意します。
Stripeのドキュメントサイトにあるクイックスタートを利用して、ローカル環境にAPIを用意しましょう。
Stripe.jsライブラリを追加する
フォームを埋め込むために、まずはSDKを追加しましょう。
% npm i @stripe/stripe-js
Stripe Elements用のComponentを用意する
APIで作成されたPayment Intentを利用してフォームを描画しましょう。
<script hoist type='module'>
import {loadStripe} from '@stripe/stripe-js';
const stripe = await loadStripe('pk_test_TYooMQauvdEDq54NiTphI7jx');

class PaymentForm {
	private readonly publicAPIKey;
	private readonly formElementId;
	private readonly elementId;
	private readonly stripe
	private elements

	constructor(publicAPIKey, options = {}) {
		this.publicAPIKey = publicAPIKey;
		this.elementId = options.elementId || 'payment-element';
		this.formElementId = options.formElementId || 'payment-element-form';
	}
	async init() {
		this.stripe = await loadStripe(this.publicAPIKey)
	}
	create(clientSecret) {
		if (!this.stripe) return;

 		// Elementsの作成とマウントを実施
		this.elements = this.stripe.elements({
			appearance: {
				theme: 'stripe',
			},
			clientSecret
		});
		const paymentElement = this.elements.create("payment", {
			layout: "tabs",
		});
		const elementPlaceholder = document.getElementById(this.elementId);
		paymentElement.mount(elementPlaceholder);

		// FormのSubmit処理
		const paymentForm = document.getElementById(this.formElementId);
		paymentForm.addEventListener('submit', async (e) => {
			e.preventDefault();
			if (!this.stripe || !this.elements) return;
			const { error, paymentIntent } = await this.stripe.confirmPayment({
				elements: this.elements,
				redirect: 'if_required'
			});
			if (error) {
				alert(`${error.code}: ${error.message}`);
			} else {
				alert("done");
			}
		});
	}
}

// ページ読み込み時の動作
try {
	const response = await fetch('http://localhost:4200/create-payment-intent', {
		method: 'post'
	});
	const { clientSecret } = await response.json();
	const form = new PaymentForm('pk_test_xxxxx');
	await form.init();
	form.create(clientSecret);

} catch (e) {
	console.error(e);
}
</script>


    <form id='payment-element-form' client:only>
		<div id='payment-element'></div>
		<button type='submit'>Checkout</button>
    </form>
これで決済フォームが表示されます。

マウント時にエラーが出る場合は、次のような方法をとることもできます。
		const elementPlaceholder = document.createElement("div");
		paymentElement.mount(elementPlaceholder);
		const targetElement = document.getElementById(this.elementId);
		targetElement.appendChild(elementPlaceholder);
[Appendix] Web Componentとして実装する
Web Componentとして実装することもできます。
この方法では、scriptタグを配置せずに実装できるようになるのがポイントです。
<script hoist type='module'>
import {loadStripe} from '@stripe/stripe-js';
class StripeElement extends HTMLElement {
	private readonly stripe;
	private readonly elements;
	constructor() {
		super();

        // Stripe.jsを読み込みする
		loadStripe('pk_test_xxxxx')
			.then(stripe => {
				this.stripe = stripe;
                // 決済フォームを描画・マウントする
				return this.createPaymentElement();
			})
			.then(() => {
                // formのsubmitイベントで、決済処理を実施する
				const formElement = document.getElementById('payment-element-form');
				formElement.addEventListener('submit', async (e) => {
					e.preventDefault();
					this.handleSubmit();
				});
			});
	}
	async handleSubmit() {
		if (!this.stripe || !this.elements) return;
		const { error, paymentIntent } = await this.stripe.confirmPayment({
			elements: this.elements,
			redirect: 'if_required'
		});
		if (error) {
			alert(`${error.code}: ${error.message}`);
		} else {
			alert("done");
		}

	}
	async createPaymentElement() {
                        // Payment Intentを取得する
			fetch('http://localhost:4200/create-payment-intent', {
					method: 'post'
			}).then(response => response.json())
			.then(pi => {
                // Payment Intentから、フォームを描画・マウントする
				this.elements = this.stripe.elements({
					appearance: {
						theme: 'stripe',
					},
					clientSecret: pi.clientSecret
				});
				const paymentElement = this.elements.create("payment", {
					layout: "tabs",
				});
				const elementPlaceholder = document.createElement("div");
				paymentElement.mount(elementPlaceholder);
				const targetElement = document.getElementById('payment-element');
				targetElement.appendChild(elementPlaceholder);
			});

	}
}
customElements.define('stripe-element', StripeElement);
</script>


<stripe-element>
    <form id='payment-element-form' client:only>
		<div id='payment-element'></div>
		<button type='submit'>Checkout</button>
    </form>
</stripe-element>
3-1: AstroのSSRもしくはHybrid Renderingを使って、サーバー側の処理も実装する方法
Astro 2.0からサポートされたHybrid Renderingを利用し、決済に関連する部分だけSSRで動作させることもできます。
ライブラリのインストール
StripeのJSライブラリを追加しましょう。
$ yarn add stripe
[1/4] 🔍  Resolving packages...
[2/4] 🚚  Fetching packages...
warning prettier-plugin-astro@0.7.2: The engine "pnpm" appears to be invalid.
[3/4] 🔗  Linking dependencies...
[4/4] 🔨  Building fresh packages...

success Saved lockfile.
success Saved 7 new dependencies.
環境変数で、シークレットAPIキーを設定する
.envファイルを作成し、StripeのシークレットAPIキーを保存しましょう。
STRIPE_SECRET_API_KEY=sk_test_xxxx
サーバー側のスクリプトでPayment Intentを作成する
---フェンス内でサーバー側の処理を実装しましょう。
---
import Layout from '../layouts/Layout.astro';
import Card from '../components/Card.astro';

import Stripe from 'stripe';
const stripe = new Stripe(import.meta.env.STRIPE_SECRET_API_KEY);

const paymentIntent = await stripe.paymentIntents.create({
	amount: 100,
	currency: "jpy",
	automatic_payment_methods: {
		enabled: true,
	},
});
const clientSecret = paymentIntent.client_secret;
---
クライアント側のJSで、clientSecretを利用するため、data属性に値を設定します。
		<form id='payment-element-form' client:only>
-			<div id="payment-element"></div>
+			<div id="payment-element" data-pi={clientSecret}></div>
			<button type='submit'>Checkout</button>
		</form>
Elementsをマウントする処理に、data属性から値を取得するコードを追加しましょう。
+	create(clientSecret) {
-	create() {
		if (!this.stripe) return;
+		const elementPlaceholder = document.getElementById(this.elementId);
+		const clientSecret = elementPlaceholder.dataset.pi;
		this.elements = this.stripe.elements({
			appearance: {
				theme: 'stripe',
			},
			clientSecret
		});
		const paymentElement = this.elements.create("payment", {
			layout: "tabs",
		});
-		const elementPlaceholder = document.getElementById(this.elementId);
		paymentElement.mount(elementPlaceholder);
APIをfetchしてデータを取得する必要がなくなりましたので、コードを削除します。
try {
-	const response = await fetch('http://localhost:4200/create-payment-intent', {
-		method: 'post'
-	});
-	const { clientSecret } = await response.json();
	const form = new PaymentForm('pk_test_xxxxx');
	await form.init();
+	form.create(clientSecret);
-	form.create(clientSecret);

} catch (e) {
	console.error(e);
}
</script>
これでAstroのSSR機能を利用した決済フォーム表示処理が実装できました。
Checkoutのセッションについても、---フェンス内にセッションURLを発行することで実現できます。
Customer Portalについても同様です。
もし決済ページ以外で静的な書き出し(SSG)を行いたいページがある場合は、--フェンス内に1行次のコードを追加しましょう。
---
+export const prerender = true;
---
おわりに
StripeをAstroで構築したサイトに組み込む方法を、リンク・リダイレクト・埋め込みの3種類から紹介しました。
サブスクリプションについても、Checkoutセッションを作成する処理の引数を変更したり、Payment Intentの代わりにサブスクリプションを作成することで対応できます。
またテストクロックを利用して、プラン変更の動作をテストすることもできます。
## 参考ドキュメントなど