世間はWindows OSの再起動事件で混乱していますね。
もはやWindows OSは社会(の重要)インフラに組み込まれており、更にそこに組み込まれるセキュリティ関連製品も社会のインフラの一部である、ということを改めて認識させられる事件でしたね。
先月我が家のメインルーターRTX1300が故障してしまい、起動しなくなりました。
現在予備機のRTX1210で運用しているのですが、これでAWSとインターネットVPNをTerraformで張りました。
以前の記事でしれっとAzureとインターネットVPN張っているので、これのAWS版ですね。
ざっと調べるとYAMAHA RTXシリーズとAWSのVPNはIKEv1の記事が多かったので、IKEv2でVPNを張る記事を書きたいと思います。
構成図
では早速構成図です。

はい。
こんな感じですね。
とってもシンプルです。
なんでIKEv1とIKEv2にこだわるの?
はい。
これもちゃんと理由があります。
IKEv2の方が新しい規格(といっても結構古く、RFC7296が書かれたのは2014年10月と、ほぼ10年前です)で、IKEv2よりも簡単で高速、セキュアになっています。
IKEv1だとメーカーや機種、ファームウェア単位で接続時に利用する必須パラメータが統一されていなかった(複雑であり、機器間で処理が異なる=接続ごとにオーバーヘッド処理が発生し時間を要するため高速でない)り、PSKで接続する際に総当たり攻撃に対する脆弱性があったり(セキュアでない)と、冒頭の通り昨今の事情を鑑みると単に新しい規格だから安全だ、皆が採用しているから安全だということではなく、ちゃんと理由があってIKEv2を選択している、ということです。
読者の皆様の環境でもインターネットVPNをお使いの場合はIKEv1かv2を確認してもらい、v1の場合はそれ相応の理由があるかどうか確認してください。
また提案する立場の読者の皆様も今まで自分が提案してきた内容、パラメーターにそれ相応の理由があるかどうか今一度確認しましょう。
Terrafrom
はい。
では早速いってみましょう。
変数設定
# ---------------------------
# Variables - 変数設定
# ---------------------------

# region
# ap-northeast-1 東京リージョン
# ap-south-1 ムンバイリージョン
variable "region" {
  default = "ap-south-1"
}

# 環境種別(本番:prd,ステージング:stg,開発:dev)
variable "env_type" {
  default = "dev"
}

# システム名
variable "sys_name" {
  default = "vpn-test01"
}

# availability_zone
variable "availability_zone" {
  type = object({
    a = string
    b = string #ムンバイリージョンで利用
    c = string
  })
  default = {
    a = "ap-south-1a" # ムンバイ(インド)のアベイラビリティゾーン
    b = "ap-south-1b" # ムンバイ(インド)のアベイラビリティゾーン
    c = "ap-south-1c" # ムンバイ(インド)のアベイラビリティゾーン
  }
}

# ------------------------------
# VPC 関連
# ------------------------------

# vpc address
variable "vpc_address_pre" {
  default = "10.0."
}

variable "vpc_address_suf" {
  default = "0.0/23"
}

# private subnet suffix address01
variable "private_sn_address_suf01" {
  default = "1.0/24"
}

# public subnet suffix address01
variable "public_sn_address_suf01" {
  default = "0.0/24"
}

# VPC Endpoint
variable "vpc_endpoints" {
  type    = list(any)
  default = ["ssm", "ssmmessages", "ec2messages"]
}

# ------------------------------
# VPN (On-Premises Network) 関連
# ------------------------------

# RTX1300 Global IP Address
variable "rtx1300_gip_address" {
  default = "60.138.244.248"
}

# RTX1300 Local IP Address01
variable "rtx1300_local_address01" {
  type = string
  default = "192.168.11.0/24"
}

# RTX1300 Local IP Address02
variable "rtx1300_local_address02" {
  type = string
  default = "172.16.0.0/24"
}

# ------------------------------
# EC2 作成
# ------------------------------

# Linux EC2のインスタンスタイプ
variable "ec2_instance_type_lin" {
    default = "t2.micro"
}

# Windows EC2のインスタンスタイプ
variable "ec2_instance_type_win" {
    default = "m4.large"
}
今回はVPNを張るのでオンプレミス関連のパラメータが存在しますね。
リージョンは安定のムンバイです!
main
# ---------------------------
# main
# ---------------------------

terraform {
  required_version = ">= 1.4" # Terraformのバージョンを1.4以上に指定
  required_providers {
    aws = {
      source  = "hashicorp/aws"
      version = "= 5.22.0" # AWSプロバイダのバージョンを5.22.0に固定
    }
  }
}

# プロバイダー設定
provider "aws" {
  region = var.region
}
いつも通りですね。
iam
# ---------------------------
# IAM
# ---------------------------

# IAM ROLE 定義
resource "aws_iam_role" "ec2_role" {
  name               = "${var.env_type}-${var.sys_name}-iam-role"
  assume_role_policy = data.aws_iam_policy_document.ec2_assume_role.json
}

# IAMポリシー定義
data "aws_iam_policy_document" "ec2_assume_role" {
  statement {
    actions = ["sts:AssumeRole"]

    principals {
      type        = "Service"
      identifiers = ["ec2.amazonaws.com"]
    }
  }
}

# IAM ROLEのインスタンスプロフィールの作成
resource "aws_iam_instance_profile" "instance_prof" {
  name = "${var.env_type}-${var.sys_name}-instance-profile-ssm"
  role = aws_iam_role.ec2_role.name
}

# ---------------------------
# FOR SSM
# ---------------------------
# SSM用ポリシーをEC2ロールに設定
resource "aws_iam_role_policy_attachment" "ssm_control" {
  role       = aws_iam_role.ec2_role.name
  policy_arn = "arn:aws:iam::aws:policy/AmazonSSMManagedInstanceCore"
}
はい。
ここも安定のいつも通りですね。
SSMいらんかなとも思ったんですが、念のため付けておきます。
VPC
# ---------------------------
# VPC 構築
# ---------------------------

resource "aws_vpc" "vpc" {
  cidr_block           = "${var.vpc_address_pre}${var.vpc_address_suf}"
  enable_dns_hostnames = true
  enable_dns_support   = true
  tags = {
    Name = "${var.env_type}-${var.sys_name}-vpc"
  }
}

# ---------------------------
# Public Subnet 構築
# ---------------------------

resource "aws_subnet" "sn_public_1a" {
  vpc_id            = aws_vpc.vpc.id
  cidr_block        = "${var.vpc_address_pre}${var.public_sn_address_suf01}"
  availability_zone = var.availability_zone.a
  tags = {
    Name = "${var.env_type}-${var.sys_name}-sn-public-1a"
  }
}

# ---------------------------
# Private Subnet 構築
# ---------------------------

resource "aws_subnet" "sn_private_1b" {
  vpc_id            = aws_vpc.vpc.id
  cidr_block        = "${var.vpc_address_pre}${var.private_sn_address_suf01}"
  availability_zone = var.availability_zone.b
  tags = {
    Name = "${var.env_type}-${var.sys_name}-sn-private-1b"
  }
}

# ---------------------------
# Internet Gateway 作成
# ---------------------------
resource "aws_internet_gateway" "igw" {
  vpc_id = aws_vpc.vpc.id
  tags = {
    Name = "${var.env_type}-${var.sys_name}-igw"
  }
}

# ---------------------------
# Route table 作成
# ---------------------------

# Public Subnet 用Route Table 作成
resource "aws_route_table" "rt_sn_public_1a" {
  vpc_id = aws_vpc.vpc.id
  # Default GatewayをInternet Gatewayに向ける
  route {
    cidr_block = "0.0.0.0/0"
    gateway_id = aws_internet_gateway.igw.id
  }
  tags = {
    Name = "${var.env_type}-${var.sys_name}-rt-sn-public-1a"
  }
}

# Private Subnet 用Route Table 作成
resource "aws_route_table" "rt_sn_private_1b" {
  vpc_id = aws_vpc.vpc.id
  # Default GatewayをInternet Gatewayに向ける
  route {
    cidr_block = "0.0.0.0/0"
    gateway_id = aws_internet_gateway.igw.id
  }
  route {
    cidr_block = "${var.rtx1300_local_address01}"
    gateway_id = aws_vpn_gateway.vgw.id
  }
  route {
    cidr_block = "${var.rtx1300_local_address02}"
    gateway_id = aws_vpn_gateway.vgw.id
  }
  tags = {
    Name = "${var.env_type}-${var.sys_name}-rt-sn-private-1b"
  }
}

# Public Subnet とDefault Route table の関連付け
resource "aws_route_table_association" "associate_rt_sn_public_1a_sn_public_1a" {
  subnet_id      = aws_subnet.sn_public_1a.id
  route_table_id = aws_route_table.rt_sn_public_1a.id
}

# Private Subnet とDefault Route table の関連付け
resource "aws_route_table_association" "associate_rt_sn_private_1b_sn_private_1b" {
  subnet_id      = aws_subnet.sn_private_1b.id
  route_table_id = aws_route_table.rt_sn_private_1b.id
}
今回はPublic SubnetをAvailability Zone Aとし、Private SubnetをAvailability Zone Bとしました。
Availability Zone Cも使ってよかったのですが、CだとSpot InstanceでEC2を構築できませんでした。
恐らく新しいZoneのためDCの総床面積が少なく、EC2を構築するために必要な各種リソースに余力ないのでしょう。
またVPNなんで念のため構成図にRoute Tableを記載しています。
これは当然TerraformでもPublic SubnetとPrivate SubnetとでRoute Tableに違いがありますので念のため分けて記載しました。
Security Group
# ---------------------------
# Security Group
# ---------------------------

# ---------------------------
# EC2用 Security Group作成
# ---------------------------

#Linux EC2 用SG
resource "aws_security_group" "sg_ec2_linux01" {
  name   = "${var.env_type}-${var.sys_name}-sg-ec2-linux01"
  vpc_id = aws_vpc.vpc.id
  tags   = {
    Name = "${var.env_type}-${var.sys_name}-sg-ec2-linux01"
  }

  # インバウンドルール
  # from SSM
  ingress {
    description     = "AllowHttpsInBoundFromVPC for SSM"
    from_port       = 443
    to_port         = 443
    protocol        = "tcp"
    cidr_blocks = ["${var.vpc_address_pre}${var.vpc_address_suf}"]
  }

  ingress {
    description     = "AllowICMPv4InBoundFromVPC"
    from_port       = -1
    to_port         = -1
    protocol        = "icmp"
    cidr_blocks = ["${var.vpc_address_pre}${var.vpc_address_suf}"]
  }

  ingress {
    description     = "AllowInBoundFromOn-Premises-General-Subnet"
    from_port       = 0
    to_port         = 0
    protocol        = "-1"
    cidr_blocks = ["${var.rtx1300_local_address01}"]
  }

  ingress {
    description     = "AllowInBoundFromOn-Premises-Server-Subnet"
    from_port       = 0
    to_port         = 0
    protocol        = "-1"
    cidr_blocks = ["${var.rtx1300_local_address02}"]
  }

  # アウトバウンドルール
  egress {
    description = "AllowAnyOutBound"
    from_port   = 0
    to_port     = 0
    protocol    = "-1"
    cidr_blocks = ["0.0.0.0/0"]
  }
}

# Windows Server 用SG
resource "aws_security_group" "sg_ec2_windows01" {
  name   = "${var.env_type}-${var.sys_name}-sg-windows01"
  vpc_id = aws_vpc.vpc.id
  tags   = {
    Name = "${var.env_type}-${var.sys_name}-sg-windows01"
  }

  # インバウンドルール
  # from VPC ICMPv4
  ingress {
    description     = "AllowICMPv4InBoundFromVPC"
    from_port       = -1
    to_port         = -1
    protocol        = "icmp"
    cidr_blocks = ["${var.vpc_address_pre}${var.vpc_address_suf}"]
  }

  # For RDPアクセス
  ingress {
    description     = "AllowInBoundFromOn-Premises-General-Subnet"
    from_port       = 0
    to_port         = 0
    protocol        = "-1"
    cidr_blocks = ["${var.rtx1300_local_address01}"]
  }

  ingress {
    description     = "AllowInBoundFromOn-Premises-Server-Subnet"
    from_port       = 0
    to_port         = 0
    protocol        = "-1"
    cidr_blocks = ["${var.rtx1300_local_address02}"]
  }

  # アウトバウンドルール
  egress {
    description = "AllowAnyOutBound"
    from_port   = 0
    to_port     = 0
    protocol    = "-1"
    cidr_blocks = ["0.0.0.0/0"]
  }
}

# ---------------------------
# SSM用 Vpc endpoint Security Group作成
# ---------------------------

resource "aws_security_group" "sg_ssm" {
  name   = "${var.env_type}-${var.sys_name}-sg-ssm"
  vpc_id = aws_vpc.vpc.id
  tags   = {
    Name = "${var.env_type}-${var.sys_name}-sg-ssm"
  }

  # インバウンドルール
  ingress {
    from_port   = 443
    to_port     = 443
    protocol    = "tcp"
    cidr_blocks = ["${var.vpc_address_pre}${var.vpc_address_suf}"]
  }

  # アウトバウンドルール
  egress {
    from_port   = 0
    to_port     = 0
    protocol    = "-1"
    cidr_blocks = ["0.0.0.0/0"]
  }
}

resource "aws_security_group" "sg_ssmmessages" {
  name   = "${var.env_type}-${var.sys_name}-sg-ssmmessages"
  vpc_id = aws_vpc.vpc.id
  tags   = {
    Name = "${var.env_type}-${var.sys_name}-sg-ssmmessages"
  }

  # インバウンドルール
  ingress {
    from_port   = 443
    to_port     = 443
    protocol    = "tcp"
    cidr_blocks = ["${var.vpc_address_pre}${var.vpc_address_suf}"]
  }

  # アウトバウンドルール
  egress {
    from_port   = 0
    to_port     = 0
    protocol    = "-1"
    cidr_blocks = ["0.0.0.0/0"]
  }
}

resource "aws_security_group" "sg_ec2messages" {
  name   = "${var.env_type}-${var.sys_name}-sg-ec2messages"
  vpc_id = aws_vpc.vpc.id
  tags   = {
    Name = "${var.env_type}-${var.sys_name}-sg-ec2messages"
  }

  # インバウンドルール
  ingress {
    from_port   = 443
    to_port     = 443
    protocol    = "tcp"
    cidr_blocks = ["${var.vpc_address_pre}${var.vpc_address_suf}"]
  }

  # アウトバウンドルール
  egress {
    from_port   = 0
    to_port     = 0
    protocol    = "-1"
    cidr_blocks = ["0.0.0.0/0"]
  }
}
はい。
大したこと書いてないですね。
Azureとの違いを挙げるなら、NSGではVPN to VPNの通信をタグで許可すると、VPN接続先、今回だとオンプレミスのローカルネットワークアドレス帯が暗黙的にNSGのタグに含まれるため、追加でポリシーを記載する必要がありません。
AWSではそこは暗黙的に含まれない(ある意味当たり前)なので、明示的に開けています。
オンプレミスでFirewall機器やUTM機器を使ってVPNを張ったことがある方々であれば違和感なくご理解いただけるかなと思います。
VPNゲートウェイ関連
# ---------------------------
# VPN Gateway 作成
# ---------------------------
resource "aws_vpn_gateway" "vgw" {
  vpc_id = aws_vpc.vpc.id
  tags = {
    Name = "${var.env_type}-${var.sys_name}-vgw"
  }
}

# ---------------------------
# Customer Gateway 作成 (On-Premises 側ルーター)
# ---------------------------
resource "aws_customer_gateway" "cgw" {
  bgp_asn    = 65000 # default
  ip_address = "${var.rtx1300_gip_address}"
  type       = "ipsec.1"
  tags = {
    Name = "${var.env_type}-${var.sys_name}-cgw"
  }
}
はい。
ここも何の変哲もないVPN GatewayとCustomer Gatewayですね。
VPN接続
# ------------------------------
# VPN 接続作成
# ------------------------------

resource "aws_vpn_connection" "vpn_connection" {
  vpn_gateway_id           = aws_vpn_gateway.vgw.id
  customer_gateway_id      = aws_customer_gateway.cgw.id
  type                     = "ipsec.1"
  static_routes_only       = true
  tags = {
    Name = "${var.env_type}-${var.sys_name}-vpn-connection"
  }
}

resource "aws_vpn_connection_route" "on-premises-general-subnet" {
  destination_cidr_block = "${var.rtx1300_local_address01}"
  vpn_connection_id      = aws_vpn_connection.vpn_connection.id
}

resource "aws_vpn_connection_route" "on-premises-server-subnet" {
  destination_cidr_block = "${var.rtx1300_local_address02}"
  vpn_connection_id      = aws_vpn_connection.vpn_connection.id
}
はい。
ここも何の変哲もありませんが、我が家はネットワークが一般サブネットとサーバサブネットに分かれているので、変数やVPCのルートテーブルでも宣言している通りサブネット2つ接続しています。
EC2
# -------------------------------
# EC2作成
# -------------------------------

# -------------------------------
# Amazon Linux EC2を作成
# -------------------------------

# Amazon Linux 2023 の最新版AMIを取得
data "aws_ssm_parameter" "al2023-ami-kernel-default-x86_64" {
  name = "/aws/service/ami-amazon-linux-latest/al2023-ami-kernel-default-x86_64"
}

 resource "aws_spot_instance_request" "ec2_linux01" { #spot_priceを設定する。ムンバイリージョンではAvailability Zone CではSpot Instanceは使えない。
   spot_price                  = "0.0046"
   ami                         = data.aws_ssm_parameter.al2023-ami-kernel-default-x86_64.value
   instance_type               = var.ec2_instance_type_lin
   availability_zone           = var.availability_zone.b
   vpc_security_group_ids      = [aws_security_group.sg_ec2_linux01.id]
   subnet_id                   = aws_subnet.sn_private_1b.id
   associate_public_ip_address = "false"
   iam_instance_profile        = aws_iam_instance_profile.instance_prof.name
   user_data                   = <<-EOF
                                 #!/bin/bash
                                 sudo hostnamectl set-hostname ${var.env_type}-${var.sys_name}-ec2-linux01
                                 EOF

   root_block_device {
     volume_size = 30   # GB
     volume_type = "gp3" # 汎用SSD
     encrypted   = false
     tags        = {
       Snapshot = "false"
     }
   }
   tags = {
     Name = "${var.env_type}-${var.sys_name}-ec2-amazon-linux01"
   }
      depends_on = [
    aws_route_table_association.associate_rt_sn_private_1b_sn_private_1b
   ]
 }

# -------------------------------
# Windows Server EC2を作成
# -------------------------------

# -------------------------------
# Windows Server 用のKey pair作成
# -------------------------------
variable "key_name" {
  default = "kp-ec2-01"
}
variable "key_path" {
  # - Windowsの場合はフォルダを"\\"で区切る(エスケープする必要がある)実行中のtfファイルと同じ場所にキーファイルを出力する
  default = ".\\"
}
resource "tls_private_key" "kp-windows-ec2-01" {
  algorithm = "RSA"
  rsa_bits  = 2048
}

# クライアントPCにKey pair(秘密鍵と公開鍵)を作成
# - Windowsの場合はフォルダを"\\"で区切る(エスケープする必要がある)
# - [terraform apply] 実行後はクライアントPCの公開鍵は自動削除される
locals {
  public_key_file  = "${var.key_path}\\${var.key_name}.id_rsa.pub"
  private_key_file = "${var.key_path}\\${var.key_name}.id_rsa"
}

resource "local_file" "kp_windows_ec2_01_pem" {
  filename = "${local.private_key_file}"
  content  = "${tls_private_key.kp-windows-ec2-01.private_key_pem}"
}

# 上記で作成した公開鍵をAWSのKey pairにインポート
resource "aws_key_pair" "kp_windows_ec2_01" {
  key_name   = "${var.key_name}"
  public_key = "${tls_private_key.kp-windows-ec2-01.public_key_openssh}"
}

#20240523時点のAMI
#Microsoft Windows Server 2022 Base:ami-0f346136f3b372267
#Microsoft Windows Server 2019 Base:ami-01bd28d73d0053a15
#Microsoft Windows Server 2016 Base:ami-063d3d00f8a97a6d1

 resource "aws_spot_instance_request" "ec2_windows01" { #spot_priceを設定する。ムンバイリージョンではAvailability Zone CではSpot Instanceは使えない。
   spot_price                  = "0.1318"
   ami                         = "ami-0f346136f3b372267" #Microsoft Windows Server 2022 Base
   instance_type               = var.ec2_instance_type_win
   availability_zone           = var.availability_zone.b
   vpc_security_group_ids      = [aws_security_group.sg_ec2_windows01.id]
   subnet_id                   = aws_subnet.sn_private_1b.id
   associate_public_ip_address = "false"
   key_name                    = "${var.key_name}"
   iam_instance_profile        = aws_iam_instance_profile.instance_prof.name
   root_block_device {
     volume_size = 50   # GB
     volume_type = "gp3" # 汎用SSD
     encrypted   = false
     tags        = {
       Snapshot = "false"
     }
   }
   tags = {
     Name = "${var.env_type}-${var.sys_name}-ec2-windows01"
   }
   depends_on = [
    aws_route_table_association.associate_rt_sn_private_1b_sn_private_1b
   ]
 }
Windows EC2用の鍵ファイルの出力先をほんのちょっとだけ汎用的にしました。
そしてLinuxもWindowsもどっちもSpot Instanceで構築しています!
お金、大事ですもんね!(例のごとく自腹環境です)
output
# ---------------------------
# Output
# ---------------------------

# 作成したWindows EC2 のパブリックIPアドレスを出力
output "aws_spot_instance_request_global_ips" {
   value = aws_spot_instance_request.ec2_windows01.*.public_ip
 }
WindowsのEC2のPublic IP Address(Elastic IP Address)を出力しようとしてるんですが、EC2のコードでPublic IPの項目をFalseにしてるんで出てきません。
このファイルも無いとコケるんでなんでも良いんですが、今回は適当にこれにしました。
NAT Gateway建ててるならそのPublic IP Addressとか出力すると良いですね。
今回はそこまでしてないのでこれでいっちゃいます。
Terraform実行結果
今回の検証で知ったんですけど、vs code内でコマンド実行できるんですね。
めっちゃ便利。
下の赤枠内です。
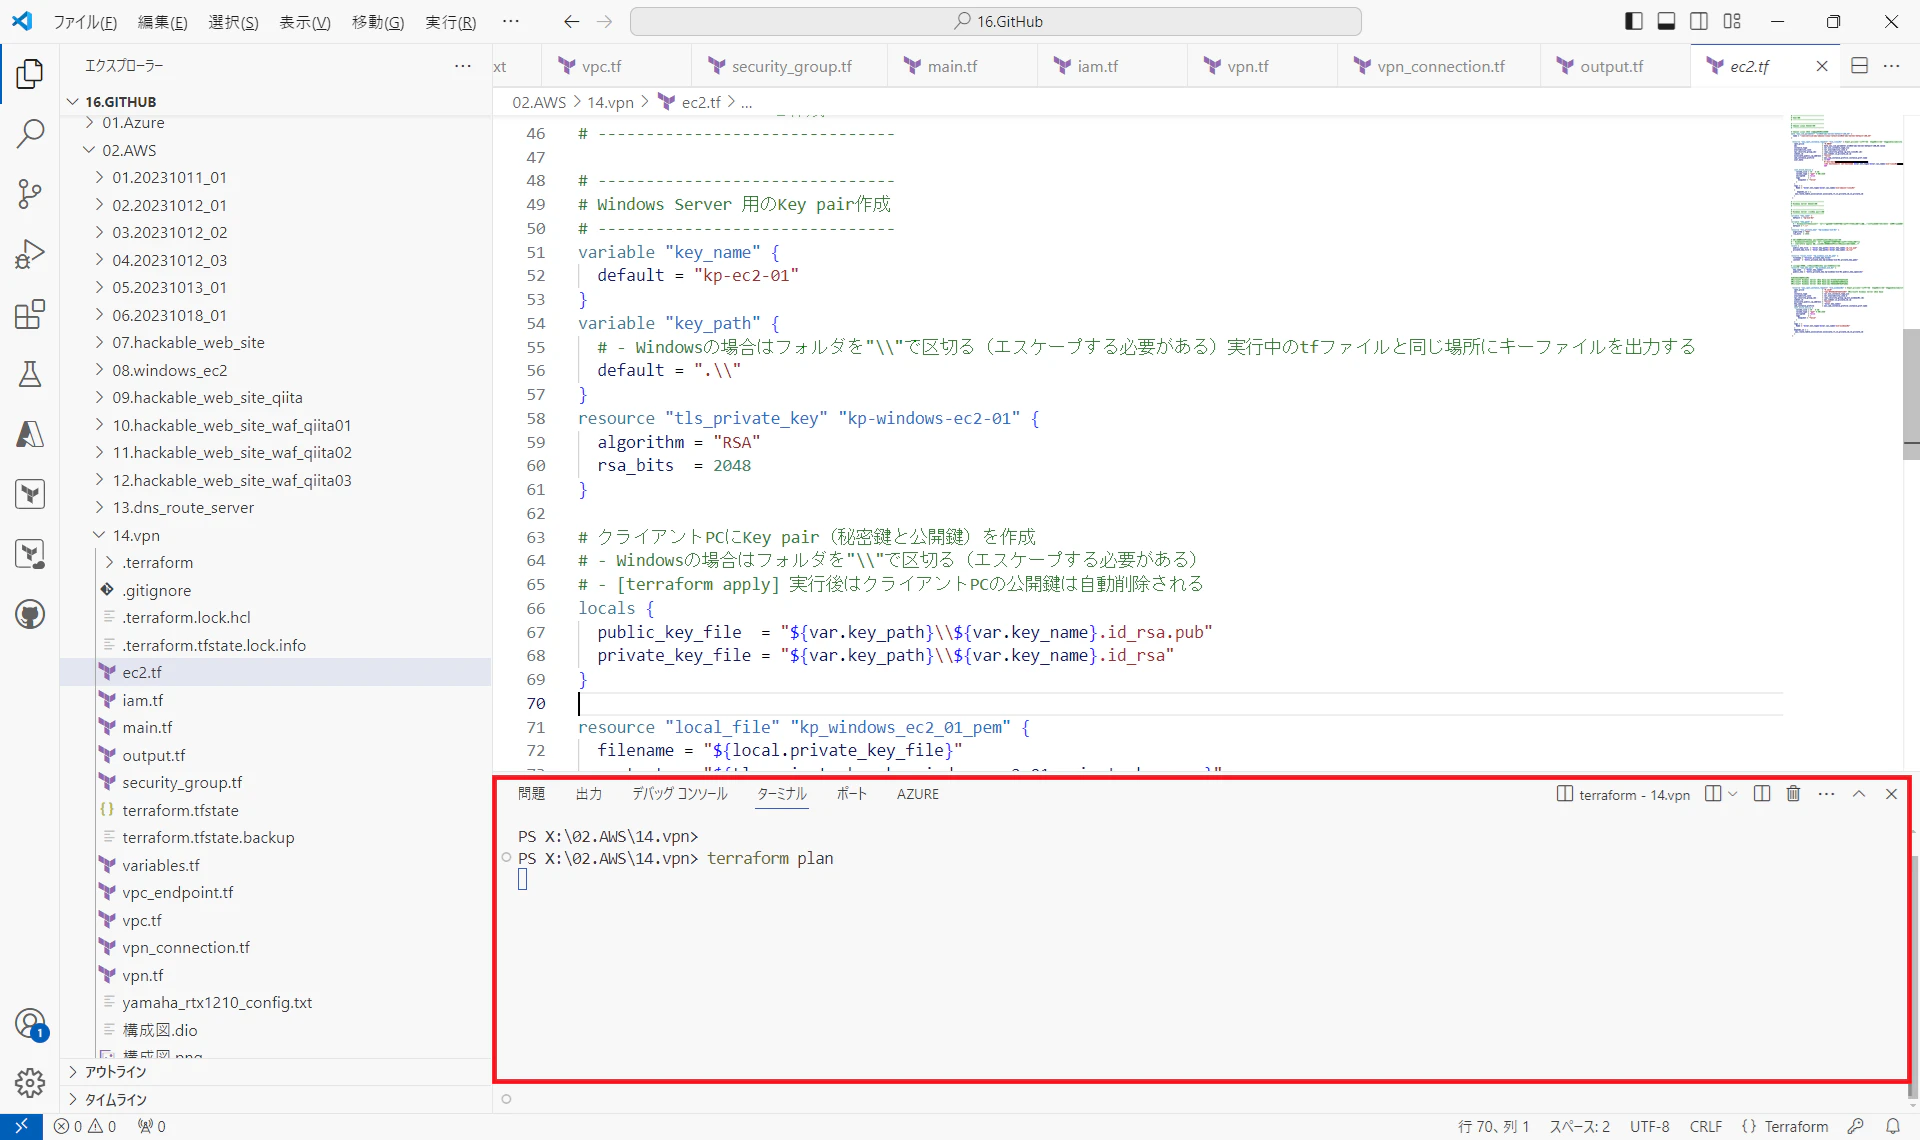
terraform plan実行して問題ないよ、って言われてるんで実行しちゃいましょう。
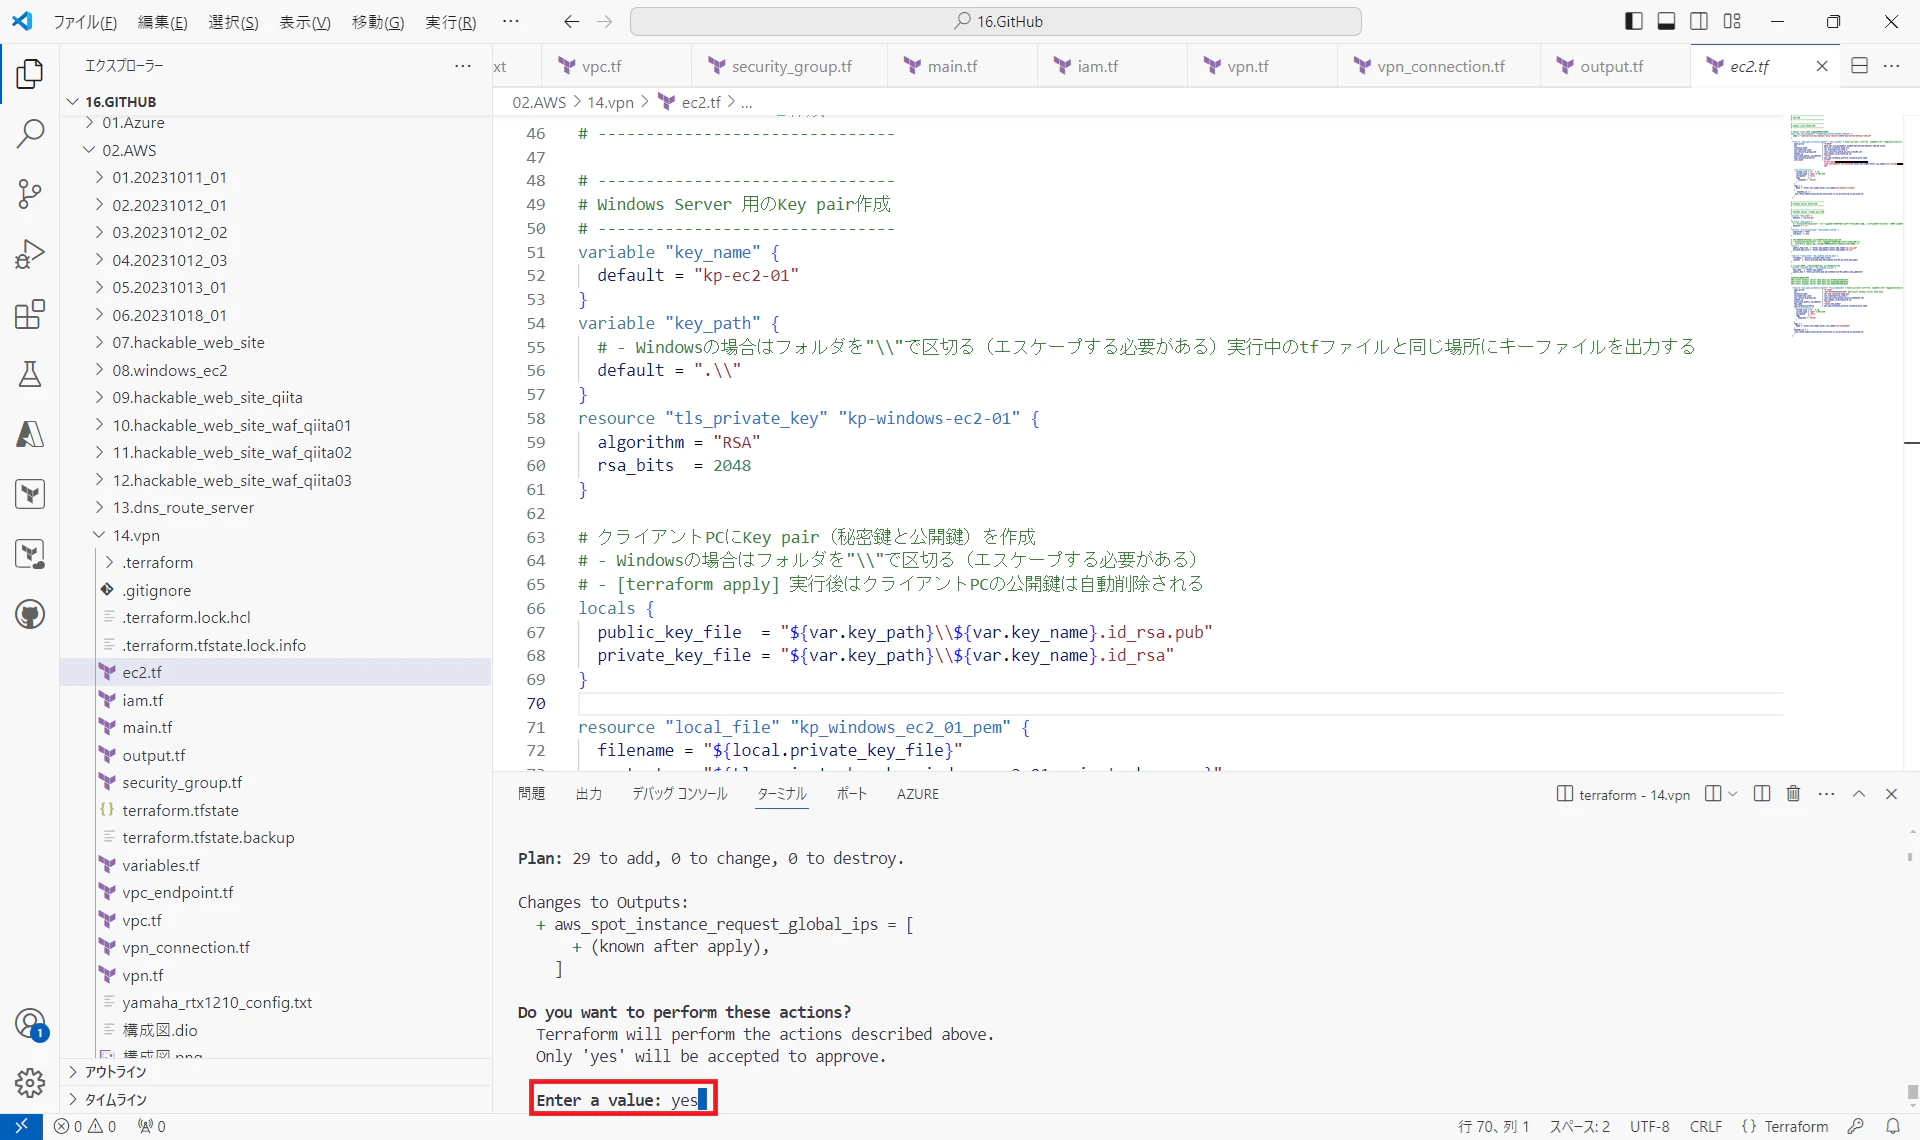
terraform applyからの

yesで!
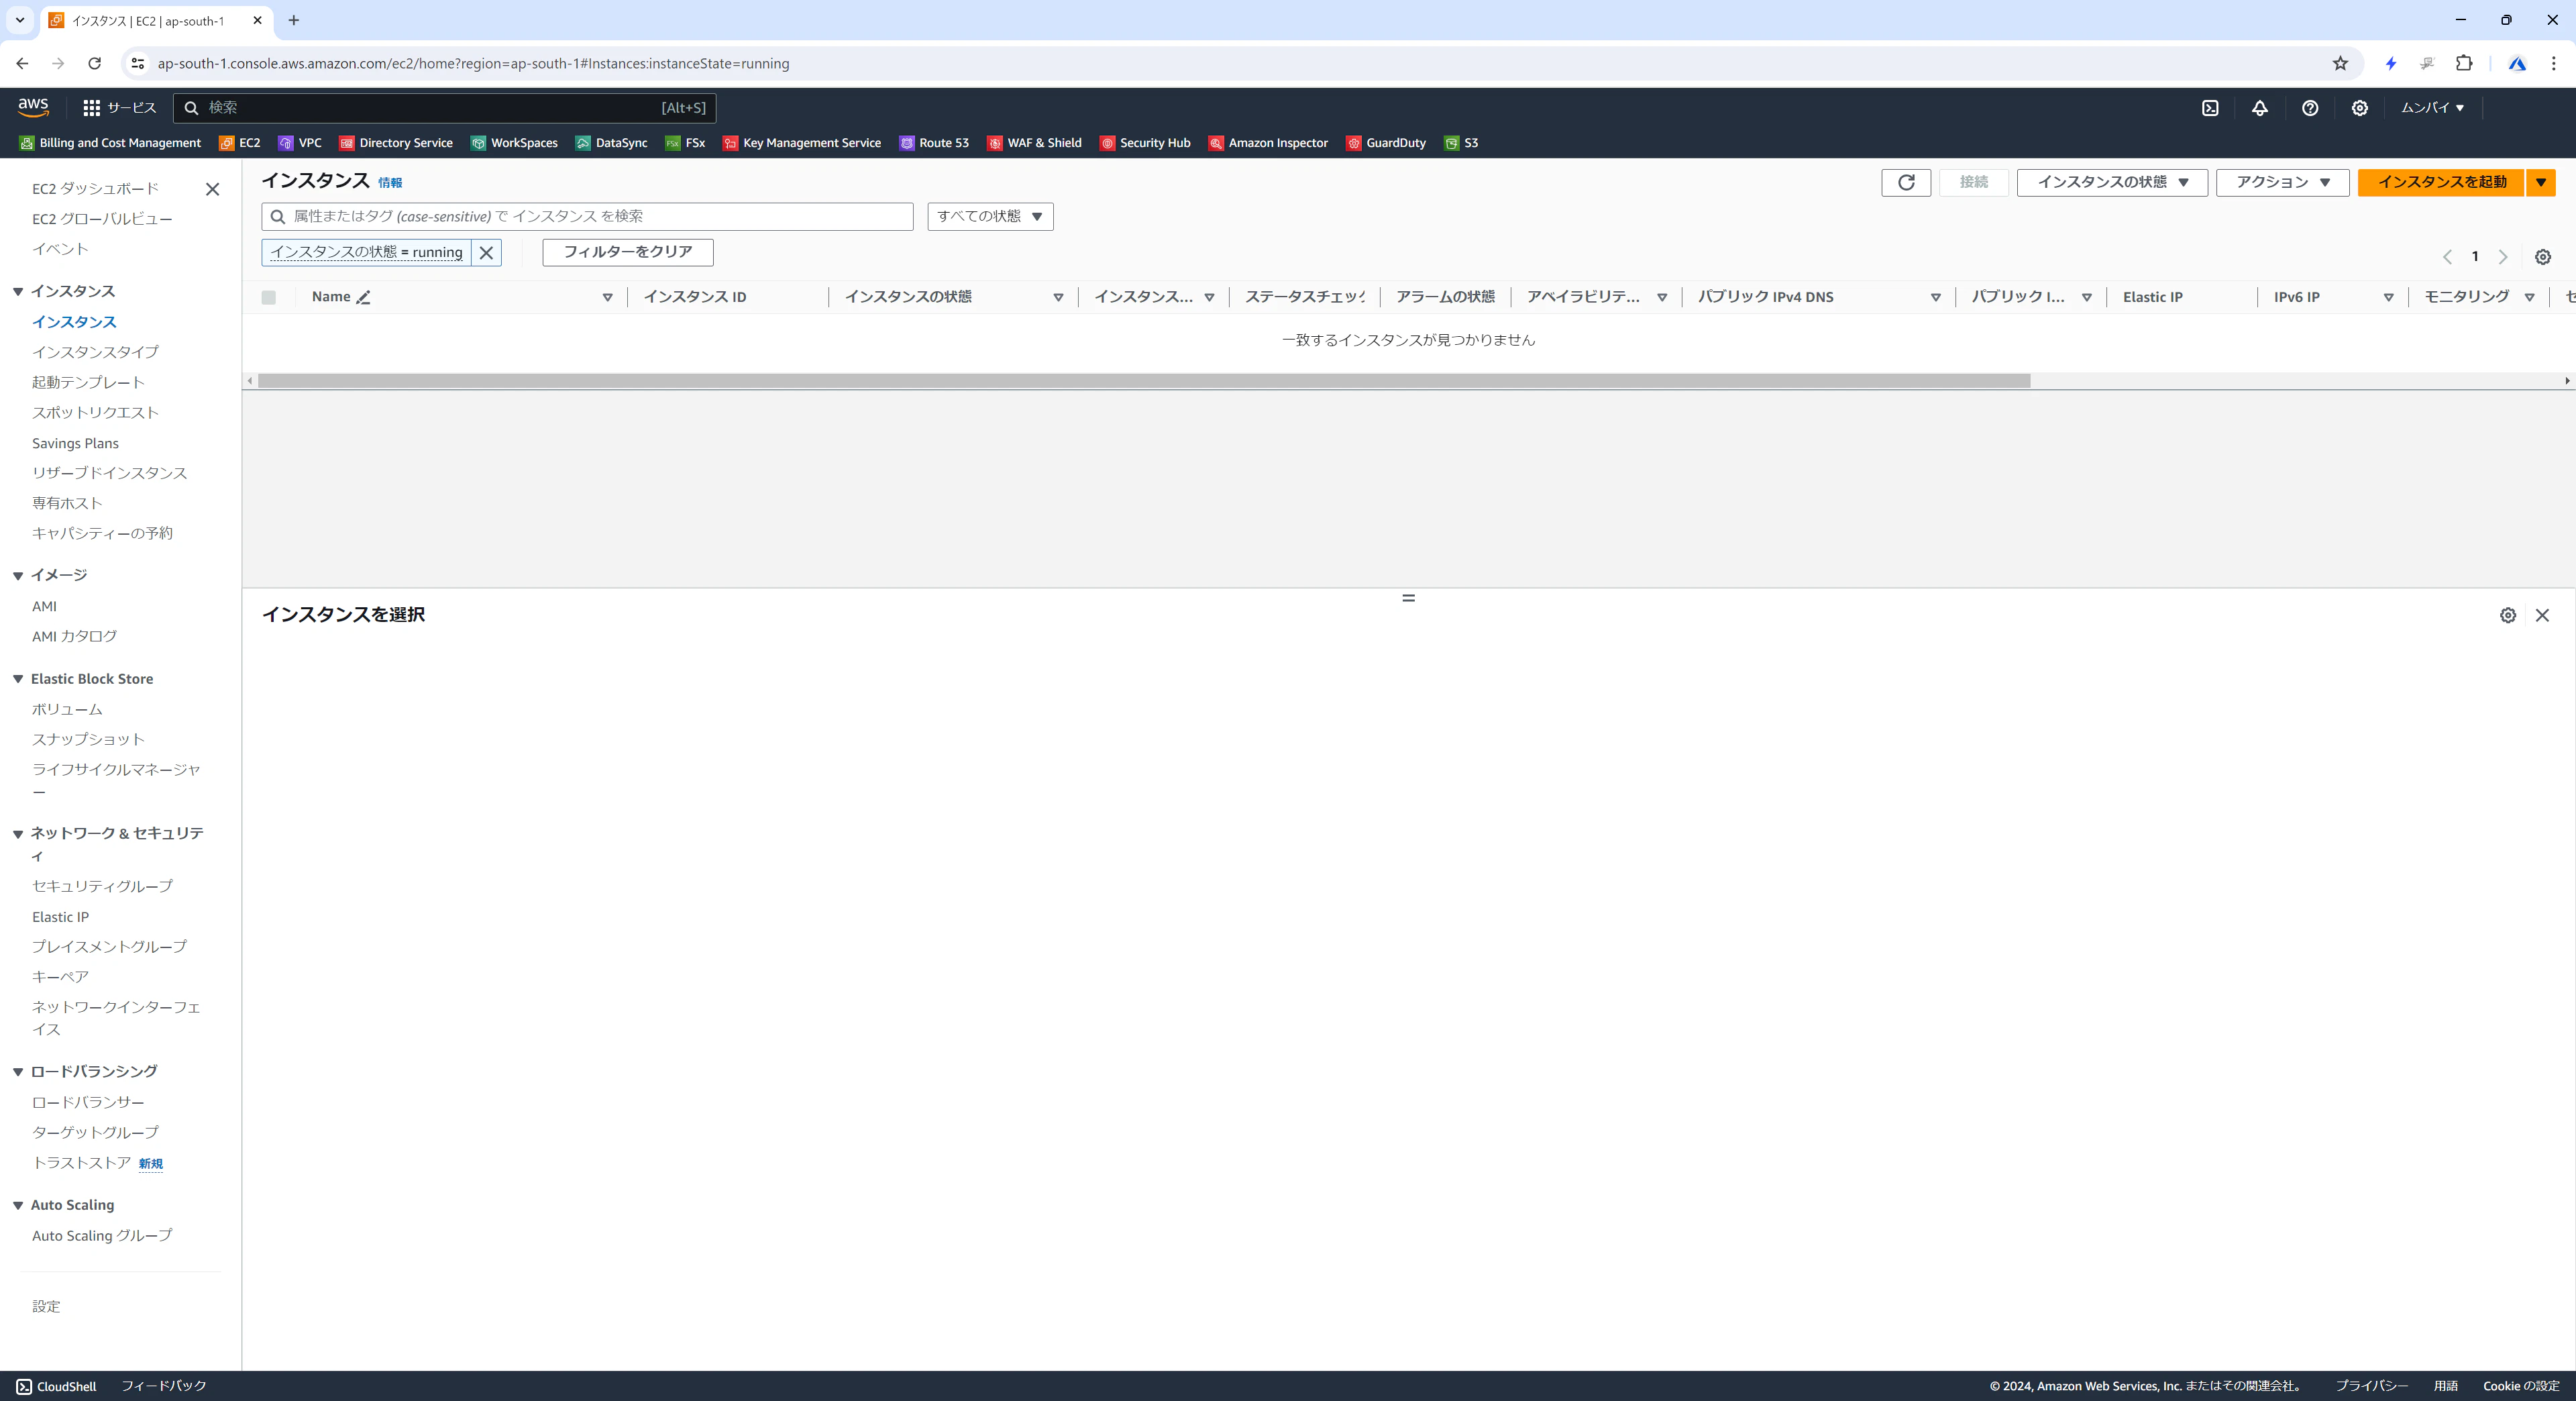
こうやって何もない環境に
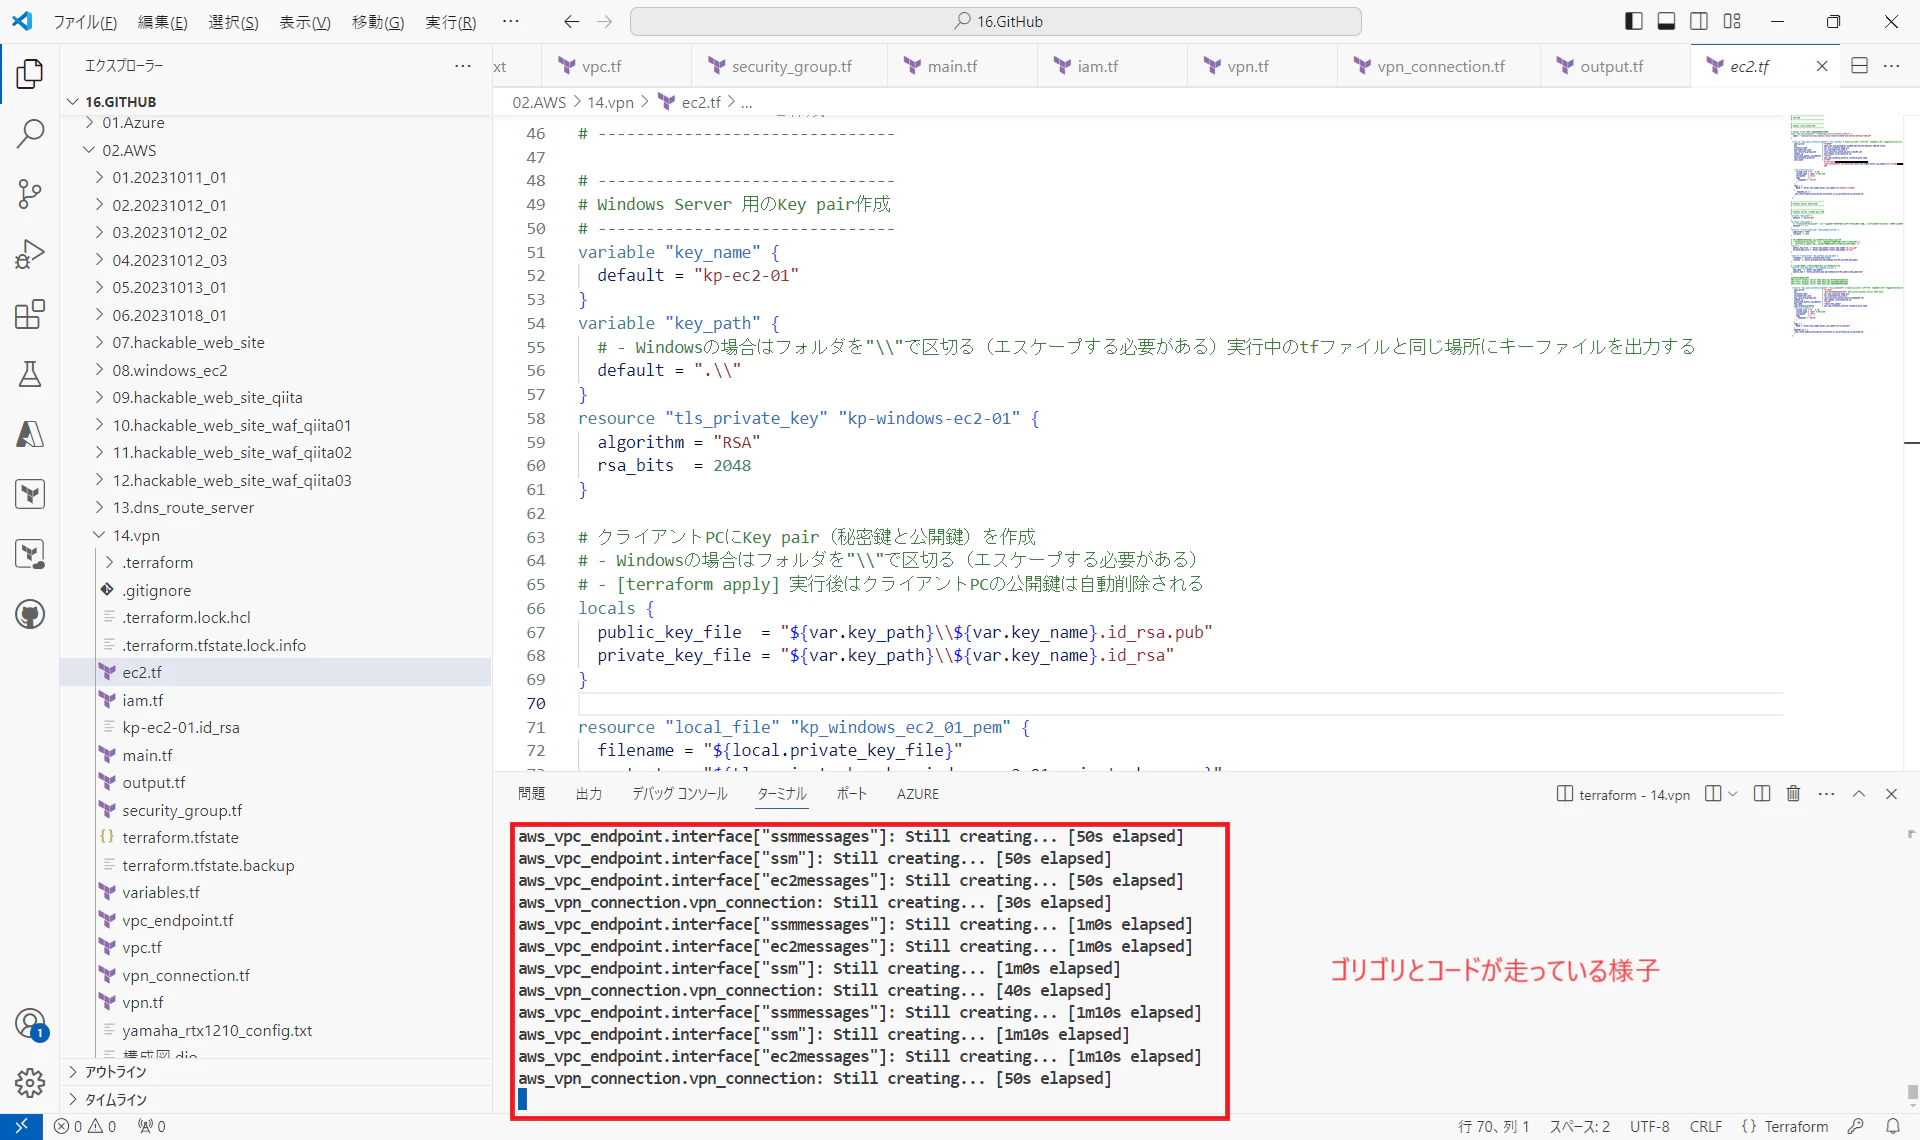
ゴリゴリとコードが走った後に
こうやって思った通りのマシンができると嬉しいですね!
はい。
完了しました。
AWSとのVPN(IKEv2)接続
はい。
では本記事の本懐いってみましょう。
設定のダウンロード
下画像の赤枠内の通りAWS ConsoleからVPC内の仮想プライベートネットワーク(VPN)配下にあるSite-to-Site VPN接続をクリックします。

画面が遷移したらTerraformで構築したリソースを選択し、設定をダウンロードするをクリックします。
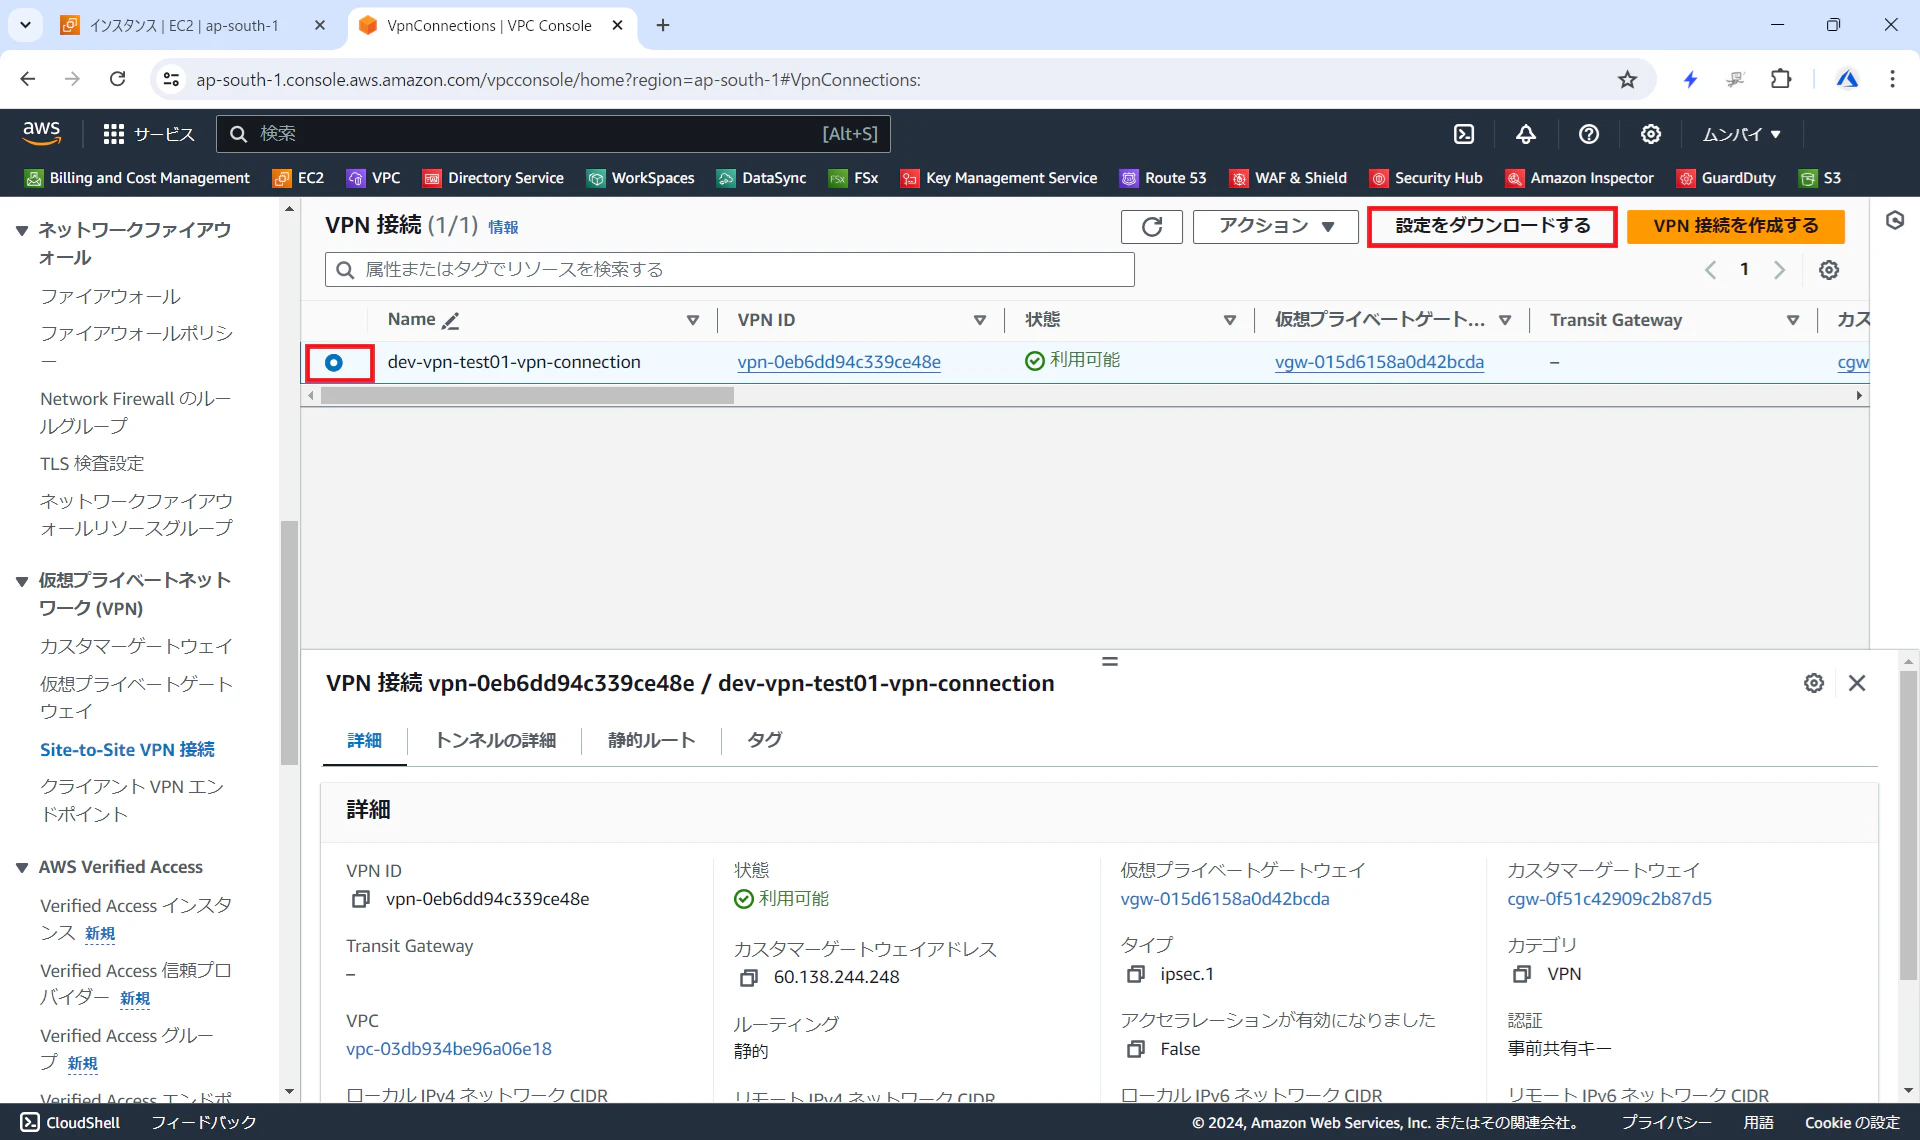
やいのやいの指示を求める画面が出てくるので、指定しましょう。
今回は表題の通りYAMAHA RTXシリーズでIKEv2なので、以下の画像のようになりますね。

これでダウンロードをクリックします。
この機能、便利ですよね。
この機能はAzureにはありません!
さすがAWSさん!
素晴らしい!
AWS Consoleから出力されたConfigファイル
はい。
もうそのままはっちゃいましょう。
# Amazon Web Services
# Virtual Private Cloud

# AWS utilizes unique identifiers to manage the configuration of
# a VPN Connection. Each VPN Connection is assigned an identifier and is
# associated with two other identifiers, namely the
# Customer Gateway Identifier and Virtual Private Gateway Identifier.
#
# Your VPN Connection ID  		    : vpn-0eb6dd94c339ce48e
# Your Virtual Private Gateway ID           : vgw-015d6158a0d42bcda
# Your Customer Gateway ID 		    : cgw-0f51c42909c2b87d5
#
#
# This configuration consists of two tunnels. Both tunnels must be
# configured on your Customer Gateway.
#

# Before configuring the tunnels run the following command to enable the IPSec feature:
  ipsec use on

# --------------------------------------------------------------------------------
# IPSec Tunnel #1
# --------------------------------------------------------------------------------


# #1: Internet Key Exchange (IKE) Configuration
#
# A policy is established for the supported ISAKMP encryption,
# authentication, Diffie-Hellman, lifetime, and key parameters.
#
# Please note, these sample configurations are for the minimum requirement of AES128, SHA1, and DH Group 2.
# Category "VPN" connections in the GovCloud region have a minimum requirement of AES128, SHA2, and DH Group 14.
# You will need to modify these sample configuration files to take advantage of AES256, SHA256, or other DH groups like 2, 14-18, 22, 23, and 24.
# NOTE: If you customized tunnel options when creating or modifying your VPN connection, you may need to modify these sample configurations to match the custom settings for your tunnels.
#
# Higher parameters are only available for VPNs of category "VPN," and not for "VPN-Classic".
# The address of the external interface for your customer gateway must be a static address.
# Your customer gateway may reside behind a device performing network address translation (NAT).
# To ensure that NAT traversal (NAT-T) can function, you must adjust your firewall !rules to unblock UDP port 4500.
# If not behind NAT, and you are not using an Accelerated VPN, we recommend disabling NAT-T. If you are using an Accelerated VPN, make sure that NAT-T is enabled.

tunnel select 1

# Note that there are a global list of IPSec policies, each identified by
# sequence number. This policy is defined as #201, which may conflict with
# an existing policy using the same number. If so, we recommend changing
# the sequence number to avoid conflicts.

 ipsec tunnel 201
  ipsec ike version 1 2
  ipsec ike duration isakmp-sa 1 28800
  ipsec ike encryption 1 aes-cbc
  ipsec ike group 1 modp1024
  ipsec ike hash 1 sha
  ipsec ike pre-shared-key 1 text _8033bndSGP6oQFGWoNDCqdWQpsAB_O6

# #2: IPSec Configuration

# The IPSec policy defines the encryption, authentication, and IPSec
# mode parameters.
# Category "VPN" connections in the GovCloud region have a minimum requirement of AES128, SHA2, and DH Group 14.
# Please note, you may use these additionally supported IPSec parameters for encryption like AES256 and other DH groups like 2, 5, 14-18, 22, 23, and 24.
# NOTE: If you customized tunnel options when creating or modifying your VPN connection, you may need to modify these sample configurations to match the custom settings for your tunnels.
#
# Higher parameters are only available for VPNs of category "VPN," and not for "VPN-Classic".
#

  ipsec sa policy 201 1 esp aes-cbc sha-hmac
  ipsec ike duration ipsec-sa 1 3600
  ipsec ike pfs 1 on
  ipsec ike message-id-control 1 on
  ipsec ike child-exchange type 1 2
  ipsec ike keepalive use 1 on rfc4306 10 3

# --------------------------------------------------------------------------------
# #3: Tunnel Interface Configuration
#
# A tunnel interface is configured to be the logical interface associated
# with the tunnel. All traffic routed to the tunnel interface will be
# encrypted and transmitted to the VPC. Similarly, traffic from the VPC
# will be logically received on this interface.
#
# The address of the interface is configured with the setup for your
# Customer Gateway.  If the address changes, the Customer Gateway and VPN
# Connection must be recreated with Amazon VPC.
#
  ipsec ike local address 1 60.138.244.248
  ipsec ike local name 1 60.138.244.248 ipv4-addr
  ipsec ike remote address 1 3.6.75.13
  ipsec ike remote name 1 3.6.75.13 ipv4-addr
  ipsec ike negotiation receive 1 off
 ipsec tunnel outer df-bit clear
	ip tunnel address 169.254.80.210/255.255.255.252
	ip tunnel remote address 169.254.80.209
 ip tunnel tcp mss limit auto
 tunnel enable 1
tunnel select none
ipsec auto refresh on

# --------------------------------------------------------------------------------

# ----------------------------------------------------------------------------
# #4 Static Route Configuration
#
# Your Customer Gateway needs to set a static route for the prefix
# corresponding to your VPC to send traffic over the tunnel interface.
# An example for a VPC with the prefix 10.0.0.0/16, where tunnel 1 is the
# preferred tunnel, is provided below:
# ip route 10.0.0.0/16 gateway tunnel 1 keepalive 1 gateway tunnel 2 weight 0
#
# Keepalive is used to provide a failover between the two tunnels.
# If the primary tunnel fails, the redundant tunnel will automatically be used.
# This keepalive is defined as keepalive 1, which may conflict with an existing
# keepalive using same number. If so, we recommend changing the keepalive
#  number to avoid conflicts.
#
# ip keepalive 1 icmp-echo 1 5 169.254.80.209
# exit


# --------------------------------------------------------------------------------
# IPSec Tunnel #2
# --------------------------------------------------------------------------------


# #1: Internet Key Exchange (IKE) Configuration
#
# A policy is established for the supported ISAKMP encryption,
# authentication, Diffie-Hellman, lifetime, and key parameters.
#
# Please note, these sample configurations are for the minimum requirement of AES128, SHA1, and DH Group 2.
# Category "VPN" connections in the GovCloud region have a minimum requirement of AES128, SHA2, and DH Group 14.
# You will need to modify these sample configuration files to take advantage of AES256, SHA256, or other DH groups like 2, 14-18, 22, 23, and 24.
# NOTE: If you customized tunnel options when creating or modifying your VPN connection, you may need to modify these sample configurations to match the custom settings for your tunnels.
#
# Higher parameters are only available for VPNs of category "VPN," and not for "VPN-Classic".
# The address of the external interface for your customer gateway must be a static address.
# Your customer gateway may reside behind a device performing network address translation (NAT).
# To ensure that NAT traversal (NAT-T) can function, you must adjust your firewall !rules to unblock UDP port 4500.
# If not behind NAT, and you are not using an Accelerated VPN, we recommend disabling NAT-T. If you are using an Accelerated VPN, make sure that NAT-T is enabled.

tunnel select 2

# Note that there are a global list of IPSec policies, each identified by
# sequence number. This policy is defined as #202, which may conflict with
# an existing policy using the same number. If so, we recommend changing
# the sequence number to avoid conflicts.

 ipsec tunnel 202
  ipsec ike version 2 2
  ipsec ike duration isakmp-sa 2 28800
  ipsec ike encryption 2 aes-cbc
  ipsec ike group 2 modp1024
  ipsec ike hash 2 sha
  ipsec ike pre-shared-key 2 text 5LBvQXUQYanIovxYXzk4YJce55blnrqb

# #2: IPSec Configuration

# The IPSec policy defines the encryption, authentication, and IPSec
# mode parameters.
# Category "VPN" connections in the GovCloud region have a minimum requirement of AES128, SHA2, and DH Group 14.
# Please note, you may use these additionally supported IPSec parameters for encryption like AES256 and other DH groups like 2, 5, 14-18, 22, 23, and 24.
# NOTE: If you customized tunnel options when creating or modifying your VPN connection, you may need to modify these sample configurations to match the custom settings for your tunnels.
#
# Higher parameters are only available for VPNs of category "VPN," and not for "VPN-Classic".
#

  ipsec sa policy 202 2 esp aes-cbc sha-hmac
  ipsec ike duration ipsec-sa 2 3600
  ipsec ike pfs 2 on
  ipsec ike message-id-control 2 on
  ipsec ike child-exchange type 2 2
  ipsec ike keepalive use 2 on rfc4306 10 3

# --------------------------------------------------------------------------------
# #3: Tunnel Interface Configuration
#
# A tunnel interface is configured to be the logical interface associated
# with the tunnel. All traffic routed to the tunnel interface will be
# encrypted and transmitted to the VPC. Similarly, traffic from the VPC
# will be logically received on this interface.
#
# The address of the interface is configured with the setup for your
# Customer Gateway.  If the address changes, the Customer Gateway and VPN
# Connection must be recreated with Amazon VPC.
#
  ipsec ike local address 2 60.138.244.248
  ipsec ike local name 2 60.138.244.248 ipv4-addr
  ipsec ike remote address 2 52.66.157.101
  ipsec ike remote name 2 52.66.157.101 ipv4-addr
  ipsec ike negotiation receive 2 off
 ipsec tunnel outer df-bit clear
	ip tunnel address 169.254.57.206/255.255.255.252
	ip tunnel remote address 169.254.57.205
 ip tunnel tcp mss limit auto
 tunnel enable 2
tunnel select none
ipsec auto refresh on

# --------------------------------------------------------------------------------

# ----------------------------------------------------------------------------
# #4 Static Route Configuration
#
# Your Customer Gateway needs to set a static route for the prefix
# corresponding to your VPC to send traffic over the tunnel interface.
# An example for a VPC with the prefix 10.0.0.0/16, where tunnel 1 is the
# preferred tunnel, is provided below:
# ip route 10.0.0.0/16 gateway tunnel 1 keepalive 1 gateway tunnel 2 weight 0
#
# Keepalive is used to provide a failover between the two tunnels.
# If the primary tunnel fails, the redundant tunnel will automatically be used.
# This keepalive is defined as keepalive 1, which may conflict with an existing
# keepalive using same number. If so, we recommend changing the keepalive
#  number to avoid conflicts.
#
# ip keepalive 1 icmp-echo 1 5 169.254.80.209
# exit


# Additional Notes and Questions

#  - Amazon Virtual Private Cloud Getting Started Guide:
#       http://docs.amazonwebservices.com/AmazonVPC/latest/GettingStartedGuide
#  - Amazon Virtual Private Cloud Network Administrator Guide:
#       http://docs.amazonwebservices.com/AmazonVPC/latest/NetworkAdminGuide
#  - Yamaha router's manual:
#	 http://www.rtpro.yamaha.co.jp/RT/docs/amazon-vpc/index.html
#  - Yamaha router's NAT settings in IPsec:
#        http://www.rtpro.yamaha.co.jp/RT/docs/ipsec/nat.html
もうそのまんまYAMAHA RTXシリーズのConfigファイルですね。
ただこれ、一部間違っているのでこのままではAWS VPN GatewayとVPN Connectionで作成した各種リソース群(Customer Gatewayも)とVPN張れません。
修正箇所はYAMAHAさんの公式サイトで言及されている部分、今回上に張っているConfigだと
ipsec ike local address 1 60.138.244.248
と
ipsec ike local address 2 60.138.244.248
になります。
それぞれオンプレミス側VPN機器、今回だとRTX1210のグローバルIPアドレスですね。
AWSはデフォルトでYAMAHA RTXシリーズと2本VPN張る仕様なんで、2本トンネル設定が存在しますね。
この辺もAzureと違って堅牢だなと思います
Azureはデフォルトだと1本です。
やっぱりAWSさん凄い!
欲を言うなら、以前の記事でも書いてる通りAzureはオンプレミスルーターの宛先をFQDNでも指定できるようになっているので、AWSさんもFQDNを指定可能にしてもらいたいですね。
修正Config
ipsec ike local address 1 60.138.244.248
と
ipsec ike local address 2 60.138.244.248
を
ipsec ike local address 1 192.168.11.1
と
ipsec ike local address 2 192.168.11.1
に変更します。
それぞれオンプレミスルーターのグローバルIPアドレスが指定されていた個所を、ローカルIPアドレスに変更します。
もうちょっと言及すると、AWS側にCustomer Gatewayで定義しているセグメントに含まれるローカルIPアドレス、ですね。
はい。ここまでは一般的な修正箇所です。
ぼくのかんがえたさいきょうのVPN設定
はい。
ここまでは一般的ですね。
ここでタイトル回収します。
AWSさんの出力するRTXシリースのConfigがファームウェア10という古いものなので仕方がないのかもしれませんが、ハッシュ形式が2本のVPNともsha1です。
ご存じの通りsha1は2017年にハッシュ衝突という脆弱性が見つかっているので、これを使い続けるわけにはいきません。
なのでここも修正します。
ついでにAESも128Bitなので256Bitに、DHもグループ2からグループ5に変更します。
「ぼくのかんがえたさいきょうのVPN」とか言いながらなんてことないですね。
現場レベルだと既に実装済みの設定かなという感じです。
ちょっと修正箇所が多いのでトンネル1本目と2本目それぞれわけて記載します。
まずはトンネル1本目
~省略~
  ipsec ike encryption 1 aes-cbc
  ipsec ike group 1 modp1024
  ipsec ike hash 1 sha
~省略~
  ipsec sa policy 201 1 esp aes-cbc sha-hmac
を
~省略~
  ipsec ike encryption 1 aes256-cbc
  ipsec ike group 1 modp1536
  ipsec ike hash 1 sha256
~省略~
  ipsec sa policy 201 1 esp aes256-cbc sha256-hmac
にします。
次にトンネル2本目です。
~省略~
  ipsec ike encryption 2 aes-cbc
  ipsec ike group 2 modp1024
  ipsec ike hash 2 sha
~省略~
  ipsec sa policy 202 2 esp aes-cbc sha-hmac
を
~省略~
  ipsec ike encryption 2 aes256-cbc
  ipsec ike group 2 modp1536
  ipsec ike hash 2 sha256
~省略~
  ipsec sa policy 202 2 esp aes256-cbc sha256-hmac
にします。
はい。
こんなもんですかね。
VPN機器の脆弱性が狙われる昨今なので、VPN機器のファームウェア更新が行われた際にVPNに必要なパラメーターでより強力なハッシュ形式、暗号化形式がサポートされていないか確認し、都度Configに修正をかけていきましょう。
最後にルーティング追加
AWSさんのConfigではなぜかルーティングの設定がコメント内に記載されているだけにとどめられています。
たぶんルーティングはスタティックかBGPかどっちにするかは要件次第なので、どちらでもいけるようにスタティックルートはこうなるよ、とコメント内の記載にとどめているのでしょうね。
今回のTerraformだと以下のスタティックルートになります。
ip route 10.0.0.0/23 gateway tunnel 1 keepalive 1 gateway tunnel 2 weight 0
はい。
では接続確認いってみましょう。
接続確認
はい。
ではお待ちかねの接続確認です。
まずはLinuxから。

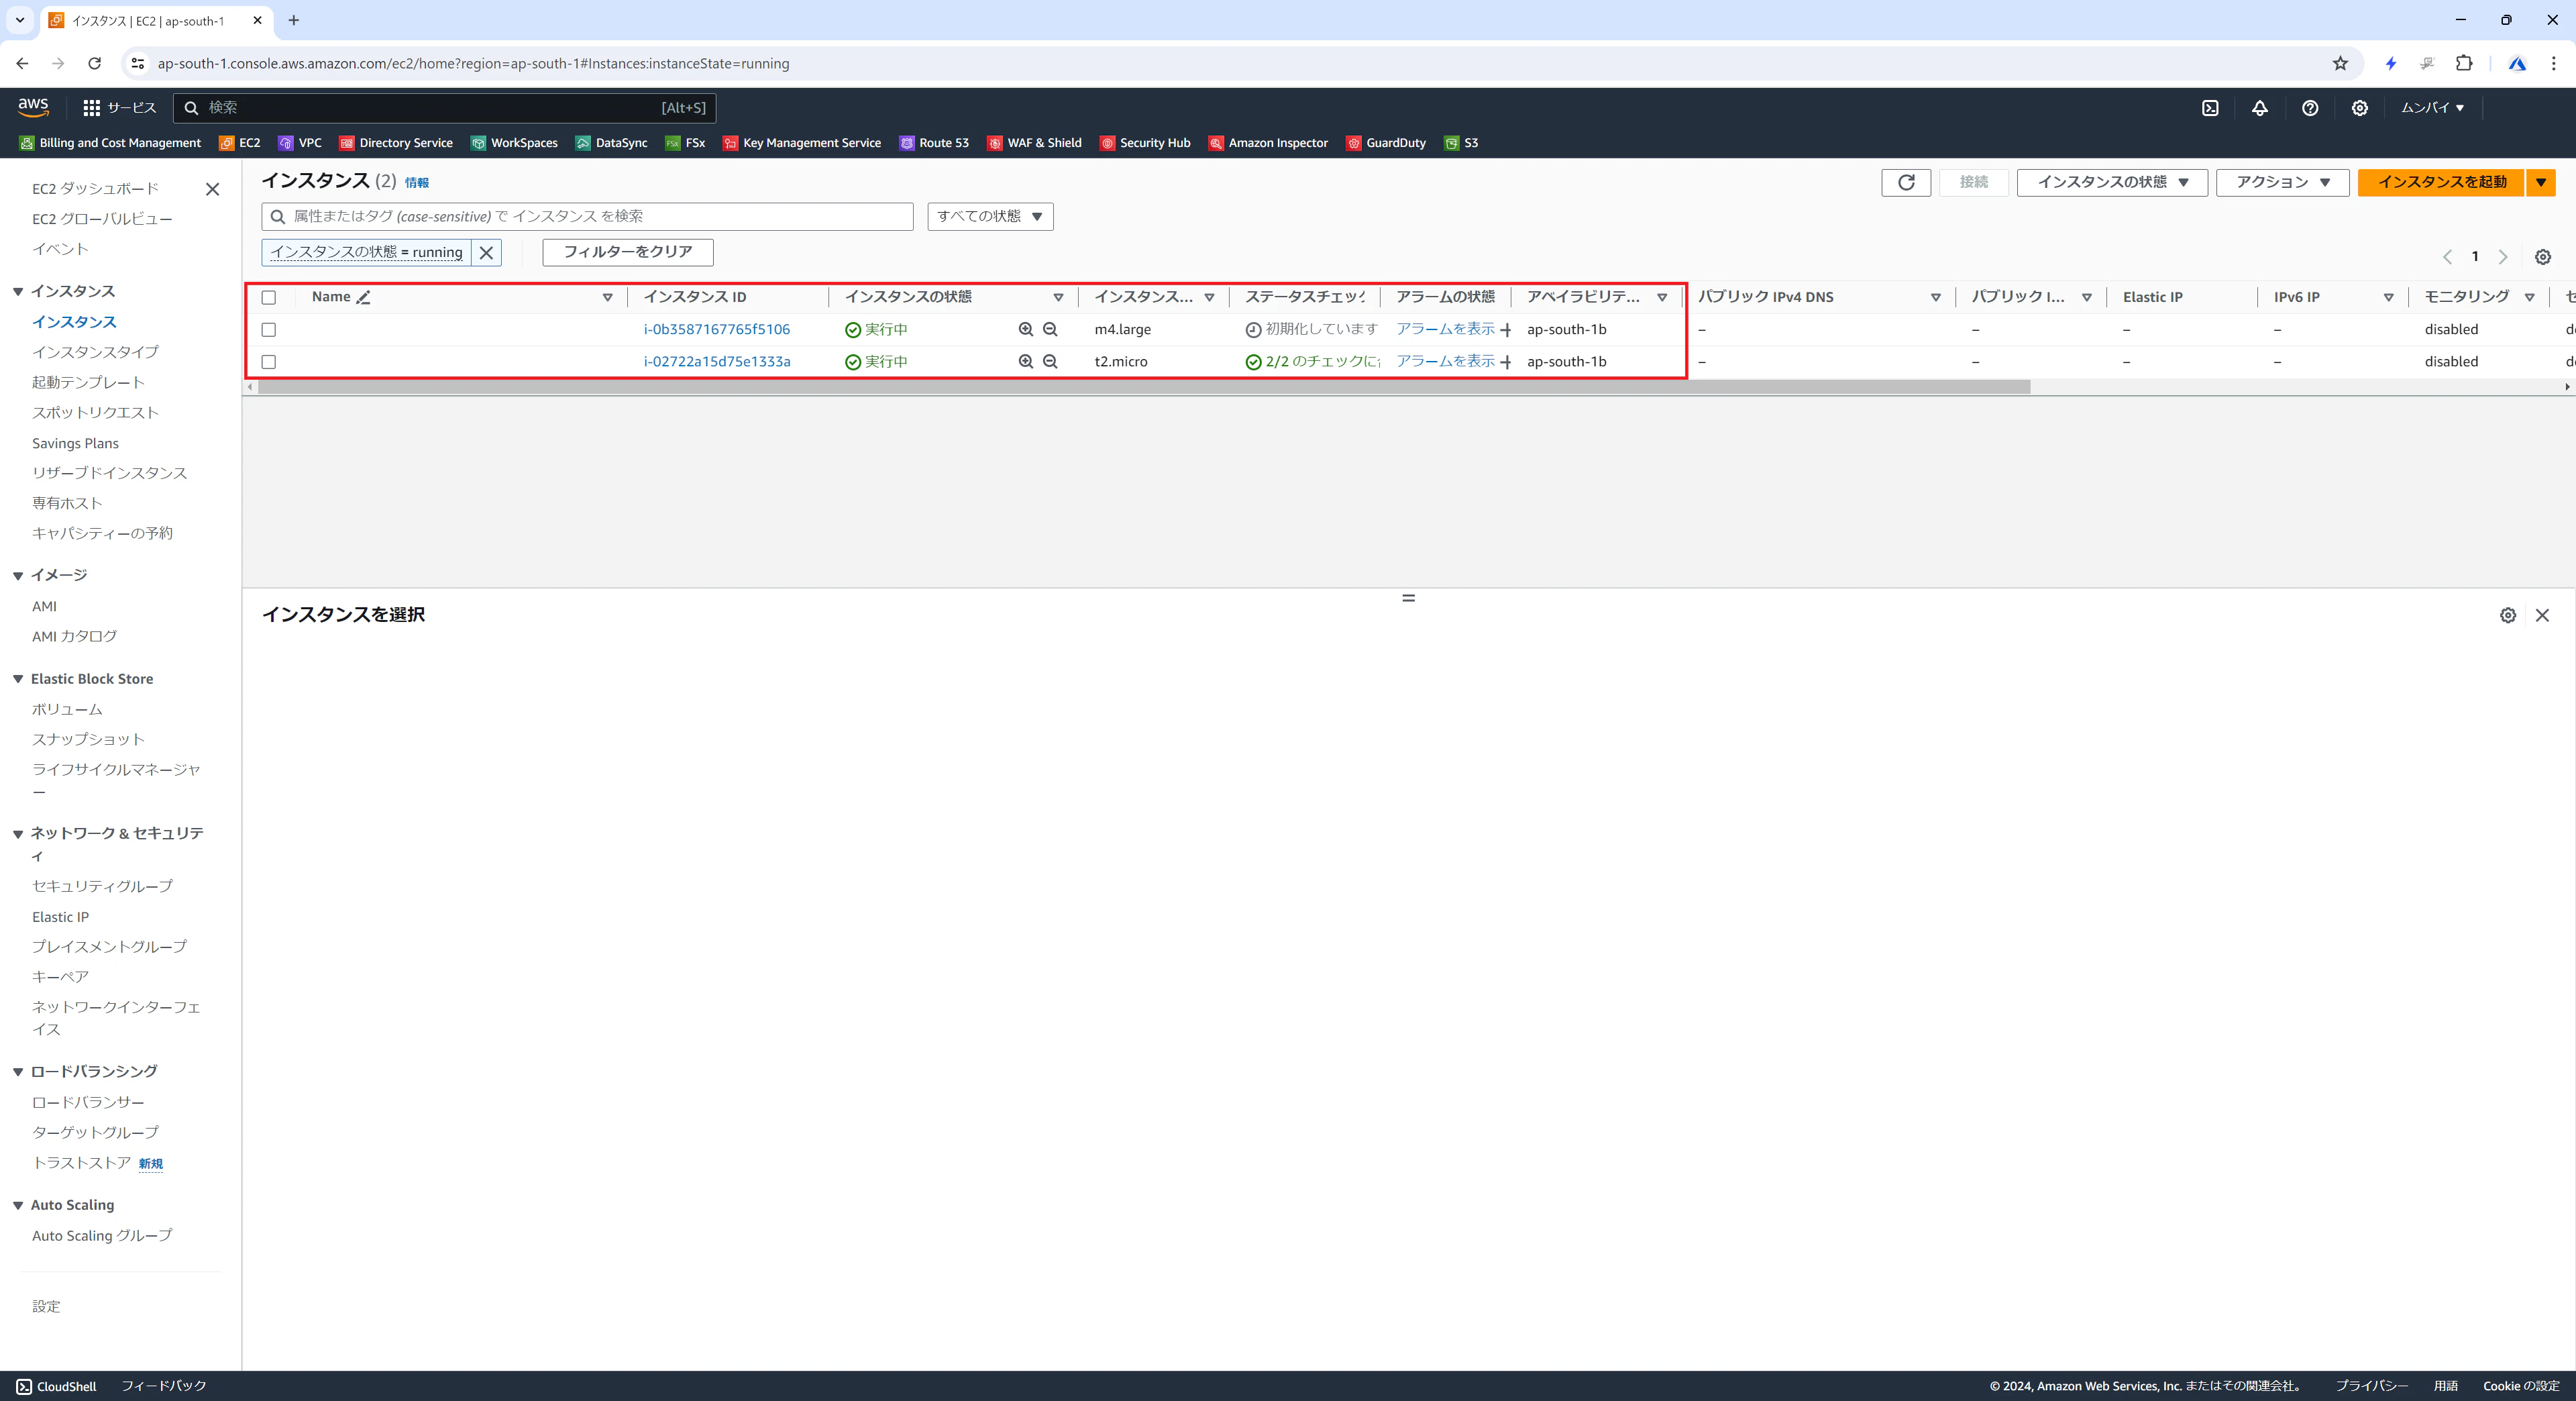
10.0.1.84がAWS上のLinuxのIPアドレスなので、Ping打ってみましょう。
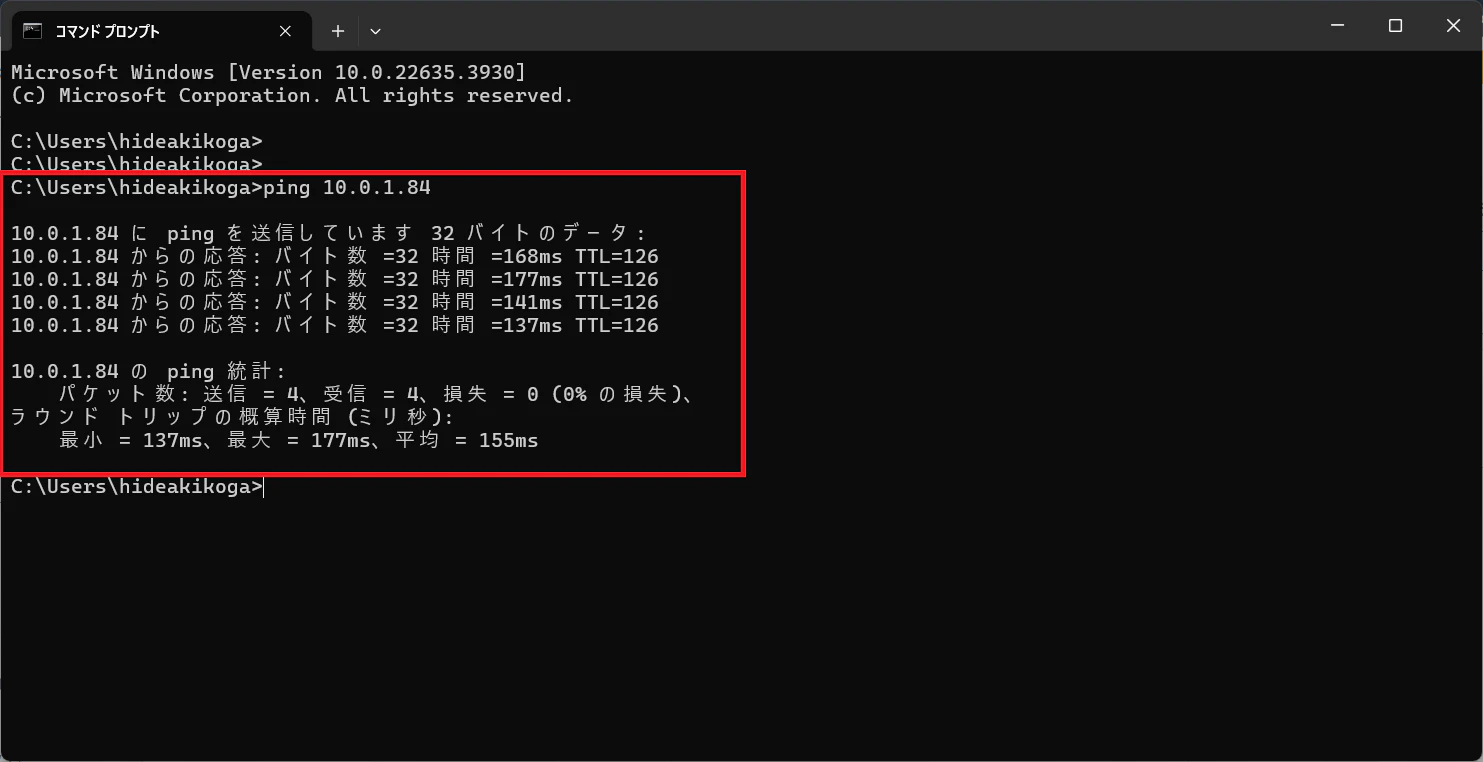
完璧ですね!
SSHも

完璧ですね!
続いてWindowsですが、Windows Defender FirewallのデフォルトネットワークプロファイルがPublicであることを考慮し、TNCを使います。
まずはAWS上のWindowsのIPアドレスですが
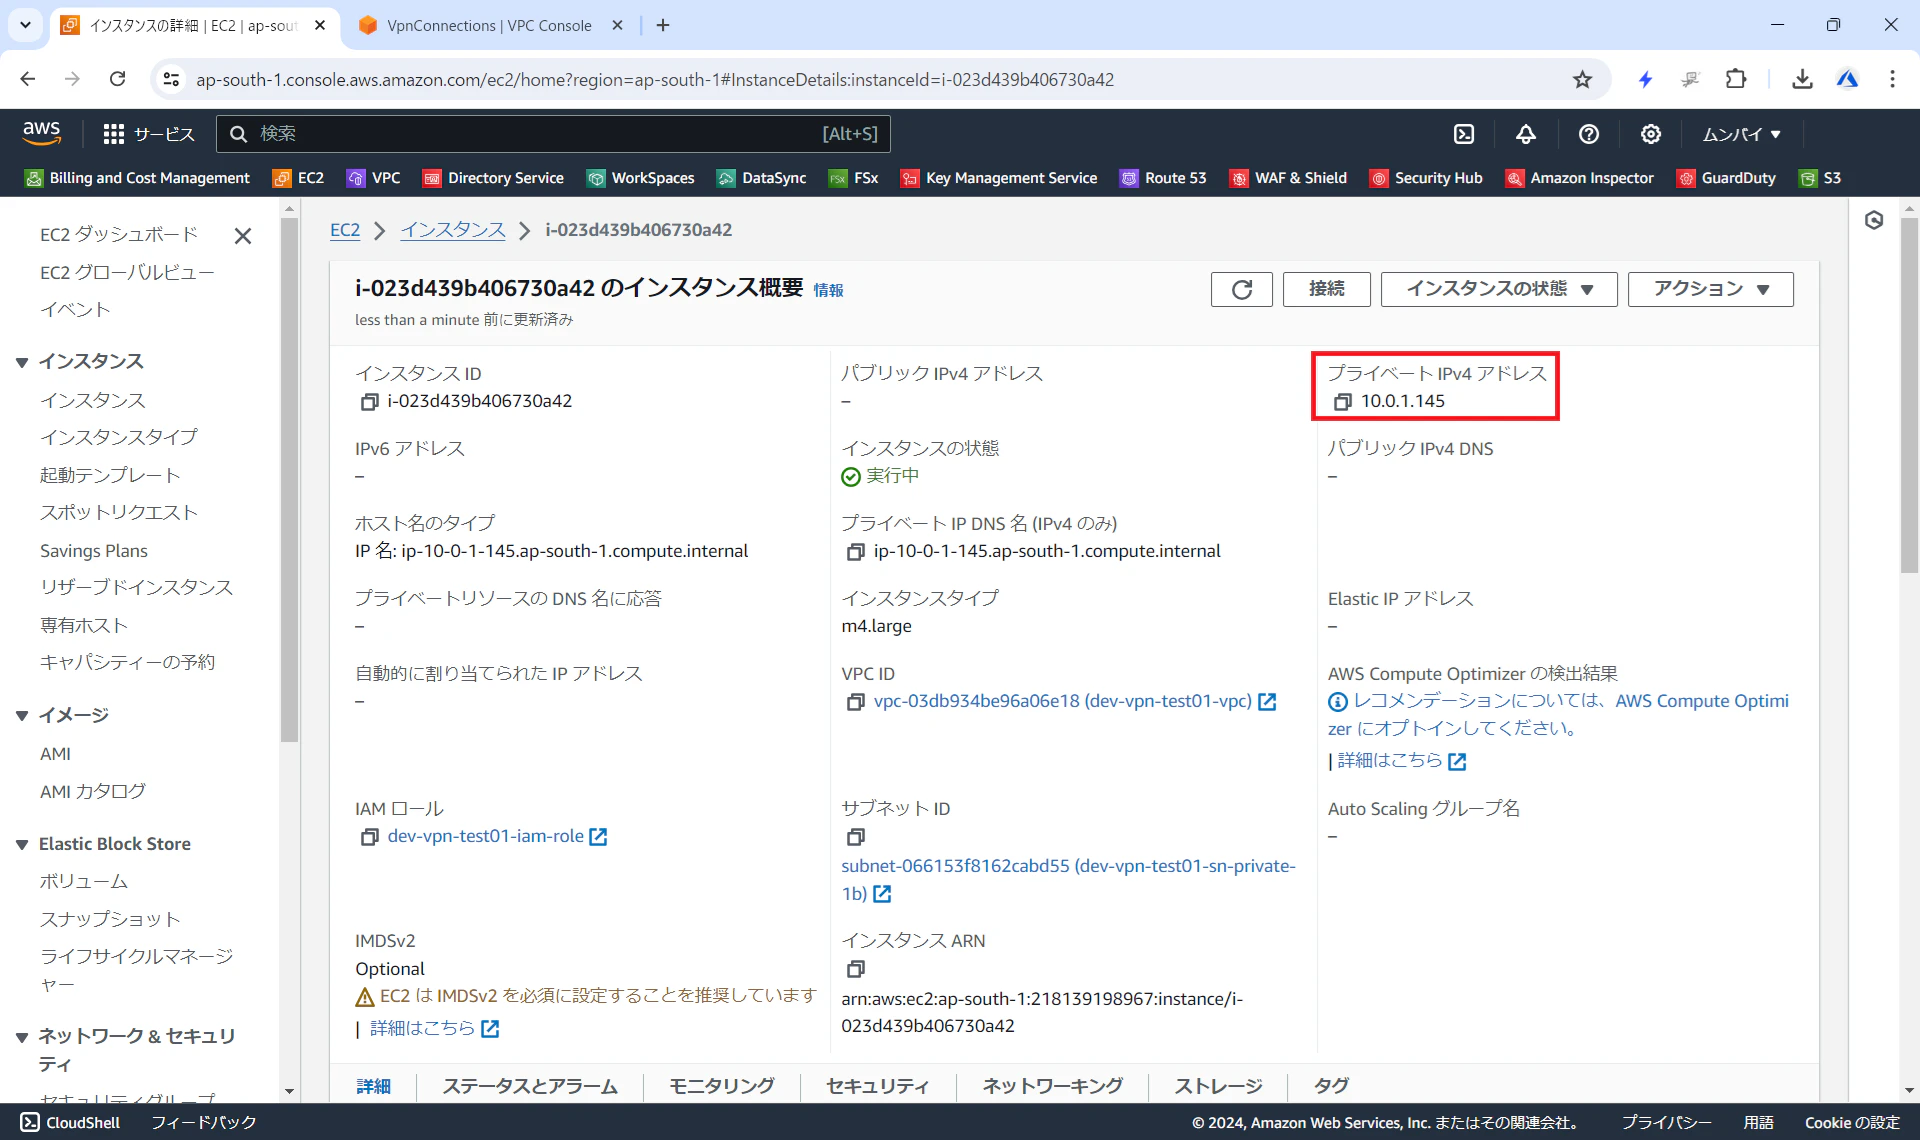
10.0.1.145なので、ここにTNCでポートを3389(RDP)指定してみます。
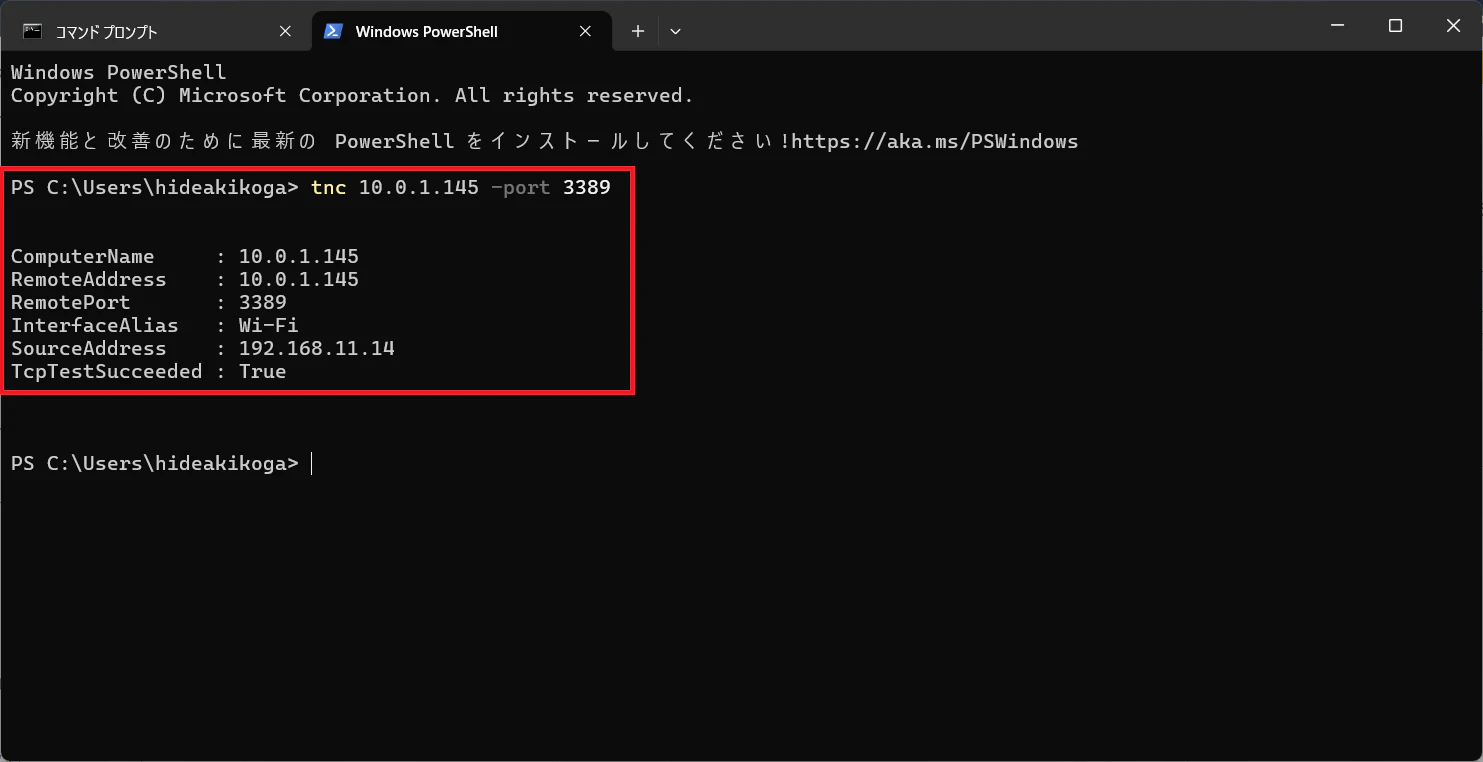
はい!
接続確認できましたね!
完璧ですね!
RDPも
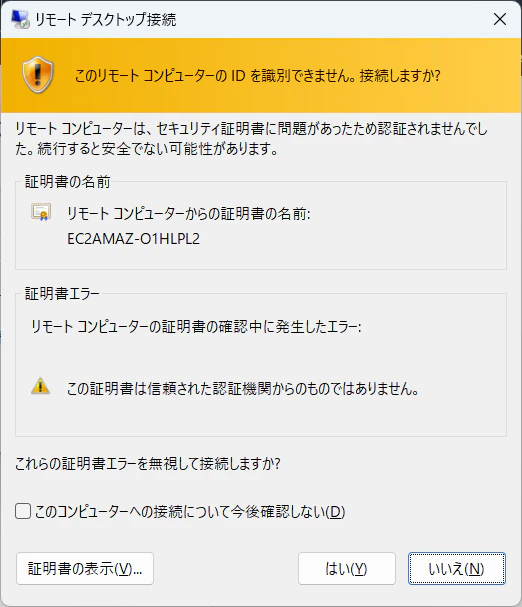
完璧ですね!
はい。
これでAWSとTerraformを用いてオンプレミスのRTX1210と無事VPNが張れました。
本日はここまで。