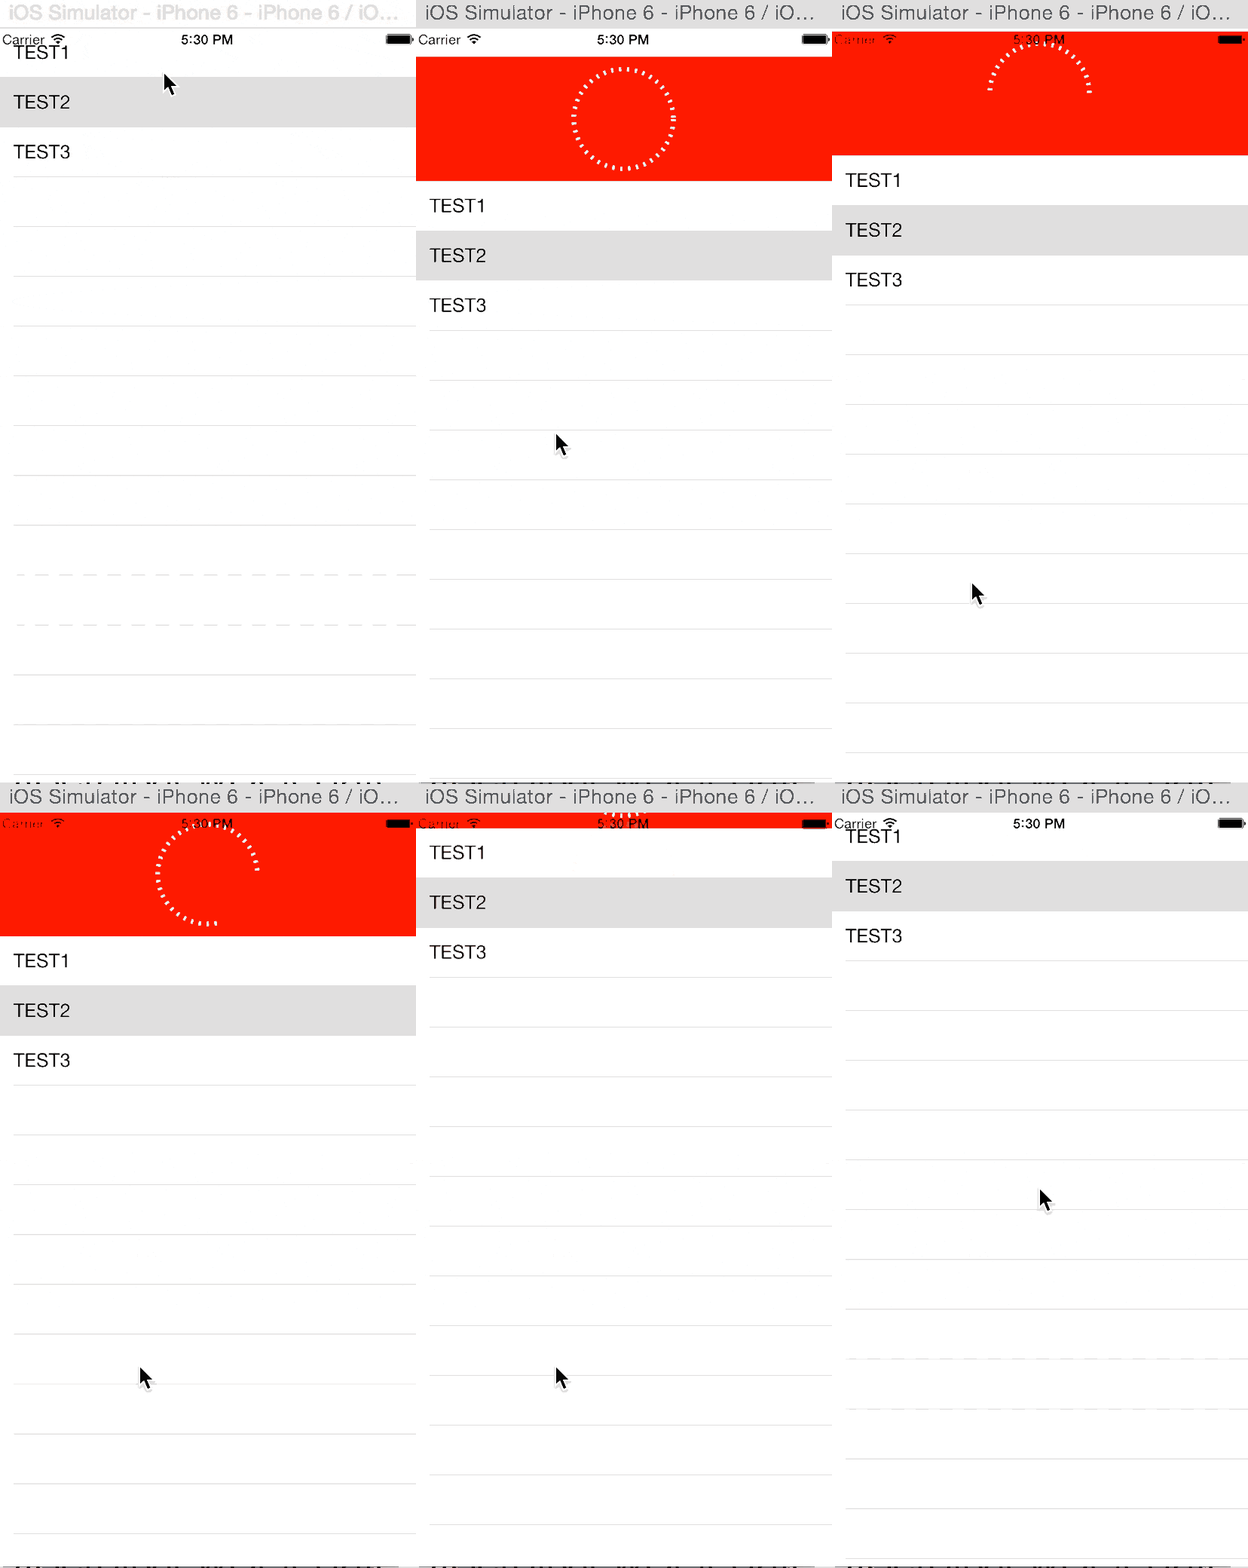
最終的に表示するアニメーション
TableViewをPullした時にTableViewが下りアニメーションし、一定時間後にTableViewを表示するというようなアニメーションを実装しています。
基本となるアニメーションの作成
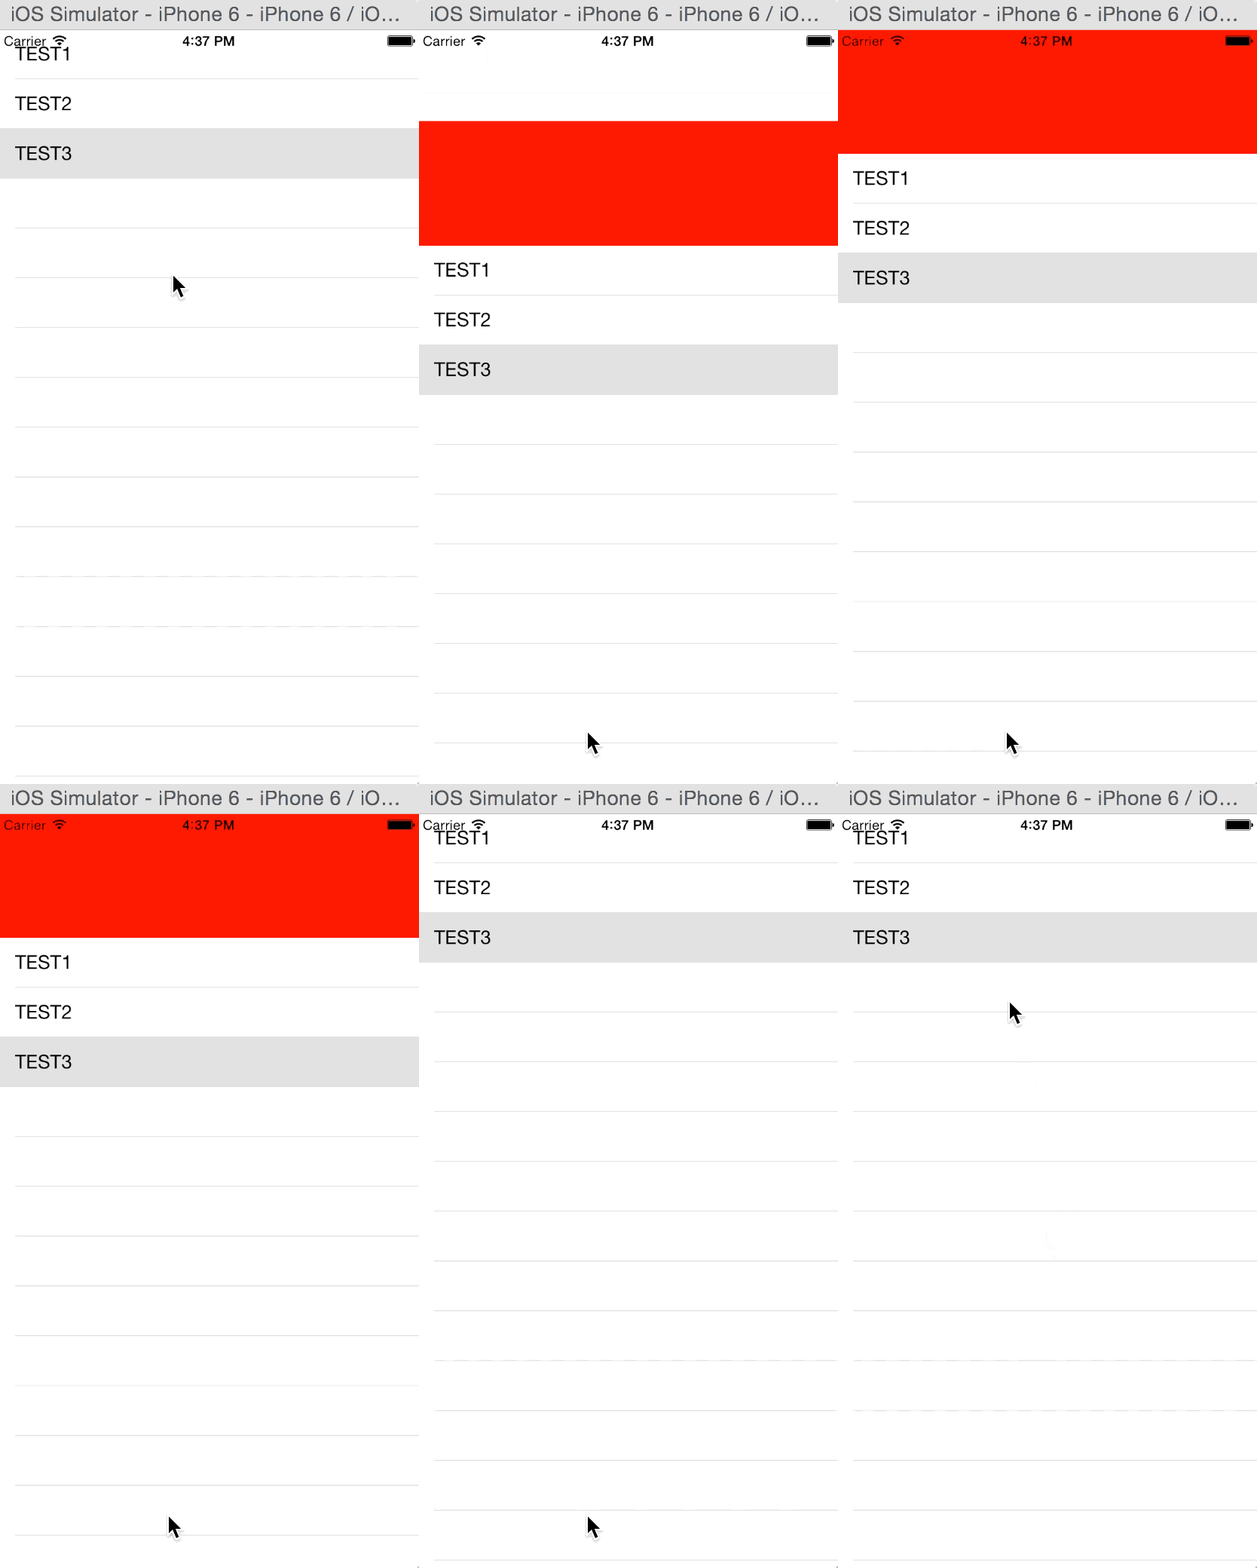
基本となるアニメーションの実行結果
UITableViewでPullすると、Viewが新たに表示されその領域分TableViewが下に下り、一定時間後に元に戻るというアニメーションの処理を作成します。
基本となるアニメーションの実装
メインのViewControllerでは、主に3つのことを行っています。
- 次に作成するRefreshViewの初期化、及びRefreshViewDelegateプロトコルで宣言する予定のメソッドの適用。
- UITableViewControllerが採用しているUIScrollViewDelegateの一部メソッドの実装
- UITableViewDelegateの適用(ここでは省略しています)
メインのViewControllerのコードを下記に示しまします。
ViewController.swift
import UIKit

class ViewController: UITableViewController , RefreshViewDelegate{

    // Tableで使用する配列を設定する
    let myItems: NSArray = ["TEST1", "TEST2", "TEST3"]

    var refreshView: RefreshView!
    let refreshViewHeight:CGFloat = 110.0

    override func viewDidLoad() {
        super.viewDidLoad()
        // Do any additional setup after loading the view, typically from a nib.

        // pull down時に表示するViewの追加
        let refreshRect = CGRect(x: 0.0, y: -refreshViewHeight, width: self.view.frame.size.width, height: refreshViewHeight)
        refreshView = RefreshView(frame: refreshRect, scrollView: self.tableView)
        refreshView.delegate = self
        view.addSubview(refreshView)

    }


    // MARK: Refresh view delegate

    func refreshViewDidRefresh(refreshView: RefreshView) {
        // Refreshが完了した際に呼ぶべきだが、とりあえず2秒後に呼ぶことにする
        let delaySec = dispatch_time(DISPATCH_TIME_NOW, Int64(2 * NSEC_PER_SEC))
        dispatch_after(delaySec, dispatch_get_main_queue()) {
            // Refreshが完了したことになったので、アニメーションを完了する
            refreshView.endRefreshing()
            println("test")
        }
    }

    // MARK: Scroll view methods
    // オフセットが変換した
    override func scrollViewDidScroll(scrollView: UIScrollView) {
        refreshView.scrollViewDidScroll(scrollView)
    }

    // ある速度(point/ミリ秒)を持っている状況でドラッグが終りそう。最終的な落ち着き先をtargetContentOffsetで指定できる。
    override func scrollViewWillEndDragging(scrollView: UIScrollView, withVelocity velocity: CGPoint, targetContentOffset: UnsafeMutablePointer<CGPoint>) {
        refreshView.scrollViewWillEndDragging(scrollView, withVelocity: velocity, targetContentOffset: targetContentOffset)
    }


    // MARK: Table View methods
    // テーブルの表示などを実施

}
RefreshViewでは、主に3つのことを行っています。
- 確認用のUIViewの追加
- scrollの際に追加したViewが表示されきったかどうかを確認するための処理
- Viewの位置の変更、および元に戻すというanimateWithDurationを使ったアニメーションの定義
RefreshView.swift
import UIKit
import QuartzCore


protocol RefreshViewDelegate {
    func refreshViewDidRefresh(refreshView: RefreshView)
}

class RefreshView: UIView {

    var delegate: RefreshViewDelegate?
    var scrollView: UIScrollView?
    var progress: CGFloat = 0.0
    var isRefreshing = false


    required init(coder aDecoder: NSCoder) {
        super.init(coder: aDecoder)
    }

    init(frame: CGRect, scrollView: UIScrollView) {
        // Scroll時に表示する領域を設定
        super.init(frame: frame)

        self.scrollView = scrollView

        // わかりやすいようにするために、背景が赤のUIViewを作成してSubViewとする
        let subView = UIView(frame: CGRectMake(0, 0, frame.size.width, frame.size.height))
        subView.backgroundColor = UIColor.redColor()
        addSubview(subView)

    }

    // MARK: Scroll View Delegate methods
	// ViewControllerのScroll View Delegateから呼ばれる処理を実装する

    // ドラッグの開始
    func scrollViewDidScroll(scrollView: UIScrollView!) {
        let offsetY = CGFloat( max(-(scrollView.contentOffset.y + scrollView.contentInset.top), 0.0))
        self.progress = min(max(offsetY / frame.size.height, 0.0), 1.0)
        //  initで指定されたframeのsize.heightより下がるとprogressが1以上になる。
    }

    // ある速度(point/ミリ秒)を持っている状況でドラッグが終りそう。最終的な落ち着き先をtargetContentOffsetで指定できる。
    func scrollViewWillEndDragging(scrollView: UIScrollView!, withVelocity velocity: CGPoint, targetContentOffset: UnsafePointer<CGPoint>) {

        // refreshが開始されていない & initで指定されたframeのsize.heightより下がったら処理を実施。
        if !isRefreshing && self.progress >= 1.0 {
            delegate?.refreshViewDidRefresh(self)
            // Refresh処理が実行されている間のAnimationを開始する
            beginRefreshing()
        }
    }

    // MARK: animate the Refresh View

    func beginRefreshing() {
        isRefreshing = true
        UIView.animateWithDuration(0.3, animations: {
            // frame分 scrollViewの位置を下げる
            var newInsets = self.scrollView!.contentInset
            newInsets.top += self.frame.size.height
            self.scrollView!.contentInset = newInsets
        })

    }

    func endRefreshing() {

        isRefreshing = false

        UIView.animateWithDuration(0.3, delay:0.0, options: .CurveEaseOut ,animations: {
            // frame分 scrollViewの位置を上げる(元の位置に戻す)
            var newInsets = self.scrollView!.contentInset
            newInsets.top -= self.frame.size.height
            self.scrollView!.contentInset = newInsets
            }, completion: {_ in
                //finished
        })
    }

}
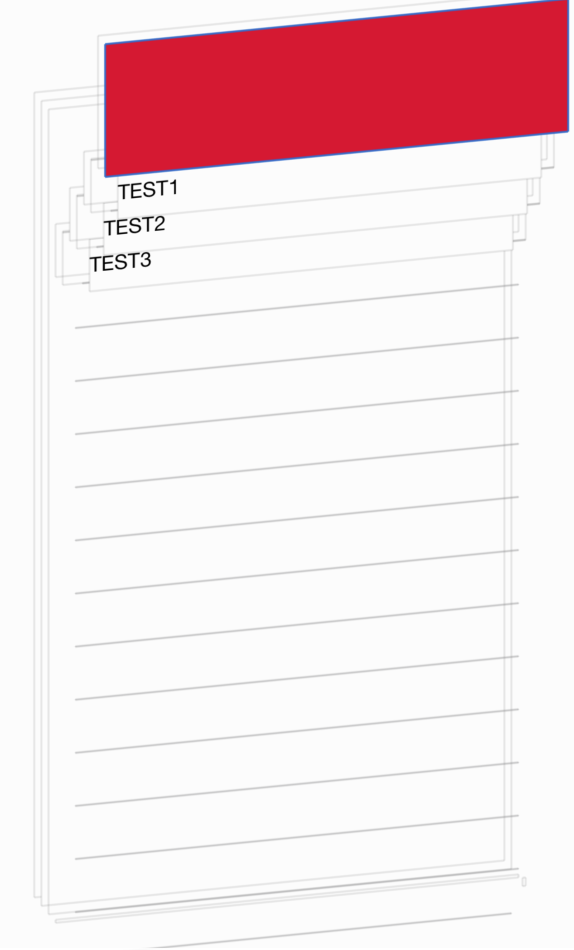
実装したコードを実行すると以下のようにViewの階層は以下の図のようになります。
ここでのポイントは、下にドラッグした際に表示するViewを最初はマイナス座標を指定して画面からはみ出すように配置して、そのViewが全部表示されたら一度停止するというような作りにしています。
表示するアニメーションの追加
RefreshViewの初期化時に円を表示する処理を追加します。
RefreshView.swift
	// レイヤーの追加
    let ovalShapeLayer: CAShapeLayer = CAShapeLayer()

    init(frame: CGRect, scrollView: UIScrollView) {

		// addSubviewの後に描画処理を追加する
        // 円を表示する処理を追加
        ovalShapeLayer.strokeColor = UIColor.whiteColor().CGColor
        ovalShapeLayer.fillColor = UIColor.clearColor().CGColor
        ovalShapeLayer.lineWidth = 4.0
        ovalShapeLayer.lineDashPattern = [2, 5]

        let refreshRadius = frame.size.height/2 * 0.8
        ovalShapeLayer.path = UIBezierPath(ovalInRect: CGRect(
            x: frame.size.width/2 - refreshRadius,
            y: frame.size.height/2 - refreshRadius,
            width: 2 * refreshRadius,
            height: 2 * refreshRadius)
            ).CGPath

        subView.layer.addSublayer(ovalShapeLayer)
    }
beginRefreshingの処理内にanimation処理を追加します。
RefreshView.swift
    func beginRefreshing() {
        isRefreshing = true
        UIView.animateWithDuration(0.3, animations: {
            // frame分 scrollViewの位置を下げる
            var newInsets = self.scrollView!.contentInset
            newInsets.top += self.frame.size.height
            self.scrollView!.contentInset = newInsets
        })

        // animationを追加
        let strokeStartAnimation = CABasicAnimation(keyPath: "strokeStart")
        strokeStartAnimation.fromValue = 0.0
        strokeStartAnimation.toValue   = 1.0
        strokeStartAnimation.duration = 1.0
        strokeStartAnimation.repeatCount = 2.0

        ovalShapeLayer.addAnimation(strokeStartAnimation, forKey: nil)


    }


