はじめに
- 本記事では UiPath Automation Suite v2024.10 をAmazon EKS環境 (東京リージョン) にて、Terraformを利用してリソースをデプロイし、インストールを実行する手順をまとめたものです。
- システム要件は こちらのページ をご参照ください。かなりハイスペックなマシンが必要となりますので、AWSの利用料金にはご注意ください。
- 利用するUiPath製品によって要件のマシンスペックが異なります。今回はGPUを利用する Document Understanding のインストール手順についても説明しますが、利用されない場合にはその手順はスキップしてください。
Automation Suiteとは?
- UiPathの各製品サービスを一まとめにしてユーザーが所有する環境に展開できる全部入りの製品です。
- v2024.10では 次の製品サービス がサポートされています。
- Action Center
- AI Center
- Apps
- Automation Hub
- Automation Ops
- Data Service
- Document Understanding
- Insights
- Integration Service
- Orchestrator
- Automation Suite Robots
- Process Mining
- Studio Web
- Task Mining
- Test Manager
- 全部入りという意味ではSaaS型のAutomation Cloudも利用可能ですが、次のような利用上の課題が考えられます。
- 企業のセキュリティポリシーとして個人情報を扱う業務などではSaaS利用に制約があり、Automation Cloudがセンシティブな業務の自動化には適さない場合がある。
- インターネット経由でのアクセスのみ許可されており、専用線やVPNのみに接続を限定することはできません。
- ソースIPの制限を設けることはできますが、インターネット経由でのアクセスという点では変わりはありません。
- Automation CloudはUiPath社が管理するAzure基盤にマルチテナントで展開されております。専有型のオプションも発表されていますが、利用条件があるため詳細はUiPath社までお問い合わせください。
- これらの課題を解決すべく、いわば「Automation Cloudのオンプレミス版」とも呼べるのがAutomation Suiteになります。UiPath社は2022年9月より、Business Automation Platform という戦略を打ち出しており、自動化領域の発見から開発、管理・運用、効果計測に至るまで一気通貫した製品群をプラットフォームとして提供しています。つまり Business Automation Platformをオンプレミスで実現する製品がAutomation Suite という位置づけになると筆者は捉えています。
- ただしAutopilotなどの生成AI関連のサービスは現時点ではAutomation Suiteではサポートされていません。詳細は Automation Cloudとの比較表 をご覧ください。
Automation Suiteの構成
Amazon EKS環境における構成図
-
構成図は次の通りです。(※ 参照: デプロイのシナリオ)

-
この構成において利用するAWSサービスと用途は次の通りです。
| AWSサービス | 用途 |
|---|---|
| EC2 (Windows) | 踏み台サーバー。管理者がRDPで接続 |
| EC2 (Linux) | 作業用Linuxマシン。管理者が踏み台サーバーからSSHで接続kubectl コマンドなどを実行してEKSクラスターを操作 |
| EKS | Automation SuiteをインストールするKubernetesクラスター 管理プレーンとワーカーノード(EC2)から構成 |
| RDS for SQL Server | Automation Suiteの各製品サービスが使用するデータベース |
| ElastiCahe for Redis | ワーカーノードから読み書きされ、キャッシュを保持するためのインメモリデータベース |
| EFS | Automation Suiteのバックアップファイルを格納するためのファイルサーバー |
| S3 | Automation Suiteの各製品サービスのアプリケーションデータを格納するストレージ。オブジェクトストアと呼ばれる |
| Route 53 | Automation Suiteによって使用されるDNSレコードを作成 ※ 今回は検証用に lab.test というローカルドメインを使用 |
- 各マシンとワーカーノードからはアウトバウンドへのインターネットアクセスは可能とします。
- ワーカーノードからRDS for SQL Server、ElastiCahe for RedisおよびS3へのアクセスにはそれぞれプライベート接続を使用します。
サイジング
- EKSワーカーノードは利用するUiPath製品によってインスタンスタイプとノード数を選定します。詳細は 要件算出ツール で試算します。
- 今回はUiPath OrchestratorとDocument Understandingを利用する想定で、次のノード構成で進めてゆきます。
-
c7a.8xlargex3台 -
g4dn.xlargex5台
-
Automation Suite 環境構築手順
AWSリソース作成
- 上の構成図に記載したAWSリソースを手作業で作成するには少々骨が折れるため、本記事ではTerraformにて展開します。Terraformの使い方に慣れていない方はこちらの記事を参照してTerraformの実行環境をセットアップしてください。
- AWSリソースをTerraformにて作成するためには AWS CLI をインストールします。
- aws configureコマンドでAWS CLIの設定を行います。
- Terraformは作成するリソースの単位、変数およびアウトプットなどによってファイルを分割した方が良いのですが、今回は分かりやすさを優先するため main.tf という一つのファイルで保存して実行します。各local変数は環境に応じて値を変更します。
| 変数名 | 用途 |
|---|---|
| res_prefix | 各AWSリソースのプレフィックス名 |
| region | リージョン |
| availability_zones | アベイラビリティゾーン |
| tags | リソースグループに付けるタグ (省略可) |
| vpc_address | VPCアドレス範囲 |
| db_instance_type | RDS for SQL Serverのインスタンスタイプ |
| sql_username | RDS for SQL Serverの管理者ユーザー名 |
| sql_password | RDS for SQL Serverの管理者パスワード |
| redis_password | ElastiCahe for Redisの接続パスワード |
| as_fqdn | Automation SuiteのFQDN |
| enable_public_access | Automation Suiteへのパブリックアクセス許可 閉域網では false に設定 |
| cpu_instance_type | EKSワーカーノード(GPU無し)のインスタンスタイプ 要件算出ツール により決定 |
| number_of_cpu_nodes | EKSワーカーノード(GPU無し)のインスタンス数 |
| gpu_instance_type | EKSワーカーノード(GPU有り)のインスタンスタイプ Document Understandingなど利用時 |
| number_of_gpu_nodes | EKSワーカーノード(GPU有り)のインスタンス数 利用しない場合は 0 に設定 |
| kubernetes_version | EKSクラスターのKubernetesバージョン |
| my_ip | 踏み台サーバーにRDPアクセスを許可するIPアドレス 作業マシンがインターネット接続しているグローバルIPアドレス確認して指定します |
main.tf (クリックして展開)
# Local variables (change them according to your environment)
locals {
  res_prefix         = "hidecha-eks"
  region             = "ap-northeast-1"
  availability_zones = ["ap-northeast-1a", "ap-northeast-1c", "ap-northeast-1d"]
  tags = {
    Owner   = "hidecha"
    Project = "Qiita"
  }
  vpc_address          = "10.1.0.0/16"
  db_instance_type     = "db.m6i.2xlarge"
  sql_username         = "sql_admin"
  sql_password         = "SuperSecretPassword"
  redis_password       = "1234567890123456"
  as_fqdn              = "as.lab.test"
  enable_public_access = false
  cpu_instance_type    = "c7a.8xlarge"
  number_of_cpu_nodes  = 3
  gpu_instance_type    = "g4dn.xlarge"
  number_of_gpu_nodes  = 5
  kubernetes_version   = "1.31"
  my_ip                = "x.x.x.x"
}

# Provider
provider "aws" {
  region = local.region
  default_tags {
    tags = local.tags
  }
}

# Virtual Network
## VPC
resource "aws_vpc" "vpc" {
  cidr_block           = local.vpc_address
  enable_dns_support   = true
  enable_dns_hostnames = true

  tags = {
    Name = "${local.res_prefix}-vpc"
  }
}

## Public Subnets
resource "aws_subnet" "subnet_public" {
  count = length(local.availability_zones)

  vpc_id                  = aws_vpc.vpc.id
  availability_zone       = local.availability_zones[count.index]
  cidr_block              = cidrsubnet(aws_vpc.vpc.cidr_block, 8, count.index + 1)
  map_public_ip_on_launch = true

  tags = {
    Name = "${local.res_prefix}-subnet-public${format("%02d", count.index + 1)}"
  }
}

## Private Subnets
resource "aws_subnet" "subnet_private" {
  count = length(local.availability_zones)

  vpc_id                  = aws_vpc.vpc.id
  availability_zone       = local.availability_zones[count.index]
  cidr_block              = cidrsubnet(aws_vpc.vpc.cidr_block, 8, count.index + 11)
  map_public_ip_on_launch = false

  tags = {
    Name = "${local.res_prefix}-subnet-private${format("%02d", count.index + 1)}"
  }
}

locals {
  public_subnet_ids  = aws_subnet.subnet_public[*].id
  private_subnet_ids = aws_subnet.subnet_private[*].id
}

## Internet Gateway
resource "aws_internet_gateway" "igw" {
  vpc_id = aws_vpc.vpc.id

  tags = {
    Name = "${local.res_prefix}-igw"
  }
}

## Elastic IPs for NAT Gateways
resource "aws_eip" "eip_ngw" {
  count  = length(local.availability_zones)
  domain = "vpc"

  tags = {
    Name = "${local.res_prefix}-eip-ngw${format("%02d", count.index + 1)}"
  }
}

## NAT Gateways
resource "aws_nat_gateway" "ngw" {
  count = length(local.availability_zones)

  connectivity_type = "public"
  subnet_id         = aws_subnet.subnet_public[count.index].id
  allocation_id     = aws_eip.eip_ngw[count.index].id

  tags = {
    Name = "${local.res_prefix}-ngw${format("%02d", count.index + 1)}"
  }

  depends_on = [aws_internet_gateway.igw]
}

## Route table for Public Subnet
resource "aws_route_table" "rt_public" {
  vpc_id = aws_vpc.vpc.id

  tags = {
    Name = "${local.res_prefix}-rt-public"
  }
}

resource "aws_route" "public_internet_gateway" {
  route_table_id         = aws_route_table.rt_public.id
  destination_cidr_block = "0.0.0.0/0"
  gateway_id             = aws_internet_gateway.igw.id
}

## Route Tables for Private Subnets
resource "aws_route_table" "rt_private" {
  count = length(local.availability_zones)

  vpc_id = aws_vpc.vpc.id

  tags = {
    Name = "${local.res_prefix}-rt-private${format("%02d", count.index + 1)}"
  }
}

resource "aws_route" "private_nat_gateway" {
  count = length(local.availability_zones)

  route_table_id         = aws_route_table.rt_private[count.index].id
  destination_cidr_block = "0.0.0.0/0"
  nat_gateway_id         = aws_nat_gateway.ngw[count.index].id
}

## Route Table to Public Subnets association
resource "aws_route_table_association" "rt_public_assoc" {
  count = length(local.availability_zones)

  subnet_id      = aws_subnet.subnet_public[count.index].id
  route_table_id = aws_route_table.rt_public.id
}

## Route Tables to Private Subnets association
resource "aws_route_table_association" "rt_private_assoc" {
  count = length(local.availability_zones)

  subnet_id      = aws_subnet.subnet_private[count.index].id
  route_table_id = aws_route_table.rt_private[count.index].id
}

# Security Groups
## Security Group for Bastion
resource "aws_security_group" "sg_bastion" {
  name   = "${local.res_prefix}-sg-bastion"
  vpc_id = aws_vpc.vpc.id

  ingress {
    from_port   = 3389
    to_port     = 3389
    protocol    = "tcp"
    cidr_blocks = ["${local.my_ip}/32"]
  }

  egress {
    from_port   = 0
    to_port     = 0
    protocol    = "-1"
    cidr_blocks = ["0.0.0.0/0"]
  }

  tags = {
    Name = "${local.res_prefix}-sg-bastion"
  }
}

## Security Group for VPC
resource "aws_security_group" "sg_internal" {
  name   = "${local.res_prefix}-sg-internal"
  vpc_id = aws_vpc.vpc.id

  ingress {
    from_port   = 0
    to_port     = 0
    protocol    = "-1"
    cidr_blocks = [local.vpc_address]
  }

  egress {
    from_port   = 0
    to_port     = 0
    protocol    = "-1"
    cidr_blocks = ["0.0.0.0/0"]
  }

  tags = {
    Name = "${local.res_prefix}-sg-internal"
  }
}

# Key Pair
## Generate a secure private key and encodes it as PEM
resource "tls_private_key" "key_pair" {
  algorithm = "RSA"
  rsa_bits  = 4096
}

## Create Key Pair
resource "aws_key_pair" "key_pair" {
  key_name   = "${local.res_prefix}-key-pair"
  public_key = tls_private_key.key_pair.public_key_openssh
}

## Save file
resource "local_sensitive_file" "ssh_key" {
  filename        = "${aws_key_pair.key_pair.key_name}.pem"
  content         = tls_private_key.key_pair.private_key_pem
  file_permission = "0600"
}

# EC2 Instance for Bastion
## Get latest Windows Server AMI
data "aws_ami" "windows_ami" {
  most_recent = true
  owners      = ["amazon"]
  filter {
    name   = "name"
    values = ["Windows_Server-2022-Japanese-Full-Base-*"]
  }
  filter {
    name   = "state"
    values = ["available"]
  }
}

## Create Windows EC2 Instance for Bastion
resource "aws_instance" "vm_basion" {
  ami                         = data.aws_ami.windows_ami.id
  instance_type               = "t3.medium"
  subnet_id                   = aws_subnet.subnet_public[0].id
  vpc_security_group_ids      = [aws_security_group.sg_bastion.id]
  source_dest_check           = false
  key_name                    = aws_key_pair.key_pair.key_name
  associate_public_ip_address = true

  root_block_device {
    volume_size           = 64
    volume_type           = "gp3"
    delete_on_termination = true
    encrypted             = true
  }

  tags = {
    Name = "${local.res_prefix}-bastion"
  }
}

## Elastic IP for Bastion
resource "aws_eip" "eip_vm" {
  domain = "vpc"

  tags = {
    Name = "${local.res_prefix}-eip-bastion"
  }
}

### Elastic IP to Bastion association
resource "aws_eip_association" "eip_vm_assoc" {
  instance_id   = aws_instance.vm_basion.id
  allocation_id = aws_eip.eip_vm.id
}

# EC2 Instance for Client
## Get latest Amazon Linux 2023 AMI
data "aws_ami" "al2023" {
  most_recent = true
  owners      = ["amazon"]
  filter {
    name   = "name"
    values = ["al2023-ami-2023.*-kernel-*-x86_64"]
  }
  filter {
    name   = "state"
    values = ["available"]
  }
}

## Create EC2 Instance for Client
resource "aws_instance" "vm_client" {
  ami                         = data.aws_ami.al2023.id
  instance_type               = "t3.medium"
  subnet_id                   = aws_subnet.subnet_private[0].id
  vpc_security_group_ids      = [aws_security_group.sg_internal.id]
  source_dest_check           = false
  key_name                    = aws_key_pair.key_pair.key_name
  associate_public_ip_address = false

  # root disk
  root_block_device {
    volume_size           = 64
    volume_type           = "gp3"
    delete_on_termination = true
    encrypted             = true
  }

  tags = {
    Name = "${local.res_prefix}-client"
  }
}

# Create IAM Role for EKS
## IAM Role for EKS Control Plane
resource "aws_iam_role" "iam_role_controlplane" {
  name = "${local.res_prefix}-controlplane-role"
  assume_role_policy = jsonencode({
    Statement = [{
      Action = "sts:AssumeRole"
      Effect = "Allow"
      Principal = {
        Service = "eks.amazonaws.com"
      }
    }]
    Version = "2012-10-17"
  })
}

resource "aws_iam_role_policy_attachment" "iam_role_controlplane_policy" {
  policy_arn = "arn:aws:iam::aws:policy/AmazonEKSClusterPolicy"
  role       = aws_iam_role.iam_role_controlplane.name
}

## IAM Role for EKS Worker Node
resource "aws_iam_role" "iam_role_workernode" {
  name = "${local.res_prefix}-workernode-role"
  assume_role_policy = jsonencode({
    Statement = [{
      Action = "sts:AssumeRole"
      Effect = "Allow"
      Principal = {
        Service = "ec2.amazonaws.com"
      }
    }]
    Version = "2012-10-17"
  })
}

resource "aws_iam_role_policy_attachment" "iam_role_workernode_policy" {
  for_each = toset([
    "AmazonEKSWorkerNodePolicy",
    "AmazonEKS_CNI_Policy",
    "AmazonEC2ContainerRegistryReadOnly",
    "AmazonS3FullAccess"
  ])

  policy_arn = "arn:aws:iam::aws:policy/${each.key}"
  role       = aws_iam_role.iam_role_workernode.name
}

resource "aws_iam_role_policy" "iam_policy_workernode_ebs" {
  name = "EBS_CSI_Driver"
  role = aws_iam_role.iam_role_workernode.name
  policy = jsonencode({
    Version = "2012-10-17"
    Statement = [
      {
        Effect = "Allow"
        Action = [
          "ec2:AttachVolume",
          "ec2:CreateSnapshot",
          "ec2:CreateTags",
          "ec2:CreateVolume",
          "ec2:DeleteSnapshot",
          "ec2:DeleteTags",
          "ec2:DeleteVolume",
          "ec2:DescribeInstances",
          "ec2:DescribeSnapshots",
          "ec2:DescribeTags",
          "ec2:DescribeVolumes",
          "ec2:DetachVolume"
        ]
        Resource = "*"
      }
    ]
  })
}

resource "aws_iam_role_policy" "iam_policy_workernode_efs" {
  name = "EFS_CSI_Driver"
  role = aws_iam_role.iam_role_workernode.name
  policy = jsonencode({
    "Version" : "2012-10-17",
    "Statement" : [
      {
        "Effect" : "Allow",
        "Action" : [
          "elasticfilesystem:DescribeAccessPoints",
          "elasticfilesystem:DescribeFileSystems",
          "elasticfilesystem:DescribeMountTargets",
          "ec2:DescribeAvailabilityZones"
        ],
        "Resource" : "*"
      },
      {
        "Effect" : "Allow",
        "Action" : [
          "elasticfilesystem:CreateAccessPoint"
        ],
        "Resource" : "*",
        "Condition" : {
          "StringLike" : {
            "aws:RequestTag/efs.csi.aws.com/cluster" : "true"
          }
        }
      },
      {
        "Effect" : "Allow",
        "Action" : "elasticfilesystem:DeleteAccessPoint",
        "Resource" : "*",
        "Condition" : {
          "StringEquals" : {
            "aws:ResourceTag/efs.csi.aws.com/cluster" : "true"
          }
        }
      }
    ]
  })
}

resource "aws_iam_role_policy" "iam_policy_workernode_elb" {
  name = "ELB_Permissions"
  role = aws_iam_role.iam_role_workernode.name
  policy = jsonencode({
    "Version" : "2012-10-17",
    "Statement" : [
      {
        "Sid" : "VisualEditor0",
        "Effect" : "Allow",
        "Action" : [
          "elasticloadbalancing:ModifyListener",
          "elasticloadbalancing:SetLoadBalancerPoliciesForBackendServer",
          "elasticloadbalancing:DetachLoadBalancerFromSubnets",
          "elasticloadbalancing:AttachLoadBalancerToSubnets",
          "elasticloadbalancing:RegisterTargets",
          "elasticloadbalancing:ConfigureHealthCheck",
          "elasticloadbalancing:CreateTargetGroup",
          "elasticloadbalancing:*",
          "elasticloadbalancing:DeleteTargetGroup",
          "elasticloadbalancing:CreateLoadBalancerListeners",
          "elasticloadbalancing:CreateListener",
          "elasticloadbalancing:DescribeListeners",
          "elasticloadbalancing:SetLoadBalancerPoliciesOfListener",
          "elasticloadbalancing:DescribeTargetHealth",
          "elasticloadbalancing:DescribeLoadBalancerPolicies",
          "elasticloadbalancing:DescribeTargetGroups",
          "elasticloadbalancing:ApplySecurityGroupsToLoadBalancer",
          "elasticloadbalancing:DeleteLoadBalancerListeners",
          "elasticloadbalancing:DeregisterInstancesFromLoadBalancer",
          "elasticloadbalancing:RegisterInstancesWithLoadBalancer",
          "elasticloadbalancing:CreateLoadBalancerPolicy",
          "elasticloadbalancing:ModifyTargetGroup",
          "elasticloadbalancing:DeleteListener"
        ],
        "Resource" : "*"
      }
    ]
  })
}

# Create EKS Cluster
resource "aws_eks_cluster" "eks_cluster" {
  name     = "${local.res_prefix}-cluster"
  role_arn = aws_iam_role.iam_role_controlplane.arn
  version  = local.kubernetes_version

  vpc_config {
    subnet_ids         = local.enable_public_access ? local.public_subnet_ids : local.private_subnet_ids
    security_group_ids = [aws_security_group.sg_internal.id]
  }

  depends_on = [
    aws_iam_role_policy_attachment.iam_role_controlplane_policy
  ]
}

## Add-On
resource "aws_eks_addon" "eks_addons" {
  for_each = toset(["vpc-cni", "coredns", "kube-proxy", "aws-ebs-csi-driver", "aws-efs-csi-driver"])

  cluster_name = aws_eks_cluster.eks_cluster.name
  addon_name   = each.key

  depends_on = [
    aws_eks_cluster.eks_cluster,
    aws_eks_node_group.eks_nodegroup_cpu
  ]
}

## Launch Template for EKS Node Group
resource "aws_launch_template" "eks_nodegroup_template" {
  name = "${local.res_prefix}-nodegroup-template"

  block_device_mappings {
    device_name = "/dev/xvda"

    ebs {
      volume_size           = 256
      volume_type           = "gp3"
      delete_on_termination = true
    }
  }

  metadata_options {
    http_endpoint               = "enabled"
    http_put_response_hop_limit = 2
    http_tokens                 = "required"
  }

  tag_specifications {
    resource_type = "instance"
    tags          = local.tags
  }
}

## Create EKS Node Group (CPU)
resource "aws_eks_node_group" "eks_nodegroup_cpu" {
  count = local.number_of_cpu_nodes > 0 ? 1 : 0

  cluster_name    = aws_eks_cluster.eks_cluster.name
  node_group_name = "${local.res_prefix}-nodegroup-cpu"
  ami_type        = "AL2023_x86_64_STANDARD"
  node_role_arn   = aws_iam_role.iam_role_workernode.arn
  subnet_ids      = local.enable_public_access ? local.public_subnet_ids : local.private_subnet_ids
  instance_types  = [local.cpu_instance_type]

  scaling_config {
    desired_size = local.number_of_cpu_nodes
    min_size     = local.number_of_cpu_nodes
    max_size     = local.number_of_cpu_nodes > 0 ? local.number_of_cpu_nodes : 1
  }

  update_config {
    max_unavailable = 1
  }

  launch_template {
    id      = aws_launch_template.eks_nodegroup_template.id
    version = aws_launch_template.eks_nodegroup_template.latest_version
  }

  depends_on = [
    aws_iam_role_policy_attachment.iam_role_workernode_policy
  ]
}

## Create EKS Node Group (GPU)
resource "aws_eks_node_group" "eks_nodegroup_gpu" {
  count = local.number_of_gpu_nodes > 0 ? 1 : 0

  cluster_name    = aws_eks_cluster.eks_cluster.name
  node_group_name = "${local.res_prefix}-nodegroup-gpu"
  ami_type        = "AL2023_x86_64_NVIDIA"
  node_role_arn   = aws_iam_role.iam_role_workernode.arn
  subnet_ids      = local.enable_public_access ? local.public_subnet_ids : local.private_subnet_ids
  instance_types  = [local.gpu_instance_type]

  scaling_config {
    desired_size = local.number_of_gpu_nodes
    min_size     = local.number_of_gpu_nodes
    max_size     = local.number_of_gpu_nodes > 0 ? local.number_of_gpu_nodes : 1
  }

  taint {
    key    = "nvidia.com/gpu"
    value  = "present"
    effect = "NO_SCHEDULE"
  }

  labels = {
    "accelerator" = "nvidia-gpu"
  }

  update_config {
    max_unavailable = 1
  }

  launch_template {
    id      = aws_launch_template.eks_nodegroup_template.id
    version = aws_launch_template.eks_nodegroup_template.latest_version
  }

  depends_on = [
    aws_iam_role_policy_attachment.iam_role_workernode_policy
  ]
}

# DNS Zone
resource "aws_route53_zone" "dns_zone" {
  name = local.as_fqdn
  vpc {
    vpc_id = aws_vpc.vpc.id
  }

  lifecycle {
    ignore_changes = [vpc]
  }
}

resource "aws_route53_record" "dns_cname_record" {
  for_each = toset(["alm", "monitoring", "objectstore", "registry", "insights", "apps"])

  zone_id = aws_route53_zone.dns_zone.zone_id
  name    = "${each.key}.${local.as_fqdn}"
  type    = "CNAME"
  ttl     = 300
  records = [local.as_fqdn]
}

# EFS File system
resource "aws_efs_file_system" "efs_file" {
  creation_token = "${local.res_prefix}-efs"
  encrypted      = true

  tags = {
    Name = "${local.res_prefix}-efs"
  }
}

# EFS Mount target
resource "aws_efs_mount_target" "efs_mount" {
  count = length(local.availability_zones)

  file_system_id  = aws_efs_file_system.efs_file.id
  subnet_id       = local.enable_public_access ? local.public_subnet_ids[count.index] : local.private_subnet_ids[count.index]
  security_groups = [aws_security_group.sg_internal.id]
}

# RDS instance for SQL Server
## DB Subnet
resource "aws_db_subnet_group" "db_subnet" {
  name       = "${local.res_prefix}-db-subnet-gp"
  subnet_ids = [aws_subnet.subnet_private[0].id, aws_subnet.subnet_private[1].id]
}

## DB Parameter Group
resource "aws_db_parameter_group" "sqlserver_pg" {
  name   = "${local.res_prefix}-sqlserver-pg"
  family = "sqlserver-se-15.0"
}

## DB Option Group
resource "aws_db_option_group" "sqlserver_opg" {
  name                 = "${local.res_prefix}-sqlserver-opg"
  engine_name          = "sqlserver-se"
  major_engine_version = "15.00"
}

## DB Instance
resource "aws_db_instance" "sqlserver_instance" {
  identifier     = "${local.res_prefix}-database"
  instance_class = local.db_instance_type
  engine         = "sqlserver-se"
  engine_version = "15.00.4236.7.v1"
  license_model  = "license-included"
  multi_az       = false
  username       = local.sql_username
  password       = local.sql_password

  # storage
  storage_type          = "gp3"
  allocated_storage     = 256
  max_allocated_storage = 1000
  storage_encrypted     = true

  # network
  db_subnet_group_name   = aws_db_subnet_group.db_subnet.name
  vpc_security_group_ids = [aws_security_group.sg_internal.id]
  port                   = 1433

  # backup snapshot
  backup_retention_period  = 7
  copy_tags_to_snapshot    = true
  delete_automated_backups = true
  deletion_protection      = false
  skip_final_snapshot      = true

  # window time
  backup_window      = "01:00-01:30"
  maintenance_window = "Mon:02:00-Mon:03:00"

  # options
  parameter_group_name       = aws_db_parameter_group.sqlserver_pg.name
  option_group_name          = aws_db_option_group.sqlserver_opg.name
  character_set_name         = "SQL_Latin1_General_CP1_CI_AS"
  timezone                   = "Tokyo Standard Time"
  auto_minor_version_upgrade = false
}

# Create ElastiCache
## ElastiCache subnet
resource "aws_elasticache_subnet_group" "redis_subnet" {
  name       = "${local.res_prefix}-redis-subnet-gp"
  subnet_ids = local.private_subnet_ids
}

## ElastiCache Replication Group
resource "aws_elasticache_replication_group" "redis_repgroup" {
  automatic_failover_enabled  = false
  preferred_cache_cluster_azs = local.availability_zones
  replication_group_id        = "${local.res_prefix}-redis-repgroup"
  description                 = "Redis Replication Group"
  node_type                   = "cache.t3.medium"
  num_cache_clusters          = length(local.availability_zones)
  engine                      = "redis"
  engine_version              = "7.1"
  parameter_group_name        = "default.redis7"
  port                        = 6380
  auth_token                  = local.redis_password
  transit_encryption_enabled  = true
  subnet_group_name           = aws_elasticache_subnet_group.redis_subnet.name
  security_group_ids          = [aws_security_group.sg_internal.id]
}

# Outputs
output "bastion_public_ip_address" {
  value = aws_eip.eip_vm.public_ip
}

output "client_private_ip_address" {
  value = aws_instance.vm_client.private_ip
}

output "sqlserver_hostname" {
  value = aws_db_instance.sqlserver_instance.address
}

output "redis_endpoint" {
  value = aws_elasticache_replication_group.redis_repgroup.primary_endpoint_address
}

output "private_subnet_ip_ids" {
  value = join(",", local.private_subnet_ids)
}
上記TerraformはElastiCacheとRDSをシングルAZでデプロイしています。マルチAZによる冗長化が必要な場合など、ご要件や環境に応じて変更を行ってください。
- 準備が整いましたらmain.tfが配置されたディレクトリに移動し、次のコマンドを一行ずつ実行し、Automation Suiteに必要なAWSリソースを展開します。
terraform initterraform plan -out main.tfplanterraform apply main.tfplan- Terraformによるリソース作成が成功することを確認します。
- AWS管理コンソールにアクセスし、各リソースが作成されていることを確認します。
- Terraformを用いずに手動でAWSリソースを作成することもできます。詳細な手順は 前提条件の一覧 をご参照ください。
前提条件のコンポーネントインストールなど
Automation Suiteインストールに必要な前提条件のコンポーネントのインストールや設定などを行います。
SSH接続
まず踏み台サーバーにRDPログインし、そこから作業用LinuxクライアントマシンにSSHで接続します。

以降Linuxマシンにて順次コマンド実行します。
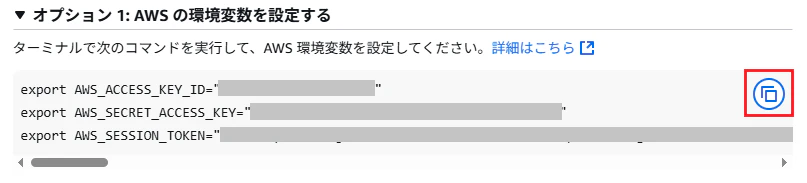
環境変数定義
-
AWSマネジメントコンソールのアクセスキーに表示されるAWS環境変数をコピーし、SSHクライアントにペーストします。aws configureコマンド でアクセスする方法は 後述します。
-
変数定義 (環境に応じて変更)
AS_VER=2024.10.2                    # インストールするAutomation Suiteバージョン
REGION=ap-northeast-1               # 東京リージョン
PREFIX=hidecha-eks                  # Terraformのres_prefix
CLUSTER_NAME=${PREFIX}-cluster      # EKS
ROLE_NAME=${PREFIX}-workernode-role # ワーカーノードIAMロール
EFS_NAME=${PREFIX}-efs              # EFS
hop limit確認
- EKSワーカーノードの hop limit が2であることを確認します。これはAmazon Linux 2023のhop limitの値が既定で1になっており、Pod上からインスタンスプロファイルを使用するためのAPIにアクセスできない問題が発生するため、Terraformの起動テンプレートにて既にhop limitを2に変更しています。詳細は こちらの記事 をご参照ください。
aws ec2 describe-instances \
  --region ${REGION} \
  --filters "Name=tag:eks:cluster-name,Values=${CLUSTER_NAME}" "Name=instance-state-name,Values=running" \
  --query "Reservations[].Instances[].{InstanceId:InstanceId,HopLimit:MetadataOptions.HttpPutResponseHopLimit}" \
  --output table
kubectl
- kubectlインストール
curl -LO "https://dl.k8s.io/release/$(curl -L -s https://dl.k8s.io/release/stable.txt)/bin/linux/amd64/kubectl" sudo install -o root -g root -m 0755 kubectl /usr/local/bin/kubectl - kubeconfigファイルを作成
aws eks update-kubeconfig --name ${CLUSTER_NAME} --region ${REGION} - Kubernetesクラスタのすべてのリソース確認
kubectl get all -A
NVIDIAアドイン
- GPUノードを利用している場合、NVIDIAアドイン をインストール
kubectl create -f https://raw.githubusercontent.com/NVIDIA/k8s-device-plugin/v0.17.1/deployments/static/nvidia-device-plugin.yml
EBSストレージクラス作成
-
EBSストレージクラス作成
sudo dnf install -y git
git clone https://github.com/kubernetes-sigs/aws-ebs-csi-driver.git
echo "parameters:
  type: gp3" >> aws-ebs-csi-driver/examples/kubernetes/dynamic-provisioning/manifests/storageclass.yaml
kubectl apply -f aws-ebs-csi-driver/examples/kubernetes/dynamic-provisioning/manifests/storageclass.yaml
kubectl describe storageclass ebs-sc
EFSストレージクラス作成
- EFSストレージクラス作成
- 信頼関係ポリシー更新
oidc_id=$(aws eks describe-cluster --name ${CLUSTER_NAME} --query "cluster.identity.oidc.issuer" --output text | cut -d '/' -f 5) cat <<EOF > trust-policy.json { "Version": "2012-10-17", "Statement": [ { "Effect": "Allow", "Principal": { "Federated": "arn:aws:iam::225248685317:oidc-provider/oidc.eks.region-code.amazonaws.com/id/${oidc_id}" }, "Action": "sts:AssumeRoleWithWebIdentity", "Condition": { "StringLike": { "oidc.eks.region-code.amazonaws.com/id/${oidc_id}:sub": "system:serviceaccount:kube-system:efs-csi-*", "oidc.eks.region-code.amazonaws.com/id/${oidc_id}:aud": "sts.amazonaws.com" } } } ] } EOF aws iam update-assume-role-policy --role-name ${ROLE_NAME} --policy-document file://trust-policy.json - サービスアカウント作成
cat <<EOF > efs-service-account.yaml apiVersion: v1 kind: ServiceAccount metadata: labels: app.kubernetes.io/name: aws-efs-csi-driver name: efs-csi-controller-sa namespace: kube-system annotations: eks.amazonaws.com/role-arn: arn:aws:iam:role/${ROLE_NAME} EOF kubectl apply -f efs-service-account.yaml - eksctlインストール
ARCH=amd64 PLATFORM=$(uname -s)_$ARCH curl -sLO "https://github.com/eksctl-io/eksctl/releases/latest/download/eksctl_$PLATFORM.tar.gz" curl -sL "https://github.com/eksctl-io/eksctl/releases/latest/download/eksctl_checksums.txt" | grep $PLATFORM | sha256sum --check tar -xzf eksctl_$PLATFORM.tar.gz -C /tmp && rm eksctl_$PLATFORM.tar.gz sudo mv /tmp/eksctl /usr/local/bin - OIDCプロバイダー信頼
eksctl utils associate-iam-oidc-provider --region=${REGION} --cluster=${CLUSTER_NAME} --approve - EFSストレージクラスのサンプルアプリ作成
file_system_id=$(aws efs describe-file-systems --query "FileSystems[?Name=='${EFS_NAME}'].FileSystemId" --output text) git clone https://github.com/kubernetes-sigs/aws-efs-csi-driver.git cat aws-efs-csi-driver/examples/kubernetes/dynamic_provisioning/specs/storageclass.yaml | sed "s/fileSystemId: fs-92107410/fileSystemId: ${file_system_id}/" > efs-storageclass.yaml kubectl apply -f efs-storageclass.yaml cat aws-efs-csi-driver/examples/kubernetes/dynamic_provisioning/specs/pod.yaml | sed "s/image: centos/image: almalinux/" > efs-pod.yaml kubectl apply -f efs-pod.yaml - 動作確認
kubectl get pvc
kubectl get pod/efs-app
Metrics Server
-
Metrics Serverインストール
kubectl apply -f https://github.com/kubernetes-sigs/metrics-server/releases/latest/download/components.yaml
EKSセキュリティグループ変更
- EKSセキュリティグループを変更し、インバウンドHTTPSを追加
sg_id=$(aws eks describe-cluster --name ${CLUSTER_NAME} --query "cluster.resourcesVpcConfig.clusterSecurityGroupId" --output text)
aws ec2 authorize-security-group-ingress \
  --group-id ${sg_id} \
  --protocol tcp \
  --port 443 \
  --cidr 0.0.0.0/0
uipathctl
-
uipathctl インストール
curl https://download.uipath.com/uipathctl/${AS_VER}/uipathctl-${AS_VER}-linux-amd64.tar.gz -o uipathctl.tar.gz
tar xzvf uipathctl.tar.gz
chmod +x uipathctl
sudo mv ./uipathctl /usr/local/bin
uipathctl version
versions.json
- versions.jsonダウンロード
curl https://download.uipath.com/automation-suite/${AS_VER}/versions.json -o versions.json
input.json作成
-
Automation Suiteの環境設定およびインストールされるUiPath製品の定義として
input.jsonのファイルを作成します。パラメーター定義 を参照して手動で作成することもできますが、設定項目が非常に多いため ウィザード を利用して主要なパラメーター設定を行い、手作業で詳細設定を行います。 -
ウィザードを起動するには次のコマンドを実行します。
uipathctl config generate --port 8080 -
ブラウザーで
http://<Linux-IP>:8080にアクセスします。

- I accept the license agreement をオンにして Nextをクリックします。
-
Platform:
-
Automation Suite on EKS を選択して、Nextをクリックします。

-
Automation Suite on EKS を選択して、Nextをクリックします。
-
Basic Configuration
-
Deployment mode: Online を選択
-
Deployment type: Highly Available を選択
-
Istio Minimum Protocol Version: TLSV1_3 を選択

-
Automation Suite FQDN:
as.lab.testなどと指定 -
Admin Username:
adminを指定 -
Admin Password: Automation Suite管理画面ログイン時のパスワードを指定
-
Storage Class:
ebs-scを指定 -
Select Services: 利用するUiPath製品を選択します。今回は
Orchestrator,AI Center,Document Understandingを選択し、Nextをクリックします。

-
-
Database Configurations
-
SQL Database
- Create Database: オン
- FQDN: RDS for SQL Serverのエンドポイントを指定
- Port:
1433を指定 - Username:
sql_adminなどSQL Serverの管理者を指定 - Password: SQL Server管理者パスワードを指定
- ※ Dotnet, JDBC, ODBC, SQLAlchemy Connect Stringは自動設定されるため編集不要

-
Redis Cache
- Endpoint: ElastiCache for Redisのエンドポイントを指定
- Database Password: ElastiCache for Redisの接続パスワードを指定
- Database Port:
6380を指定 - TLS: オン

-
Object Store
- Storage Type: S3 Bucket Store を選択
- Create Buckets: オン
- Region:
ap-northeast-1を指定 - FQDN:
s3.ap-northeast-1.amazonaws.com - Port:
443 - Instance Profile: オン
- Bucket Prefix: 任意の文字列を指定
- Bucket Suffix: 任意の文字列を指定して、Nextをクリックします。
- ※
{Prefix}-uipath-as-{製品名}-{Suffix}という命名規則でUiPath製品ごとにS3バケットが作成されます。

-
-
Registry & Certificate
- サーバー証明書の設定を行います。サーバー証明書はインストール後に置き換えることもできるため、ここでは何も入力せずにNextをクリックします。

- サーバー証明書の設定を行います。サーバー証明書はインストール後に置き換えることもできるため、ここでは何も入力せずにNextをクリックします。
-
Networking
- NLBの設定を行います。接続方式によって設定内容が異なりますが、ここではプライベートサブネットで動的にNLBを作成・利用する場合を想定した設定を行います。
- "service.beta.kubernetes.io/aws-load-balancer-eip-allocations": 削除
- "service.beta.kubernetes.io/aws-load-balancer-scheme":
"internal"に変更 - "service.beta.kubernetes.io/aws-load-balancer-subnets": 3つのアベイラビリティゾーンのプライベートサブネットのIDをカンマ区切りで追加 (Terraform
private_subnet_ip_ids出力値) - "service.beta.kubernetes.io/aws-load-balancer-internal":
"true"を追加 - "service.beta.kubernetes.io/aws-load-balancer-additional-resource-tags": 必要に応じてNLBに付加するタグを追加し、Nextをクリックします。

- NLBの設定を行います。接続方式によって設定内容が異なりますが、ここではプライベートサブネットで動的にNLBを作成・利用する場合を想定した設定を行います。
-
Advanced Configurations
- Document Understanding: オンを指定し、Nextをクリックします。

- Document Understanding: オンを指定し、Nextをクリックします。
-
Product Specific Configuration
- Modern Projects: オン
-
Download
-
Download をクリックし、input.jsonファイルをローカルにダウンロードします。

-
Download をクリックし、input.jsonファイルをローカルにダウンロードします。
-
ダウンロードしたinput.jsonをエディターで開き、2点修正します。
-
"storage_class": "ebs-sc",の後に次の行を追加:"storage_class_single_replica": "efs-sc",

-
Extended Language OCR を利用する場合は
"documentunderstanding": {}セクションに次の行を追加:"extendedOcr": {"enabled": true, "license": "<base64-license-code>" },

- ※
<base64-license-code>部分はExtended Language OCRの実際のライセンスコードに置き換えます。
- ※
-
-
LinuxマシンにてCtrl+Cでウィザードを終了します。
-
vi input.jsonを実行し、内容をコピー&ペーストして保存します。
Automation Suiteインストール
input.json が作成できましたら、いよいよAutomation Suiteインストールを実行します。
データベース / S3バケット作成
uipathctl prereq create input.json --versions versions.json
ロードバランサー作成
uipathctl manifest apply input.json --versions versions.json --override=gateway
- AWSマネージメントコンソール > EC2 > ロードバランサーにて新しいNLBが作成されていることを確認します。
DNSレコード作成
-
AWSマネージメントコンソール > Route 53にてAutomation Suite FQDN(例:
as.lab.test)のAレコードをNLBエイリアスに紐づけします。
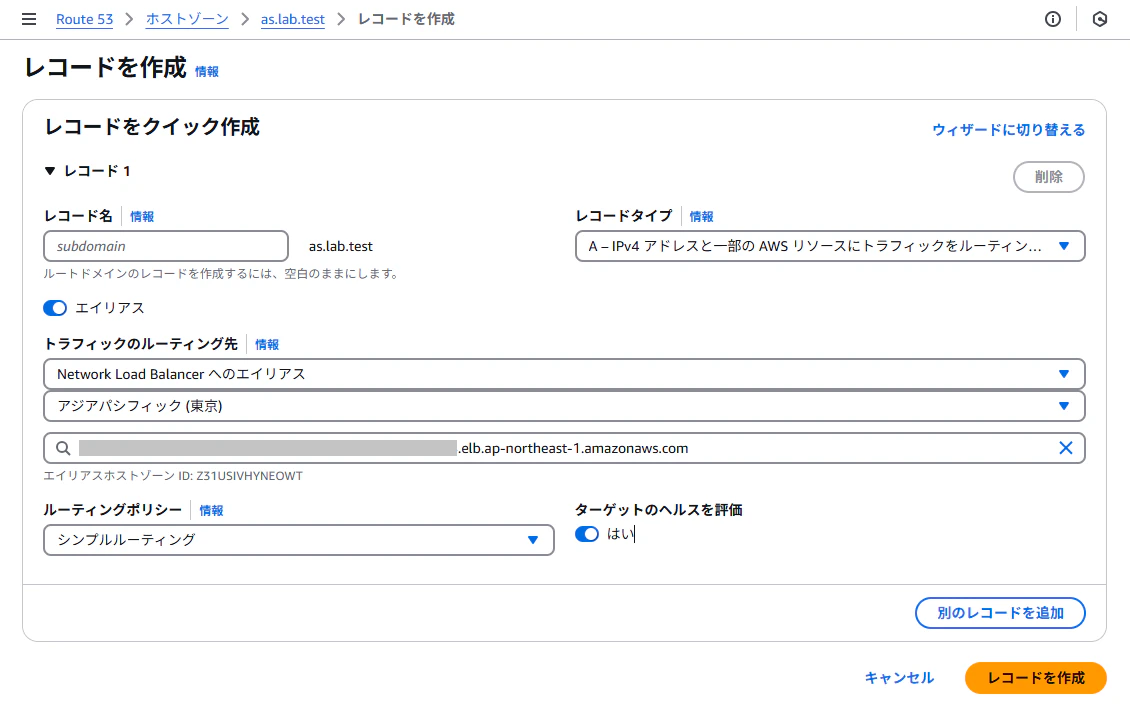
-
DNSレコード更新が伝播するまでTTL(300秒)の間、待機します。
前提条件チェック
uipathctl prereq run input.json --versions versions.json
- 次のエラーは無視してOKです。
[ECHO_SERVER_ACCESS] Echo server is not expected to be accessible from curl pod[DB_ROLES] SQL user does not have db_securityadmin role to DB- ※ ただしProcess Miningをインストールする場合はSQL Server管理者がProcess Miningのデータベースに対してdb_securityadminロールを付与する必要があります。
- DNSエラーが出る場合はレコード更新が伝播していない可能性があるため、しばらくしてからコマンドを再実行します。
Automation Suiteインストール実行
uipathctl manifest apply input.json --versions versions.json
- インストール完了までに1時間程度かかります。インストール時のPodの状態はArgoCDで監視することができます。
ArgoCDアクセス
- インストールの進捗状況はArgoCDで確認できます。
-
SSHクライアントにて別ターミナルを開き、次のコマンドにてArgoCDパスワードを取得します。
kubectl -n argocd get secret argocd-initial-admin-secret -o jsonpath="{.data.password}" | base64 -d -
ブラウザーにて
https://alm.{AS-FQDN}(例:https://alm.as.lab.test) を開き、adminユーザー/先ほど取得したパスワードにてログインします。

-
各アプリケーションのインストール状況が色分けして表示されます。
- 緑(Synced): インストール済み
- 青(Progressing): インストール中
- 赤(Degraded): インストール失敗

-
サポートバンドル取得方法
- インストール完了時にはすべて緑で表示されますが、2~3時間経過しても青や赤が残る場合にはインストールが失敗している可能性があります。次のコマンドにて サポートバンドル を取得し、UiPath カスタマーサポートへのお問い合わせの際に添付します。
uipathctl health bundle input.json --versions versions.json
インストール後の作業など
管理画面へのログイン
-
ブラウザーにて https://{AS-FQDN} (例:
https://as.lab.test) を開き、Automation Suiteのログイン画面が表示されることを確認します。

- host組織にログインするには
organization: host, Username: admin, Password: {ウィザードで指定したパスワード}にてログインします。 - default組織にログインするには
organization: default, Username: orgadmin, Password: {ウィザードで指定したパスワード}にてログインします。初回ログイン時にパスワードを変更します。
- host組織にログインするには
サーバー証明書の入れ替え
- Automation Suiteのインストール時に自動作成される自己署名証明書の有効期限は 90日間 です。有効期限が切れる前に別のサーバー証明書を準備し、入れ替えを行う必要があります。詳細な手順は 証明書を管理する をご参照ください。
変更インストール
-
input.jsonなどを変更して、Automation Suiteのインストールを再実行するには次のコマンドを実行します。uipathctl manifest apply --dry-run input.json --versions versions.jsonuipathctl manifest apply input.json --versions versions.json --skip-helm
aws configureによるkubectl実行
- 今回はAWS環境変数を使用してkubectlを実行しましたが、Automation Suite運用時に毎回コピー&ペーストするのは面倒です。aws configureで指定したIAMユーザーでkubectlを実行するには次の手順を実行します。
- 次のコマンドを実行し、aws-authのConfigMapにIAMユーザーを追加します。
USERNAME=hidecha-iam-user # aws configureで設定するIAMユーザー名 REGION=ap-northeast-1 # 東京リージョン PREFIX=hidecha-eks # Terraformのres_prefix CLUSTER_NAME=${PREFIX}-cluster # EKS account_id=$(aws sts get-caller-identity --query Account --output text) eksctl create iamidentitymapping \ --cluster ${CLUSTER_NAME} \ --region ${REGION} \ --arn arn:aws:iam::${account_id}:user/${USERNAME} \ --username ${USERNAME} \ --group system:masters - 新しいSSHセッションを起動し、kubectlが実行できることを確認します。
kubectl get all -A
おわりに
- 今回はAutomation SuiteのインストールをAmazon EKS環境にて実行する手順を説明しました。
- UiPathのすべての製品を自前のの環境で展開できるのがAutomation Suiteの大きなメリットです。ご関心のある方はぜひAutomation Suiteのインストールにチャレンジしていただけると幸いです!