TkinterとPillowを用いて複数画像からGIFアニメーションを作成する方法
本記事では、PythonでGUIツールキットのTkinterと画像処理ライブラリであるPillowを用いて、複数の静止画像をアニメーションGIFに変換するサンプルコードをご紹介します。
このサンプルでできること
- ボタン1つをクリックするとファイル選択ダイアログが表示され、複数の画像ファイル(.png, .jpg など)を選択できます。
- 次に表示されるファイル保存ダイアログでGIFファイル名を指定すると、即座に選択した画像を元にアニメーションGIFが作成されます。
前提条件
-
Python 3系がインストールされていること
-
以下のコマンドでPillowライブラリをインストールしてください。
pip install pillow
コードのポイント
-
TkinterによるGUI構築
-
tk.Tk()でメインウィンドウを作成し、geometry("300x100")でサイズを指定しています。 -
Buttonウィジェットで「画像選択」というボタンを配置しています。-
width,height,fontなどで見た目や大きさを調整できます。
-
-
-
ファイル選択
-
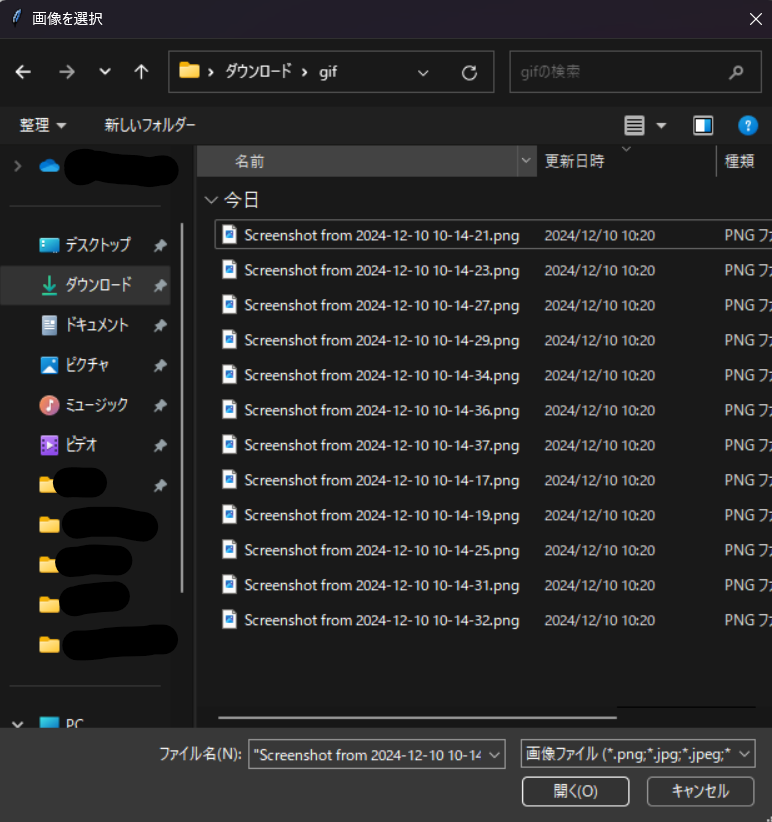
filedialog.askopenfilenames()を用いて複数の画像ファイルを選択します。 -
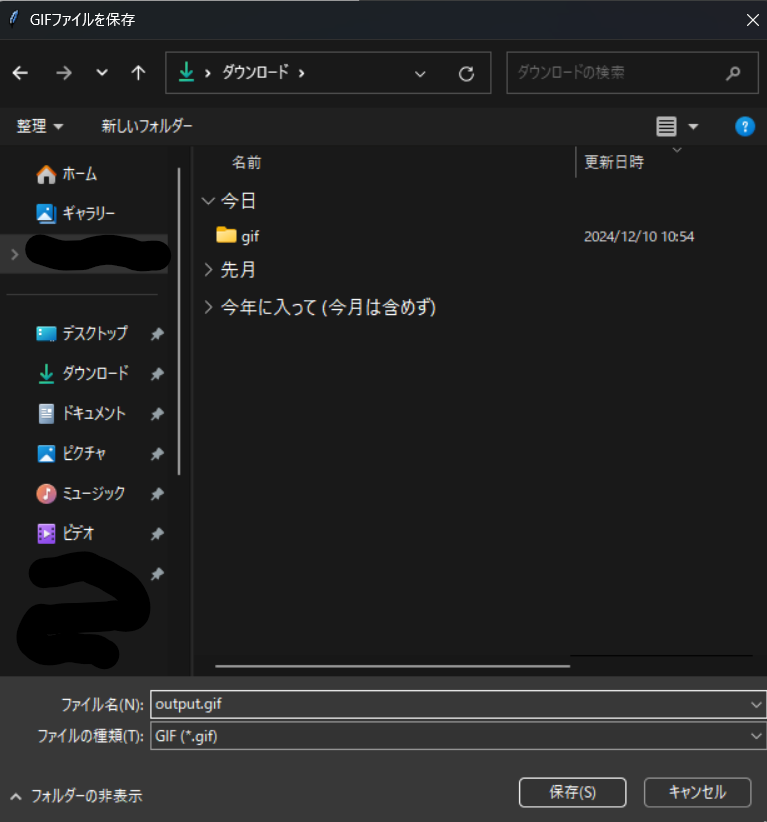
filedialog.asksaveasfilename()でGIF保存用のファイル名を指定します。
-
-
PillowでのGIF作成
-
Image.open()で読み込んだ画像をリストに格納します。 -
images[0].save()メソッドを用いてGIFとして保存し、append_imagesに他のフレーム画像を渡すことでアニメーション化します。 -
duration引数で1フレームあたりの表示時間(ミリ秒)を、loop=0でGIFを無限ループ再生に設定します。
-
-
エラー処理とメッセージ
-
messagebox.showinfo()やmessagebox.showerror()で処理結果やエラーをユーザーに通知します。
-
サンプルコード
以下が全体のサンプルコードです。コピー&ペーストしてご利用ください。
import tkinter as tk
from tkinter import filedialog, messagebox
from PIL import Image
import os

class GifCreatorApp:
    def __init__(self, master):
        self.master = master
        self.master.title("GIF作成ツール")

        # ウィンドウサイズを 300x100 に設定
        self.master.geometry("300x100")

        # ボタンを大きくするため width, height, font を調整
        self.select_button = tk.Button(
            self.master,
            text="画像選択",
            command=self.select_images,
            width=15,       # ボタンの幅
            height=2,       # ボタンの高さ
            font=("Arial", 12)
        )
        self.select_button.pack(pady=10)

    def select_images(self):
        initial_dir = os.getcwd()
        filetypes = [("画像ファイル", "*.png;*.jpg;*.jpeg;*.bmp;*.gif;*.tif;*.tiff")]
        files = filedialog.askopenfilenames(title="画像を選択", filetypes=filetypes, initialdir=initial_dir)
        if not files:
            return

        save_path = filedialog.asksaveasfilename(defaultextension=".gif",
                                                 filetypes=[("GIF", "*.gif")],
                                                 initialdir=initial_dir,
                                                 title="GIFファイルを保存")
        if not save_path:
            return

        try:
            images = [Image.open(f) for f in files]
            images[0].save(save_path, save_all=True, append_images=images[1:], optimize=False, duration=500, loop=0)
            messagebox.showinfo("完了", f"GIFファイルが作成されました:\n{save_path}")
        except Exception as e:
            messagebox.showerror("エラー", f"GIF作成中にエラーが発生しました。\n{e}")

if __name__ == "__main__":
    root = tk.Tk()
    app = GifCreatorApp(root)
    root.mainloop()
サンプルコードを実行すると
このような画面が表示されて、画像選択をクリックすると以下のようにフォルダーが開かれる。

GIFにしたい画像を複数選択し、**開く(O)**のボタンをクリックすることで、GIFの保存画面が開くため、ここで保存したいGIFのファイル名を指定して、**保存(S)**ボタンをクリックすることでGIFが作成されます。

応用
- ファイル選択ダイアログで
initialdirを指定することで、最初に開くディレクトリを変更できます。 -
duration値を変えることで、フレームスピードを調整可能です。 -
optimizeパラメータは、GIFの最適化に関するオプションです。より軽いGIFにしたい場合に活用できます。 -
width、height、fontなどを調整することで、GUIの見た目をお好みに合わせて変更できます。
以上のコードや説明は自由に再利用可能です。用途に合わせて機能を拡張したり、GUIをカスタマイズしたりしてみてください。

