概要
前回まではサーバ側でスプレッドシートにアクセスしていた。
クライアント側からのアクセスも試してみる。
基本は、公式ドキュメントの通りに作ればよい。
APIキーとクライアントIDについてはそれぞれ作る必要があるので注意。
認証情報の準備
プロジェクトの準備はできているものとする。*
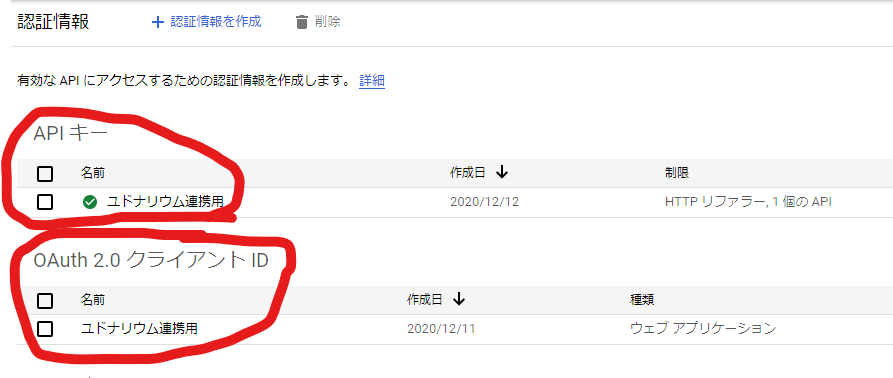
グーグルクラウドコンソール( https://console.cloud.google.com/?hl=ja ) からログインして認証情報画面に移動。

API キーとクライアントIDの2つを作る必要がある。

APIキーの作成

仕様予定のAPIの有効化を忘れていないかのチェックがてら、制限しておくとよい。
保存を忘れないこと
クライアントIDの作成
開発用のURLや本番用のURLを登録する。IPアドレス(127.0.0.1)では登録できない。
また、OAuth同意画面でスコープを設定するためにhttpsしか登録できない場合がある。後述。

APIキーとクライアントIDのコピー
作成したらコピーする。
ソース
- ポップアップダイアログが表示されるパターン。chromeにはブロックされるので、サンプル通りボタンを作るほうがよいかも。今回はとりあえず動かしたかったのでこれで。
認証
  <script async defer src="https://apis.google.com/js/api.js"
    onload="this.onload=function(){};handleClientLoad()"
    onreadystatechange="if (this.readyState === 'complete') this.onload()">
  </script>
  <script>
const CLIENT_ID = 'コピーしたクライアントID.apps.googleusercontent.com';
const API_KEY = 'コピーしたAPIキー';
const SCOPES = ['https://www.googleapis.com/auth/spreadsheets'];
const DISCOVERY_DOCS = ["https://sheets.googleapis.com/$discovery/rest?version=v4"];

function handleClientLoad() {
  gapi.load('client:auth2',  authorization);
}

async function authorization() {
  try{
    const auth = await authorize()
    await gapi.client.init({
      apiKey: API_KEY,
      clientId: CLIENT_ID,
      scope: SCOPES,
      discoveryDocs: DISCOVERY_DOCS,
    })
  }catch(err){
    console.log('authError', err)
  }
}
function authorize(){
  return new Promise((resolve, reject) => {
    gapi.auth.authorize({client_id: CLIENT_ID, scope: SCOPES, immediate: false}, function(authResult) {
      if (authResult && !authResult.error) {
        resolve(authResult)
      } else {
        reject(authResult.error)
      }
    });
  })
}
  </script>
</body>
スプレッドシートに行を追加する部分。若干Node.jsとは書き方が異なるので注意。
  const params = {
      spreadsheetId: '1JVa25s339f4kNXhdgHXI4dVq3FGMHrT8x7ZvhXKRDMY',
      range: 'A1',
      valueInputOption: 'USER_ENTERED',
      insertDataOption: 'INSERT_ROWS',
    };
    const body = {
      values: [["test","message"]],
    }

    try {
      const response = (await gapi.client.sheets.spreadsheets.values.append(params, body)).data;
      console.log(JSON.stringify(response, null, 2));
    } catch (err) {
      console.error(err);
    }
httpsについて
開発用では不便だなと思ったけれど、少し調べたら、webpackのサーバは簡単にhttps化できるようであった。
module.exports = {
  //...
  devServer: {
    https: true
  }
};
また、Angularの場合も、以下のコマンドと設定でhttps化することができた。
npm run start -- --ssl
        "serve": {
          "builder": "@angular-devkit/build-angular:dev-server",
          "options": {
            "browserTarget": "udonarium:build",
            "disableHostCheck": true
          },
          "configurations": {
            "production": {
              "browserTarget": "udonarium:build:production",
+              "ssl": true
            }
          }
        },
参考
Google APIを使ったJavaScriptで簡単アンケートページ(iPadアプリ風)
https://python5.com/q/pjgkcqok
https://angular.io/cli/serve
https://github.com/hibohiboo/udonarium/commit/1b32bec57943d201831f7f113c20626183bd86a3

