Android Advent Calendar 8日目の投稿です。
こんにちは。@hi6484です。
Goodpatchで日々Androidアプリを作ってます。
android.support.design.widget.NavigationViewのFont Typeを変更させるためのTipsです。
NavigationViewの実装方法などはAndroid SDKのSampleアプリなどを確認してください。
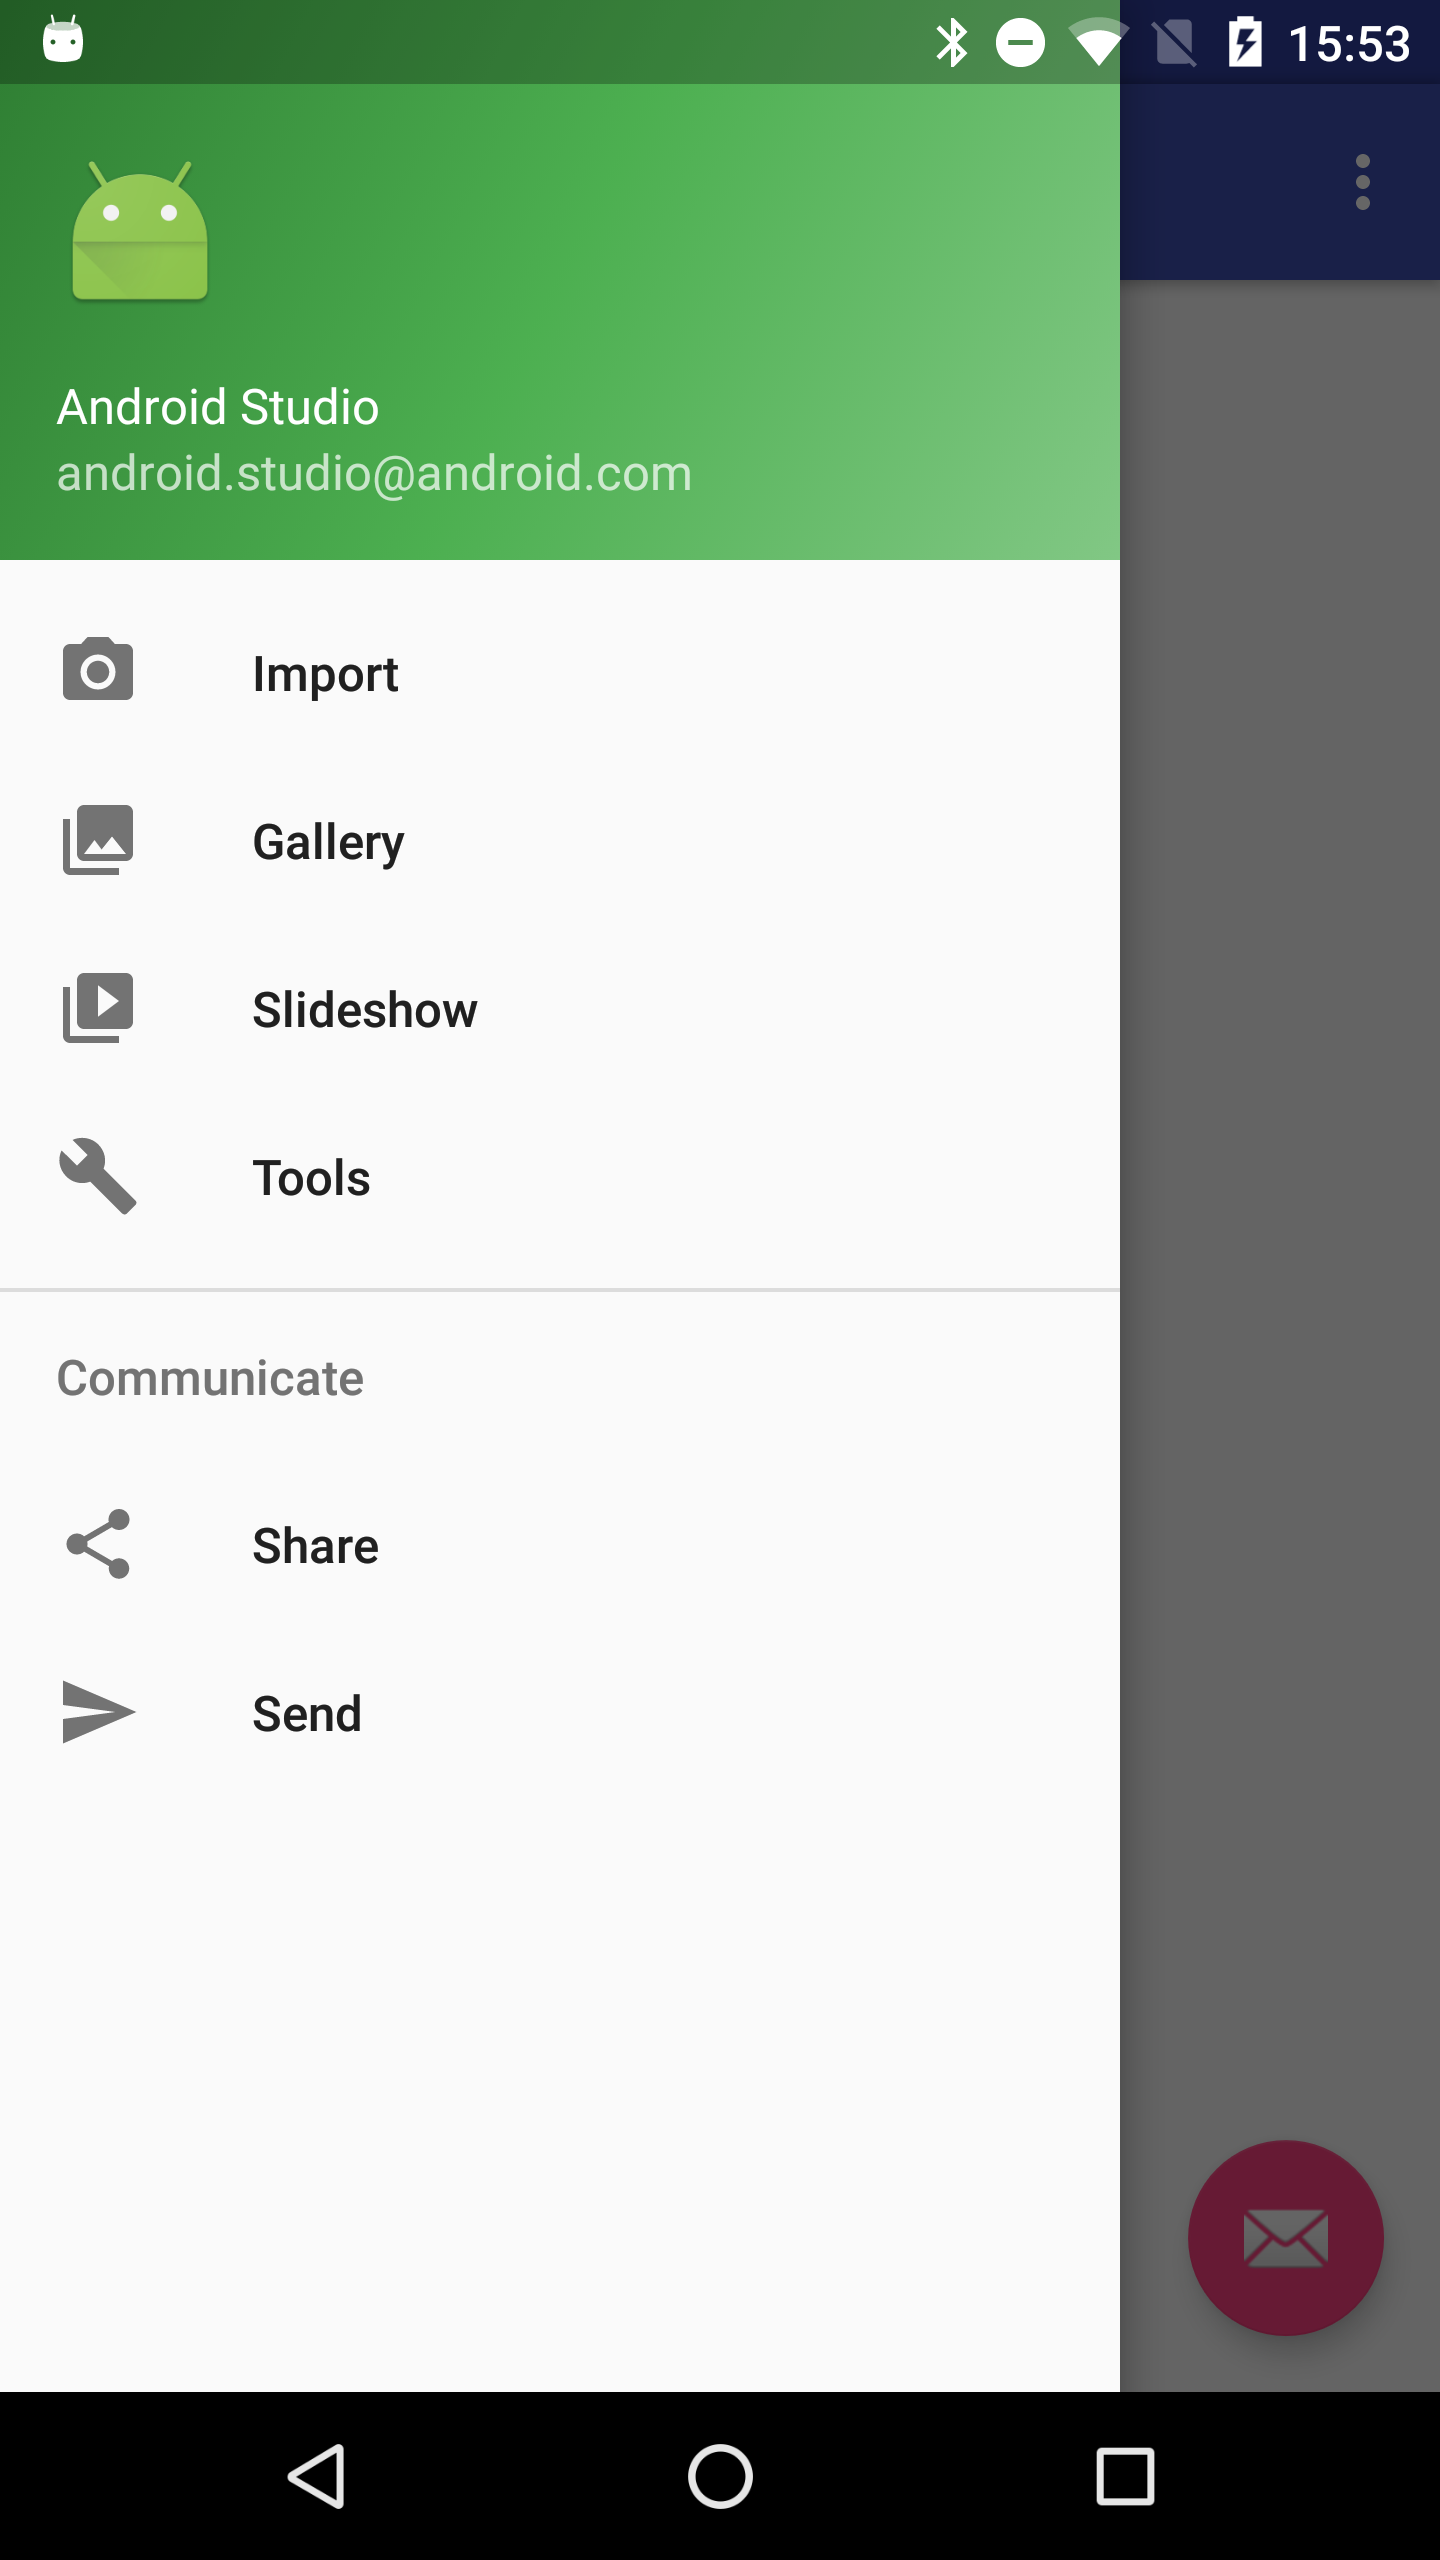
Fontを設定しないでNavigationViewを実装した場合。
英数字は問題ないが、日本語文字が端末によっては・・・。ってなる。
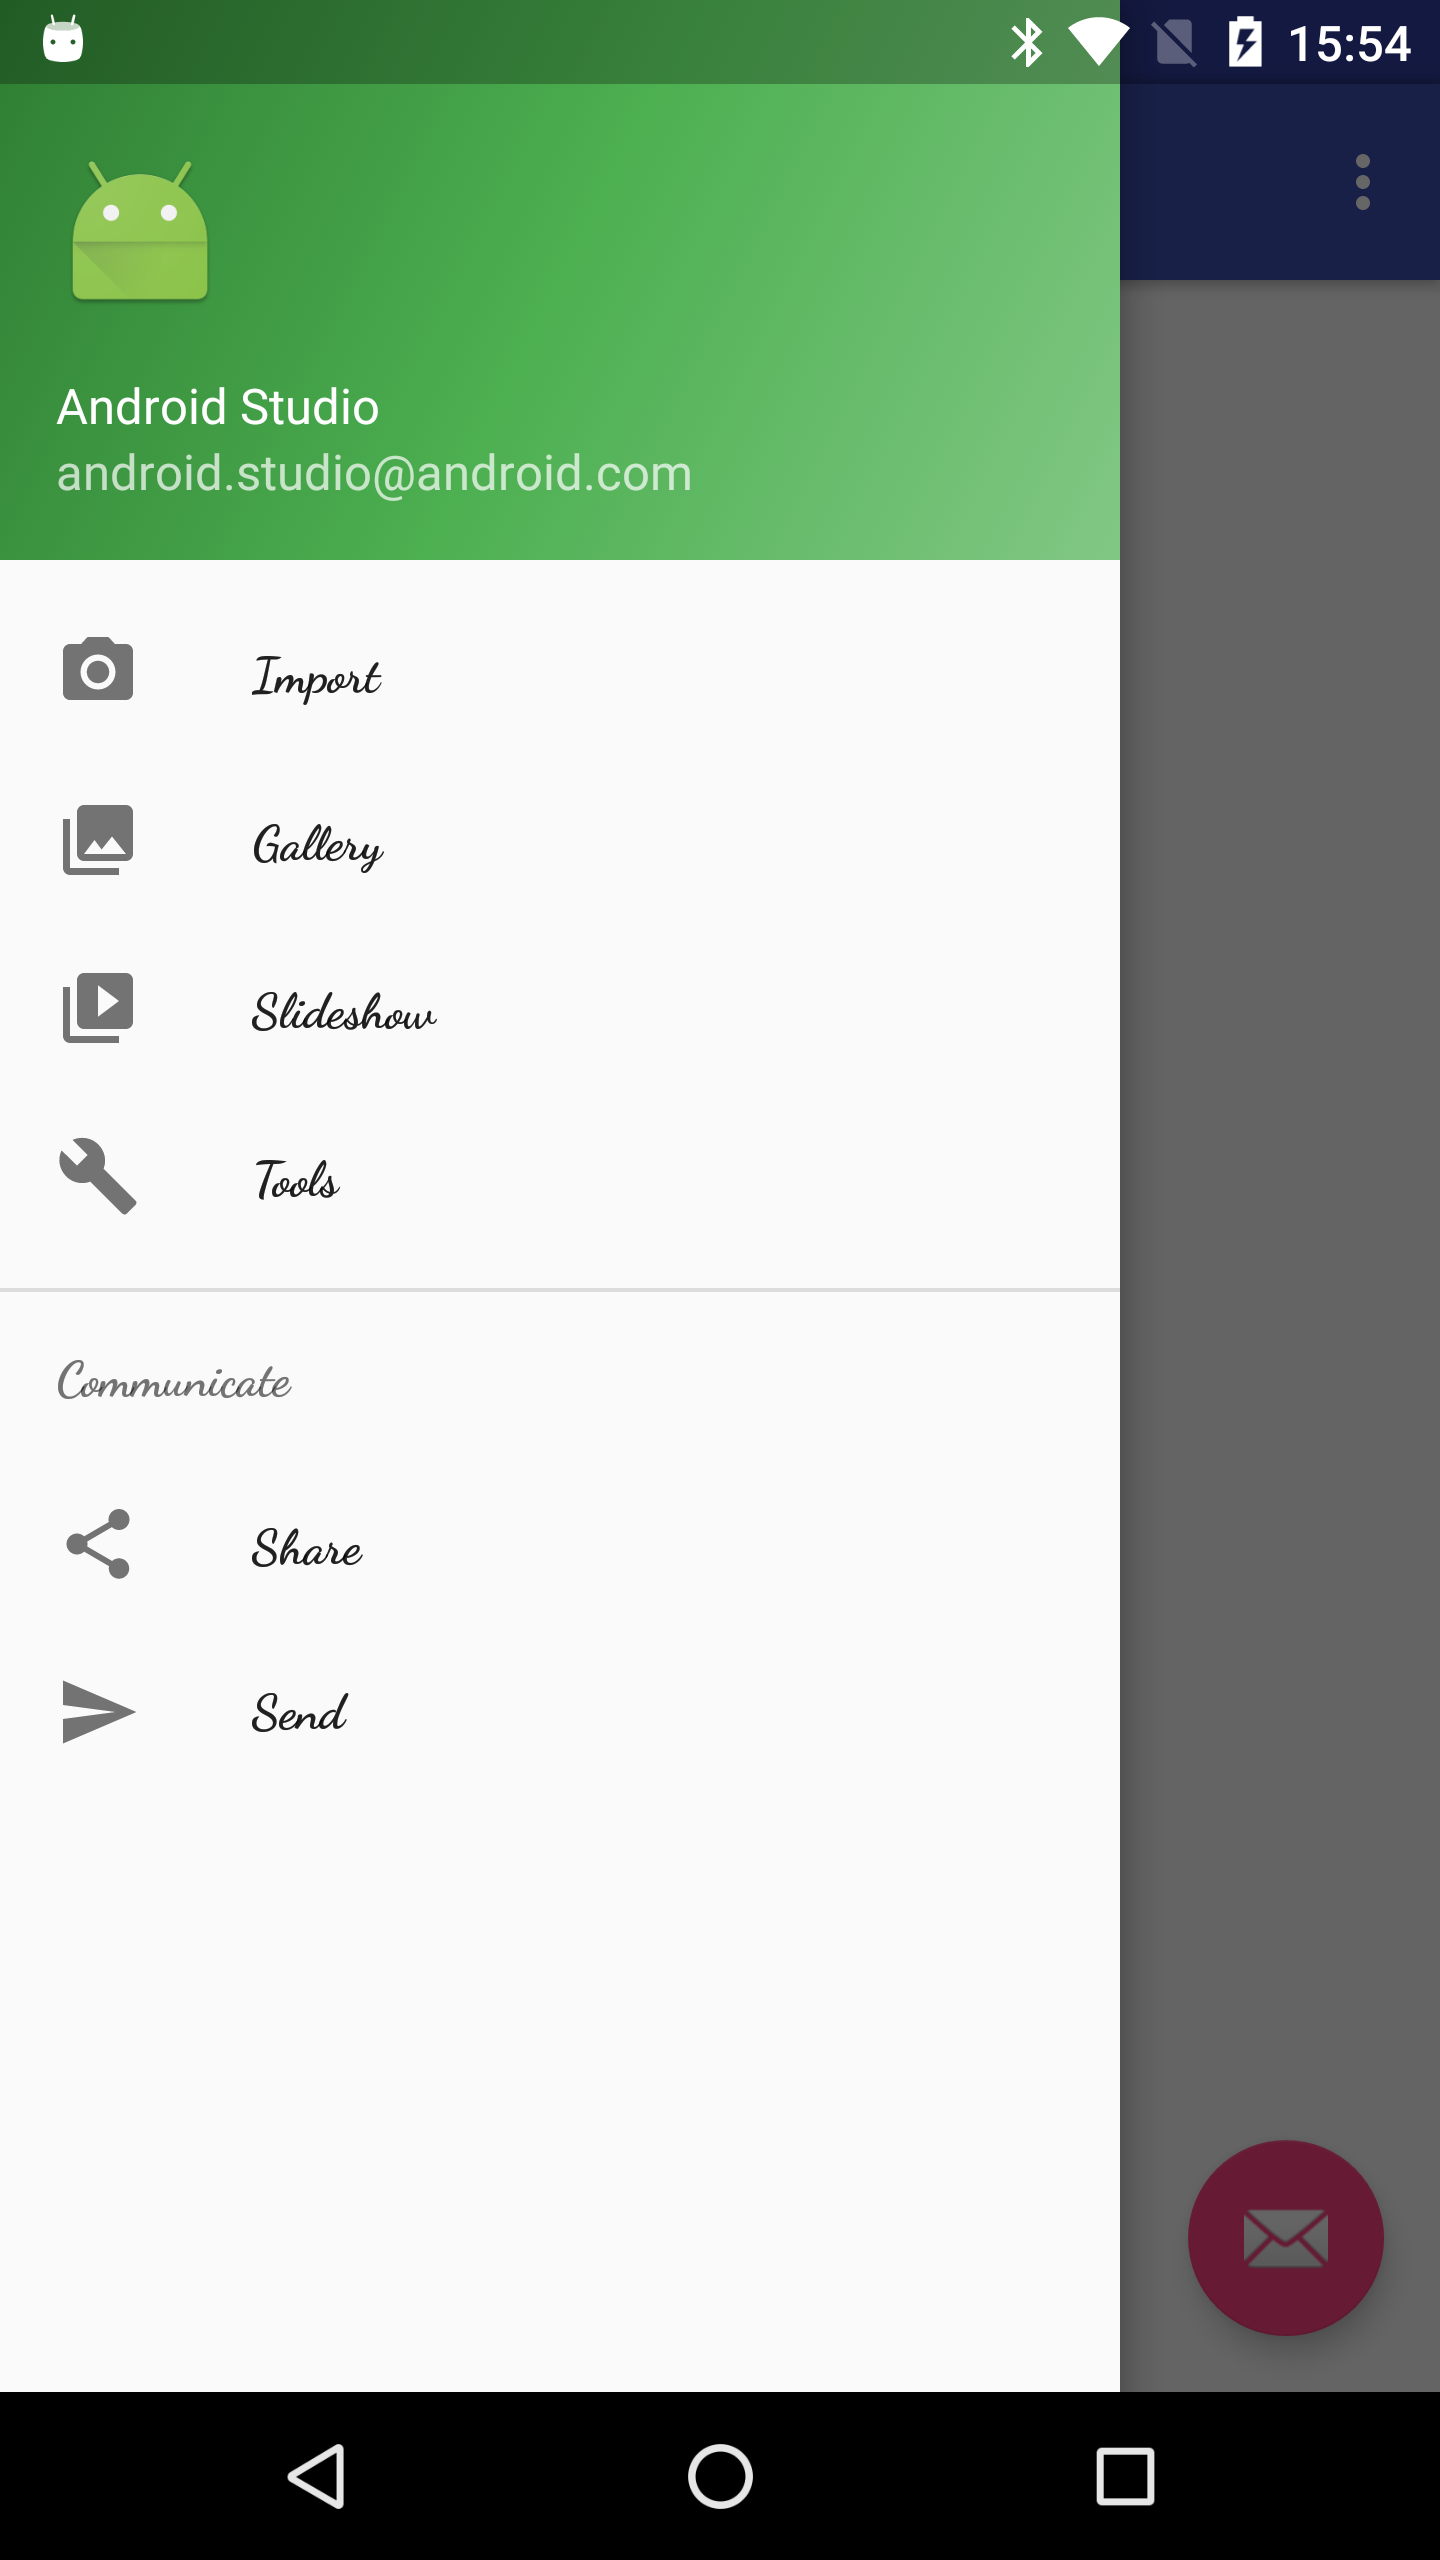
Fontを設定してNavigationViewを実装した場合。(DancingScript-Bold.ttf)
実装方法(抜粋)
getViewTreeObserver().addOnGlobalLayoutListener()にて
NavigationViewが作成されたタイミングを取得する
android.text.SpannableStringに設定したいTypefaceや文字列を設定する。
public class MainActivity extends AppCompatActivity {
    @Bind(R.id.nav_view)
    NavigationView mNavigationView;
    private Context mContext;

    @Override
    protected void onCreate(Bundle savedInstanceState) {
        super.onCreate(savedInstanceState);
        setContentView(R.layout.activity_main);
        ButterKnife.bind(this);
        mContext = getApplicationContext();
        mNavigationView.getViewTreeObserver().addOnGlobalLayoutListener(
                mOnGlobalLayoutListener);
    }

    private ViewTreeObserver.OnGlobalLayoutListener mOnGlobalLayoutListener =
            new ViewTreeObserver.OnGlobalLayoutListener() {
                @Override
                public void onGlobalLayout() {
                    AssetManager assetManager = mContext.getAssets();
                    Typeface typeface = Typeface.createFromAsset(assetManager,
                            "DancingScript-Bold.ttf");
                    mNavigationView.getViewTreeObserver().
                            removeOnGlobalLayoutListener(mOnGlobalLayoutListener);
                    Menu menu = mNavigationView.getMenu();
                    for (int loop = 0; loop < menu.size(); loop++) {
                        MenuItem item = menu.getItem(loop);
                        //外部フォントの設定.
                        SpannableString title =
                                new SpannableString(item.getTitle().toString());
                        title.setSpan(new CustomTypefaceSpan("" , typeface), 0 ,
                                title.length(), Spannable.SPAN_INCLUSIVE_INCLUSIVE);

                        item.setTitle(title);
                        SubMenu subMenu = item.getSubMenu();
                        if (subMenu != null) {
                            for (int subLoop = 0; subLoop < subMenu.size(); subLoop++) {
                                MenuItem subItem = subMenu.getItem(subLoop);
                                //外部フォントの設定.
                                SpannableString subTitle =
                                        new SpannableString(item.getTitle().toString());
                                subTitle.setSpan(new CustomTypefaceSpan("" , typeface), 0 ,
                                        subTitle.length(), Spannable.SPAN_INCLUSIVE_INCLUSIVE);
                                subItem.setTitle(subTitle);
                            }
                        }
                    }
                }
            };
}
あとは、CustomTypefaceSpan classを作成してあげればOK.
public class CustomTypefaceSpan extends TypefaceSpan {

    private final Typeface mTypeface;

    public CustomTypefaceSpan(String family, Typeface typeface) {
        super(family);
        mTypeface = typeface;
    }

    @Override
    public void updateDrawState(TextPaint textPaint) {
        applyCustomTypeFace(textPaint, mTypeface);
    }

    @Override
    public void updateMeasureState(TextPaint textPaint) {
        applyCustomTypeFace(textPaint, mTypeface);
    }

    private static void applyCustomTypeFace(Paint paint, Typeface typeface) {
        int oldStyle;
        Typeface old = paint.getTypeface();
        if (old == null) {
            oldStyle = 0;
        } else {
            oldStyle = old.getStyle();
        }

        int fake = oldStyle & ~typeface.getStyle();
        if ((fake & Typeface.BOLD) != 0) {
            paint.setFakeBoldText(true);
        }

        if ((fake & Typeface.ITALIC) != 0) {
            paint.setTextSkewX(-0.25f);
        }

        paint.setTypeface(typeface);
    }
}
CustomTypefaceSpanのfull codeは下記を参照してください。
https://android.googlesource.com/platform/packages/apps/UnifiedEmail/+/kitkat-release/src/com/android/mail/ui/CustomTypefaceSpan.java


