はじめに
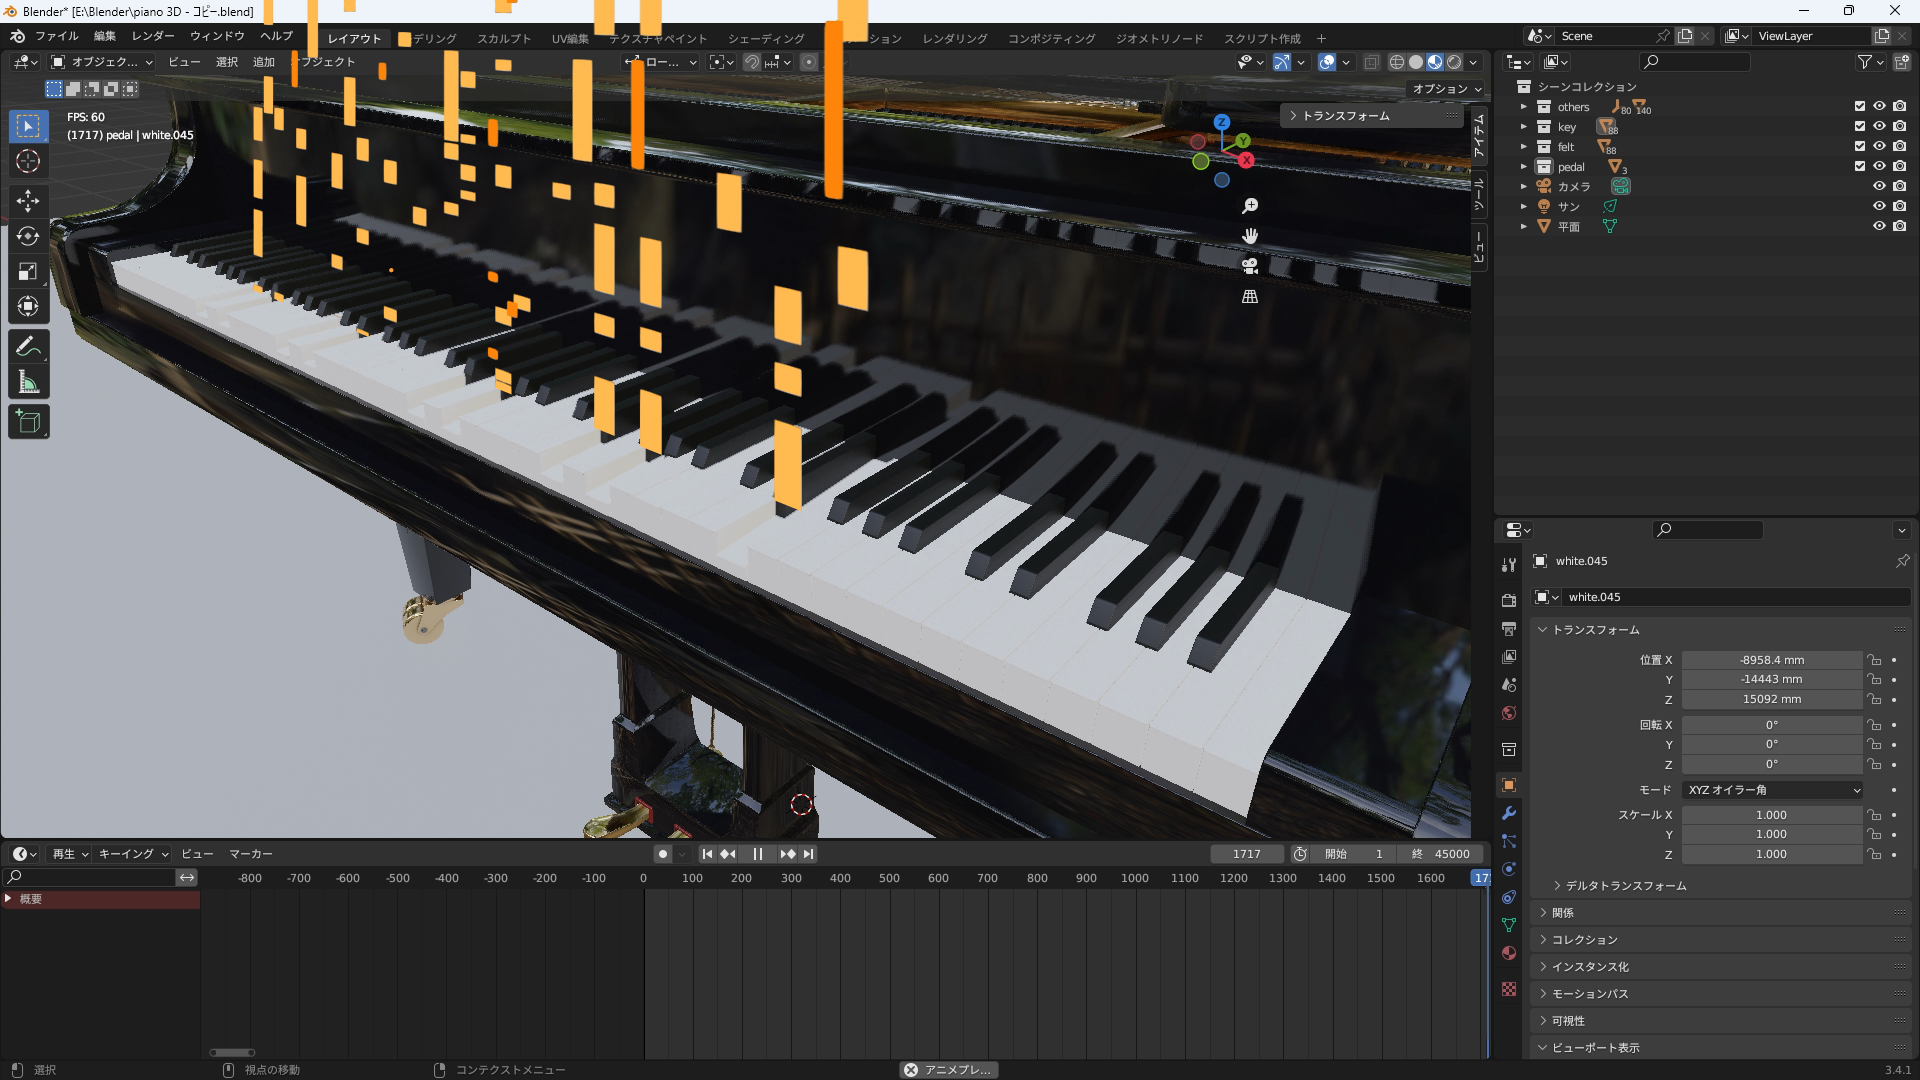
BlenderとPythonとMIDIを使ってピアノを動かしてみようと思います。ちなみに、Blenderは超初心者です。
完成したのはこのような感じです。
※オレンジの棒は後付けです。クリックすると動画に飛びます。

バージョンは以下の通りです。
Blender 3.4.1
Python(Blender内蔵) 3.10.8
まとまったソースコードも一応あります。
https://github.com/58jpygoma/BlenderPianoMidi
目次
- 事前準備
- MIDIについて
- 滑らかに見えるアニメーションについて
- アニメーションの実装
事前準備
以下のものはそろっている前提で話を進めていきます。
- type0(トラックが分かれていない)midiファイル
- 鍵盤などが分離されたピアノの3dモデル。
- フリーサイトからダウンロードして、分割すれば個人使用の範囲では十分だと思います。
- Blenderに外部のライブラリをインポートできる。
MIDIについて
みなさんMIDIについてはご存じだと思いますので、簡単な紹介にとどめたいと思います。
MIDIはこの時間にこの音を鳴らしてーみたいな情報で成り立っています。本題とはそれますが、MIDIはとても古い規格なので、音の強さが128段階しかありません。数年前にMIDI2.0ができましたが、とくに恩恵は感じてないです。
さて、pythonのmidoを使って、MIDIを見てみます。
import mido
mid = mido.MidiFile(r"path.mid")
print(mid)
結果
MidiFile(type=0, ticks_per_beat=480, tracks=[
  MidiTrack([
    MetaMessage('track_name', name='Blender01', time=0),
    MetaMessage('time_signature', numerator=4, denominator=4, clocks_per_click=24, notated_32nd_notes_per_beat=8, time=0),
    MetaMessage('set_tempo', tempo=368098, time=0),
    Message('note_on', channel=0, note=43, velocity=70, time=1920),
    Message('note_on', channel=0, note=31, velocity=87, time=0),
    Message('note_on', channel=0, note=71, velocity=83, time=1),
    Message('note_on', channel=0, note=55, velocity=86, time=0),
    Message('note_on', channel=0, note=62, velocity=87, time=0),
    Message('note_on', channel=0, note=74, velocity=88, time=3),
    Message('note_on', channel=0, note=55, velocity=71, time=0),
    Message('note_on', channel=0, note=59, velocity=86, time=0),
    Message('note_on', channel=0, note=43, velocity=86, time=236),
    Message('note_on', channel=0, note=62, velocity=62, time=3),
    Message('note_off', channel=0, note=31, velocity=64, time=57),
    Message('note_off', channel=0, note=55, velocity=42, time=55),
    Message('note_on', channel=0, note=50, velocity=73, time=5),
    Message('note_off', channel=0, note=43, velocity=64, time=36),
    Message('note_off', channel=0, note=43, velocity=64, time=30),
    Message('note_on', channel=0, note=67, velocity=67, time=54),
    Message('note_on', channel=0, note=55, velocity=77, time=0),
    Message('note_on', channel=0, note=59, velocity=78, time=0),
    Message('note_on', channel=0, note=62, velocity=78, time=0),
    Message('note_off', channel=0, note=62, velocity=70, time=40),
...
    Message('note_off', channel=0, note=53, velocity=76, time=33),
    Message('note_off', channel=0, note=57, velocity=76, time=0),
    MetaMessage('end_of_track', time=0)])
])
このように、最初に一拍当たりのtick数などを宣言してトラックが始まります。messageのなかで、使うものを紹介しておきます。
| set_temo | テンポを設定します。単位はあまり気にせずともライブラリで処理できます。 |
| note_on | 音を鳴らし始めます。2連続でnote_onにすることもあり、重なっていると解釈されます。のちに来るnote_offがどちらのnote_onに属するのかは判別できません。 |
| note_off | 音を鳴らすのをやめます |
| time | 前のメッセージからの経過時間 |
| velocity | 強さで0から127まで。off_velocityは一部楽器で使われてます。 |
| note | 音程。A0(ピアノの一番低い音)が21で順番に上がっていきます。 |
滑らかに見えるアニメーション
滑らかに見せるには、以下のポイントが必要だと思います。これにら沿ってやり方を整理します。
- 鍵盤を等速運動ではなく等加速度運動とみなす
- 力、移動時間の計測
- 鍵盤の動くタイミングをアニメーションのコマを基準にしない
- どのように鍵盤が動くのかの整理とパターン分け
どう鍵盤は動くのか
ピアノのハンマーアクションは複雑なので、等加速度運動なわけがありませんが(そもそも回転運動なはず)単純化して、等加速度運動とみなします。一応電子ピアノで測ってみて、妥当性を確かめます。
鍵盤下がった高さ$H$について
H=\frac{1}{2} \frac{F}{m}t^2
Ft^2=2Hm
となるので、入力時のベロシティを$F$、時間を$t$として$2Hm$をスマホのスローモーションカメラで計測してみます。結果、だいたい0.0055...となりこれで問題なさそうだと思い、この方向で進めることにしました。おおざっぱですが角度を高さとして扱っていきます。3.6°なので、近似の範囲です多分。
具体的な値
- velocityが127の時は1/48秒
- velocityが3のときは7/48秒
- note_offは6/48秒
ほどでした。
パターンの整理
定数を整理して、以下のようにまとめることができます。tは鍵盤が動き始めるとき(各頂点)を0とします。
onのとき
H=64.8 *velocity*t^2
offのとき
H=-240.3t^2+3.6
一つ例を出してみます。縦軸は高さで押されている状態が3.6、押されていない状態が0です。横軸は秒です。
わかりにくいのですが、赤がoffで緑がonです。offからonにかけて鍵盤は青い線の上を動いていることになります。アニメーションで鍵盤が動いているときは、二次関数に代入して高さを求めます。

offからonの場合分けをしておきます。アニメーションのフレーム数は適宜脳内補完してください。

| 色 | 状況 | やること |
|---|---|---|
| オレンジ | offが終わりきる前に次のonが始まる | 交点前と後で代入する式を変える |
| 黄色 | offが終わって、次のフレームに0を記録したいがすでに次のonが始まっている | offの分しか記録しない |
| 青 | 次のonに対して何の制約もない | offを記録し、次のフレームに高さ0を記録する |
MIDIのtimeとそれぞれの開始時間の関係について、note_offはmidiのtimeと一致しますが、note_onのtimeは鍵盤が下がったときの時間なので、下がるまでにかかる時間を引いて、開始時間とします。また、onの時もいくつかの場合分けがありますが、ここでは省略します。
実装
やることが整理できればあとは入力していくだけです。
MIDIを読み込みます。
import mido
mid = mido.MidiFile(r"path.mid")
Blenderのオブジェクト名とmidiのnote番号を対応させた辞書を作ります。自分の場合は"鍵盤の色.下からの数(3桁)"という命名になっているので、そのようにします。

コード
#midiのnote番号とblenderのオブジェクト名の対応する辞書の作成
keynum={}

for i in range (7):
    dict = {i*12+21:'white.'+str(i*7+1).zfill(3),#A0はnoteの21
            i*12+23:'white.'+str(i*7+2).zfill(3),
            i*12+24:'white.'+str(i*7+3).zfill(3),
            i*12+26:'white.'+str(i*7+4).zfill(3),
            i*12+28:'white.'+str(i*7+5).zfill(3),
            i*12+29:'white.'+str(i*7+6).zfill(3),
            i*12+31:'white.'+str(i*7+7).zfill(3)}
    keynum.update(dict)
dict={105: 'white.050',107: 'white.051',108: 'white.052'}
keynum.update(dict)

for i in range(7):
    dict = {i*12+22:'black.'+str(i*5+1).zfill(3),
            i*12+25:'black.'+str(i*5+2).zfill(3),
            i*12+27:'black.'+str(i*5+3).zfill(3),
            i*12+30:'black.'+str(i*5+4).zfill(3),
            i*12+32:'black.'+str(i*5+5).zfill(3),
           }
    keynum.update(dict)
dict = {106:'black.036'}
keynum.update(dict)
MIDIから必要な情報を抜き取り、noteの重なりを消します。例えばon on on off on off off off となっている場合は最初と最後のみを残します。鍵盤のリストの中にそれぞれのイベントの必要な情報をリストで記録しいきます。要は3次元リストです。
コード
#イベントリスト作成
keyboard = [[] for _ in range(88)]
#keyboard [[[onかoffか,note_on_offが切り替わるtime,ベロシティ,重なりカウンタ][]...][][]...]
#タイプ0のみを想定
for track in mid.tracks:
    #経過時間(midiの時間)
    #timeはテンポを含まないから、秒換算する。
    time=0
    second = 0
    #note_onで引き算をするためマージンを取る
    second_before_change_tempo = 1
    for msg in track:
        #時間を加算するときに必要な処理
        if msg.time !=0:
            #timeは前のメッセージからの経過時間だから先に加算する
            time += msg.time
            second = second_before_change_tempo + mido.tick2second( time, mid.ticks_per_beat, midi_tempo )

        #テンポが変わるときの処理
        if msg.type == 'set_tempo':
            midi_tempo = msg.tempo
            second_before_change_tempo = second
            time = 0

        if msg.type == 'note_on':
            #奇数すなわち鍵盤がonの時はそのonの重なりカウンタを加算
            if len(keyboard[msg.note-21])%2 == 1:
                keyboard[msg.note-21][-1][3] += 1
            #偶数の時はoffなので重なりカウンタ0で加算
            else:
                #開始時間を記録
                vel = msg.velocity
                move_time = math.sqrt(1 / vel) * 0.2357
                keyboard[msg.note-21].append([1,second-move_time,vel,0])
        if msg.type == 'note_off':
            #重なりカウンタが1以上の時は減算
            if keyboard[msg.note-21][-1][3] >0:
                keyboard[msg.note-21][-1][3] -= 1
            #重なっていないとき、note_off
            else:
                keyboard[msg.note-21].append([0,second])
順番的には微妙ですが、アニメーションを挿入する関数を定義します。それぞれ導出した式に引数に応じて代入してアニメーションを挿入します。keyframe_insertはこちらから確認できます。
insert_move_frame関数は鍵盤が動いているところで、insert_stop_frameは鍵盤が動き終わった後に、(フレームぴったりでないので、これがないと中途半端なままになってしまう)最後の締めをします。
コード
def insert_move_frame(sec,frames,note_type,vel = 0):
    for frame in frames:
        if note_type == 0:
            h = 3.6-(230.4 * ((frame/fps-sec)**2))
            h=round(h,1)
        elif note_type == 1:
            h = 64.8 * vel * ((frame/fps-sec) ** 2)
            h=round(h,1)
        obj.rotation_euler.x = math.radians(h)
        obj.keyframe_insert( data_path = "rotation_euler", frame = frame )
def insert_stop_frame(frame,note_type):
    if note_type == 0:
        obj.rotation_euler.x = math.radians(0)
    elif note_type == 1:
        obj.rotation_euler.x = math.radians(3.6)
    obj.keyframe_insert( data_path = "rotation_euler", frame = frame )
最後に場合分けしてアニメーションを入れます。まずは、note_offに着目し、offになりきれるものを記録します。高さ0まで戻せる場合のみ戻します。offになりきる前に次のonが始まる場合、交点を導出しそれ以前か以後化で代入する式を変えます。かぶったonの動いている部分まで記録し、もう一度記録しないようフラグを立てておきます。
note_onに着目して、まだ記録していないものを記録します。onはタイミングの関係上onになりきる前にoffが始まることがないので、場合分けが必要ありません。最後に、3.6まで鍵盤を押せる場合は次のフレームに記録します。
詳細はコードからどうぞ。
コード
fps = 60
for n, key in enumerate(keyboard):
    if len(key)==0:
        continue
    #鍵盤を選択
    obj = bpy.context.scene.objects[keynum[n+21]]
    #はじめに0度にそろえる
    insert_stop_frame(frame=1,note_type=0)

    for m in range(len(key)-1):
        event = key[m]
        next_event = key[m+1]
        note_type = event[0]
        sec = event[1]
        next_sec = next_event[1]
        #note_offの時
        if note_type == 0:
            move_time = 1/8
            anim_frames = list(range(int(sec*fps) + 1, int((sec + move_time)*fps)+1))
            next_frame = anim_frames[-1]+1
            #戻り終わるまで、次のイベントがない
            if next_sec >= sec + move_time:
                insert_move_frame(sec,anim_frames,0)
                #さらに次のフレームまで何もイベントがないときは0に移動させる
                if next_sec >= next_frame/fps:
                    insert_stop_frame(next_frame,0)
            #ある場合は、交点を計算し代入する
            else:
                #noteoff h = 3.6-(230.4 * t**2)
                #noteon  h = 64.8 * vel * (t-(next_sec-sec)) ** 2
                #求めたいのは二次方程式の解tの大きいほう
                #at^2+2bt+c=0
                vel = next_event[2]
                a = 230.4+64.8*vel
                b = -64.8*vel*(next_sec-sec)
                c =  ((next_sec-sec)**2)*64.8*vel - 3.6
                cross_time = (-b + math.sqrt(b**2-a*c))/a
                next_move_time = math.sqrt(1 / vel) * 0.2357
                cross_anim_frames = list(range(int(sec*fps) + 1, int((next_sec + next_move_time)*fps)+1))
                before_anim_frames = []
                after_anim_frames = []
                for cross_frame in cross_anim_frames:
                    if cross_frame/fps <= sec+cross_time:
                        before_anim_frames.append(cross_frame)
                    else:
                        after_anim_frames.append(cross_frame)
                insert_move_frame(sec,before_anim_frames,0)
                insert_move_frame(next_sec,after_anim_frames,1,vel)
                next_event[3] += 1
        #note_onの時
        elif note_type == 1:
            vel = event[2]
            move_time = math.sqrt(1 / vel) * 0.2357
            anim_frames = list(range(int(sec*fps) + 1, int((sec + move_time)*fps)+1))
            next_frame = anim_frames[-1]+1
            #未入力のonを描画
            if event[3] ==0:
                insert_move_frame(sec,anim_frames,1,vel)
            #戻り終わった次のフレームに何もない時はそのあとを3.6にする
            if next_sec >= next_frame/fps:
                insert_stop_frame(next_frame,1)

    #最後のoff
    event = key[-1]
    sec = event[1]
    move_time = 1/8
    anim_frames = list(range(int(sec*fps) + 1, int((sec + move_time)*fps)+1))
    next_frame = anim_frames[-1]+1
    insert_move_frame(sec,anim_frames,0)
    #動き終わった後に0に移動させる
    insert_stop_frame(next_frame,0)

    #アニメーションを滑らかに移動させず、ワープさせる。
    for fcurve in obj.animation_data.action.fcurves:
        for keyframe in fcurve.keyframe_points:
            keyframe.interpolation = 'CONSTANT'
おわりに
ある程度滑らかに入力できるようになったとは思いますが、ピアノの目に見える可動部は鍵盤だけではありません。ハンマーや消音器、ペダルはもう少し複雑です。
そもそも、最初はどんどんレンダリングして活用していく予定でしたが、完成してみていざレンダリングすると、リソースバカ食いするので作ったところで箪笥の肥やしになってしまうので、この辺にしたいと思います。モンスターマシンをお使いの方がいましたら、ぜひ消音器だけでも作ってみてはいかがでしょうか。