動作確認する際に毎度毎度AWSにデプロイするのもアレですし、
料金も気になるところなので、ローカルや開発機にて動作させれる環境を作ることでそのあたりは気にしなくてよくなるようになります。
また今回はPythonを使ってやります。
今回のコードは以下においてます。
https://github.com/hf7777hi/aws-sam-cli-helloworld
環境
- CentOS7.2
- Docker
$ python --version
Python 3.6.0
$ python -m pip -V
pip 18.0
$ java -version
openjdk version "1.8.0_181"
OpenJDK Runtime Environment (build 1.8.0_181-b13)
OpenJDK 64-Bit Server VM (build 25.181-b13, mixed mode)
$ node -v
v10.9.0
AWS SAM CLI インストール
$ pip install aws-sam-cli
インストール完了
$ sam --version
SAM CLI, version 0.6.0
Hello World
sam init で指定した言語でHelloWorldを生成してくれる。
これを基に実装していけばいい感じ。
テンプレート生成
$ sam init --runtime python3.6
以下のような構成で生成される。
$ tree
.
├── README.md
├── hello_world
│   ├── __init__.py
│   ├── __pycache__
│   │   ├── __init__.cpython-36.pyc
│   │   └── app.cpython-36.pyc
│   └── app.py
├── requirements.txt
├── template.yaml
└── tests
    └── unit
        ├── __init__.py
        ├── __pycache__
        │   ├── __init__.cpython-36.pyc
        │   └── test_handler.cpython-36.pyc
        └── test_handler.py

5 directories, 11 files
必要なモジュールをインストール
$ cd sam-app
$ pip install -r requirements.txt -t hello_world/build/
build以下にhelloworldソースをコピー。yumlに書いたパスにソースを移動させる
$ cp hello_world/*.py hello_world/build/
イベントファイルを生成する
0.5.0までは、API Gatewayはapiでしたが、apigatewayに変わった模様。
$ sam local generate-event api > event_file.json
Usage: sam local generate-event [OPTIONS] COMMAND [ARGS]...

Error: No such command "api".
$ sam local generate-event --help
~(略)~
Commands:
  alexa-skills-kit
  alexa-smart-home
  apigateway
  batch
  cloudformation
  cloudfront
  cloudwatch
  codecommit
  codepipeline
  cognito
  config
  dynamodb
  kinesis
  lex
  rekognition
  s3
  ses
  sns
  sqs
  stepfunctions
で生成できます。
$ sam local generate-event apigateway aws-proxy > event_file.json
動作確認
以下でAPI Gatewayを起動して、curl等で動作確認します。
$ sam local start-api
2018-09-29 15:39:54 Mounting HelloWorldFunction at http://127.0.0.1:3000/hello [GET]
2018-09-29 15:39:54 You can now browse to the above endpoints to invoke your functions. You do not need to restart/reload SAM CLI while working on your functions changes will be reflected instantly/automatically. You only need to restart SAM CLI if you update your AWS SAM template
2018-09-29 15:39:54  * Running on http://127.0.0.1:3000/ (Press CTRL+C to quit)
curlでAPIを叩くと無事に「hello world」が返ってきました。
$ curl http://127.0.0.1:3000/hello
{"message": "hello world", "location": "***.***.***.***"}
初回実行はDockerを立ち上げるので多少時間がかかります。
Fetching lambci/lambda:python3.6 Docker container image...................................................................................................................................................................
2018-09-29 15:45:30 Mounting /home/vagrant/work/sam-app/hello_world/build as /var/task:ro inside runtime container
START RequestId: efe93d45-c8ce-47a4-b671-3fcf870b34b9 Version: $LATEST
END RequestId: efe93d45-c8ce-47a4-b671-3fcf870b34b9
REPORT RequestId: efe93d45-c8ce-47a4-b671-3fcf870b34b9 Duration: 2467 ms Billed Duration: 2500 ms Memory Size: 128 MB Max Memory Used: 19 MB
2018-09-29 15:45:34 No Content-Type given. Defaulting to 'application/json'.
2018-09-29 15:45:34 127.0.0.1 - - [29/Sep/2018 15:45:34] "GET /hello HTTP/1.1" 200 -
ここまでで、HelloWorld完了です。
DynamoDB Local setup
DL
以下から取得します。
$ wget https://s3-ap-northeast-1.amazonaws.com/dynamodb-local-tokyo/dynamodb_local_latest.tar.gz
$ tar -zxvf dynamodb_local_latest.tar.gz
実行
展開したパスで以下を実行することでDynamoDB Localが起動します。
Javaがインストールされていない場合はインストールが必要です。
$ java -Djava.library.path=./DynamoDBLocal_lib -jar DynamoDBLocal.jar -sharedDb
Initializing DynamoDB Local with the following configuration:
Port:   8000
InMemory:       false
DbPath: null
SharedDb:       true
shouldDelayTransientStatuses:   false
CorsParams:     *
DynamoDB Localのエンドポイントは http://localhost:8000 となります。
GUIでDynamoDB Localを操作
https://github.com/aaronshaf/dynamodb-admin
にて公開されていたので利用させていただきます。
インストールします。
$ npm install dynamodb-admin -g
エンドポイントをexportして起動します。
$ export DYNAMO_ENDPOINT=http://localhost:8000
$ dynamodb-admin
  database endpoint: http://localhost:8000

  dynamodb-admin listening on http://localhost:8001 (alternatively http://0.0.0.0:8001)
http://localhost:8001
にて接続できます。
DynamoDB Localに接続する
準備
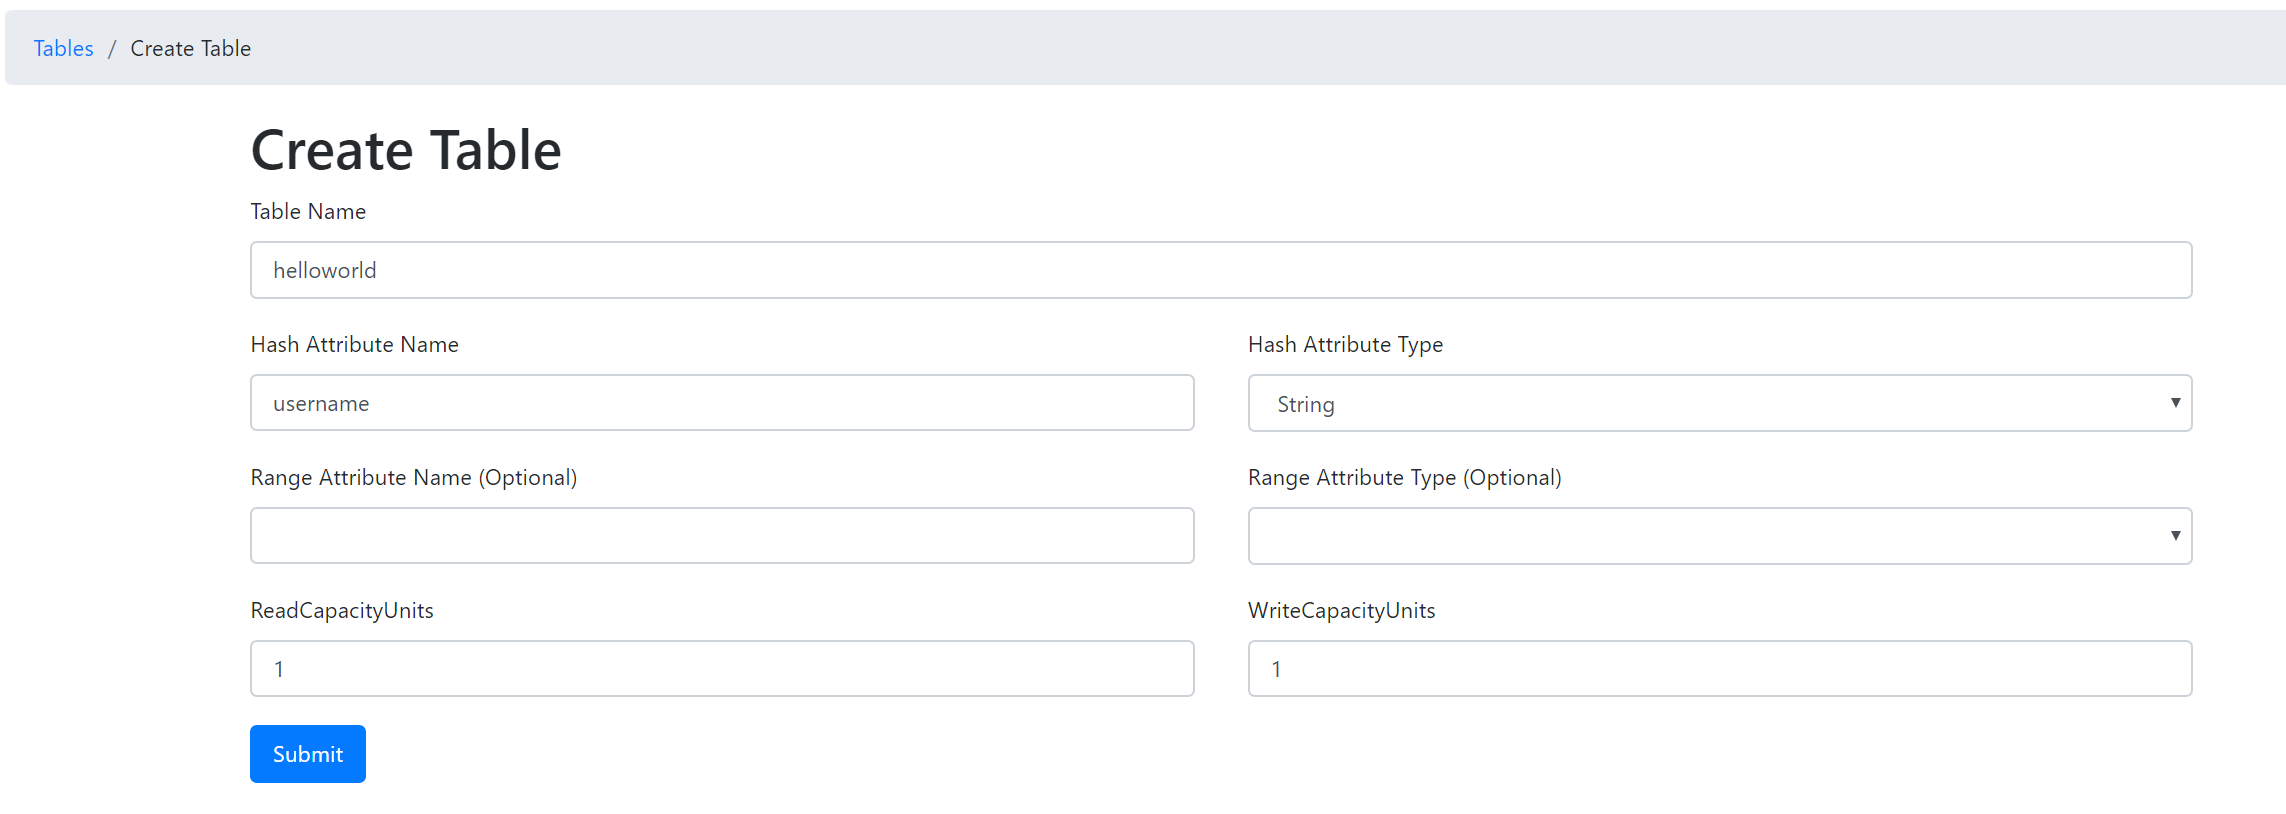
テーブルはあらかじめ作っておきます。
usernameをキーとしたテーブルを作りました。
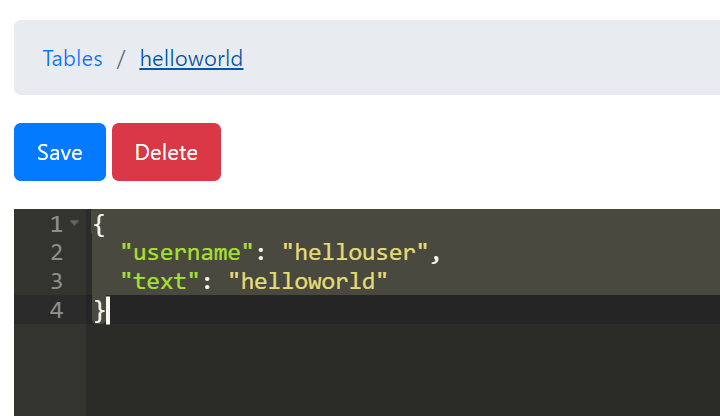
また、データも登録しておきます。
さらに、boto3を使ってDynamoDBに接続するため、インストールします。
$ pip install boto3 -t hello_world/build/
importします。
import boto3
from boto3.dynamodb.conditions import Key, Attr
詳しくは以下のドキュメントを参照ください。
ドキュメント:
https://boto3.amazonaws.com/v1/documentation/api/latest/index.html
データ取得
データの取得は get_item を使います。hello_world/app.pyを以下のように修正します。
def lambda_handler(event, context):
    dynamodb = boto3.resource("dynamodb", endpoint_url=ENDPOINT)
    table = dynamodb.Table(TABLE)
    key = {KEY_NAME: event['queryStringParameters']['username']}

    # DynamoDBから取得
    ret = table.get_item(Key=key)
    if "Item" not in ret:
        return False
    return {
        "statusCode": 200,
        "body": json.dumps(ret["Item"]),
    }
event['queryStringParameters']
でqueryパラメータがJson形式で取得できます。
event内にはさまざまなデータが格納されているので出力して確認してみてください。
実行すると先ほど登録したデータが取得できました。
$ curl http://127.0.0.1:3000/hello?username=hellouser
{"username": "hellouser", "text": "helloworld"}
データ登録
POSTでJson形式のデータを新規登録させてみます。
templete.yaml編集
まず、templete.yamlを編集します。
postのEventを追加します。
「HelloWorldPost」を追加します。
            Events:
                HelloWorld:
                    Type: Api # More info about API Event Source: https://github.com/awslabs/serverless-application-model/blob/master/versions/2016-10-31.md#api
                    Properties:
                        Path: /hello
                        Method: get
                HelloWorldPost:
                    Type: Api
                    Properties:
                        Path: /hello
                        Method: post
app.py 実装
event['httpMethod'] でhttpメソッドが取得できるので、これで判定します。
また、event['body'] でbodyパラメータが取得できます。
    # 新規登録
    elif event['httpMethod'] == 'POST':
        item = json.loads(event['body'])
        table.put_item(Item=item)
        return {
            "statusCode": 200,
            "body": json.dumps(item),
        }
data.json を以下のように用意しました。これを登録してみます。
{"username": "hogeuser", "text": "hello"}
curlで登録します。
 curl -X POST -H "Content-Type: application/json" http://127.0.0.1:3000/hello -d @data.json
{"username": "hogeuser", "text": "hello"}
先ほど作成したAPIで登録されてたか確認します。できています。
$ curl http://127.0.0.1:3000/hello?username=hogeuser
{"username": "hogeuser", "text": "hello"}
まとめ
これでAWS SAM CLIとDynamoDB Localを用いたAPIのローカル開発環境ができました。
Gitに今回利用した環境のVagrantfileを置いておきましたので、よかったらご利用ください。