この記事はオプトテクノロジーズアドベントカレンダー(2018)22日目のエントリーです。
はじめに
今年の4月に株式会社オプトに入社しました。
で、なんやかんやありまして、今は React なフロントエンドをコツコツと書いております。
今回は、お仕事の中で出会った visual testing の構築方法についてお話しします。
visual testing とは
読んで字の如く、見た目のテストのことです。
昨今のフロントエンドというのはライブラリやフレームワークの充実によって表現力が豊かになっています。たぶん。
しかし、その代償というか当然の跳ね返りとして、全容の把握が難しくなっています。
そこで、バージョンごとに画面のスナップショットを撮影し、差分を検出することで見た目の変更を把握しやすくしましょう、というわけです。
本記事では、特に React で構築されたフロントエンドを Storybook + zisui + reg-suit でテストする方法についてお伝えします。
使用するツールについて
Storybook とは
Storybook is a UI development environment and playground for UI components. The tool enables users to create components independently and showcase components interactively in an isolated development environment.
Storybook とは、UI コンポーネントを開発する際に使用されるツールです。
React や Vue で作成したコンポーネントのカタログのようなものを作成でき、その中でコンポーネントを閲覧したり動作確認したりできます。
今回構築するテストでは、この Storybook の画面でスナップショットを撮影します。
zisui とは
A fast and simple CLI to screenshot your Storybook.
zisui とは、Storybook のスクリーンショットを撮影する CLI です。
API に画面サイズや撮影のタイミングなどのオプションが用意されており、例えばスマホサイズと PC サイズでそれぞれスナップショットを撮影したりといったこともできます。
2020-12-08 追記
この記事をまだ読んでくださる方がいるようなので、念のため追記です。
現在 zisui の利用は非推奨となっており、代替である storycap への移行が促されています。
This repository is not maintained. zisui was integrated into reg-viz/storycap. And migration to Storycap is so easy. Please read our migration guide
というわけで、もしこの記事を読む場合は公式の移行ガイドなども併せてご利用くださいませ。
reg-suit とは
reg-suit is a command line interface for visual regression testing.
reg-suit とは、visual testing のためのツールです。
2つの画像を比較して、差分を検出してくれます。
これに zisui で撮影した画像を比較してもらうことで、コンポーネントの見た目の変更を検出することができます。
構築方法
React なフロントエンドに導入する方法は以下の通りです。
React の Example Projects に紹介されている calculator へ導入してみましょう。
(ちなみに、導入したリポジトリはここに公開しています。)
まず必要な npm package をインストールします。
$ npm i -D @storybook/react @babel/core babel-loader
$ npm i react react-dom

$ npm install -D zisui

$ npm install -D reg-suit
npm scripts に以下を追記します。
{
  "scripts": {
    "storybook": "start-storybook -p 9001 -c .storybook",
    "pretest-visual": "zisui --serverCmd \"npm run storybook\" http://localhost:9001 -o actual_images",
    "test-visual": "reg-suit run"
  }
}
さて、それでは Storybook を動かせるようにしましょう。
.stories/config.js を作成し、以下を記述します。
これで、 src/stories/ にある js ファイルが Storybook で読み込まれるようになります。
また、 src/index.css もここで読み込んでおきます。
import { configure } from '@storybook/react';

const req = require.context('../src/stories', true, /.js?$/);
function loadStories() {
  require('../src/index.css')
  req.keys().forEach(filename => req(filename));
}

configure(loadStories, module);
src/stories/ 以下に stories を追加します。
Button component の stories は、例えば以下のようになると思われます。
import React from 'react';
import { storiesOf } from '@storybook/react';
import Button from '../component/Button';
import '../component/Button.css';

storiesOf('Button', module)
  .add('normal', () => (
    <Button
      name="1"
      orange={false}
      wide={false}
      clickHandler={() => console.log('click handler')}
    />
  ))
  .add('orange', () => (
    <Button
      name="="
      orange={true}
      wide={false}
      clickHandler={() => console.log('click handler')}
    />
  ))
  .add('wide', () => (
    <Button
      name="0"
      orange={false}
      wide={true}
      clickHandler={() => console.log('click handler')}
    />
  ));
この状態で npm run storybook を実行すると、 localhost:9001 で以下のような画面がみられるはずです。
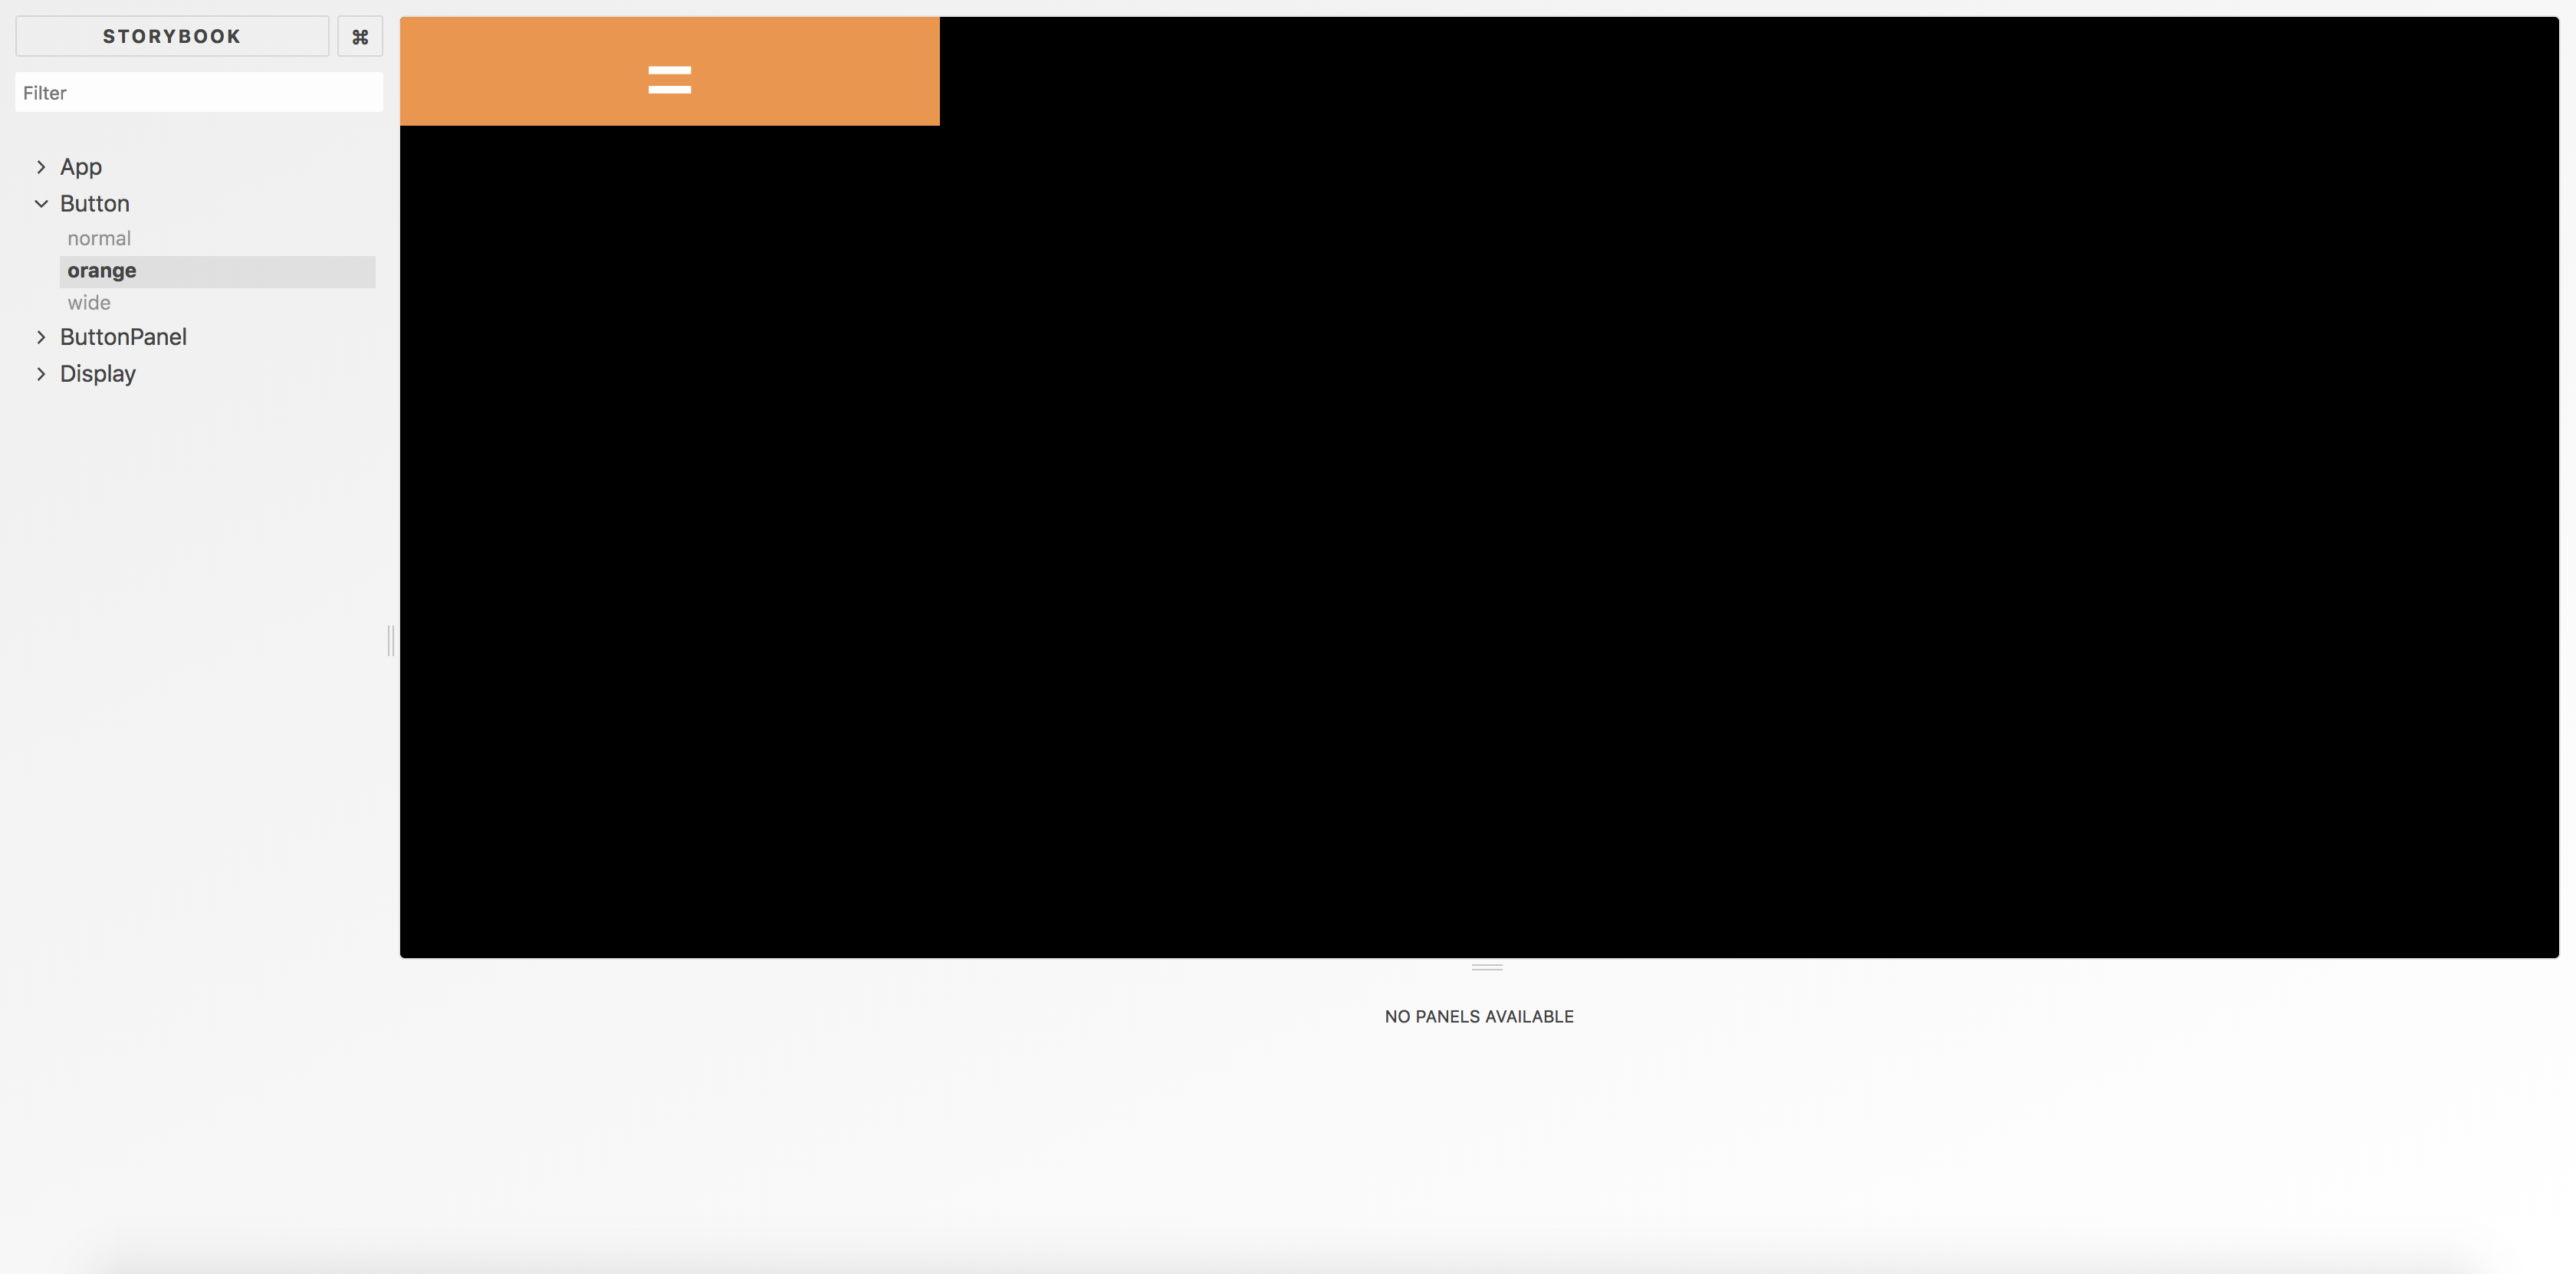
これで Storybook は動かせるようになりました。
zisui は Storybook が動かせれば使えるので、この時点で npm run pretest-visual を実行すれば、 actual_images/ 以下に全 stories の画像がこんな感じで吐き出されるはずです。

次に reg-suit のセットアップです。
画像を S3 の bucket に保存するので、S3 へのアクセス権限を持つ AWS_ACCESS_KEY_ID と AWS_SECRET_ACCESS_KEY を環境変数にセットします。
それが面倒なら、AWS の管理コンソールから bucket を先に作ってしまうのもアリです。
それができたら、 npx reg-suit init を実行します。
ひとまずこんな感じで答えましょう。
$ reg-suit init
# プラグイン
# - reg-keygen-git-hash-plugin
# - reg-notify-github-plugin
# - reg-publish-s3-plugin

# Working directory of reg-suit.
# => .reg

# Append ".reg" entry to yout .gitignore file.
# => Y

# Directory contains actual images.
# => actual_images

# Threshold, ranges from 0 to 1. Smaller value makes the comparison more sensitive.
# => 0

# notify-github plugin requires a client ID of reg-suit GitHub app. Open installation window in your browser
# => Y (ブラウザが開くので、そこから client ID を取得して貼り付ける

# Create a new S3 bucket
# => Y (既に bucket を用意している場合は n を選択

# Update configuration file
# => Y

# Copy sample images to working dir
# => n
すると、以下のような regconfig.json というファイルが生成されているはずです。
アップロードする S3 bucket 名や画像を吐き出すディレクトリ名を変えた時はこのファイルを弄りましょう。
{
  "core": {
    "workingDir": ".reg",
    "actualDir": "actual_images",
    "thresholdRate": 0,
    "addIgnore": true,
    "ximgdiff": {
      "invocationType": "client"
    }
  },
  "plugins": {
    "reg-keygen-git-hash-plugin": true,
    "reg-notify-github-plugin": {
      "clientId": "client_id"
    },
    "reg-publish-s3-plugin": {
      "bucketName": "bucket_name"
    }
  }
}
これで npm run test-visual を実行すると、画像が bucket にアップロードされるはずです。
実行結果に表示される URL にアクセスすれば、visual testing の結果が確認できます。
ここで Access Denied エラーが発生した場合は、AWS Access Key ID などが正しくセットされているか、その ID が buket に対して S3 フルアクセス権限を持っているか、bucket のパブリックアクセス設定が正しく設定されているかを確認しましょう。
% npm run test-visual                                                                                  (git)-[master]

> calculator@0.1.0 pretest-visual /path/calculator-with-visual-testing
> zisui --serverCmd "npm run storybook" http://localhost:9001 -o actual_images

info Wait for connecting storybook server http://localhost:9001.
info Found 6 stories.
info Screenshot stored: actual_images/Button/wide.png in 616 msec.
info Screenshot stored: actual_images/Button/normal.png in 619 msec.
info Screenshot stored: actual_images/App/normal.png in 640 msec.
info Screenshot stored: actual_images/Button/orange.png in 919 msec.
info Screenshot stored: actual_images/Display/normal.png in 309 msec.
info Screenshot stored: actual_images/ButtonPanel/normal.png in 311 msec.
info Screenshot was ended successfully in 8961 msec.

> calculator@0.1.0 test-visual /path/calculator-with-visual-testing
> reg-suit run

[reg-suit] info version: 0.7.17
[reg-suit] warn Failed to detect the previous snapshot key
[reg-suit] info Skipped to fetch the expected data because expected key is null.
[reg-suit] info Comparison Complete
[reg-suit] info    Changed items: 0
[reg-suit] info    New items: 6
[reg-suit] info    Deleted items: 0
[reg-suit] info    Passed items: 0
[reg-suit] info The current snapshot key: '??????????'
                                         ■ 0% | ETA: 0s | 0/10[reg-publish-s3-plugin] info Upload 10 files to bucket_name.
 ■■■■■■■■■■■■■■■■■■■■■■■■■■■■■■■■■■■■■■■■■ 100% | ETA: 0s | 10/10
[reg-suit] info Published snapshot '??????????' successfully.
[reg-suit] info Report URL: https://bucket_name.s3.amazonaws.com/??????????/index.html
[reg-notify-github-plugin] info Update status for ?????????? .
[reg-notify-github-plugin] info Comment to PR associated with master .
さて、これで visual testing はできるようになりましたが、せっかくなので CircleCI の設定もしてしまいましょう。
.circleci/config.yml で、 pull request を出した時に npm run test-visual が走るようにします。
image は 自前で用意するのが面倒なので regviz/node-xcb を使用します。
version: 2
jobs:
  build:
    docker:
      - image: regviz/node-xcb

    working_directory: ~/repo

    steps:
      - checkout

      - restore_cache:
          keys:
          - v1-dependencies-{{ checksum "package.json" }}
          - v1-dependencies-

      - run: npm install

      - save_cache:
          paths:
            - node_modules
          key: v1-dependencies-{{ checksum "package.json" }}

      - run: npm run test-visual
そしたら、CircleCI の project で AWS_ACCESS_KEY_ID と AWS_SECRET_ACCESS_KEY を環境変数にセットします。
この画面右側にある Add Variable から環境変数を追加できます。
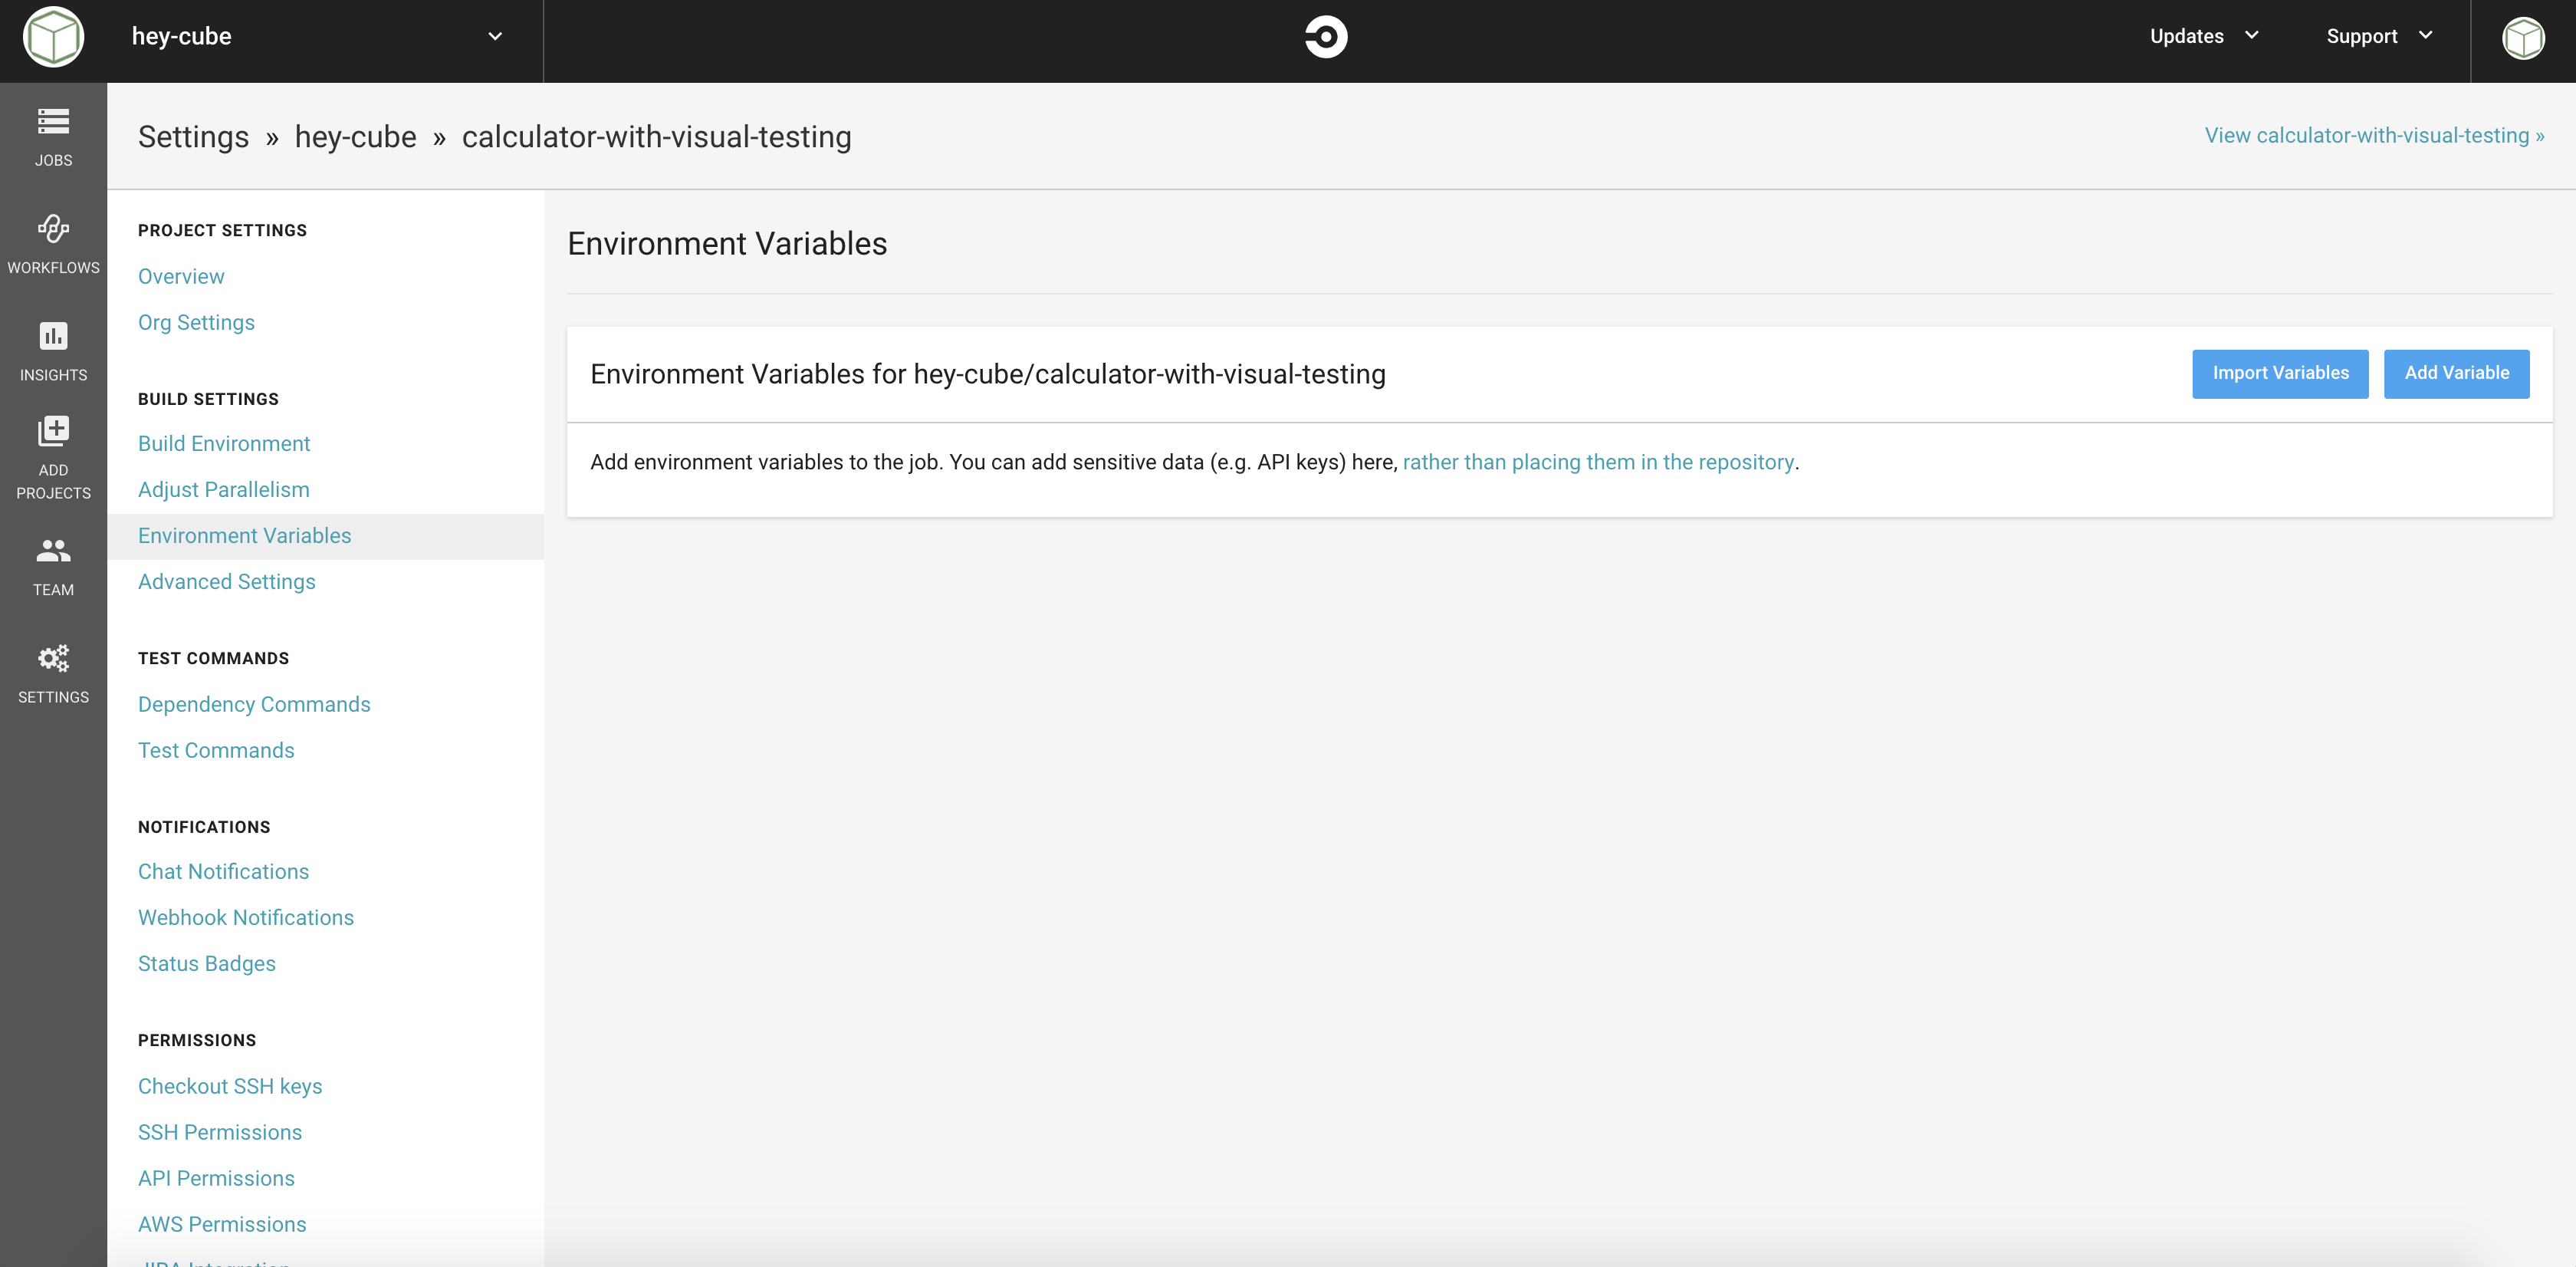
これで pull request を出せば、visual testing が勝手に行われるはずです。
試しに ButtonPanel component の記号の順番を並び替えてみましょう。
(pull request はこちら)
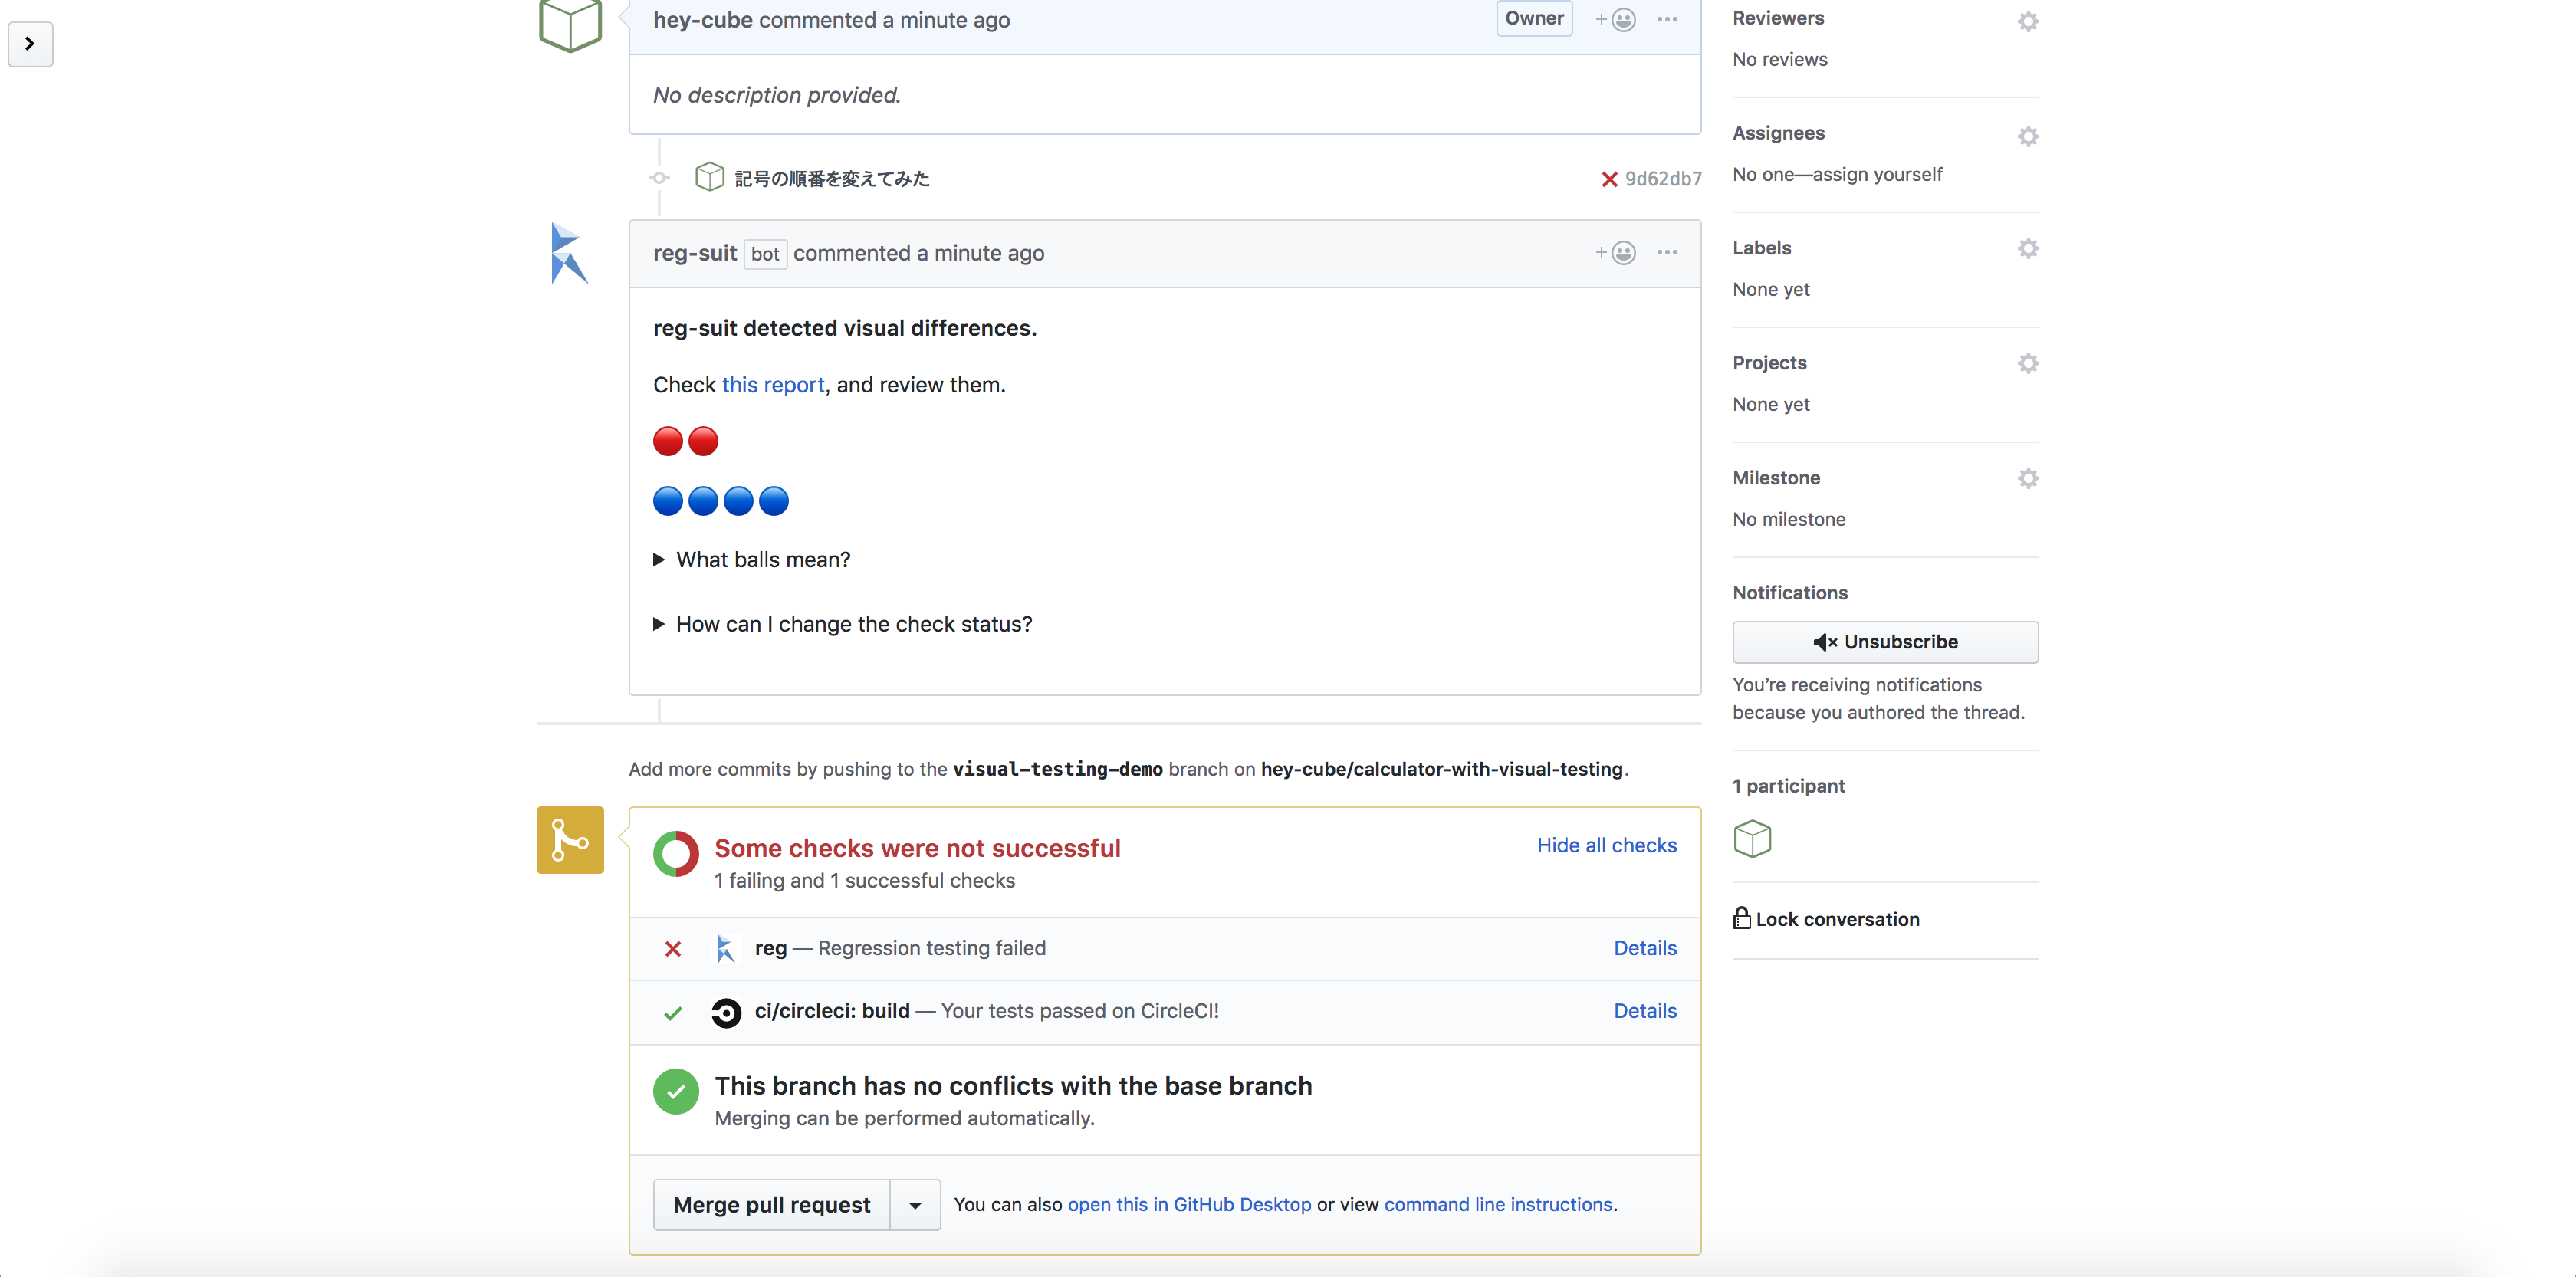
GitHub 上で reg-suit の結果が表示されました。
赤い丸が画像に差分が検出された stories の数です。
詳細を見てみましょう。
(reg-suit の結果はこちら 諸般の事情で reg-suit と連携させていた S3 のバケットを削除したため、リンクが死んでいます)
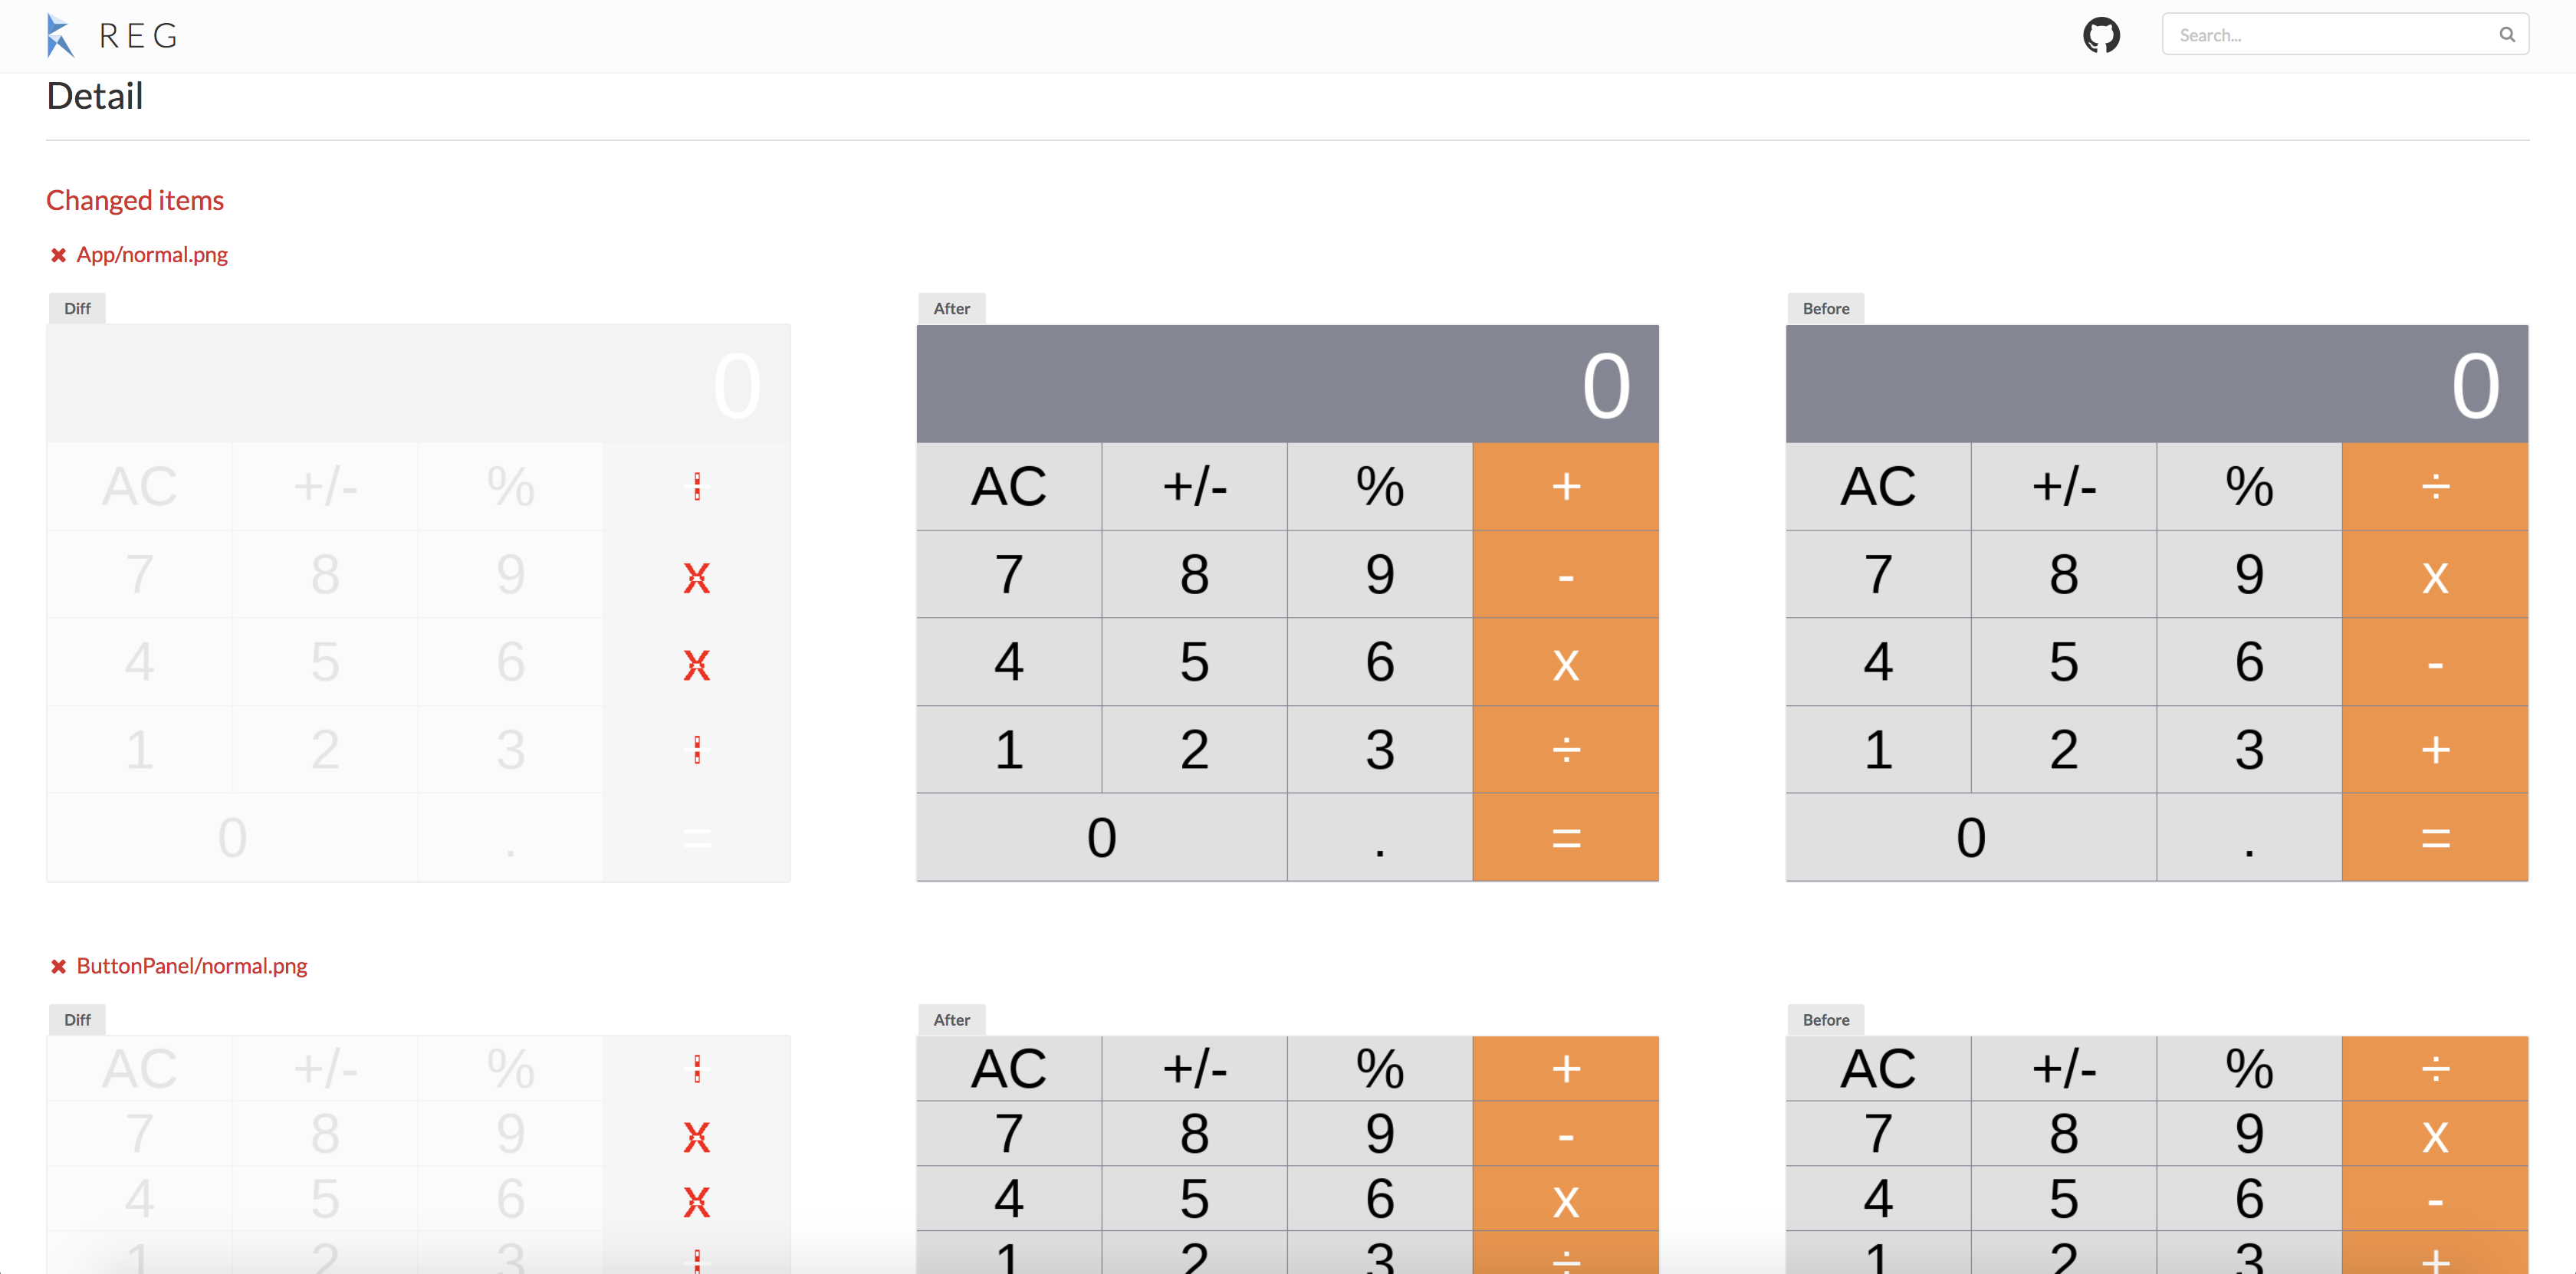
以前の画像、新しい画像、そして差分が赤くハイライトされた画像の3つが確認できます。
これで visual testing の導入が完了しました。
参考 URL
最後に
今開発しているプロダクトに導入した結果、変更が見た目にどんな影響を与えているかを容易に把握することができるようになり、開発効率が向上しました。
みなさんも是非活用してみてください。