AndroidStudioのあの緑のRunボタンでDeployGateにAPKをアップロードする方法です

準備
今回使う物は以下の物です
- AndroidStudio 0.8.5(これ以下でも多分大丈夫)
- Gradle
- deploygate-gradle-plugin
普通にAndroidStudioで開発してて、DeployGate使ってdeploygate-gradle-plugin使ってる人だったらなんも準備必要ないです
deploygate-gradle-pluginをまだ使ってない〜〜〜って人はここら辺をご参照ください
https://github.com/DeployGate/gradle-deploygate-plugin/blob/master/README.md
設定する
やり方は簡単です
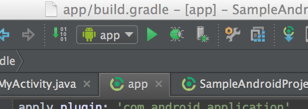
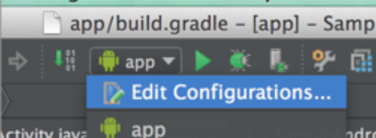
まずRunボタン左横のプルダウンメニューを開いてEdit Configurations...を選択

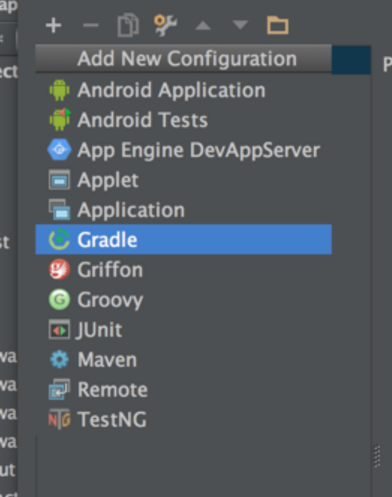
次に、開いたウィンドウの左上の+ボタンを押してGradleを追加する

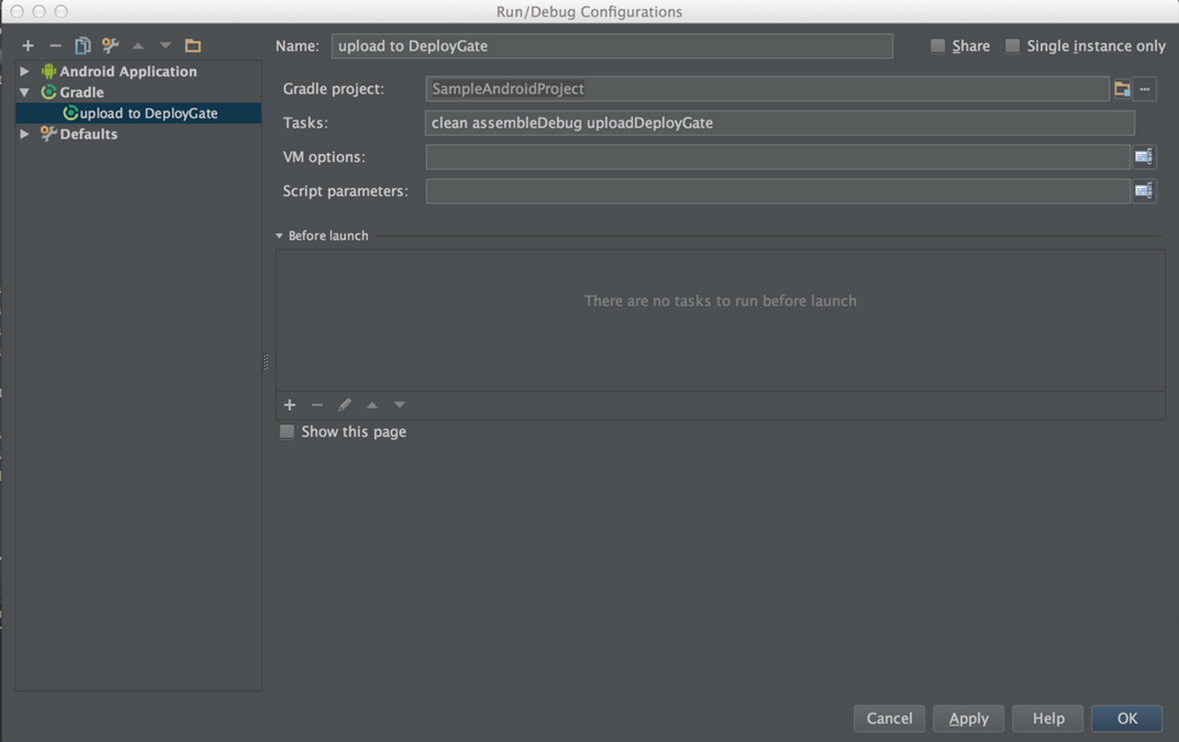
追加するとなんか新しい画面になるので、Nameを適当に入力したり、Gradle Projectを設定(右のフォルダアイコンクリックで選択出来る)したり、gradleのTasksを設定する
Tasksは、こんな感じに実行したいタスクをスペース区切りで書けばOK
clean assembleDebug uploadDeployGate
これで設定完了!!!!!!!!!!!!!!
アップロード!
あとは新しく作成したConfigurationを選択した状態でRunボタンを押せば、設定したgradleタスクが実行されて成功すればDeployGateにアップロードされます!
便利!!!


