INTRODUCTION
In previous article, We have talk about how to do Unit Test with Build it swift XCTest. This time we are going to cover Unit Test by using third party framework which are Quick and Nimble along with example. Remember that , all the code that is in the example will be organize and clean because we don't want to get headache when we do unit test.
GETTING STARTED
- First, Let create an Xcode Project.
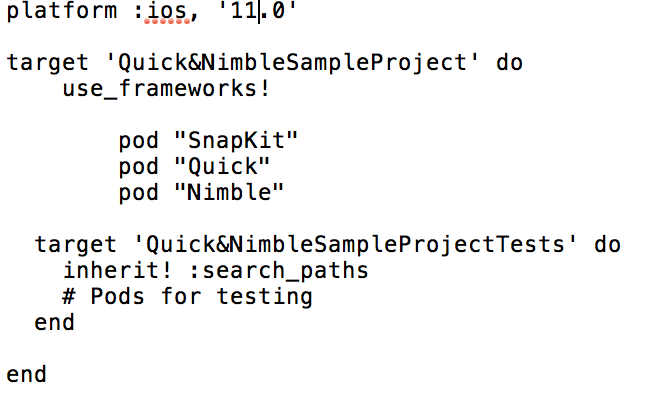
- Then, We have to use Cocoa Pod to install all the library that we are going to use. Pod that we are going to use are:
- SnapKit : Use to Setup Layout.
- Quick : Test Third Party Framework.
- Nimble : Is A matcher of Quick.
After installing , Open The xcode.workplace project. This time we are going to build an app which display Movie and Movie Genre. So first of all , Let us setup our User Interface.
View Controller
import UIKit
import SnapKit

class MovieViewController: UIViewController {

    var tableView : UITableView!
    let CellId = "myCell"

    override func viewDidLoad() {
        super.viewDidLoad()

        createComponent()
        addSupview()
        setupLayout()

    }
There are 3 callback method in our ViewController's viewDidLoad function.
1. createComponent : is use to create the UI component like tableview , setup tableviewCell.
2. addSupview : is use to add UI component as the view's supview.
3. setupLayout : is to setup the layout of our UI component.
createComponent Function
extension MovieViewController {
    func createComponent() -> Void {
        tableView = UITableView()
        tableView?.register(UITableViewCell.self, forCellReuseIdentifier: CellId)
        tableView.delegate = self
        tableView.dataSource = self
    }
}
addSupview Function
extension MovieViewController {
    func addSupview() -> Void {
        self.view.addSubview(self.tableView)
    }
}
setupLayout Function
extension MovieViewController {
    func setupLayout() -> Void {
        tableView.snp.makeConstraints { (make) in
            make.width.equalToSuperview()
            make.height.equalToSuperview()
        }
    }
}
Ok now we are done setting up the UI. Now let us create a movie sample data since we are going to display it to the user.
first, let us create MovieGenre's Enum
MovieGenre Enum
enum MovieGenre: String {
    case Animation = "Animation"
    case Action = "Action"
    case None = "None"
}
We use this enum to store the type of Movie Genre. As you can see our movie will have two type of genre which are Animation and Action. Now let create Movie struct.
Movie Struct
struct Movie {
    var title : String
    var genre : MovieGenre
}
and finally , we will create MovieDataHelper class. This class will give us the movie data that we need.
MovieDataHelper
class MovieDataHelper {
    static func getMovie() -> [Movie] {
        return [ Movie(title: "Attack On Titan", genre: MovieGenre.Action) ,
                 Movie(title: "Naruto", genre: MovieGenre.Animation) ,
                 Movie(title: "Black Clover", genre: MovieGenre.Action)]
    }
}
So in above class. We have a static function name getMovie() which is going to return the movie value. The reason here why we use static is because I don't want to create an object inorder to access this method. Ok now our data is ready , so let back to our ViewController and get the data.
ViewController
import UIKit
import SnapKit

class MovieViewController: UIViewController {

    let CellId = "myCell"
    var tableView : UITableView!
    var getMovie : [Movie] = MovieDataHelper.getMovie() // Add this

    override func viewDidLoad() {
        super.viewDidLoad()

        createComponent()
        addSupview()
        setupLayout()

    }
}
We create an array of Movie to store the movie data. Ok now it's time to setup the our tableview by playing around with tableviewDelegate.
TableViewDelegate
extension MovieViewController: UITableViewDelegate , UITableViewDataSource {

    func tableView(_ tableView: UITableView, numberOfRowsInSection section: Int) -> Int {
        return getMovie.count
    }

    func tableView(_ tableView: UITableView, cellForRowAt indexPath: IndexPath) -> UITableViewCell {
        var cell = tableView.dequeueReusableCell(withIdentifier: CellId, for: indexPath as IndexPath)
        cell = UITableViewCell(style: .subtitle, reuseIdentifier: CellId)

        cell.textLabel?.text = getMovie[indexPath.row].title
        cell.detailTextLabel?.text = getMovie[indexPath.row].genre.rawValue
        return cell
    }

}
Ok , Now our app is ready. You can run the app and will see there are 3 Row on the tableview. Ok so now it is time to do the unit test.
First Unit Test
Now Let go to our Unit Test class. Delete All the method and it should look like this.
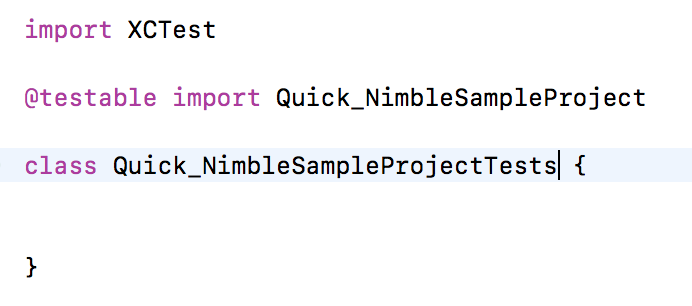
ok , now let setup Quick and Nimble by importing it and extends QuickSpec to our class.
import Quick
import Nimble

@testable import Quick_NimbleSampleProject

class Quick_NimbleSampleProjectTests: QuickSpec {

}
In Quick the Unit test will do in func spec(). So let create it and start our first Unit Test. Our first Unit test , We are going to make sure that Our tableview is not going to be empty.
import Quick
import Nimble

@testable import Quick_NimbleSampleProject

class Quick_NimbleSampleProjectTests: QuickSpec {
    override func spec() {
        var subject : MovieViewController!
        context("when view is loaded") {
            beforeEach {
                subject = MovieViewController()
                _ = subject.view
            }
            it("it should load 3 movies", closure: {
                expect(subject.tableView.numberOfRows(inSection: 0)).toNot(equal(0))
            })
        }
    }
}
Ok, Now let me explain about what happen here.
- first we have create our ViewController Instance. Because we want to be able to access to Tableview inorder to check the are there any row or not.
- Context & beforeEach & It : Is A Quick group which is going to help us understand about what's going on by allow us to set the descriptive text . For more detail about it => https://github.com/Quick/Quick/blob/master/Documentation/en-us/QuickExamplesAndGroups.md
- expect : is A nimble matcher. for more detail and its usage => https://github.com/Quick/Nimble
In this above test , I am ensure that our table view is not going to be empty by using expect(subject.tableView.numberOfRows(inSection: 0)).toNot(equal(0)). Ok now let test our Unit test. Go back to our Tableview Delegate and set return number of row to 0.
 func tableView(_ tableView: UITableView, numberOfRowsInSection section: Int) -> Int {
        return 0
    }
after that go back to our Unit Test class and run the test by press command + UU. and yeah we will got an error.

The error tell us , we don't expect it to be empty and we got empty. So now we have ensure that our tableView is not going to be empty. Now go back to Tableview Delegate and fixed everything back.
Second Unit Test
This time , we are going to ensure that In our tableview cell there is always A Movie title and Movie Genre.
 // To test table view it not empty
        context("uitableview cell") {
            var cell : UITableViewCell!
            beforeEach {
                cell = subject.tableView(subject.tableView, cellForRowAt: IndexPath(row: 0, section: 0))
            }
            it("tableview cell should contain movie title and genre", closure: {
                expect(cell.textLabel?.text).toNot(equal(""))
                expect(cell.detailTextLabel?.text).toNot(equal(""))
            })
        }
Add above code after Context {}.
Let me explain about what happen again.
- First , we create a tableview cell object.
- Then , we expect that the textLabel and DetailTextLabel is not going to be empty.
Now go back to our TableviewDelegate and assign empty String to textLabel or DetailTextlabel and run the test code. You will see it will failed and give you exact error about what is going on. Ok I think that's it.
You can find this example source code here.
https://github.com/hengsokvisal/Quick-NimbleSampleAPP