はじめに
Enhanced Inputを使ったキャラクター移動の実装のブループリントが調べてもなかなか見つからなかったので備忘録として書いておきます。
まず最初にプラグインからEnhanced Inputを適用しておきます。
たぶん大体のことは公式ドキュメントに書いてあるので、ほぼそれをなぞる形になります。
Input Action
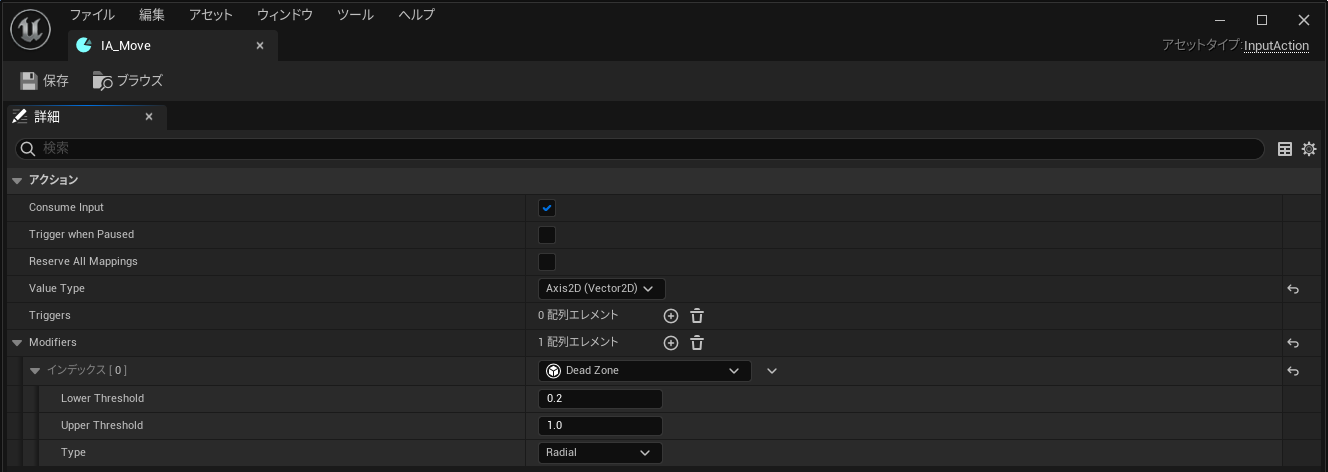
前後左右を同時に取れるようにValue TypeをAxis2Dにしておく。
前後と左右のパラメータを別で取って作ることももちろん可能。
Input Mapping Context
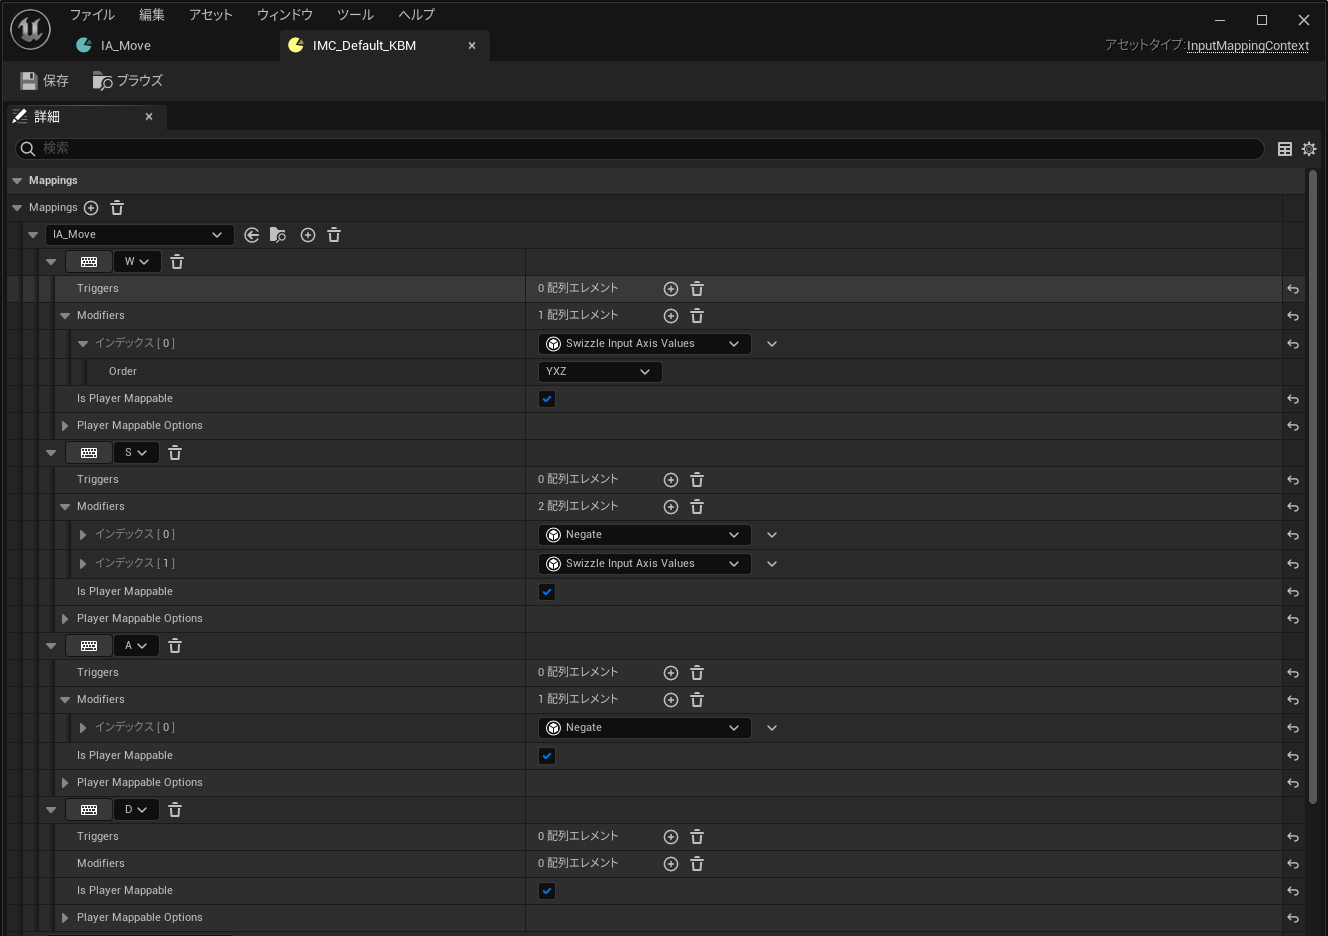
Input Actionを作成したら、Input Actionとキーを対応付けるためにInput Mapping Contextを作成。
ここではWとSをY軸の値に設定。理由は動かすキャラクターの正面方向をY軸にするため。
Negateは入力に対してマイナスをかける処理。
Player Controller
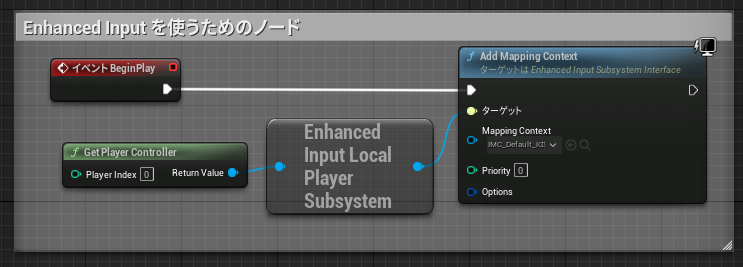
今回は入力の処理はまとめてPlayer Controllerで処理するためPlayer Controllerにブループリントを書きます。
プレイヤーコントローラーのEnhanced Input Local Player Subsystem を取得し、Input Mapping Contextを追加します。Mapping Contextに先ほど作成したInput Mapping Contextを入れます。
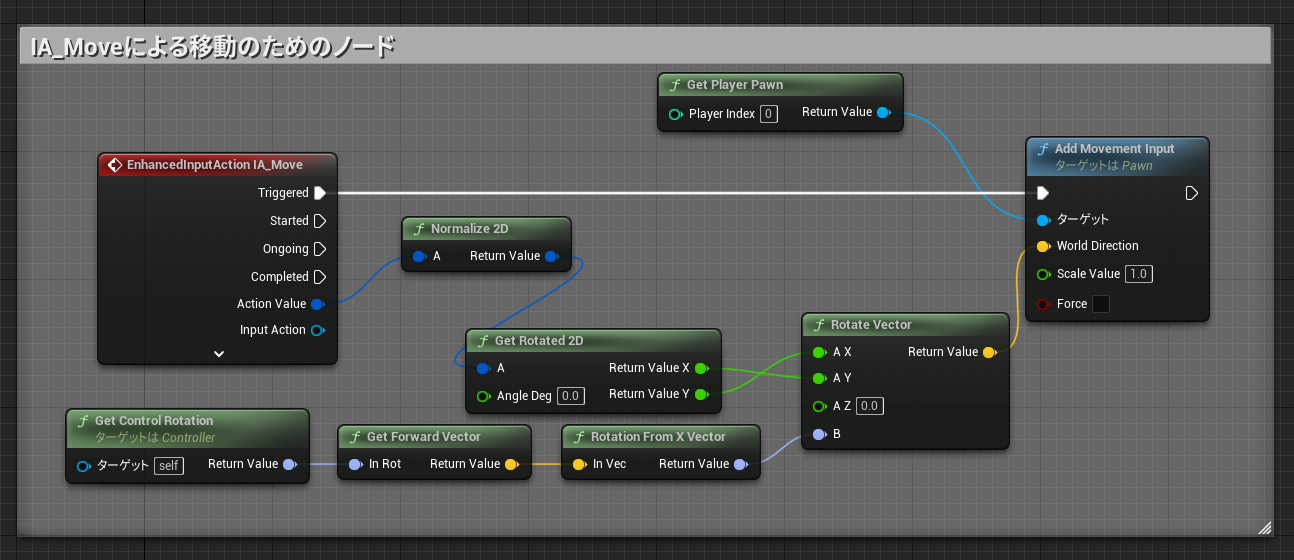
最後に移動の実装です。
今回キャラクターのメッシュを図のように配置したので、ワールドの座標とメッシュの座標が一致していません。そのためInput Actionで取得した値をそのまま移動に使ってしまうとX軸とY軸が反転した移動になってしまいます。また一般に、キャラクターの向きはワールド座標に対して動的に変化するので、ブループリントの実装はXとYの値を反転させ、キャラクターの正面(Forward)を取ってくるようにしています。
以上でキャラクターの移動の実装については完了です。
拙い文ですが最後まで読んでいただきありがとうございました。


