Basic認証はID/PASSをBase64エンコードしているため簡単にデコード可能でありセキュリティ面でよろしくない。
Digest認証はMD5でエンコードされるため盗聴/改ざんのリスクはBasic認証より低い。
しかしnginxは標準でDigest認証に対応していない。ソースから外部モジュールを追加してコンパイルすることで対応させることができる。
環境
Windows10ProのHyper-V上に下記仮想マシンを作成して検証
- CentOS 8.0.1905
- Nginx 1.17.7
なお FirewalldとSELinuxはいずれも有効にしている
流れ
コマンドはすべてrootユーザで実行する
1. 必要なパッケージをインストール
# dnf install gcc pcre pcre-devel make perl httpd-tools
gcc pcre pcre-devel make perl は コンパイル&インストールで必要
httpd-tools はDigest認証で使うパスワードファイルを生成する htdigest を使うために導入
2. ソースのダウンロード
# wget "http://nginx.org/download/nginx-1.17.7.tar.gz" -O /tmp/nginx-1.17.7.tar.gz
# wget "https://github.com/atomx/nginx-http-auth-digest/archive/master.zip" -O /tmp/nginx-http-auth-digest.zip
# wget "http://zlib.net/zlib-1.2.11.tar.gz" -O /tmp/zlib-1.2.11.tar.gz
# wget "https://www.openssl.org/source/openssl-1.1.1d.tar.gz" -O /tmp/openssl-1.1.1d.tar.gz
上から
- Nginx本体
- Digest認証モジュール https://github.com/samizdatco/nginx-http-auth-digest
- zlib (gzip圧縮に使用)
- OpenSSL
とりあえず /usr/local/src/ に展開する
# tar zxvf /tmp/nginx-1.17.7.tar.gz -C /usr/local/src/
# unzip /tmp/nginx-http-auth-digest.zip -d /usr/local/src/
# tar zxvf /tmp/zlib-1.2.11.tar.gz -C /usr/local/src/
# tar zxvf /tmp/openssl-1.1.1d.tar.gz -C /usr/local/src/
3. コンパイル&インストール
# cd /usr/local/src/nginx-1.17.7
# ./configure --prefix=/etc/nginx --sbin-path=/usr/sbin/nginx --conf-path=/etc/nginx/nginx.conf --error-log-path=/var/log/nginx/error.log --http-log-path=/var/log/nginx/access.log --pid-path=/var/run/nginx.pid --lock-path=/var/run/nginx.lock --http-client-body-temp-path=/var/cache/nginx/client_temp --http-proxy-temp-path=/var/cache/nginx/proxy_temp --http-fastcgi-temp-path=/var/cache/nginx/fastcgi_temp --http-uwsgi-temp-path=/var/cache/nginx/uwsgi_temp --http-scgi-temp-path=/var/cache/nginx/scgi_temp --user=nginx --group=nginx --with-openssl=/usr/local/src/openssl-1.1.1d --with-zlib=/usr/local/src/zlib-1.2.11 --with-http_ssl_module --with-http_realip_module --with-http_addition_module --with-http_sub_module --with-http_dav_module --with-http_flv_module --with-http_mp4_module --with-http_gunzip_module --with-http_gzip_static_module --with-http_random_index_module --with-http_secure_link_module --with-http_stub_status_module --with-http_auth_request_module --with-mail --with-mail_ssl_module --with-file-aio --with-http_v2_module --with-cc-opt='-O2 -g -pipe -Wp,-D_FORTIFY_SOURCE=2 -fexceptions -fstack-protector --param=ssp-buffer-size=4 -m64 -mtune=generic' --add-module=../nginx-http-auth-digest-master/
# make && make install
4. 足りないモノをいろいろ作成
自動で作成されないモノを作っていく
4-1. ユーザ作成
nginx実行用のユーザを作成
# groupadd nginx
# useradd -g nginx nginx
# usermod -s /bin/false nginx
4-2. キャッシュディレクトリ作成
# mkdir -p /var/cache/nginx/client_temp
4-3. 起動スクリプト作成
systemd のスクリプトも自分で作成する。
# cat <<EOF > /usr/lib/systemd/system/nginx.service
[Unit]
Description=The nginx HTTP and reverse proxy server
After=network.target remote-fs.target nss-lookup.target

[Service]
Type=forking
PIDFile=/run/nginx.pid
# Nginx will fail to start if /run/nginx.pid already exists but has the wrong
# SELinux context. This might happen when running `nginx -t` from the cmdline.
# https://bugzilla.redhat.com/show_bug.cgi?id=1268621
ExecStartPre=/usr/bin/rm -f /run/nginx.pid
ExecStartPre=/usr/sbin/nginx -t
ExecStart=/usr/sbin/nginx
ExecReload=/bin/kill -s HUP $MAINPID
KillSignal=SIGQUIT
TimeoutStopSec=5
KillMode=mixed
PrivateTmp=true

[Install]
WantedBy=multi-user.target
EOF
4-4. ログローテート設定
logrotate.dの設定ファイルを作成する
# cat <<EOF > /etc/logrotate.d/nginx
/var/log/nginx/*log {
    create 0664 nginx root
    daily
    rotate 10
    missingok
    notifempty
    compress
    sharedscripts
    postrotate
        /bin/kill -USR1 `cat /run/nginx.pid 2>/dev/null` 2>/dev/null || true
    endscript
}
EOF
4-5.firewalld
外部からアクセスできないためfirewalldに許可設定を行う
HTTP, HTTPSの両方を開けておく
# firewall-cmd --add-service=http --zone=public
# firewall-cmd --add-service=https --zone=public
4-6. パスワードファイル作成
# htdigest -c /etc/nginx/.htdigest_test "test" user
Adding password for user in realm test.
New password:
Re-type new password:
-c オプション でパスワードファイルの新規作成
"test" の部分に realm名
user の部分は認証時のユーザ名
パスワードは対話式で入力を求められる
5. NginxにDigest認証を設定
# vi /etc/nginx/nginx.conf
お試しで / に設定
        location / {
            root   html;
            index  index.html index.htm;
            auth_digest "test";
            auth_digest_user_file /etc/nginx/.htdigest_test;
        }
auth_digest にパスワードファイル作成時に指定した realm名を入れる
auth_digest_user_file にパスワードファイル名を指定
6. Nginx起動
# systemctl enable nginx.service
# systemctl start nginx.service
7. 動作確認
ブラウザからアクセスすると下記のようなダイアログが表示される。
設定したユーザ名とパスワードを入力
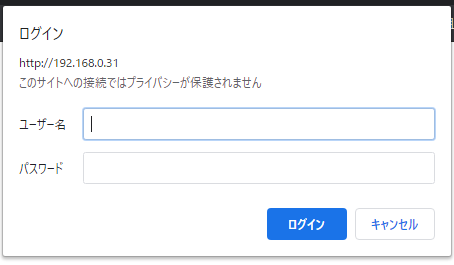
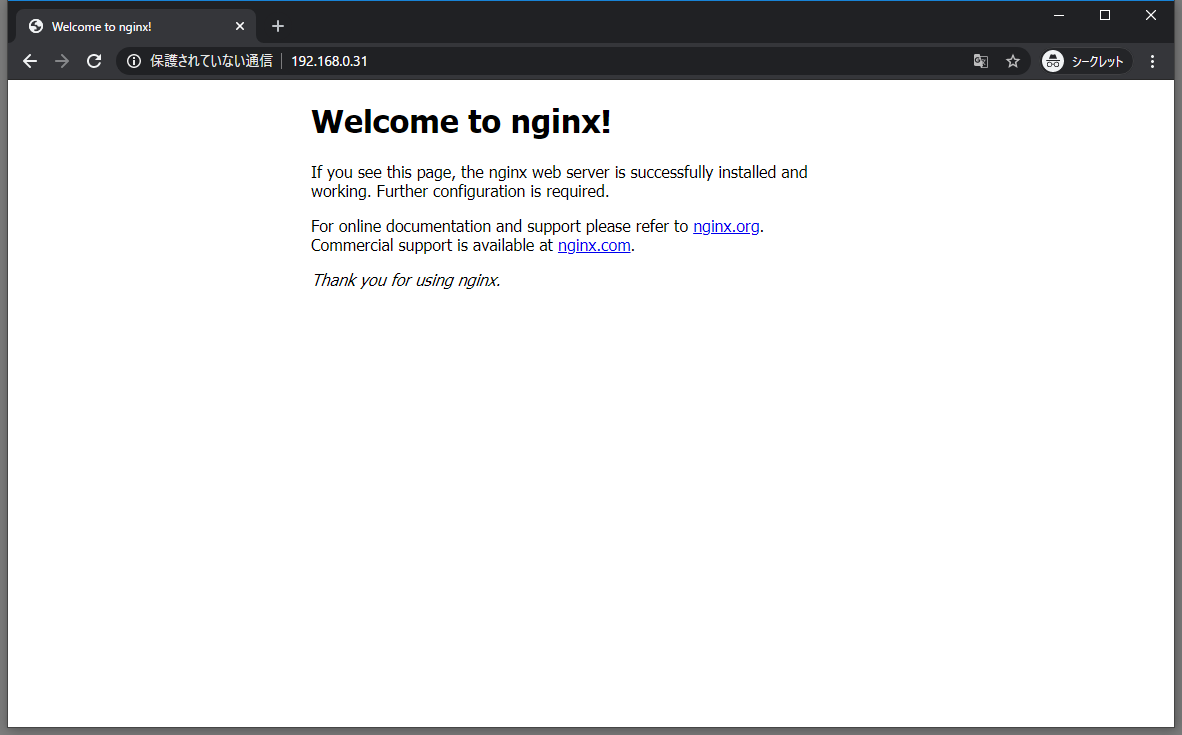
認証が通ればページが表示される
ちなみに curl の場合は -u "user:password" に加えて --digest オプションを付ける
C:\>curl --digest -u "user:password" -I http://192.168.0.31/
HTTP/1.1 401 Unauthorized
Server: nginx/1.17.7
Date: Mon, 24 Feb 2020 04:39:39 GMT
Content-Type: text/html
Content-Length: 179
Connection: keep-alive
WWW-Authenticate: Digest algorithm="MD5", qop="auth", realm="test", nonce="39e753bf5e53538b"

HTTP/1.1 200 OK
Server: nginx/1.17.7
Date: Mon, 24 Feb 2020 04:39:40 GMT
Content-Type: text/html
Content-Length: 612
Last-Modified: Mon, 24 Feb 2020 04:21:48 GMT
Connection: keep-alive
Authentication-Info: qop="auth", rspauth="0565bae4b6bfbda5513657687d318700", cnonce="66a3a2f56a85034803fdd085b686f8c3", nc=00000001
ETag: "5e534f5c-264"
Accept-Ranges: bytes
とりあえず動いていそう。