前置き
iOSアプリの高速化を測れないか、と上からボソッと言われ考えていた。そこで画像表示が遅いのでそこを高速化しようと思い、その前段階として分離を行おうと思っていた。
また、何回かに一回はセルに広告を表示する仕様になっているが、前任者の実装の仕方が依存関係が強いものであり、いろいろと問題が起っていたので、TableViewのDataSource切り離しを行いたかった。
Rxとか流行ってますので、今更感ですが備忘録として。
実装
基本的には「UITableViewを軽量化する!(Swift版)」を参考にしていますが、
カスタムセルが複数ある場合に対応できないので、以下ではそれも加味したものを掲載します。
1.現状
書き換え前の状態を書いていきます。
例として、実際のものに近い簡易的なコードを記述していきます。
・ViewModel
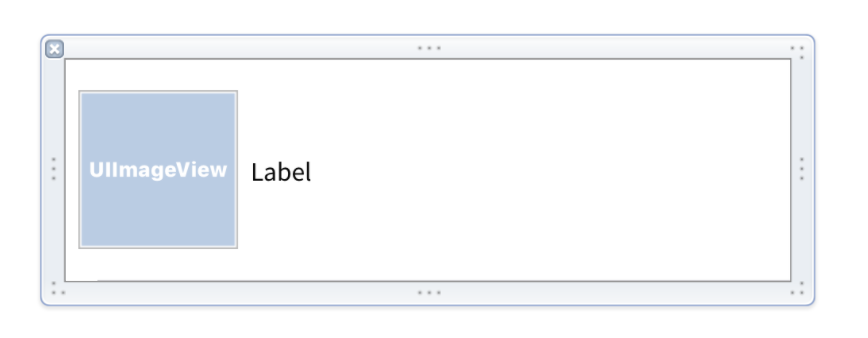
画像とラベルのシンプルなもの
struct CommonViewModel {
    var icon: URL?
    var title: String?
}
・Xib
上記のモデルを実際にセットするもの
XxxTableViewCell.xib
・TableViewCell
上記のXibに対応するセル
class XxxTableViewCell: UITableViewCell {

    // MARK: IBOutlet Variables
    @IBOutlet private weak var iconView: UIImageView!
    @IBOutlet private weak var title: UILabel!

    // MARK: Override Methods
    override func awakeFromNib() {
        super.awakeFromNib()
    }

    // MARK: Internal Methods
    func setupCell(with viewModel: CommonViewModel) {
        if let title = viewModel.title {
            title.text = title
        }
        if let url = viewModel.icon {
            iconView.setImage(withURL: url) // ライブラリNukeのメソッド
        }
    }

}
・TableView
UIViewController で実装していた場合での想定で。
例としてXxxTableViewCell,YyyTableViewCellの二つのセルを使う想定。
(上記ではYyyTableViewCellは記載ないですが、同じViewModelを使うものを想定している。)
class XxxViewController: UIViewController {

    // MARK: IBOutlet Variables
    @IBOutlet fileprivate weak var tableview: UITableView! {
        didSet {
            tableview.dataSource = self
            tableview.delegate = self

            // 複数セル
            tableView.register(UINib(nibName: "XxxTableViewCell", bundle:nil), forCellReuseIdentifier: "任意のセルID xxx")
            tableView.register(UINib(nibName: "YyyTableViewCell", bundle:nil), forCellReuseIdentifier: "任意のセルID yyy")
        }
    }

    // MARK: Fileprivate Variables
    fileprivate var viewModels: [CommonViewModel] = [] {
         didSet {
             tableview.reloadData()
         }
    }

    // MARK: Override Methods
    override func viewDidLoad() {
        super.viewDidLoad()

        setupView()
    }

    // MARK: Private Methods
    private func setupView() {

    	// do some setup methods

    	callForAPI()
    }

    private func callForAPI() {
    	// 通信メソッド 今回は成功失敗を返すものとしている。
    	APIManager.~~~~~~ { [weak self] response in
    		switch response {
    		case .success(let result):
    			// 通信成功時にviewModelsの配列に変換している前提
    			self?.viewModels = result

    		case .failure(let error):
    			// do some error handling
    		}
    	}
    }

    // MARK: Fileprivate Methods
    fileprivate func getXxxCell() -> XxxTableViewCell {
		let cell = tableView.dequeueReusableCell(
            withIdentifier: "任意のセルID xxx",
            for: indexPath
        ) as! XxxTableViewCell

        // do some custmaize

        return cell

    }

    fileprivate func getYyyCell() -> YyyTableViewCell {
		let cell = tableView.dequeueReusableCell(
            withIdentifier: "任意のセルID yyy",
            for: indexPath
		) as! YyyTableViewCell

		// do some customize

		return cell
    }
}

// MARK: - DataSource
extension XxxViewController: UITableViewDataSource {

    func tableView(_ tableView: UITableView, numberOfRowsInSection section: Int) -> Int {
        return viewModels.count
    }

    func tableView(_ tableView: UITableView, cellForRowAt indexPath: IndexPath) -> UITableViewCell {

        // 条件によってセルが変わる想定
        if  /* 条件式 */  {
            return getXxxCell() // 上記の XxxTableViewCell セル

        } else {
            return getYyyCell() // 上記とはまた別のセル

        }
    }
}

// MARK: - Delegate
extension XxxViewController: UITableViewDelegate {
    /* 省略 */
}
先にも書きましたが、簡略化して書いています。
APIを叩いてviewModelsをセットし、テーブルを更新する作りになっている。
UITableViewDelegate は記載しても仕方ないので省略。
2.DataSourceの切り出し
上記の現状を踏まえて行っていきます。
①DataSource管理クラスの作成
class XxxDataSource: NSObject {
    typealias Element = [CommonViewModel]

    var items: Element

    init(items: Element) {
        self.items = items
    }
}
②DataSourceのメソッド追加
UITableViewDataSource を継承し、メソッド追加。
また、セルの取得メソッドをこちらに移行します。
extension XxxDataSource: UITableViewDataSource {

	func tableView(_ tableView: UITableView, numberOfRowsInSection section: Int) -> Int {
        return items.count
    }

    func tableView(_ tableView: UITableView, cellForRowAt indexPath: IndexPath) -> UITableViewCell {

        // 条件によってセルが変わる想定
        if  /* 条件式 */  {
            return getXxxCell() // 上記の XxxTableViewCell セル

        } else {
            return getYyyCell() // 上記とはまた別のセル

        }
    }

    // MARK: Private Methods
    private func getXxxCell() -> XxxTableViewCell {
		let cell = tableView.dequeueReusableCell(
            withIdentifier: "任意のセルID xxx",
            for: indexPath
        ) as! XxxTableViewCell

        // do some custmaize

        return cell

    }

    private func getYyyCell() -> YyyTableViewCell {
		let cell = tableView.dequeueReusableCell(
            withIdentifier: "任意のセルID yyy",
            for: indexPath
		) as! YyyTableViewCell

		// do some costomize

		return cell
    }

}
③TableViewにDataSourceを追加
先ほどのUIViewControllerに以下のコード追加・更新を行う
class XxxViewController: UIViewController {

    // DataSourceを追加
    private var dataSource: XxxDataSource = XxxDataSource(items: [])

    // self → dataSource に変更
    @IBOutlet weak var tableView: UITableView! {
    	didSet {
            tableView.dataSource = dataSource // 変更部分
            tableview.delegate = self
            tableView.register(UINib(nibName: "XxxTableViewCell", bundle:nil), forCellReuseIdentifier: "任意のセルID")
            tableView.register(UINib(nibName: "YyyTableViewCell", bundle:nil), forCellReuseIdentifier: "任意のセルID")
    	}
    }

    // DataSourceにModelを渡す部分を追加
    private var viewModels: [XxxViewModel] = [] {
        didSet {
            dataSource.items = viewModels // 追加部分
            tableView.reloadData()
        }
    }

    /* 中略 */

}
切り出し完了です!
viewModelsが更新されると自動的にdidSetでdataSourceの中身が更新される仕組みです。
追記
おまけ
RxDataSourceの導入
ライブラリのインストールは、carthageなりで各自お願いします。
今までの流れで作成していれば、以下をだけです!
①RxTableViewDataSourceTypeを継承
②メソッドの追加
class XxxDataSource: NSObject, RxTableViewDataSourceType {
    typealias Element = [CommonViewModel]

    var items: Element

    init(items: Element) {
        self.items = items
    }

    // 追加部分
    func tableView(_ tableView: UITableView, observedEvent: Event<Element>) {
        // 各々処理
    }
}
後書き
ViewControllerの肥大化を抑えられる点は大きいですね。
実際のコードを載せるわけにいかないので、名前の置き換え等で記述が間違っているところがあるかもしれないので、ご指摘あればお願いします。
参考
swiftでDelegate/DataSourceを分離したいときに気をつけること
UITableViewを軽量化する!(Swift版)