前置き
ユーザーにヒントを出す画面は多くのアプリで実装されているかと思います。

この画面は実際にSwiftUIで作られています。
では、どのように行ったのかをみていきましょう。
実装方法
2パターン紹介したいと思います。
1. UIBezierPath on SwiftUI で実装
UIKitの場合はUIBezierPathを使った実装方法がありました。
以下はObjective-Cのコードなので古いですが、比較的にわかりやすいコード例です。
UIBezierPath で「画面全体」と「くり抜く部分」を重ねることで、重なった部分のみ透過できるというやり方です。これを SwiftUI の View に適応するだけです。
今回は、以下のような少し簡単にした画面で紹介していきます。
| くり抜き前 | くり抜き後 |
|---|---|
 |
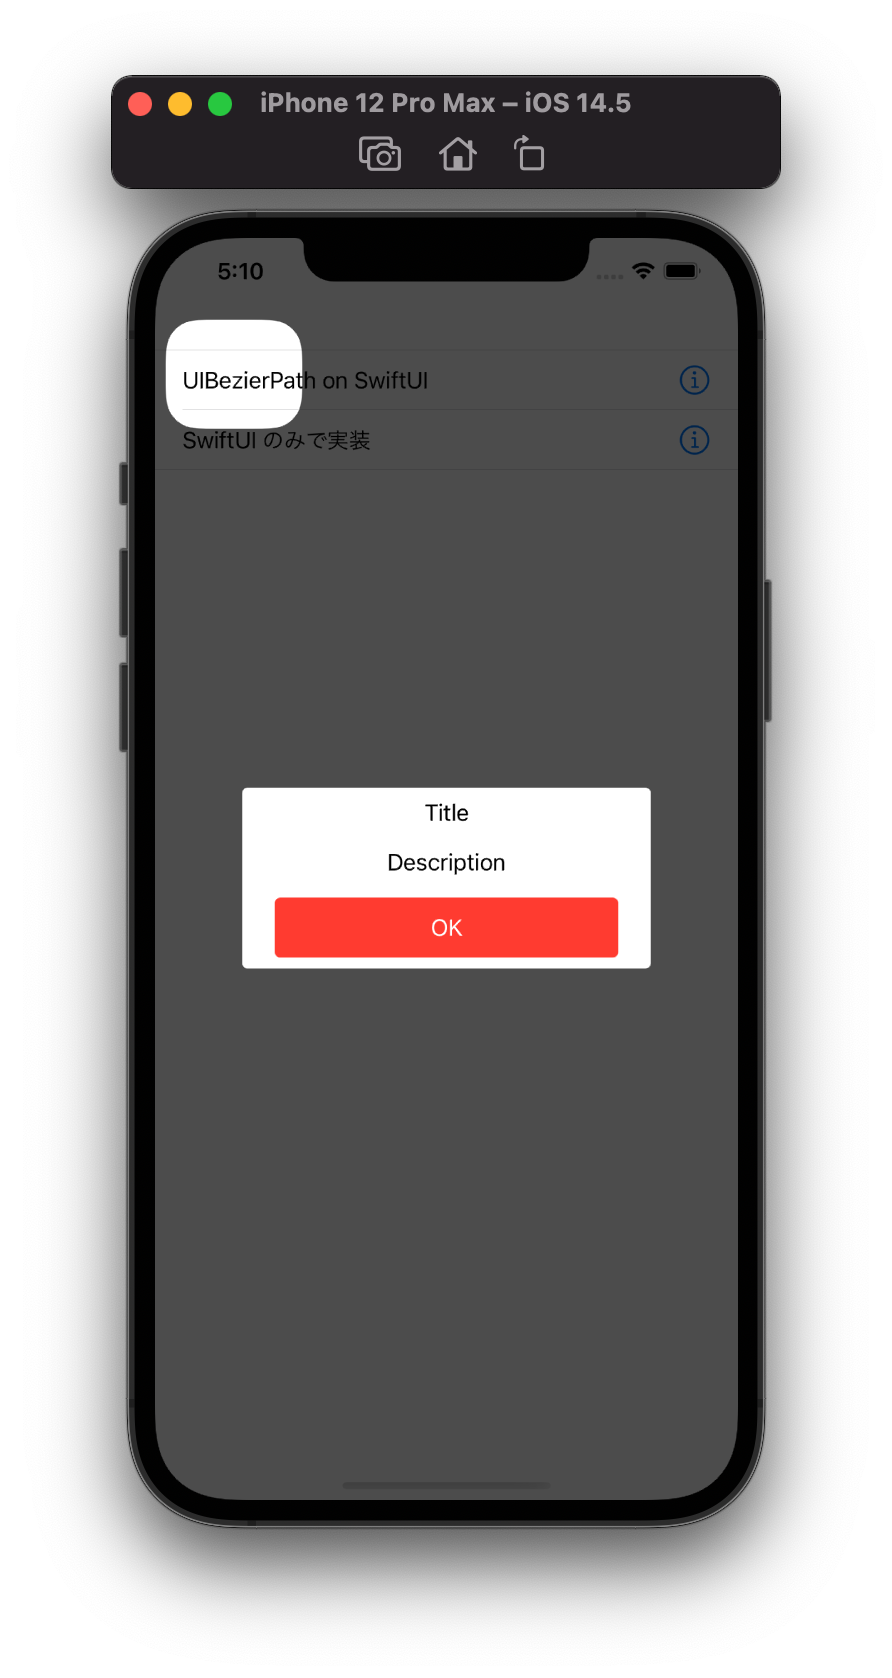 |
画面構成
画面自体は、以下の3つを組み合わせたとてもシンプルな構成になっています。
| ①アラート画面 | ②黒いフィルター画面 | ③透明な穴の画面 |
|---|---|---|
 |
 |
 |
① アラート画面
struct TutorialAlertView: View {

    var handler: (() -> Void)?

    var body: some View {
        VStack {
            Text("Title")
                .padding(EdgeInsets(top: 8, leading: 0, bottom: 0, trailing: 0))

            Text("Description")
                .padding(EdgeInsets(top: 8, leading: 0, bottom: 0, trailing: 0))

            Button(action: { handler?() }, label: {
                Text("OK")
                    .frame(width: 252, height: 44)
                    .foregroundColor(.white)
                    .background(Color.red)
                    .cornerRadius(4)
                    .padding(EdgeInsets(top: 8, leading: 0, bottom: 8, trailing: 0))
            })
            .contentShape(Rectangle())
        }
        .frame(maxWidth: 300)
        .background(Color.white)
        .cornerRadius(4)
    }
}
② 黒いフィルター画面
struct TutorialFilterView: View {

    var body: some View {
        Color.black
            .opacity(0.7)
            .mask(TutorialHoleView())
            .edgesIgnoringSafeArea(.all)
    }
}
mask()を使うことでフィルター部分の切り抜きを行なっています。
③ 透明な穴の画面
struct TutorialHoleView: View {

    var body: some View {
        // 穴
        let holePath = UIBezierPath(roundedRect: CGRect(
            x: 8,
            y: 60,
            width: 100,
            height: 80
        ), cornerRadius: 24)

        // 全体
        var shape = Path(CGRect(
            origin: .zero,
            size: UIScreen.main.bounds.size
        ))
        shape.addPath(Path(holePath.cgPath)) // Pathに変換
        return shape.fill(style: FillStyle(eoFill: true))
    }
}
SwiftUIではPathというものがあり、UIBezierPathから変換することで扱うことができます。変換自体は.cgPathを参照するだけで可能なのでとても簡単です。FillStyleがないと透過部分が反転してしまうのでつけてください。
①~③を組み合わせた画面
これをZStackで重ねて組み合わせると完成します。
| 画面 | 重なり |
|---|---|
 |
 |
struct TutorialView: View {

    var body: some View {
        ZStack {
            TutorialFilterView()
            TutorialAlertView { /* do some button action */ }
        }
        .frame(maxWidth: .infinity, maxHeight: .infinity)
    }
}
今回は例なのでframeを固定にしていますが、位置を調整する場合は前の画面から渡して行く必要があります。
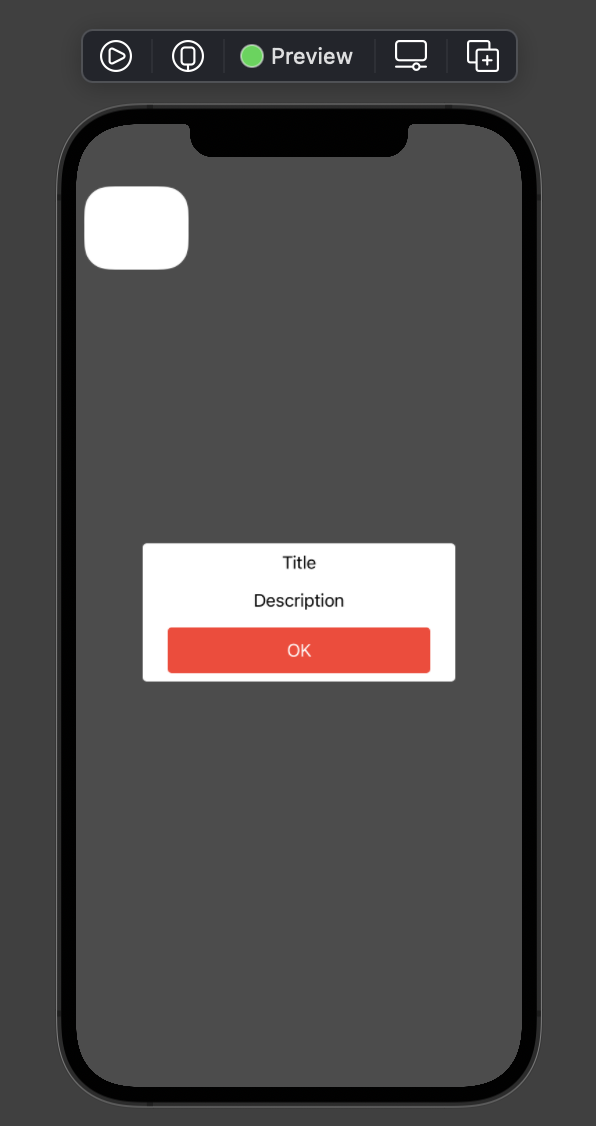
2. SwiftUI のみで実装
先ほど実装した、UIBezierPathで実装した部分をSwiftUIのShapeを使って実装します。
基本的にはほぼ同じで、「③ 透明な穴の画面」のコードで作成したTutorialHoleViewの部分を、以下のようにShape(Rectangle)にします。
example code
struct TutorialHoleView: View {

    var body: some View {
        Rectangle()
            .cornerRadius(24)
            .frame(width: 100, height: 80)
            .position(x: 60, y: 150)
            .background(Color.white)
            .compositingGroup() // ※1
            .luminanceToAlpha() // ※2
    }
}
Shape を使う場合は、注意点として以下の2つを設定する必要があります。
-
compositingGroup(): ZStack の中身をグループ化する -
luminanceToAlpha(): 暗い領域は透明に、明るい領域は不透明な黒にする
これを設定することで、くり抜きを反映することができます。
また、Rectangleを使用していますが、Shapeであれば良いので、
- RotatedShape
- RoundedRectangle
- Circle
など、さまざまな図形を用いて、くり抜くことができます。
組み合わせた画面
| 画面 | 重なり |
|---|---|
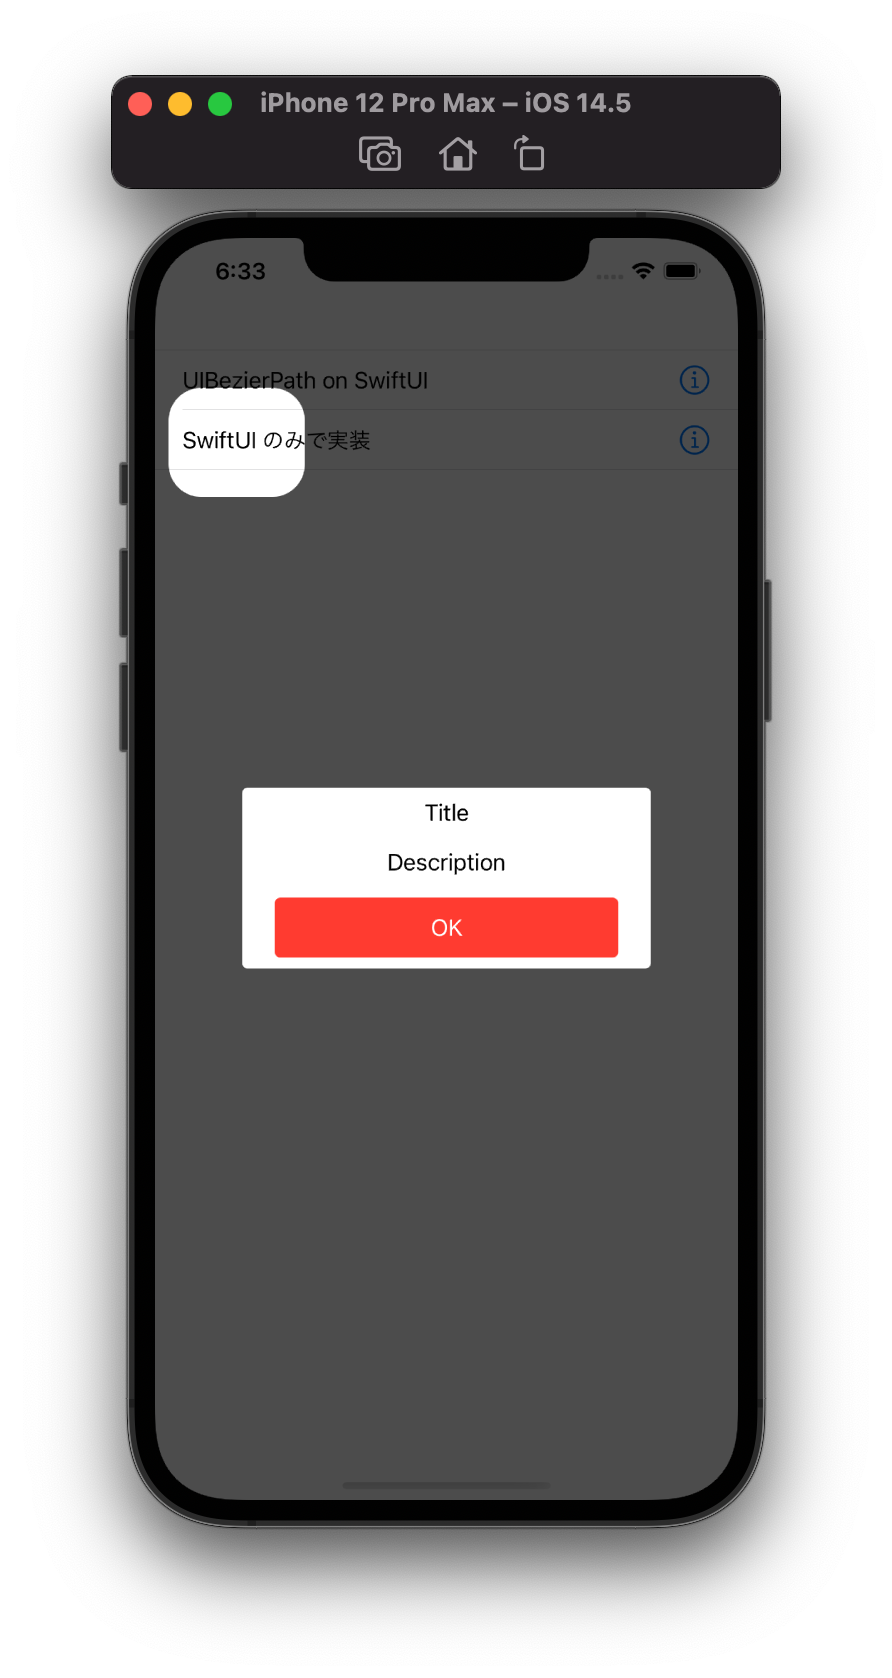 |
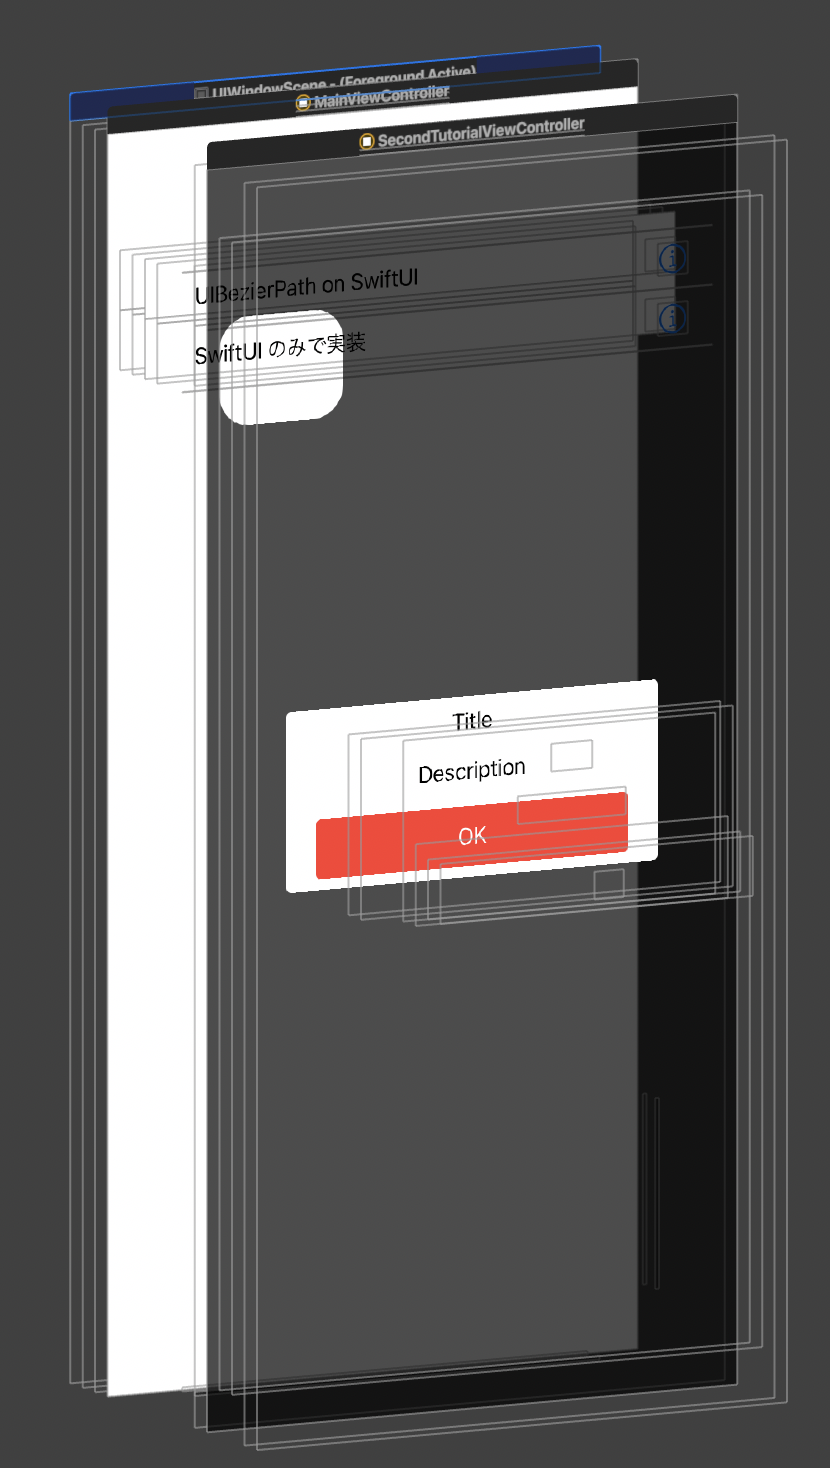 |
このようにSwiftUIが用意した図形を用いることで、シンプルな実装にすることができます。
使い分け
簡単なくり抜きの実装であれば、SwiftUIのShapeを使った実装の方が楽に実装可能です。ただ、星形やハートなど、難しい図形をくり抜きたい場合は、Path or UIBezierPathで図形を作成することになります。
動作するリポジトリを置いておくので、いろいろ試してみると面白いかと思います。
その他
- 「1. UIBezierPath on SwiftUI で実装」の実装で参考になったもの
- 「2. SwiftUI のみで実装」の実装で参考になったもの
-
UIBezierPathの方法を紹介しましたが、Pathで図形を作る方法も掲載しておきます