はじめに
実案件のフロントエンド開発でcssを書いていく上でdisplayflexってめっちゃ使いますよね。
今日はそんなdisplay flexを使う上での小技をいくつか紹介したいと思います。
活用例
こいつだけ右にしたい
display:flexはオブジェクトを横に整列させるプロパティです。
justify-cotnentを使って整列の仕方を調整はできますが、こんなパターンはありませんか?

DOMをflexBoxでまとめたけど基本は左寄せで、特定のDOMだけ右寄せにしたい。。。
そんな時は右寄せにしたいDOMに対してmargin-left:autoをするだけ!!

flexBoxをjustify-content: flex-endにしてる場合は左寄せにしたいDOMに対してmargin-right:autoにすると、特定のDOMだけ左寄せにできます。
See the Pen Untitled by Hayuse (@dtweqbgd-the-vuer) on CodePen.
横並びにもしたいけど改行もしたい
例えば、タグなどの一覧を作りたい時。

中身が不規則に変わるタグなどはうまく改行してほしいですよね。
そんな時はflex-wrap: wrapをつけるだけ!
See the Pen Untitled by Hayuse (@dtweqbgd-the-vuer) on CodePen.
ここだけスクロールしたい
タイトルとコンテンツが分かれいるタイプのカードのスタイルでは、コンテンツだけスクロールしたいという時があります。
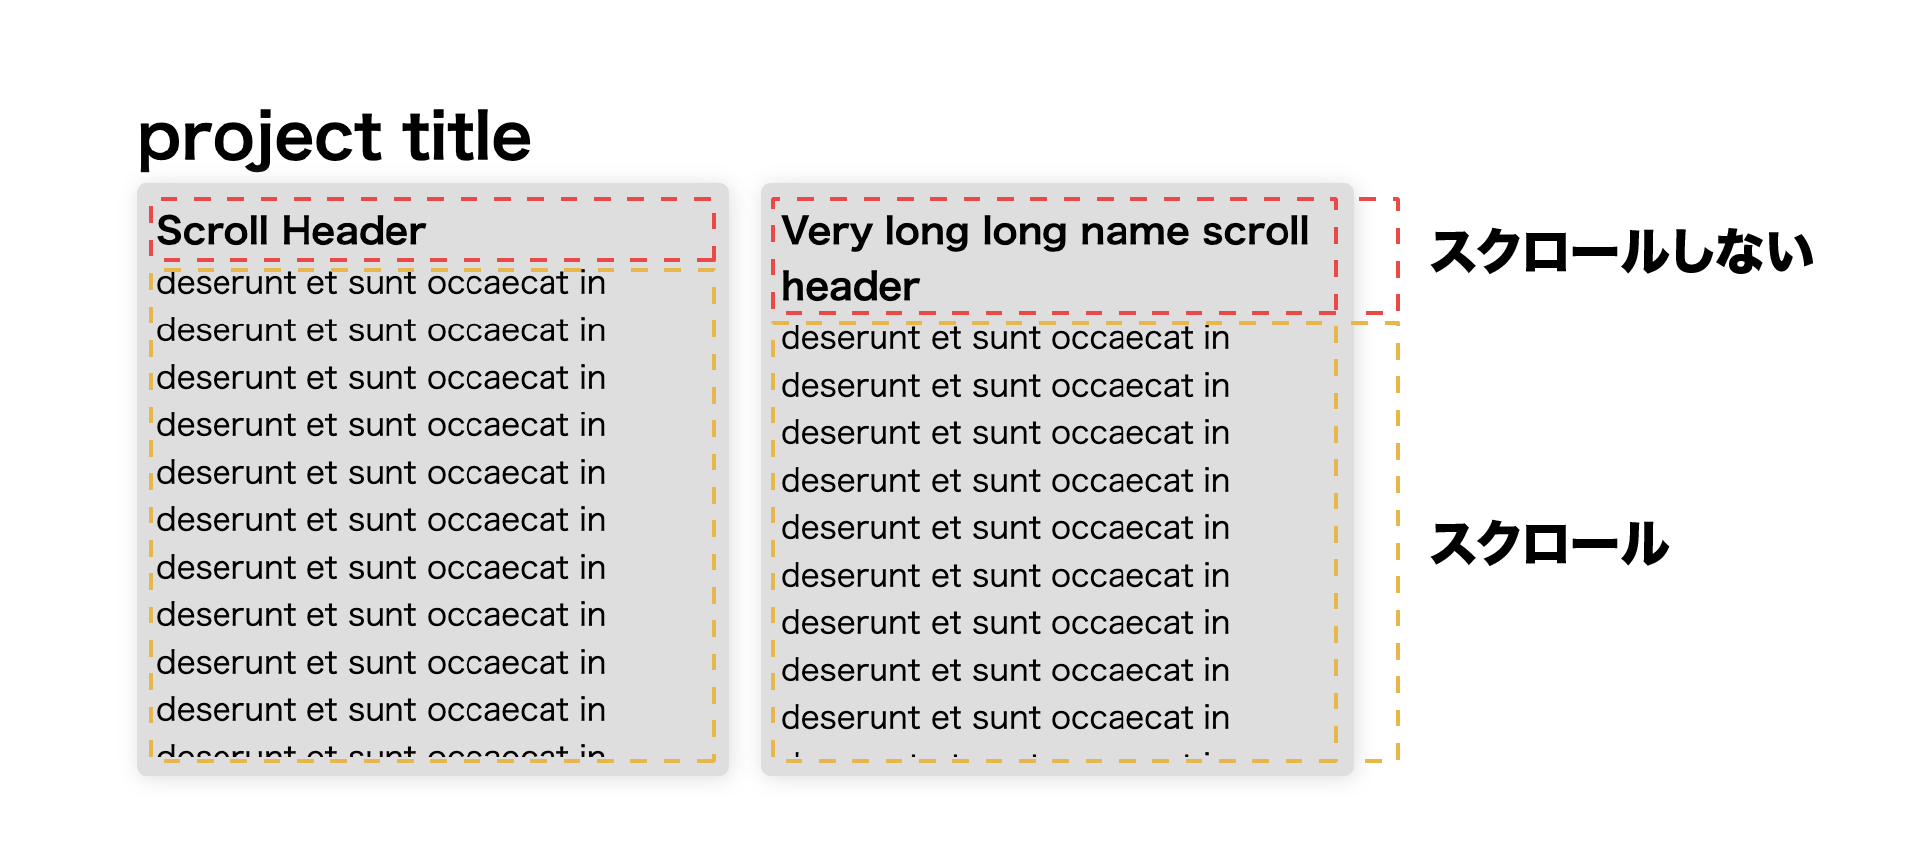
コンテンツ量や、タイトルの高さが変わってもいい感じに自動で調整してほしいって時ありますよね。
そんな時はflexしてる要素にflex-direction: columnをつけるだけ!
flexしている要素の親が高さを明確にする必要がありますが、それさえすれば、中のスクロールの高さは自動で調整してくれます。

See the Pen Untitled by Hayuse (@dtweqbgd-the-vuer) on CodePen.
終わりに
こんな感じで、display: flexにフォーカスして小技を紹介してみました。
使い方次第でいろんな風にできるのでぜひ試してみてください。
まだまだ色々紹介したいことはありますが、夜も老けてきたのでこの辺で、、、、