CeleryはDjangoで非同期処理したり、定期実行処理したりする時に非常に便利なライブラリです。ただ、そもそも日本語の記事が少なく、さらにDockerを組み合わせた記事はほとんど見つけられなくて苦労しました。
この記事ではCeleryの機能のうち、ジョブを定期実行できるCelery beatのmacのローカル環境における実装方法と躓いたところをシェアしようと思います。Django初学者が書いている記事ですので不足してる点などありましたらご指摘ください。
追記
HerokuでCelery beatを実装しました。
本番環境の実装はローカル環境とは若干異なりますのでこちらを参照ください。
Celery beatをHerokuのフリープラン(1 Dyno)でデプロイする方法
環境
mac OS 10.14
python3.7.3
Docker(Desktop for mac) 18.09.2
Django 2.2.4
Celery関連
Celery 4.3.0(Windowsはサポート外)
django-celery-beat 1.5.0
django-celery-results 1.1.2
CeleryとCelery beat
基本は公式ドキュメントを見ましたが、初めて見る人は若干全体像を掴みずらいと思います。自分もそうでしたが、いきなりdjango-celery-beatに辿り着いた人もいると思います。大事な事はpipでdjango-celery-beatだけ入れても動かないという事です。ジョブの定期実行だけやるにしてもまずはCelery本体のインストールが必要です。
もう一つ大事な事は定期実行には2パターンのやり方があるという事です。
- パターン(1)(django-celery-beatを使わないやり方)
- パターン(2)(django-celery-beatを使うやり方)
公式ドキュメントには以下のように記載があります。
The default scheduler is the celery.beat.PersistentScheduler, that simply keeps track of the last run times in a local shelve database file.
There’s also the django-celery-beat extension that stores the schedule in the Django database, and presents a convenient admin interface to manage periodic tasks at runtime.
パターン(1)は最後の実行日付をローカルのshelveに保存しておく方法。パターン(2)はスケジュールをDjangoのデータベースに保存するためadminのダッシュボードで定期タスクをコントロールできるようになります。
とりあえずこの事を頭に入れておけば理解が早まると思います。いずれのパターンも試してみましたが、パターン(2)の方が断然オススメです。
実装手順
Celery以外の基本的なDjango on Dockerアプリの設定は済んでいる前提で手順を記載します。
公式チュートリアルの目次を見ると「Django」の項目がありますが、Djangoの人もまずはfirst-steps-with-celeryを見るように記載されています。
公式チュートリアルのfirst-steps-with-celery
最初のステップとして主に次の4つのステップがあります。
- ブローカーを選択する
- Celeryのインストール
- ワーカーを立てる
- タスクを実行する
ブローカーやワーカーなどの用語が出てきますが、Celeryの全体像の把握にはこちらの日本語記事が図解されていてとても分かり易かったです。
Djangoで非同期処理を実装する方法(Celery、Redis)Macローカル編
pipで関連モジュールをインストール
pipでceleryとredis(ブローカー)をインスロールします。後ろ2つは使用しない場合はインストール不要です。
celery==4.3.0
redis==3.3.0
django_celery_beat==1.5.0     #使用しない場合はインストール不要
django-celery-results==1.1.2  #使用しない場合はインストール不要
Djangoの編集(共通)
上述した通りCelery beatの定期実行には2パターンのやり方があります。まず両方に共通したDjangoの設定をしていきます。
プロジェクトルート/
  |--manage.py
  config/
    |--__init__.py
    |--settings.py
    |--urls.py
    |--celery.py
  core(アプリ名)/
   |--__init__.py
   |--tasks.py
    |--models.py
configフォルダ配下にcelery.pyを新規作成して以下の通り編集します。
from __future__ import absolute_import, unicode_literals
import os
from celery import Celery

os.environ.setdefault('DJANGO_SETTINGS_MODULE', 'config.settings')

app = Celery('config')
app.config_from_object('django.conf:settings', namespace='CELERY')
app.autodiscover_tasks()
上記で個別に設定を変える必要があるのはconfig.settingsとCelery('config')の箇所です。「config」を自分がsettings.pyを格納しているフォルダ名に変更します。
Celery beat パターン(1)の実装
まずパターン(1)(django-celery-beatを使わないやり方)のdockerの設定です。公式チュートリアルだけではDockerの実装方法が分からなかったので以下の記事も参考にしました。
Today I Learned – Celery and Django and Docker
githubに公開されているdjango-celery-docker-example
docker-composeの設定
version: "3"

services:
    db:
        image: postgres:10-alpine
        volumes:
            - postgres_data:/var/lib/postgresql/data/
        environment:
            - POSTGRES_DB=app
            - POSTGRES_USER=postgres
            - POSTGRES_PASSWORD=supersecretpassword
        ports:
            - "5432:5432"
    redis:
        image: "redis:alpine"
    app:
        build:
            context: .
        ports:
            - "8000:8000"
        volumes:
            - ./app:/app
        command: >
         sh -c "python manage.py wait_for_db &&
                python manage.py runserver 0.0.0.0:8000"
        environment:
            - DB_HOST=db
            - DB_NAME=app
            - DB_USER=postgres
            - DB_PASS=supersecretpassword
        depends_on:
            - db
            - redis
    celery:
        build: .
        command: celery -A config worker -l info
        volumes:
            - ./app:/app
        environment:
            - DB_HOST=db
            - DB_NAME=app
            - DB_USER=postgres
            - DB_PASS=supersecretpassword
        depends_on:
            - app
            - db
            - redis
    celery-beat:
        build: .
        command: celery -A config beat -l INFO --pidfile=
        volumes:
            - ./app:/app
        environment:
            - DB_HOST=db
            - DB_NAME=app
            - DB_USER=postgres
            - DB_PASS=supersecretpassword
        depends_on:
            - app
            - db
            - redis
volumes:
  postgres_data:
Pidfileが既に存在するエラー
Celery beatを連続して起動すると以下のエラーが出ました。
celery-beat_1 | ERROR: Pidfile (celerybeat.pid) already exists.
celery beatを起動するとcelerybeat.pidを出力しますが、連続起動するとファイルが既にあってエラーとなります。対処法は毎回事前にcelerybeat.pidを削除する、tmpに保存するなどあるようですが、--pidfile=をつけてpidを出力しないという方法を採用しました。
command: celery -A config beat -l INFO --pidfile=
Docker&Celery - ERROR: Pidfile (celerybeat.pid) already exists
Djangoのsettings.pyの設定
from celery.schedules import crontab
(中略)
# Celery config
CELERY_BROKER_URL = 'redis://redis:6379'
CELERY_RESULT_BACKEND = 'redis://redis:6379'
CELERY_BEAT_SCHEDULE = {
    'hello': {
        'task': 'core.tasks.hello',
        'schedule': crontab()  # execute every minute
    }
}
crontab()はデフォルトで毎分の実行になります。crontabの設定は公式チュートリアルに詳しいです。
| Example | Meaning |
|---|---|
| crontab() | 1分毎に実行 |
| crontab(minute=0, hour=0) | 毎日0:00に実行 |
| crontab(minute=0, hour='*/3') | 3時間毎に実行: 0am, 3am, 6am, 9am, 正午, 3pm, 6pm, 9pm. |
| crontab(minute=0, hour='0,3,6,9,12,15,18,21') | 同上 |
| crontab(day_of_week='sunday') | 日曜日に毎分ごとに実行 |
タスクを登録して実行
アプリケーションフォルダ(この例ではcoreフォルダ)の中にtasks.pyを作成して実行したいタスクを登録します。
from celery import shared_task


@shared_task
def hello():
    print('Hello!')
@shared_taskデコレータの下に実行したいタスクを登録します。ここで設定するfunctionをsettings.pyのCELERY_BEAT_SCHEDULEに登録したタスクと一致させる必要があります。
あとはdocker-compose upで以下のような結果が1分毎に出力されれば成功です。
celery-beat_1  | [2019-09-08 01:07:13,412: INFO/MainProcess] Writing entries...
celery-beat_1  | [2019-09-08 01:07:20,299: INFO/MainProcess] Scheduler: Sending due task hello (core.tasks.hello)
celery_1       | [2019-09-08 01:07:20,322: INFO/MainProcess] Received task: core.tasks.hello[91522887-c7a1-4334-a0a0-eb2587cff1f8]
celery_1       | [2019-09-08 01:07:20,324: WARNING/ForkPoolWorker-2] Hello!
celery_1       | [2019-09-08 01:07:20,352: INFO/ForkPoolWorker-2] Task core.tasks.hello[91522887-c7a1-4334-a0a0-eb2587cff1f8] succeeded in 0.028256000019609928s: None
Celery beat パターン(2)の実装
次はdjango_celery_beatを使用するやり方を書いていきます。公式チュートリアルはこの部分です。
celery==4.3.0
redis==3.3.0
django_celery_beat==1.5.0
django-celery-results==1.1.2
前述した通り、django_celery_beatを使う場合もCelery本体とredisのインストールは必要です。django-celery-resultsはなくても良いですが、後述する通りあるとタスクの実行結果がadminダッシュボードから見れるので便利です。
docker-composeの設定
基本は上記のパターン(1)と同じですが、celery-beatのコマンドを以下の通りにします。
celery-beat:
        build: .
        command: celery -A config beat -l INFO --scheduler django_celery_beat.schedulers:DatabaseScheduler --pidfile=
        volumes:
            - ./app:/app
        environment:
            - DB_HOST=db
            - DB_NAME=app
            - DB_USER=postgres
            - DB_PASS=supersecretpassword
        depends_on:
            - app
            - db
            - redis
commandに「--scheduler django_celery_beat.schedulers:DatabaseScheduler」を追加します。--pidfile=はパターン(1)と同様に必要です。
django-celery-resultsのチュートリアルは以下の通りです。
django-celery-resultsの公式チュートリアル
Djangoのsettings.pyの設定
INSTALLED_APPS = [
    'django.contrib.admin',
    'django.contrib.auth',
    'django.contrib.contenttypes',
    'django.contrib.sessions',
    'django.contrib.messages',
    'django.contrib.staticfiles',
    'core',
    'django_celery_beat',   #追加
    'django_celery_results', #追加
]
(中略)

# Celery config
CELERY_BROKER_URL = 'redis://redis:6379'
CELERY_RESULT_BACKEND = 'django-db'
CELERY_CACHE_BACKEND = 'django-cache'
migrationを実行
docker-compose run app /bin/sh -c "python manage.py migrate"
タスクを登録して実行
migrationを実行した後にDjangoのadminにいくとPERIODIC TASKが登録されています。
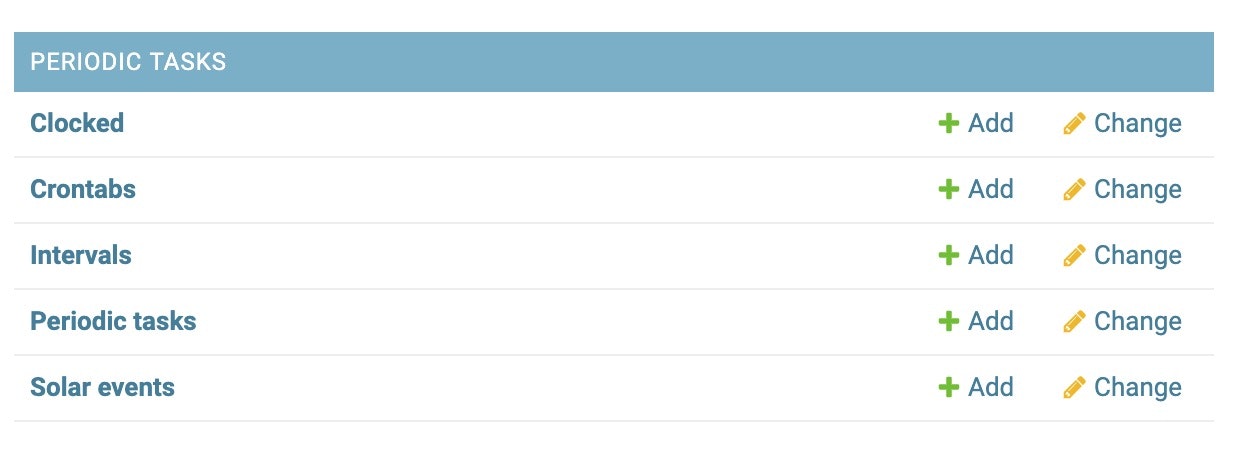
PERIODIC TASKのPeriodic tasksを開いてタスクを追加します。


パターン(1)と同様にtasks.pyに実行したいタスクを登録します。自分がやりたい作業はDBの定期更新だったので今度はmodelオブジェクトへのアクセスを追加します。
from celery import shared_task
from .models import Repository


@shared_task
def hello():
    print('Hello!')
    print('count=' ,Repository.objects.count())
docker-compose up
django_celery_resultsをインストールしておくとdocker-compose upしてadminダッシュボードのCELERY RESULTSで結果を確認できます。
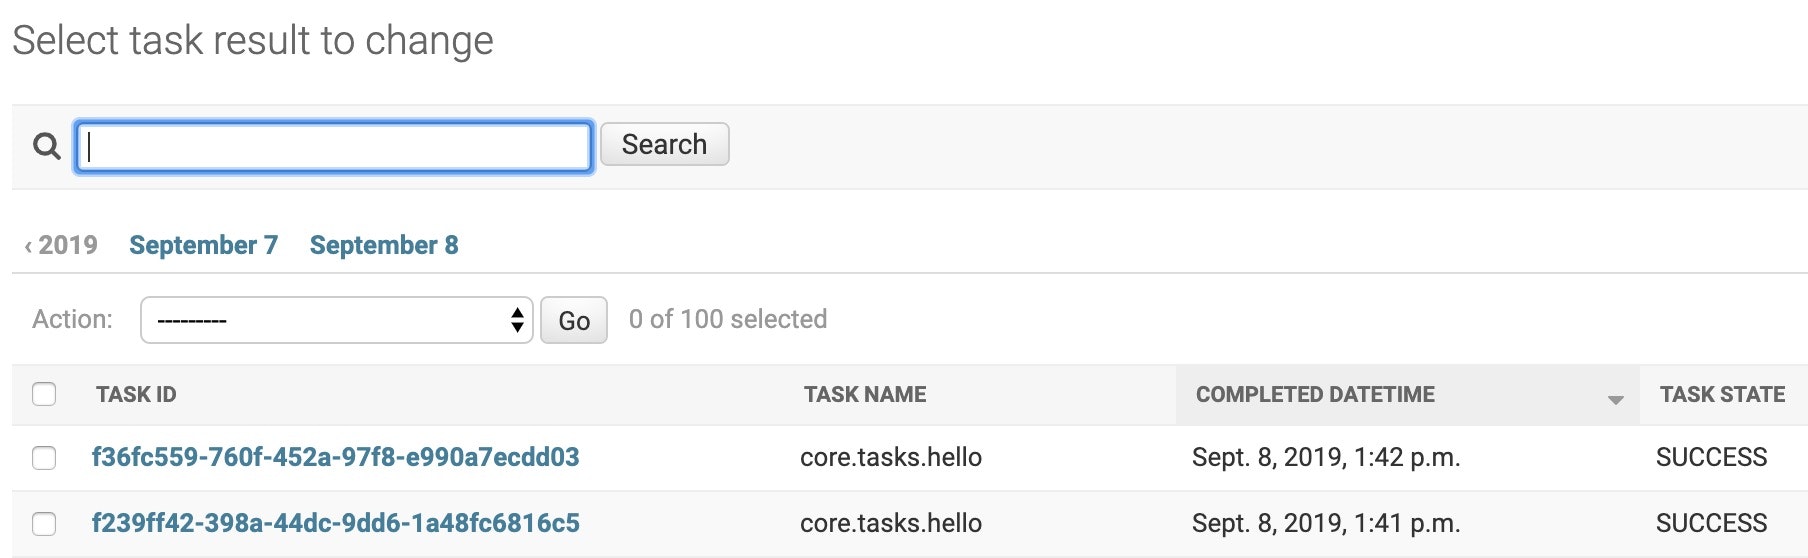 タスクが1分毎に実行されているのが分かります。めちゃくちゃ便利ですね!
Celery beatからmodelオブジェクト(postgresql)へのアクセスでエラー
成功した例を記載しましたが、Celery beatからmodelオブジェクト(postgresql)へのアクセスでエラーになって数日間ハマりました。
# エラーメッセージ
celery-beat_1  | [2019-09-05 14:05:00,017: INFO/MainProcess] Scheduler: Sending due task hello (core.tasks.hello)
celery_1       | [2019-09-05 14:05:00,040: INFO/MainProcess] Received task: core.tasks.hello[7ec020bf-bc75-4bef-818d-fbbe44801f38]
celery_1       | [2019-09-05 14:05:00,073: ERROR/ForkPoolWorker-2] Task core.tasks.hello[7ec020bf-bc75-4bef-818d-fbbe44801f38] raised unexpected: OperationalError('could not connect to server: No such file or directory\n\tIs the server running locally and accepting\n\tconnections on Unix domain socket "/tmp/.s.PGSQL.5432"?\n')
celery_1       | Traceback (most recent call last):
celery_1       |   File "/usr/local/lib/python3.7/site-packages/django/db/backends/base/base.py", line 217, in ensure_connection
celery_1       |     self.connect()
celery_1       |   File "/usr/local/lib/python3.7/site-packages/django/db/backends/base/base.py", line 195, in connect
celery_1       |     self.connection = self.get_new_connection(conn_params)
celery_1       |   File "/usr/local/lib/python3.7/site-packages/django/db/backends/postgresql/base.py", line 178, in get_new_connection
celery_1       |     connection = Database.connect(**conn_params)
celery_1       |   File "/usr/local/lib/python3.7/site-packages/psycopg2/__init__.py", line 130, in connect
celery_1       |     conn = _connect(dsn, connection_factory=connection_factory, **kwasync)
celery_1       | psycopg2.OperationalError: could not connect to server: No such file or directory
celery_1       | 	Is the server running locally and accepting
celery_1       | 	connections on Unix domain socket "/tmp/.s.PGSQL.5432"?
最後のエラーメッセージが以下の通り、
celery_1       | psycopg2.OperationalError: could not connect to server: No such file or directory
celery_1       | 	Is the server running locally and accepting
celery_1       | 	connections on Unix domain socket "/tmp/.s.PGSQL.5432"?
"/tmp/.s.PGSQL.5432"?となっていたので何かしらpostgreでエラーが起きている事が推測できましたが、ネットで調べてみると"/tmp/.s.PGSQL.5432"が出るのはpostgreが起動されていないため出るエラーのようでした。ただpostgreのコンテナは正常に動いており原因が分かりませんでした。
最終的にdocker-composeを眺めていて自分で気づきましたが、CeleryとCelery beatにpostgreのenvironment設定がされておらず、Celeryからpostgreにアクセスができない事が問題でした。
docker-composeのCeleryとCelery beatに以下設定を追加したらCelery beatの定期実行タスクからもDB更新できるようになりました。
# CeleryとCelery beatに以下の記載追加
       environment:
            - DB_HOST=db
            - DB_NAME=app
            - DB_USER=postgres
            - DB_PASS=supersecretpassword
タスクが登録されない(unregistered)でエラー
tasks.pyの@shared taskに定義した関数を別の名前に置き換えて実行しようとしたら以下の通りタスクが登録されないでエラーになりました。
celery-beat_1  | [2019-09-23 04:16:47,995: INFO/MainProcess] Scheduler: Sending due task update (core.tasks.update)
celery_1       | [2019-09-23 04:16:48,000: ERROR/MainProcess] Received unregistered task of type 'core.tasks.update'.
celery_1       | The message has been ignored and discarded.
celery_1       |
celery_1       | Did you remember to import the module containing this task?
celery_1       | Or maybe you're using relative imports?
celery_1       |
celery_1       | Please see
celery_1       | http://docs.celeryq.org/en/latest/internals/protocol.html
celery_1       | for more information.
celery_1       |
celery_1       | The full contents of the message body was:
celery_1       | b'[[], {}, {"callbacks": null, "errbacks": null, "chain": null, "chord": null}]' (77b)
celery_1       | Traceback (most recent call last):
celery_1       |   File "/usr/local/lib/python3.7/site-packages/celery/worker/consumer/consumer.py", line 559, in on_task_received
celery_1       |     strategy = strategies[type_]
celery_1       | KeyError: 'core.tasks.update'
本来ならCelery.pyの以下のautodiscover_tasks()で@shared taskが定義されてる箇所を自動で調べてタスクを登録してくれるはずですが、それがうまく行かない事があるようです。
app.autodiscover_tasks()
解決策として、settgings.pyに以下を追加したらうまく登録されるようになりました。
CELERY_IMPORTS = ('core.tasks') #tasks.pyを格納してるフォルダ
終わりに
今回はCeleryの定期実行機能にフォーカスしましたが、今後非同期処理についても試してみたいと思います。Celeryを使えばDjangoでバッチ処理的なことができますね。
また、今まだ自分が作成しているアプリを本番環境にデプロイするところまでいっていないのでCeleryも本番環境で動かそうとすると躓くポイントがありそうです。デプロイしてみたところでこの記事もアップデートしようと思います。最後までお読み頂きありがとうございました。