はじめに
冬休みの宿題のとして Agents for Amazon Bedrock を使用した AWS アップデート解説くん Slack アプリを作成しました。あっという間にもうすぐ 2 月ですが、ここに課題を提出します。
Slack の RSS アプリで What's New with AWS? の RSS フィード を受信して、投稿に含まれる URL を参照し、要約を日本語で投稿します。
ソースコードは以下の GitHub リポジトリに置いてあります。
Agents for Amazon Bedrock の CloudFormation サポートにより、現在は CloudFormation テンプレートで Agent のデプロイも完結できるようになっています。本記事では投稿当初のままコンソールでの作成手順を紹介しています。
なお、Agent のアクショングループの設定や Lambda 関数は @nasuvitz さんの以下の記事を参考にさせていただいています。感謝。
全体像
次のような構成です。
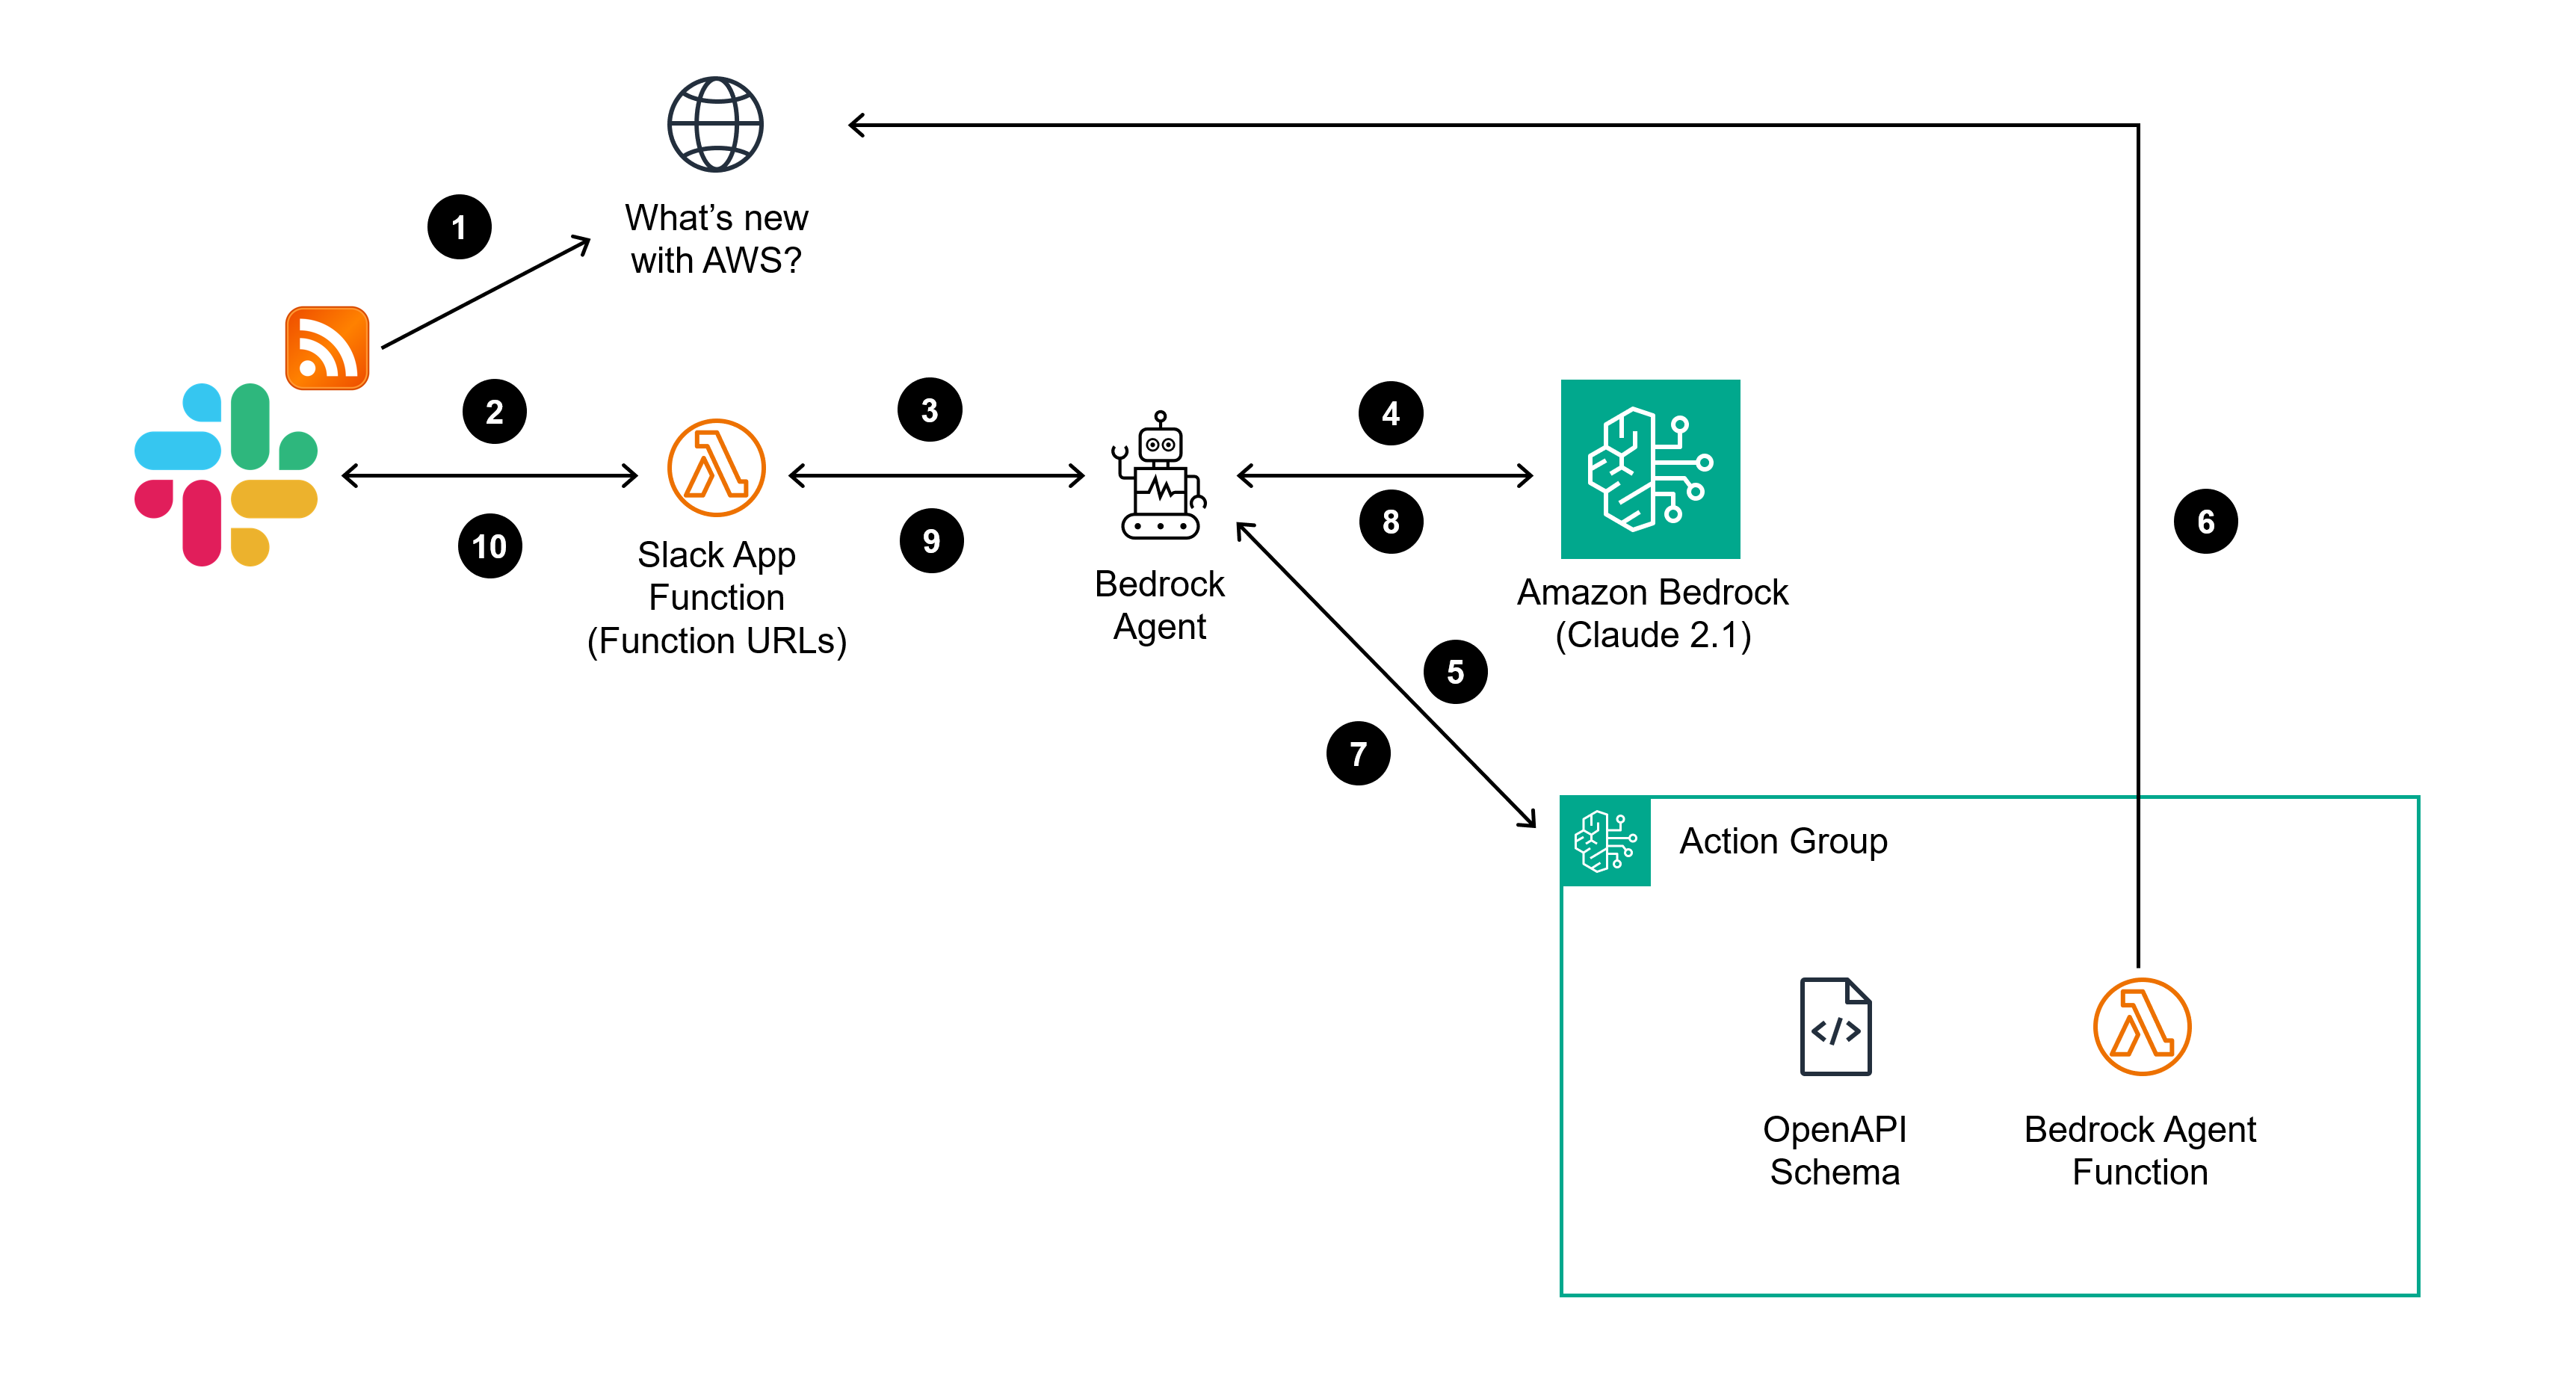
① Slack の 公式 RSS アプリに What's new with AWS? の RSS フィードを登録し、Slack チャンネルにアップデート情報が投稿されます。
② チャンネルに投稿されたメッセージをトリガーに、Lambda 関数 URL を通じて Slack App Function が呼ばれます。
今回の例では簡易的に認証なしの Lambda 関数 URL を使用しています。セキュリティを強化したい場合は、WAF + API Gateway + Lambda 関数の構成とするか、以下の記事のように CloudFront + Lambda@Edge + Lambda 関数 URL (AWS_IAM) といった構成を検討してください。
Slack アプリは常時起動しておく必要はないため、以下の記事を参考に Lambda 関数として実行します。
③ Slack App Function は投稿されたメッセージ本文から AWS のアップデートに関する URL を抽出し、Bedrock Agent を呼び出します。
④⑤ Agent は基盤モデル (Claude V2.1) と連携して思考し、 アクショングループに設定された Bedrock Agent Function を実行します。
⑥⑦ Bedrock Agent Function は入力として受けとった URL を開いて本文を抽出し、Agent に返します。
⑧ Agent は再度基盤モデルと連携し、本文を日本語で要約して結果を json 型式で返します。
⑨⑩ Slack App Function は受けとった json を元に該当のメッセージのスレッドに解説を投稿します。
以降では使用方法について解説します。
Lambda 関数のデプロイ
冒頭の GitHub リポジトリには Slack App Function および Bedrock Agent Function をデプロイするための AWS SAM テンプレートが含まれています。Python ライブラリとして Beautiful Soup および Bolt for Python を使用するため、Lambda Layer もあわせてデプロイされます。
git clone https://github.com/hayao-k/aws-update-navigator.git
cd aws-update-navigator
sam build -u
sam deploy --guided
デプロイ後に出力される Lambda 関数 URL を控えておきます。Slack UI 側でアプリケーションを登録する際に使用します。
CloudFormation outputs from deployed stack
-------------------------------------------------------------------------------------------
Outputs
-------------------------------------------------------------------------------------------
Key                 SlackAppFunctionUrl
Description         Function URL Endpoint
Value               https://ciwfc5r6vbgl5gtgh35bclt7y0example.lambda-url.us-east-1.on.aws/
-------------------------------------------------------------------------------------------
参考: AWS SAM テンプレート (クリックで展開)
AWSTemplateFormatVersion: '2010-09-09'
Transform: AWS::Serverless-2016-10-31
Description: >
  aws-update-navigator

  Sample SAM Template for aws-update-navigator

Globals:
  Function:
    Handler: app.lambda_handler
    Runtime: python3.12
    Architectures:
    - x86_64
    LoggingConfig:
      LogFormat: JSON
      ApplicationLogLevel: INFO

Resources:
  SlackAppFunction:
    Type: AWS::Serverless::Function
    Properties:
      CodeUri: slack_app/
      MemorySize: 512
      Timeout: 180
      FunctionUrlConfig:
        AuthType: NONE
      Environment:
        Variables:
          BEDROCK_AGENT_ID: 'dummy'
          BEDROCK_AGENT_ALIAS_ID: 'dummy'
          SLACK_BOT_TOKEN: 'dummy'
          SLACK_SIGNING_SECRET: 'dummy'
      Layers:
        - !Ref SlackAppLayer
      Role: !GetAtt SlackAppFunctionRole.Arn

  SlackAppFunctionPolicy:
    Type: AWS::IAM::ManagedPolicy
    Properties:
      Description: Policy for Slack App Function
      PolicyDocument:
        Version: 2012-10-17
        Statement:
          - Effect: Allow
            Action:
              - 'bedrock:InvokeAgent'
            Resource: '*'
          - Effect: Allow
            Action:
             - 'lambda:InvokeFunction'
            Resource: '*'
          - Effect: Allow
            Action:
              - 'logs:CreateLogGroup'
              - 'logs:CreateLogStream'
              - 'logs:PutLogEvents'
            Resource: '*'

  SlackAppFunctionRole:
    Type: AWS::IAM::Role
    Properties:
      ManagedPolicyArns:
        - !Ref SlackAppFunctionPolicy
      AssumeRolePolicyDocument:
        Version: '2012-10-17'
        Statement:
          - Effect: 'Allow'
            Action: 'sts:AssumeRole'
            Principal:
              Service: lambda.amazonaws.com

  SlackAppFunctionLogGroup:
    Type: AWS::Logs::LogGroup
    Properties:
      LogGroupName: !Sub '/aws/lambda/${SlackAppFunction}'
      RetentionInDays: 14

  SlackAppLayer:
    Type: AWS::Serverless::LayerVersion
    Properties:
      Description: 'boto3 & slack_bolt'
      ContentUri: 'slack_app_layer/'
      CompatibleRuntimes:
        - python3.12
    Metadata:
      BuildMethod: python3.12
      BuildArchitecture: x86_64

  BedrockAgentFunction:
    Type: AWS::Serverless::Function
    Properties:
      CodeUri: bedrock_agent/
      MemorySize: 128
      Timeout: 10
      Layers:
        - !Ref BedrockAgentLayer
      Policies:

  BedrockAgentPermission:
    Type: AWS::Lambda::Permission
    Properties:
      Action: 'lambda:InvokeFunction'
      FunctionName: !Ref BedrockAgentFunction
      Principal: 'bedrock.amazonaws.com'
      SourceArn: !Sub 'arn:aws:bedrock:${AWS::Region}:${AWS::AccountId}:agent/REPLACEYOURAGENTID'

  BedrockAgentLayer:
    Type: AWS::Serverless::LayerVersion
    Properties:
      Description: 'beautifulsoup4'
      ContentUri: 'bedrock_agent_layer/'
      CompatibleRuntimes:
        - python3.12
    Metadata:
      BuildMethod: python3.12
      BuildArchitecture: x86_64

  BedrockAgentFunctionLogGroup:
    Type: AWS::Logs::LogGroup
    Properties:
      LogGroupName: !Sub '/aws/lambda/${BedrockAgentFunction}'
      RetentionInDays: 14

Outputs:
  SlackAppFunctionUrl:
    Description: 'Function URL Endpoint'
    Value: !GetAtt SlackAppFunctionUrl.FunctionUrl
Agent の設定
Agent の作成
2024/1/25 時点で Amazon Bedrock は CloudFormation でのリソース作成をサポートしていないため、コンソールから作成します。
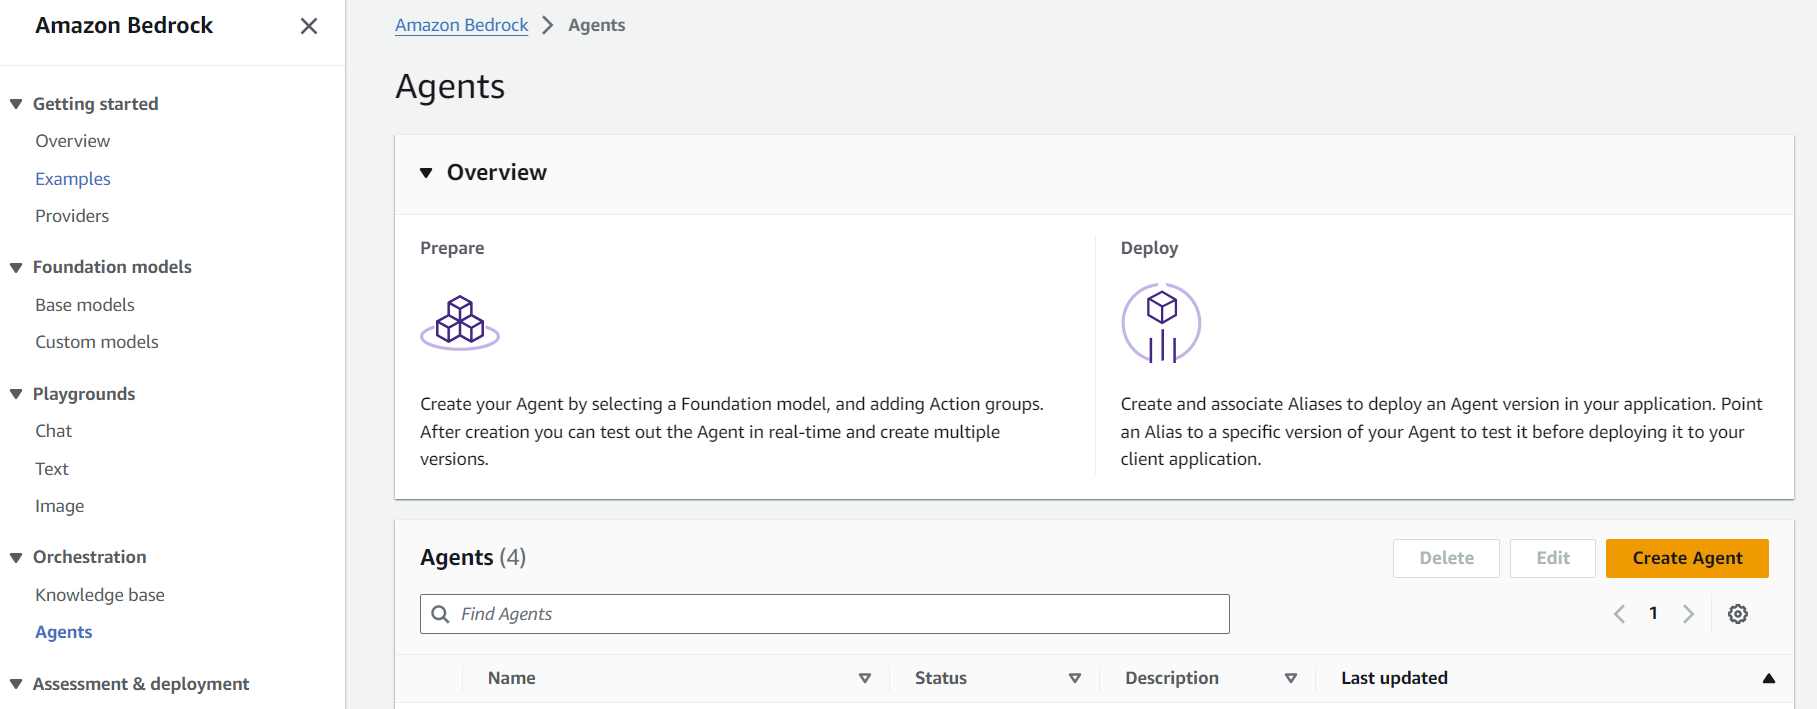
Bedrock コンソールの Agents から Create Agent をクリックします。
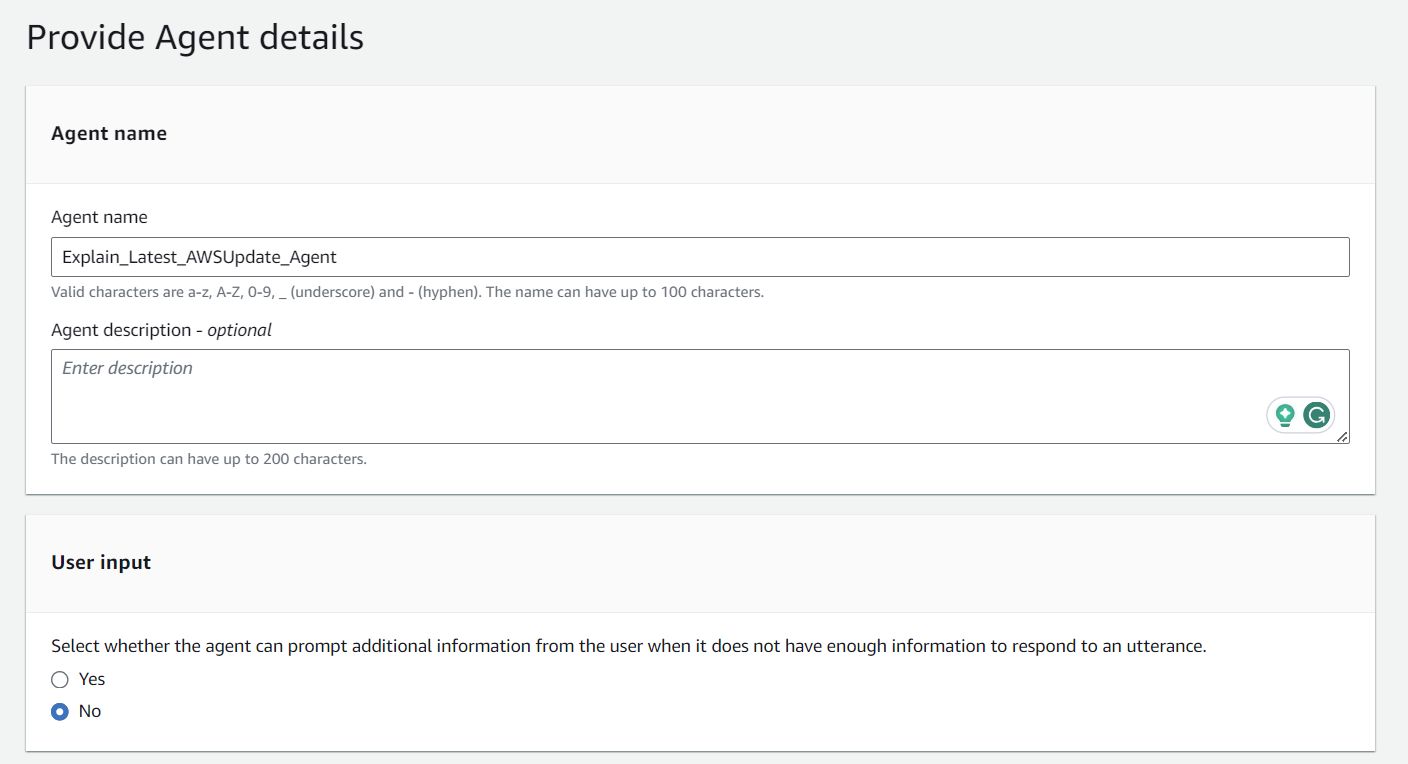
Agent name には任意の名称を設定します。
User input では Agent がユーザーの入力に応答するために十分な情報を持っていない場合に、ユーザーに対し追加の情報入力を求めるかどうかを設定します。今回は人間の判断は介在させずに処理を完結させたいため、No を選択します。
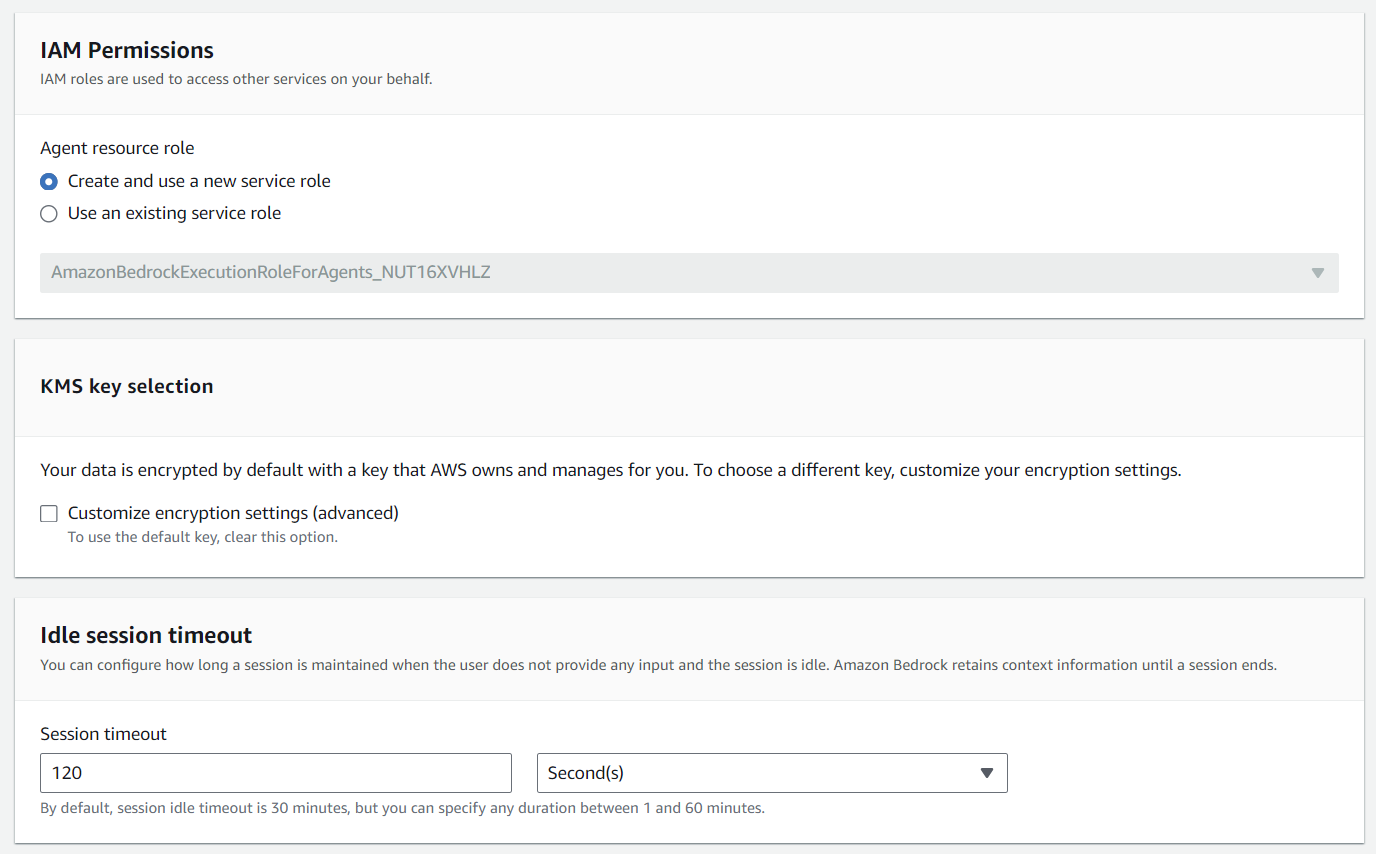
IAM Permissions では Agent が他のサービスにアクセスする際に使用する IAM ロールを指定します。ウィザード上で新規作成するか以下のドキュメントの要件に従って作成したカスタムロールを指定できます。
Agent によって処理されるデータをカスタマー管理の KMS キーで暗号化したい場合は、KMS key selection の Customize encryption settings (advanced) にチェックを入れ、KMS Key を指定できます。
Idle session timeout では Amazon Bedrock が会話履歴を保持する期間を設定します。デフォルト 30 分ですが、今回はユーザーとの会話履歴は不要であるため、短めに設定できます。
オプションでタグを設定し、次に進みます。
Select model で Anthropic Claude V2.1 を選択します。Instructions for the Agent では次の内容を入力します。
As an AWS Principal Engineer, you have been assigned the following tasks:

1. Access the AWS service update URL and provide a summary of the English text in Japanese.
2. Share your thoughts on the update in Japanese, focusing on the following points:
   2.1. Discuss the advantages of this technology or service compared to existing technologies or services, and explain how it achieves these benefits.
   2.2. Describe the technical challenges that this technology or service addresses.
3. Describe the summary and your thoughts in separately.
4. Respond in json format.

Here’s an example:
summary, advantages, and addresses are all required fields
<example>
{
    "summary": "Amazon EC2シリアルコンソールがすべてのAWSローカルゾーンで利用できるようになりました。",
    "advantages": "インスタンスの起動やネットワークの接続の問題をトラブルシューティングするために、シリアルポートへのテキストベースのアクセスを簡単かつ安全に提供します。これにより、SSHやRDPで接続できない場合でも、対話形式でコマンドを実行して構成の問題を解決できます。",
    "addresses": "これまでも管理コンソールやAPIを通じてシリアルコンソール出力にアクセスできましたが、それらは主に診断のためで、対話式のトラブルシューティングには適していませんでした。この新機能により、こうした制限がなくなり、はるかに使いやすくなります。"
}
</example>

If the tool did not return a summary, reply "Could not retrieve."

Agent instruction は最大 1,200 文字という制限があり、上限緩和することができません。1,200 文字を超える場合は Advanced Prompts の使用をご検討ください。
上記の例で 1,122 文字なので結構ぎりぎりです。Instruction は日本語で記述しても問題ありませんが、Agent に設定されているデフォルトのプロンプトが英語であるため、今回はあえて英語で「日本語への要約と解説」や「json 型式の出力」を指示しています。
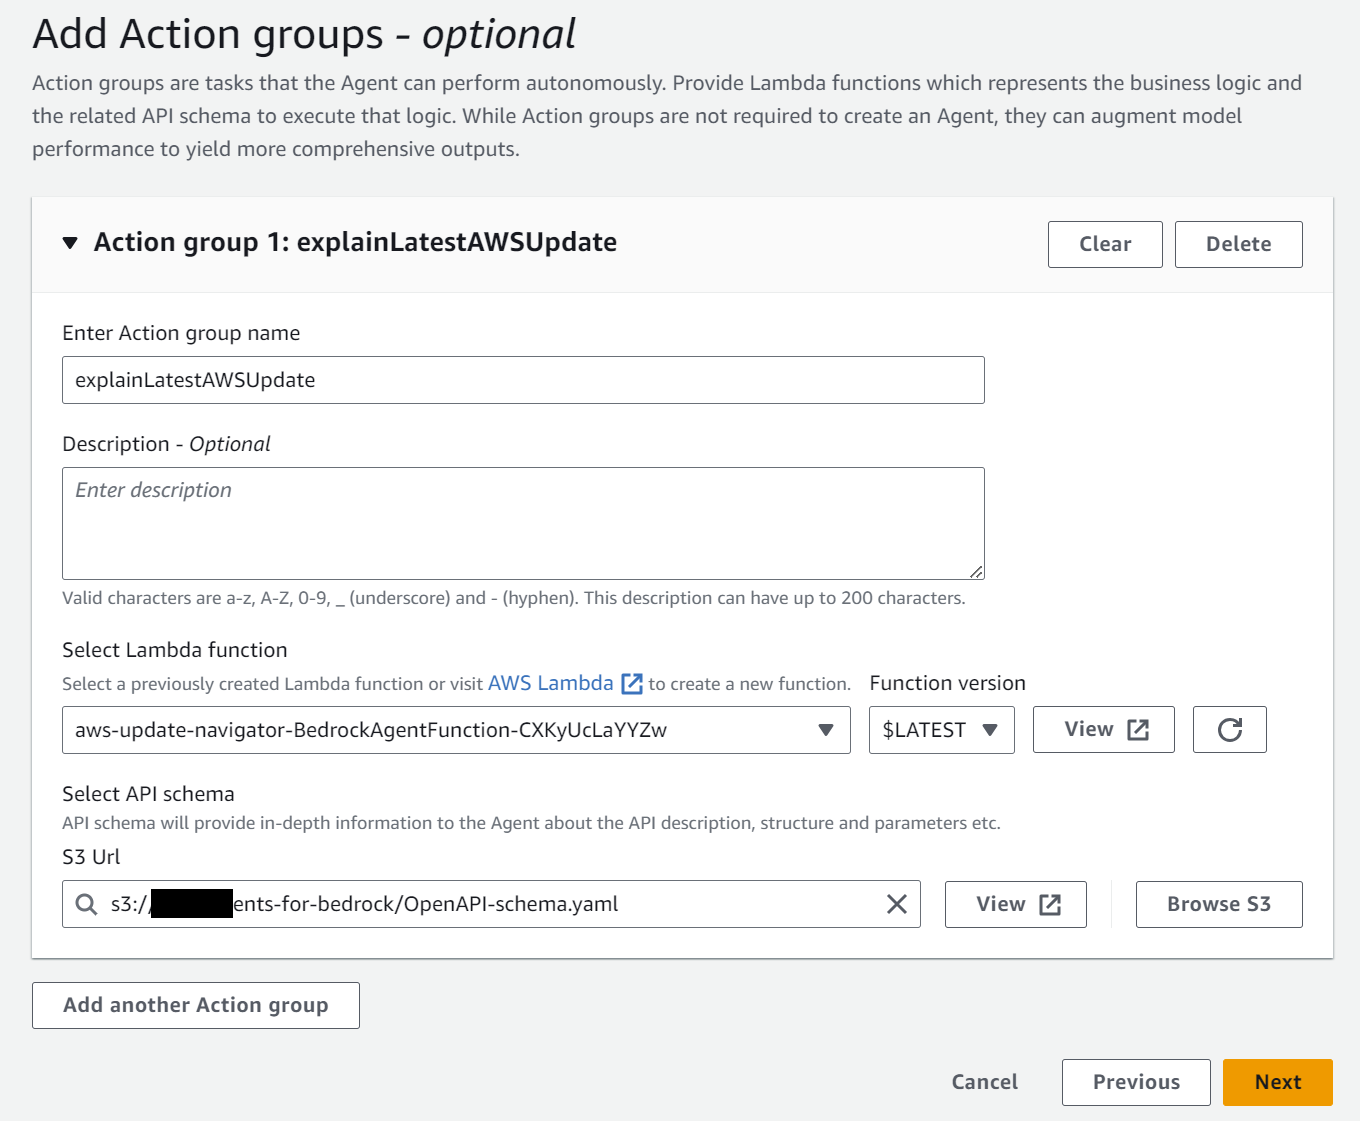
次にアクショングループの設定を入力します。Enter Action group name に任意の名前の入力します。Select Lambda function で AWS SAM テンプレートから作成された Bedrock Agent Function を指定します。
OpenAPI の Schema ファイル (OpenAPI-schema.yaml) を任意の S3 バケットに配置し、その S3 Url を入力して次へすすみます。
今回、Knowledge base の機能は使用しないため、Add Knowledge base では何も入力せずに次へ進みます。Review and create で入力内容を確認し、Agent を作成します。
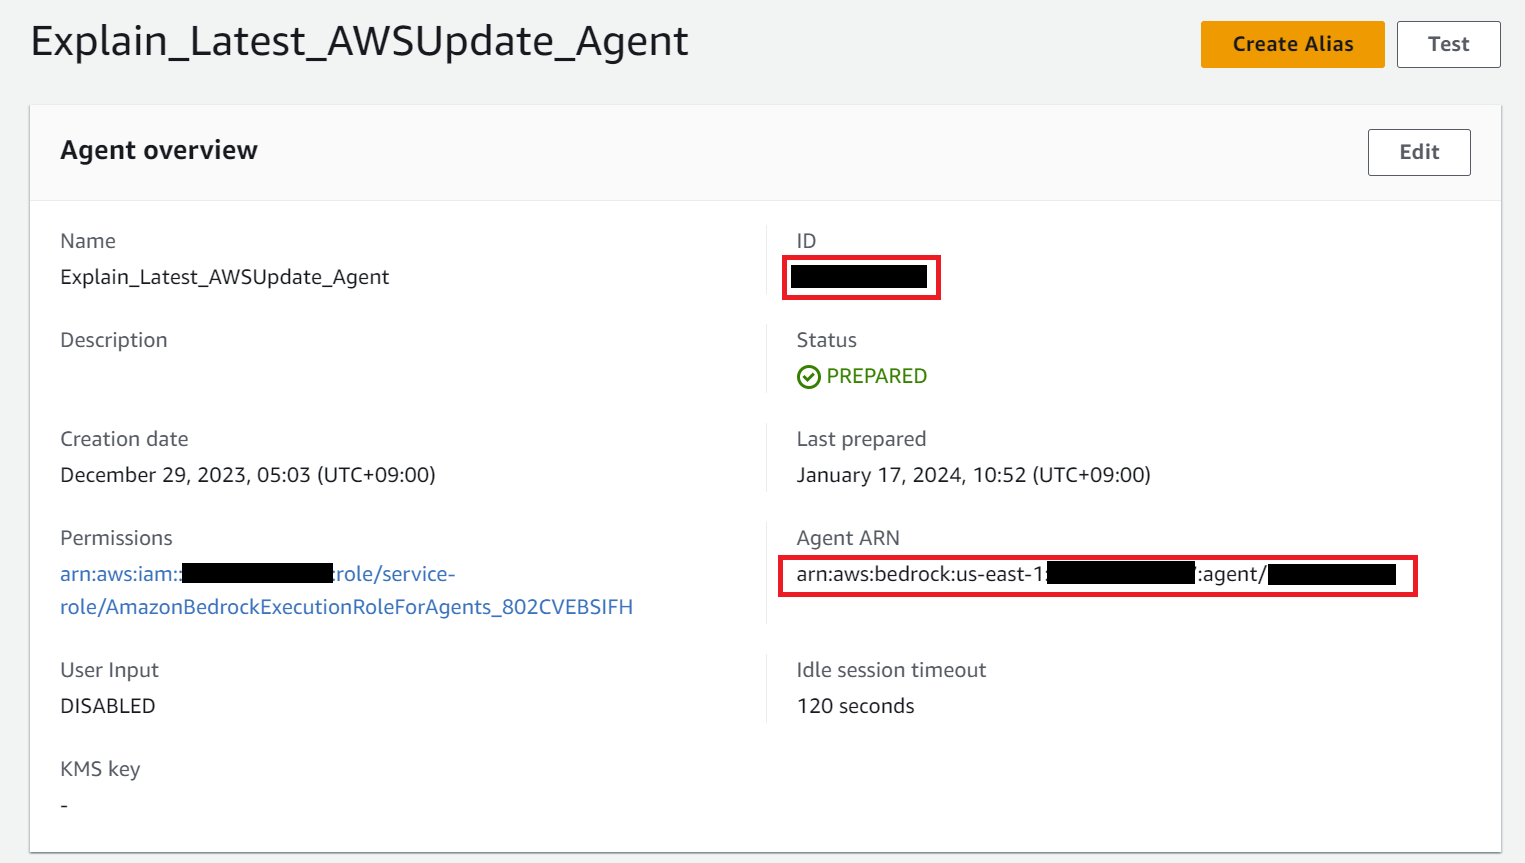
Agent の作成が完了したら、Agent ID および Agent ARN の値を控えておきます。
リソースベースポリシーの変更
この時点では Agent は Bedrock Agent Function を実行できません。有効なリソースベースポリシーが設定されていないためです。
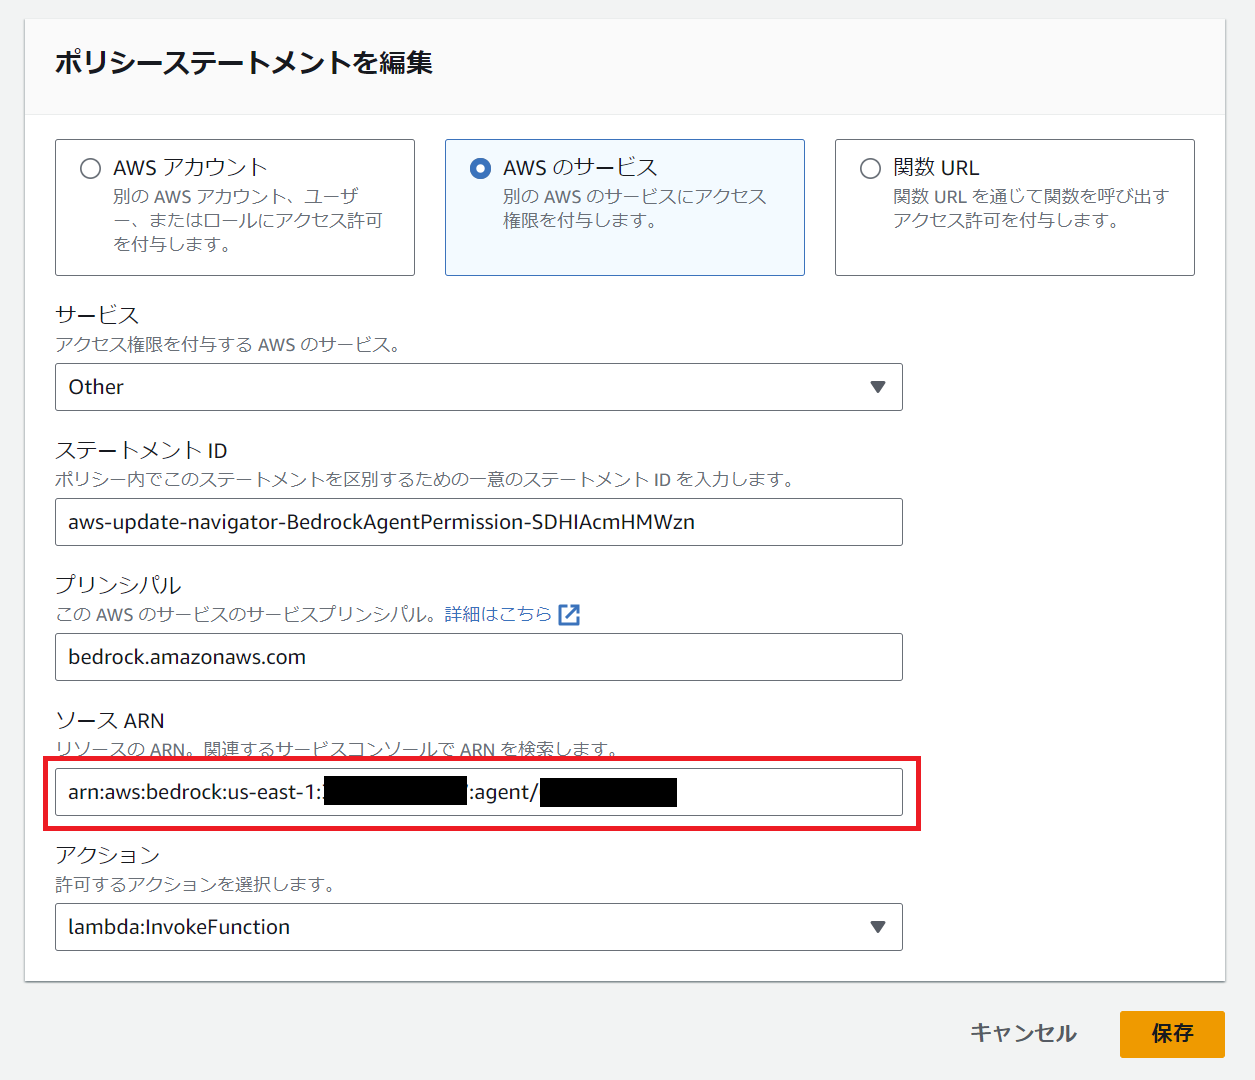
AWS Lambda コンソールに移動し、Bedrock Agent Function の設定タブからアクセス権限を参照します。すでに設定されている BedrockAgentPermission を選択し、編集をクリックします。

ポリシーステートメントの編集画面でソース ARN にダミーの値が入力されていますので、先ほど控えておいた Agent ARN に書き換えて保存します。
Agent のデプロイ
Agent 構成に対する変更はまず作業ドラフト (Working draft) に反映されます。エージェントをデプロイして使用するにはバージョンとエイリアスを新しく作成する必要があります。
Working draft のバージョンは DRAFT であり、それを指すエイリアスが TestAlias です。
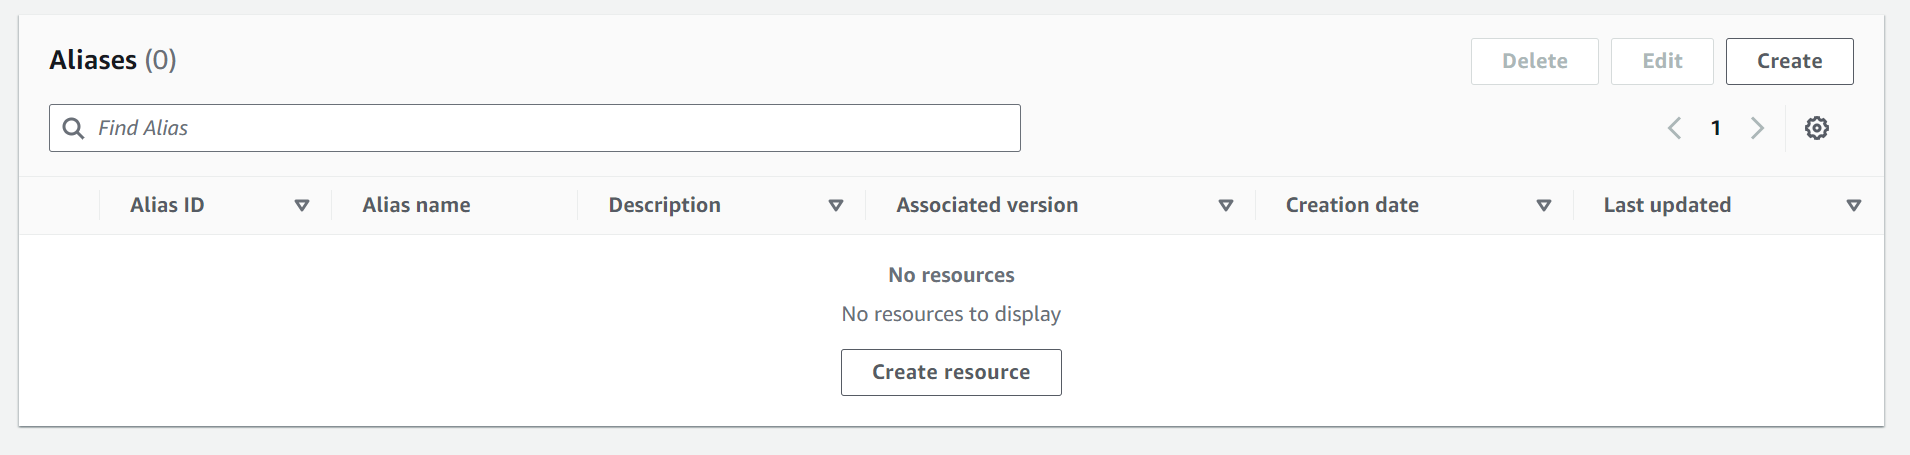
Agent の詳細画面下部の Aliases で Create をクリックします。
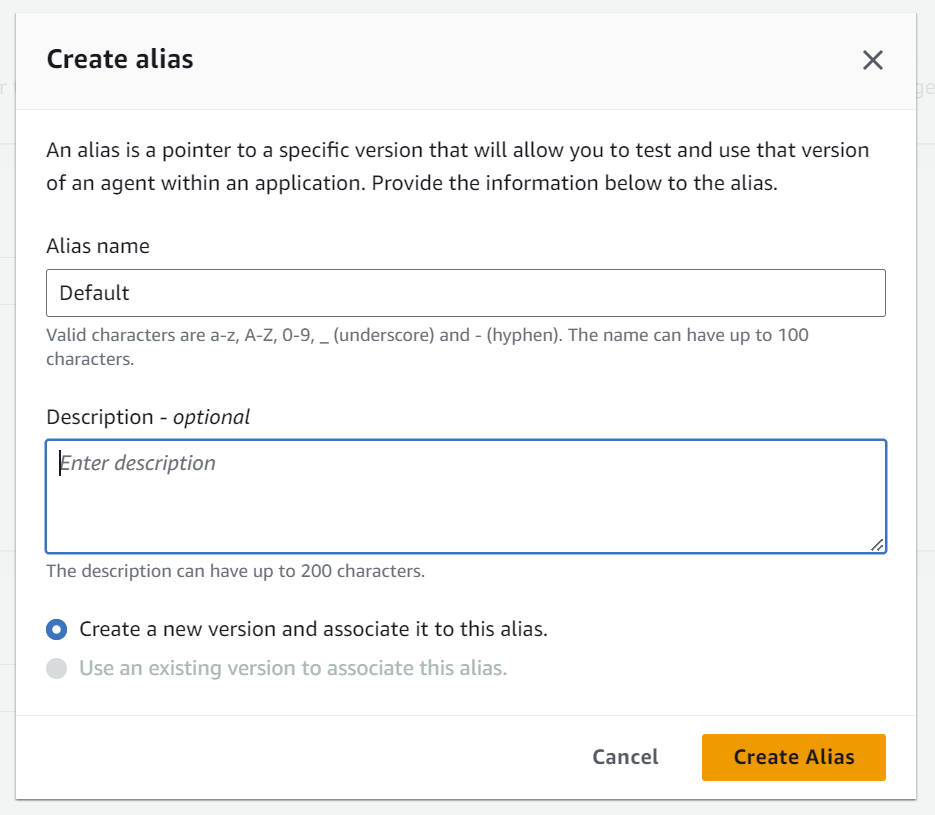
Alias name に任意の名前を設定して Create Alias をクリックします。バージョンはエイリアス作成時に新規作成することもできますが、個別に作ったバージョンを任意のエイリアスと紐づけることもできます。
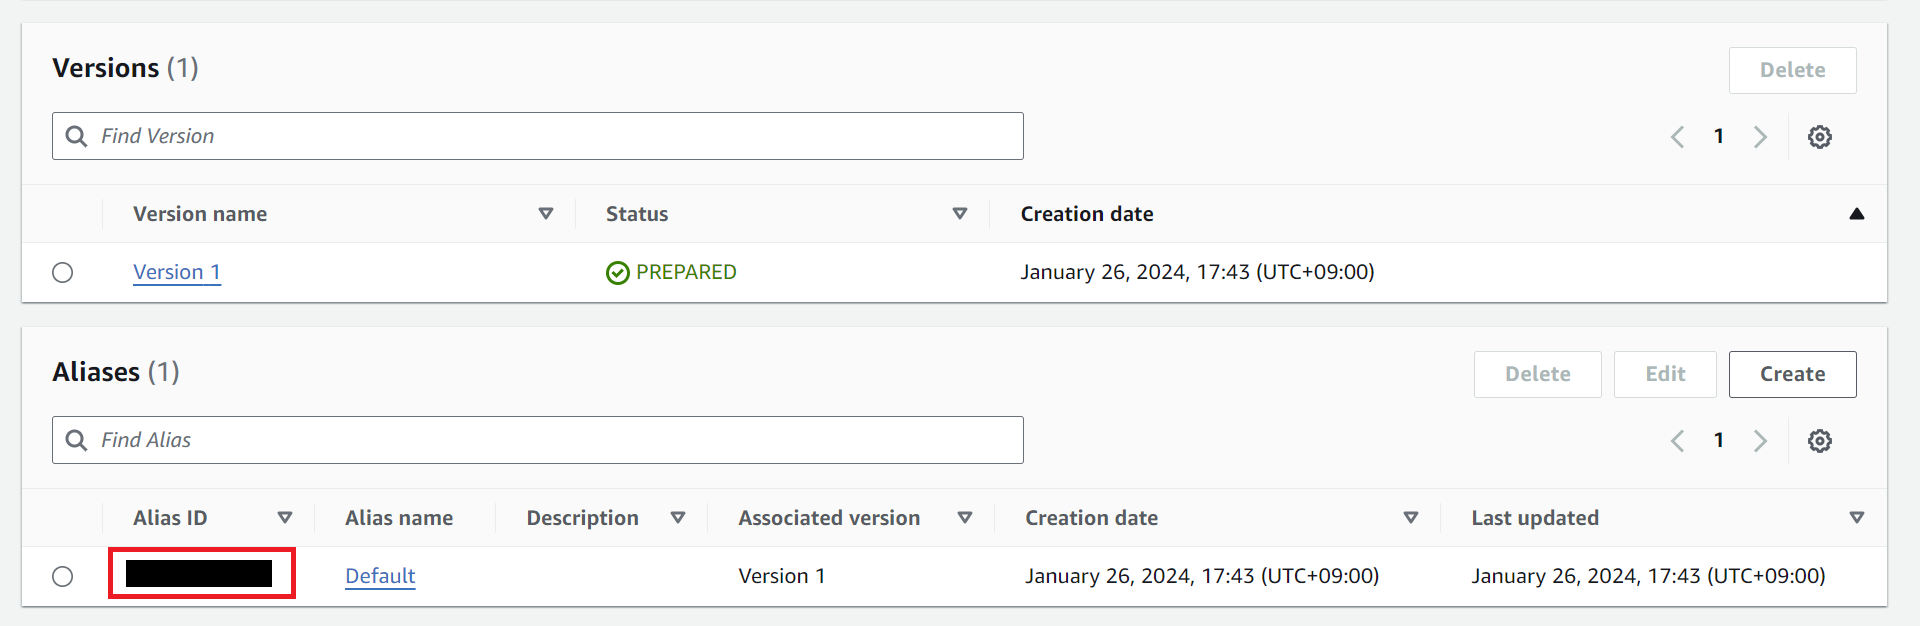
エイリアスの作成が完了したら、Alias ID を控えておきます。後続の Slack アプリの設定で使用します。
以上で Bedrock Agent の設定は完了です。
参考: Bedrock Agent Function のコード (クリックで展開)
import json
from logging import getLogger
from typing import Optional
from urllib.request import urlopen
from urllib.error import URLError, HTTPError
from bs4 import BeautifulSoup

logger = getLogger()

def extract_text_from_url(url: str, target_tag: str = 'p',
                          text_limit: Optional[int] = 5000) -> str:
    try:
        with urlopen(url) as response:
            html_body = response.read().decode('utf-8')

        soup = BeautifulSoup(html_body, 'html.parser')
        extracted_texts = [content.get_text() for content in soup.find_all(target_tag)]
        concatenated_texts = '\n\n'.join(extracted_texts)

        return (concatenated_texts[:text_limit] if text_limit else concatenated_texts)
    except HTTPError as e:
        logger.error('HTTP request failed: %s, %s', e.code, e.reason)
        return ''
    except URLError as e:
        logger.error('URL error occured: %s', e.reason)
        return ''

def lambda_handler(event, context):
    logger.debug(event)
    api_path = event['apiPath']
    url = ''
    body = {}
    http_status_code = 200

    if api_path == '/summarize_article':
        properties = event['requestBody']['content']['application/json']['properties']
        url = next((item['value'] for item in properties if item['name'] == 'url'), '')
        # Beautiful Soup で URL を開き、本文をアクションレスポンスの body として返す
        body = {'body': extract_text_from_url(url)}
    else:
        body = {'error': 'Invalid API path'}
        logger.error('Invalid API path: %s', api_path)
        http_status_code = 400

    response_body = {
        'application/json': {
            'body': json.dumps(body, ensure_ascii=False)
        }
    }

    action_response = {
        'actionGroup': event['actionGroup'],
        'apiPath': api_path,
        'httpMethod': event['httpMethod'],
        'httpStatusCode': http_status_code,
        'responseBody': response_body,
    }

    return {
        'messageVersion': '1.0',
        'response': action_response
    }
Slack アプリの設定
Slack UI でのアプリケーション作成
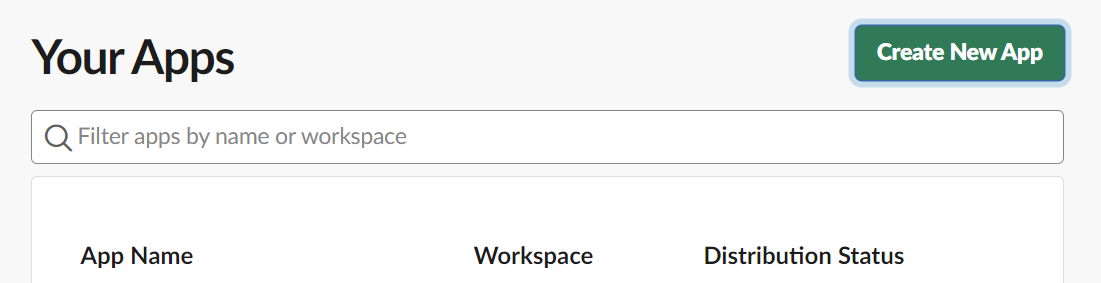
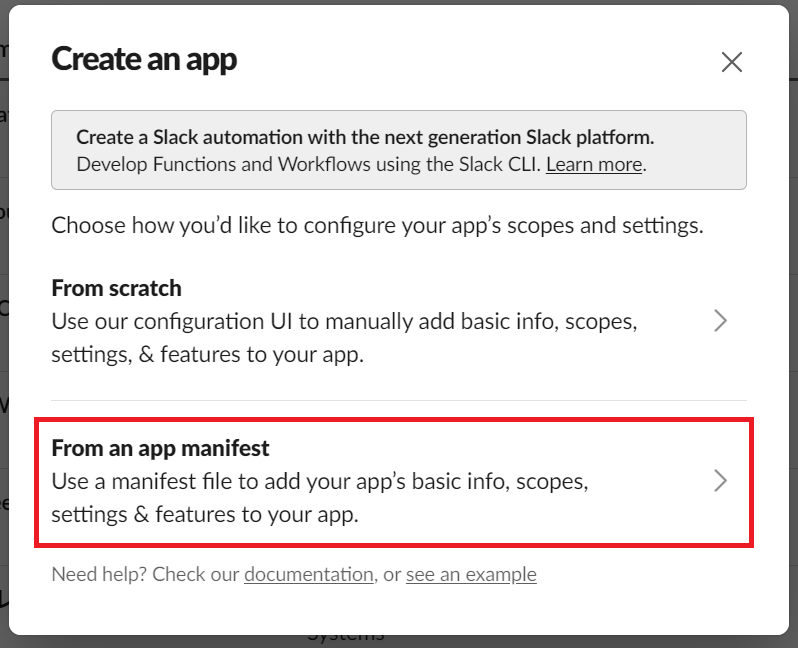
Slack API: Applications (https://api.slack.com/apps) で Create New App をクリックします。
Create an app で「From an app manifest」を選択します。
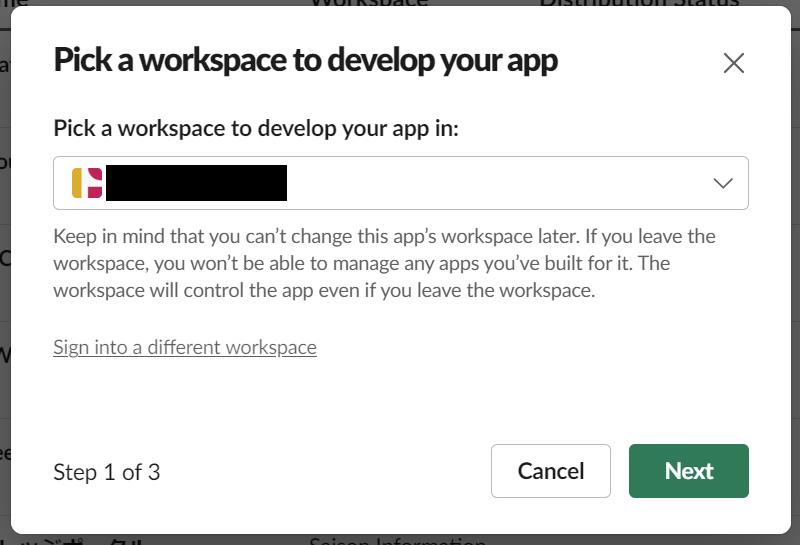
Pick a workspace to develop your app で作業対象のワークスペースを選択して次に進みます。
Enter app manifest bellow で以下の内容を貼り付けて次に進みます。その際、request_url の値を AWS SAM テンプレートのデプロイ時に控えておいた Lambda 関数 URL に変更します。
display_information:
  name: AWS アップデート解説くん
features:
  bot_user:
    display_name: AWS Update Navigator
    always_online: false
oauth_config:
  scopes:
    bot:
      - channels:history
      - chat:write
      - links:read
settings:
  event_subscriptions:
    request_url: <Lambda 関数 URL や API Gateway のエンドポイントに置換してください>
    bot_events:
      - message.channels
  org_deploy_enabled: false
  socket_mode_enabled: false
  token_rotation_enabled: false

本来であれば event_subscriptions は message event ではなく、link_shared event をリッスンした方が Lambda 関数 の起動は少なくて済みます。検証したところ Slack 公式 RSS アプリが投稿した URL は link_shared イベントが発火しなかったため、message イベントをリッスンしています。
oauth_config で指定している bot スコープはパブリックチャンネルでの利用に必要なものです。プライベートチャンネルで利用したい場合は、groups:history を追加する必要があります。
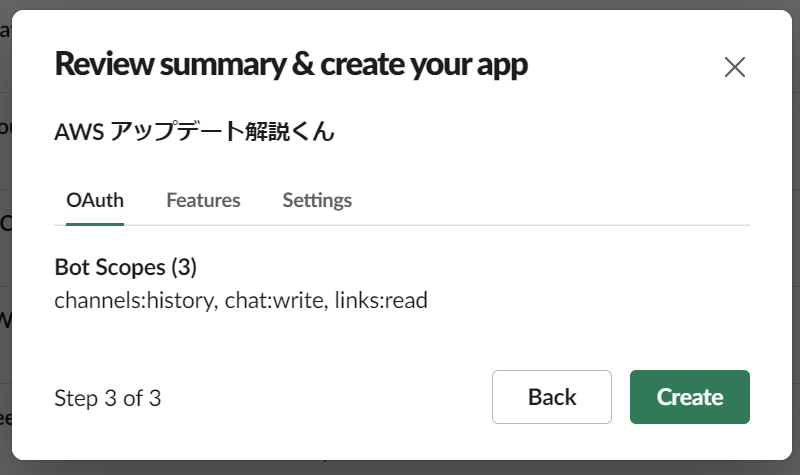
入力した内容を確認し、アプリケーションを作成します。
作成が完了したら Install to Workspace をクリックして、アプリケーションをインストールします。
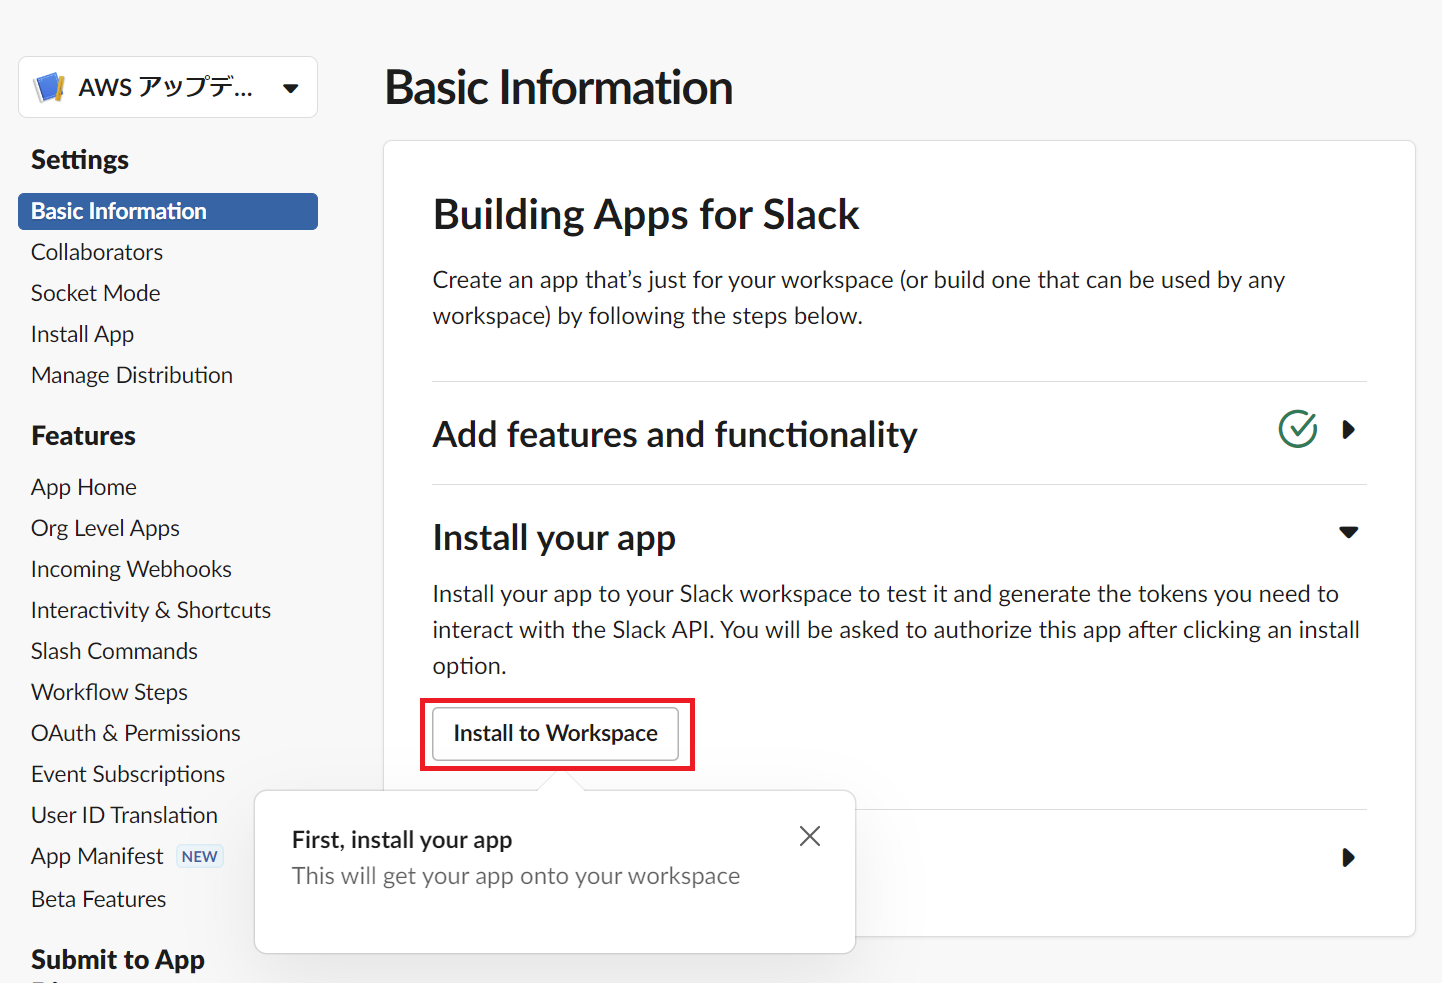
権限リクエストの確認画面で許可するを選択します。

設定値の確認
後続の Slack App Function に設定に必要な設定値を確認します。
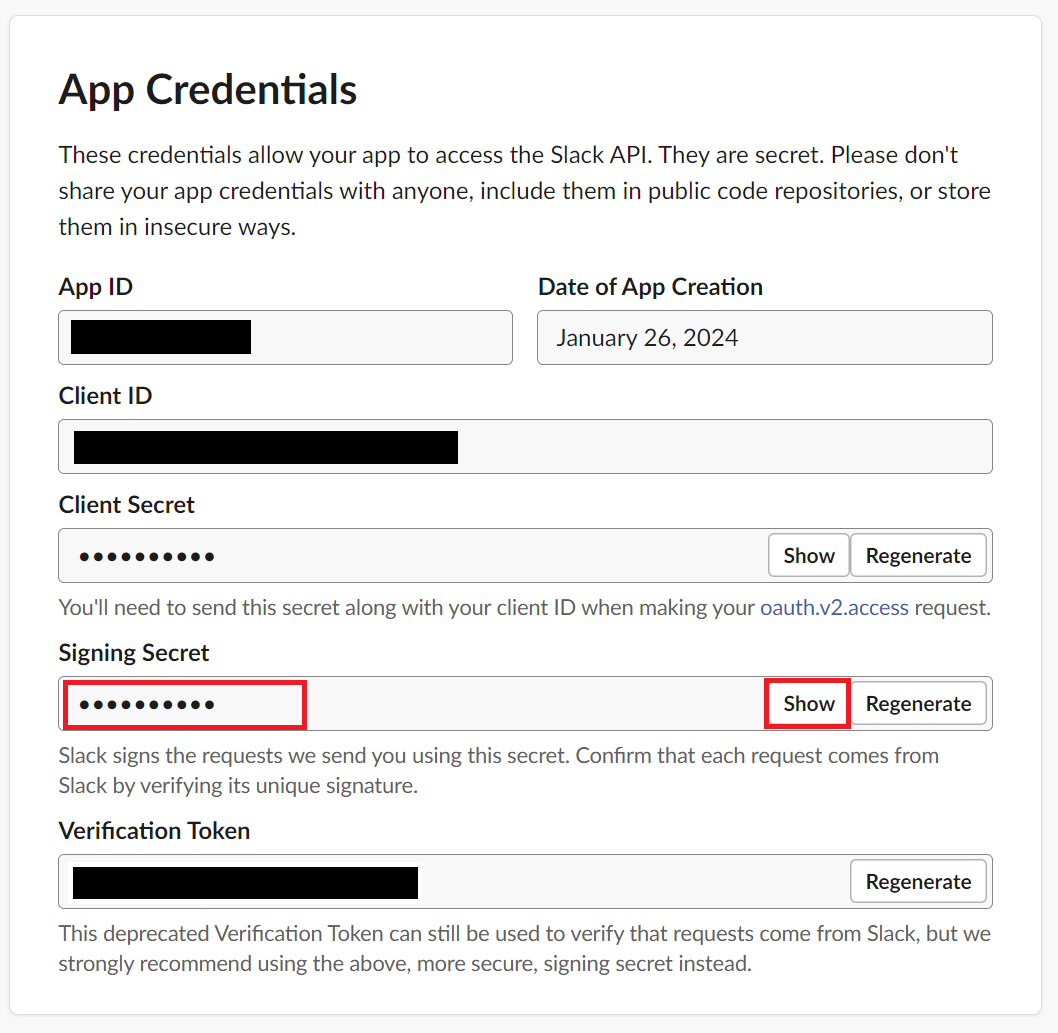
Settings → Basic Information → App Credential から Signing Secret の値を表示して控えておきます。
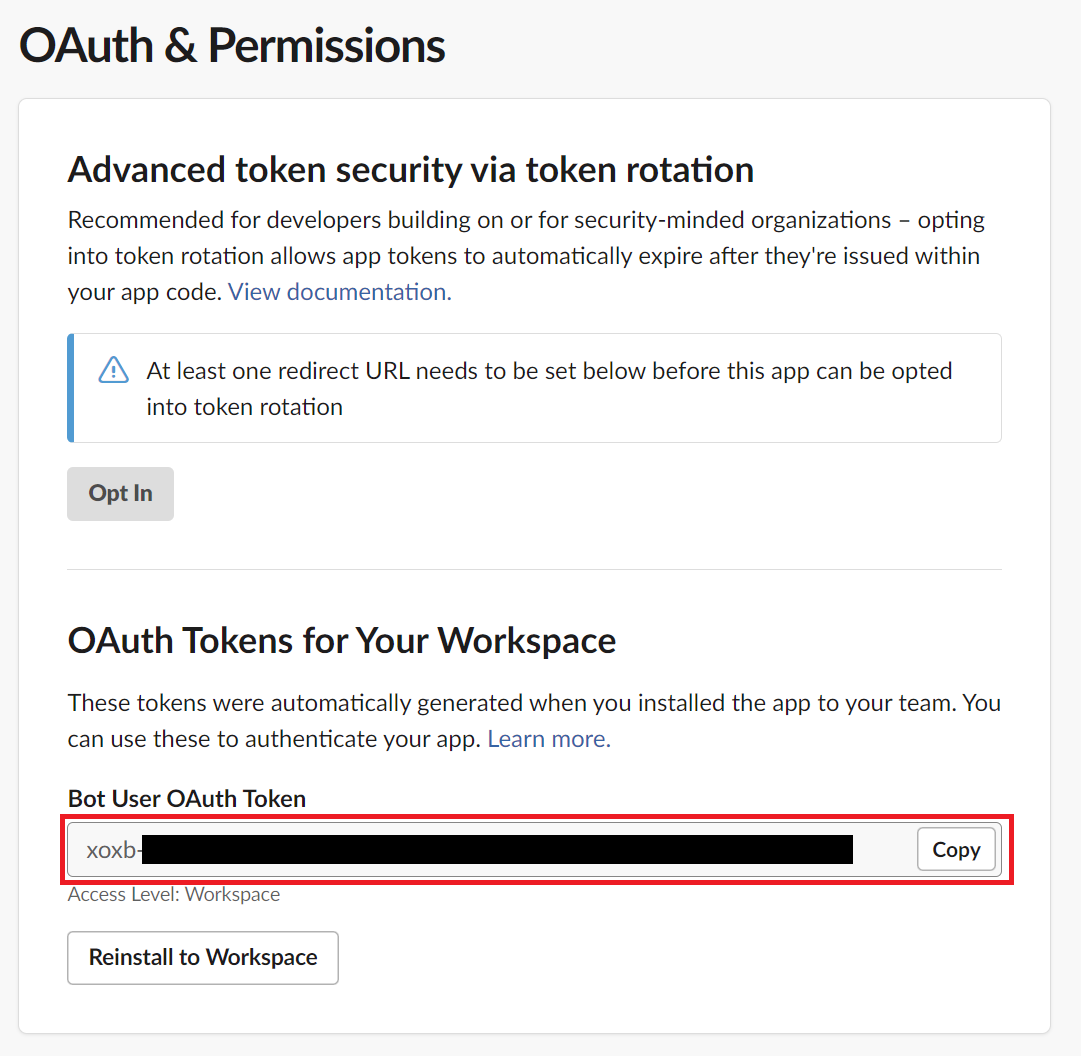
Features → OAuth & Permissions → OAuth Tokens for Your Workspace から Bot User OAuth Token の値を控えておきます。
Slack App Function の設定
AWS Lambda コンソールで SlackAppFunction を選択し、設定タブの環境変数をクリックします。4 つの環境変数に対して dummy 値が設定されているのでこれまで控えておいた値に変更して保存します。
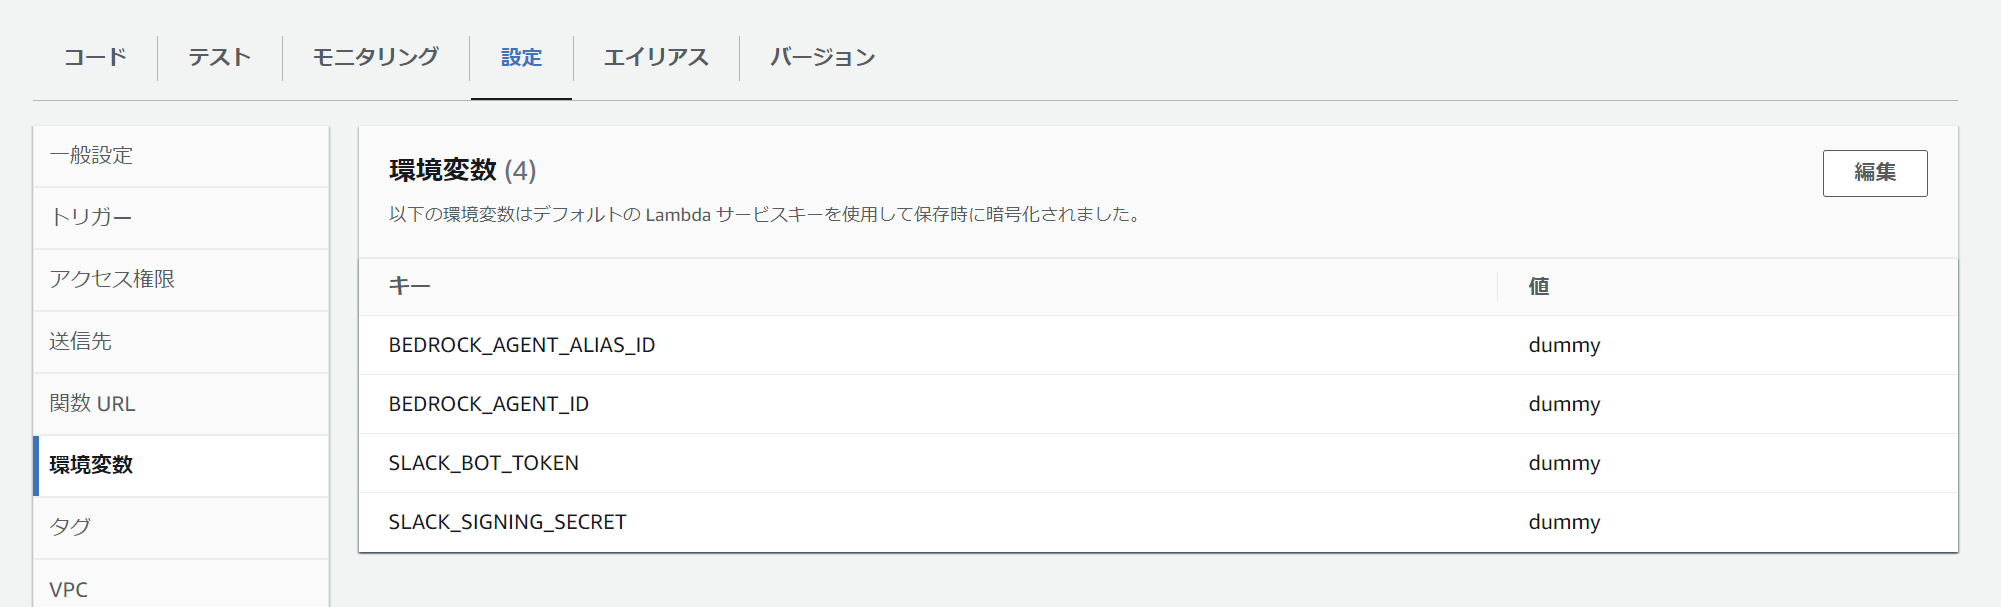
-
BEDROCK_AGENT_ALIAS_ID: エイリアス発行時に確認した Alias ID -
BEDROCK_AGENT_ID: Agent の作成後に確認した Agent ID -
SLACK_BOT_TOKEN: Bot User OAuth Token の値 -
SLACK_SIGNING_SECRET: Signing Secret の値

変更が完了したら Slack App Function の動作確認を行います。 Slack アプリケーションの管理画面に戻り、Features → Event Subscriptions から Request URL を Retry します。応答が Verified ✓ となれば正常に設定が完了しています。

Slack の Events API を使用するには、Slack がリクエストを送信する URL の所有権を URL verification handshake のプロセスを通して証明する必要があります。slack_bolt を使用していればこのプロセスは自動で処理されます。(@seratch さん、コメントありがとうございます!)
Slack App Function は以下のようなコードになっています。Slack に投稿されたメッセージから AWS アップデートの URL を正規表現で抜き出し、ユーザーの入力として InvokeAgent API を call します。Agent からは json で応答が返ってくるので、メッセージを整形して内容をスレッドに返信しています。
import json
from logging import getLogger
import os
import re
from uuid import uuid4
import boto3
from botocore.config import Config
from botocore.client import BaseClient
from botocore.exceptions import ClientError
from slack_bolt import App, Ack
from slack_bolt.adapter.aws_lambda import SlackRequestHandler
logger = getLogger()
# URLの正規表現
URL_PATTERN = re.compile(
r'https://aws\.amazon\.com/about-aws/whats-new/(?:\d{4})/(?:\d{2})/(?:[\w-]+)/'
)
app = App(
token=os.environ['SLACK_BOT_TOKEN'],
signing_secret=os.environ['SLACK_SIGNING_SECRET'],
process_before_response=True, # AWS Lambdaで実行する際に必要な設定
)
def just_ack(ack: Ack):
logger.info('Just ACK')
ack()
def create_bedrock_agent_client() -> BaseClient:
config = Config(
retries={
'max_attempts': 10,
'mode': 'standard'
},
read_timeout=120
)
return boto3.client('bedrock-agent-runtime', config=config)
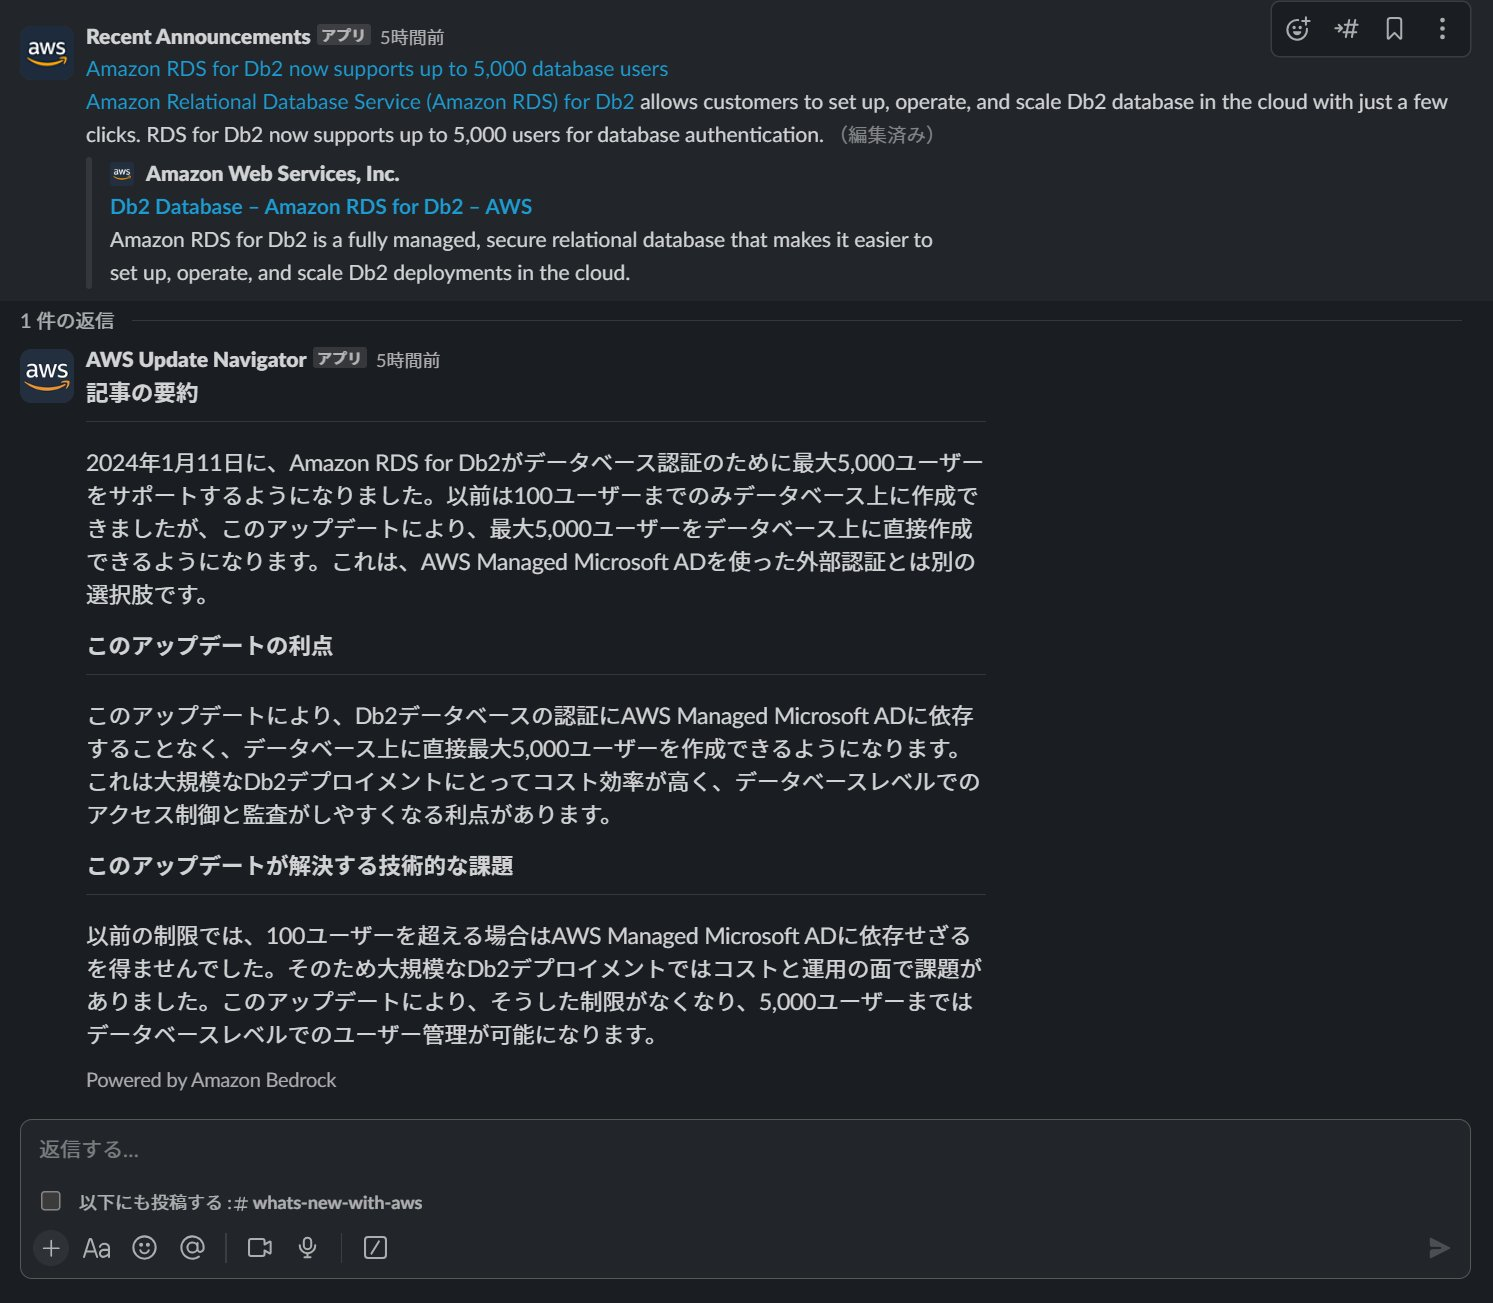
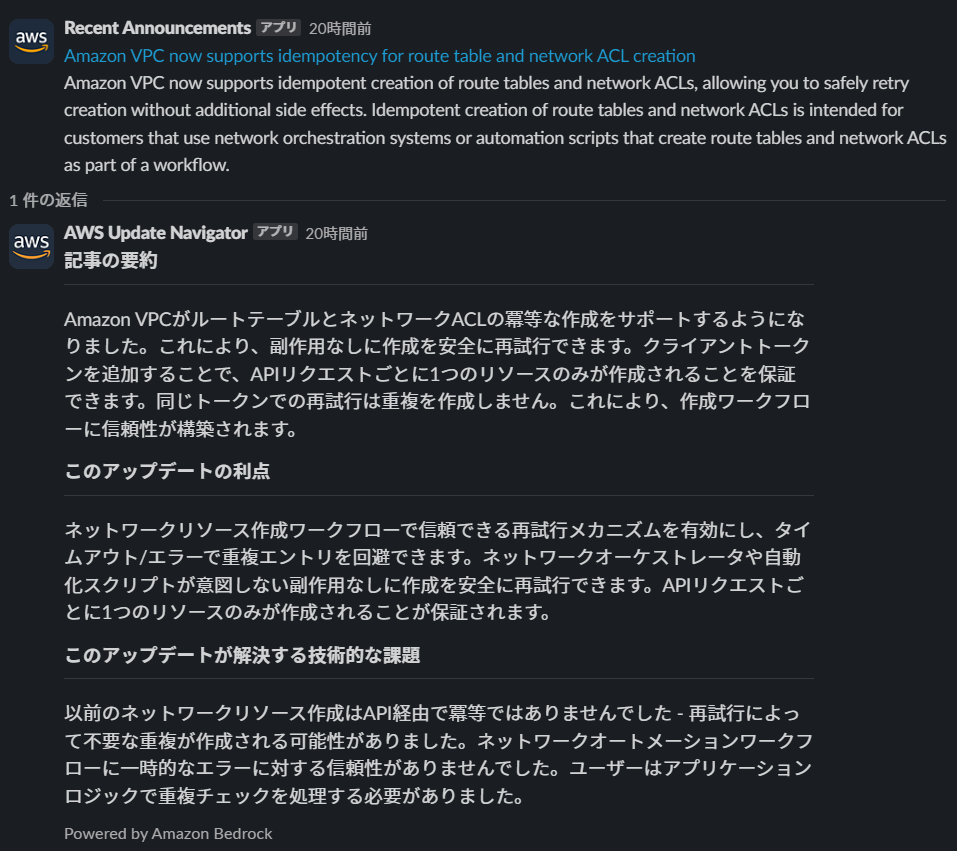
def create_slack_message(data):
"""Agent から返ってきた回答を Block Kit 型式で装飾する"""
blocks = [
{"type": "section", "text": {"type": "mrkdwn", "text": "*記事の要約*"}},
{"type": "divider"},
{"type": "section", "text": {"type": "plain_text", "text": data['summary']}},
{"type": "section", "text": {"type": "mrkdwn", "text": "*このアップデートの利点*"}},
{"type": "divider"},
{"type": "section", "text": {"type": "plain_text", "text": data['advantages']}},
{"type": "section", "text": {"type": "mrkdwn", "text": "*このアップデートが解決する技術的な課題*"}},
{"type": "divider"},
{"type": "section", "text": {"type": "plain_text", "text": data['addresses']}},
{"type": "context", "elements": [{"type": "plain_text", "text": "Powered by Amazon Bedrock"}]}
]
return {"blocks": blocks, "text": data['summary']}
def process_whats_new_url(body, say):
text = body.get('event', {}).get('text', {}) # Slackに投稿されたメッセージ本文
thread_ts = body['event']['ts'] # スレッドのタイムスタンプ
url = URL_PATTERN.search(text) # AWS アップデートの URL が含まれるかチェック
if url:
try:
client = create_bedrock_agent_client()
response = client.invoke_agent(
agentId=os.environ['BEDROCK_AGENT_ID'],
agentAliasId=os.environ['BEDROCK_AGENT_ALIAS_ID'],
sessionId=str(uuid4()),
enableTrace=True,
inputText=url.group() # アップデートのURLをユーザー入力として渡す
)
event_stream = response['completion']
data = ''
trace = ''
for event in event_stream:
if 'chunk' in event:
data = event['chunk']['bytes'].decode('utf-8')
logger.info(data)
trace = event.get('trace', {}).get('trace', {}).get('preProcessingTrace', {}) \
.get('modelInvocationOutput', {}).get('parsedResponse')
if trace:
# 前処理でユーザーの入力が無効と判断されると、オーケストレーションが実行されない
# 前処理のトレースメッセージをスレッドに返信、ログ出力しておく
if trace['isValid'] is False:
logger.info(trace)
say(text=trace['rationale'], thread_ts=thread_ts)
if data:
# Agent から json で応答が返ってくるので、整形して内容をスレッドに返信
message = create_slack_message(json.loads(data))
say(blocks=message['blocks'], text=message['text'], thread_ts=thread_ts)
except ClientError as e:
error_message = e.response['Error']['Message']
logger.error(error_message)
say(text=error_message, thread_ts=thread_ts)
else:
logger.info('nothing to do')
# メッセージイベントを受け取って、処理を実行する
app.event('message')(
ack=just_ack, # Slack API の 3 秒ルールに対応するため Ack のみを返す
lazy=[process_whats_new_url], # lazy に指定した関数が別の AWS Lambda 実行として非同期処理される
)
def lambda_handler(event, context):
logger.debug(event)
slack_handler = SlackRequestHandler(app=app)
return slack_handler.handle(event, context)
Slack チャンネルの準備
messege event をリッスンしているため、チャンネル内に投稿されたすべてのメッセージに反応してしまいます。そのため、What's new with AWS? の RSS feed をサブスクライブするための専用チャンネルを作成します。
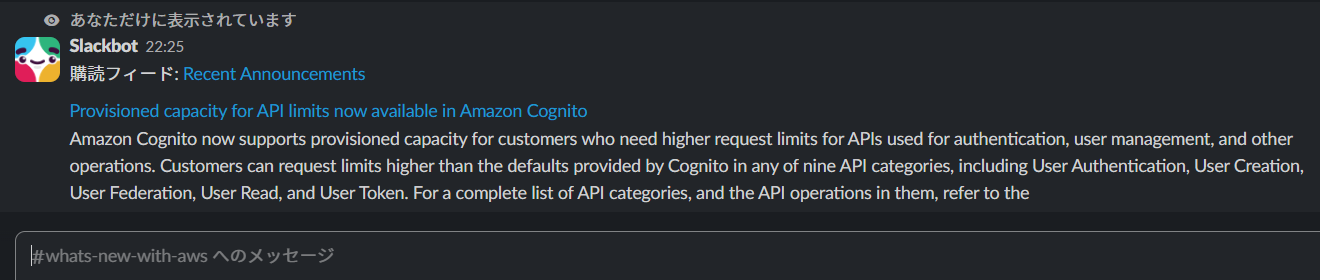
チャンネルを作成したら、RSS feed を登録します。
/feed subscribe https://aws.amazon.com/about-aws/whats-new/recent/feed/
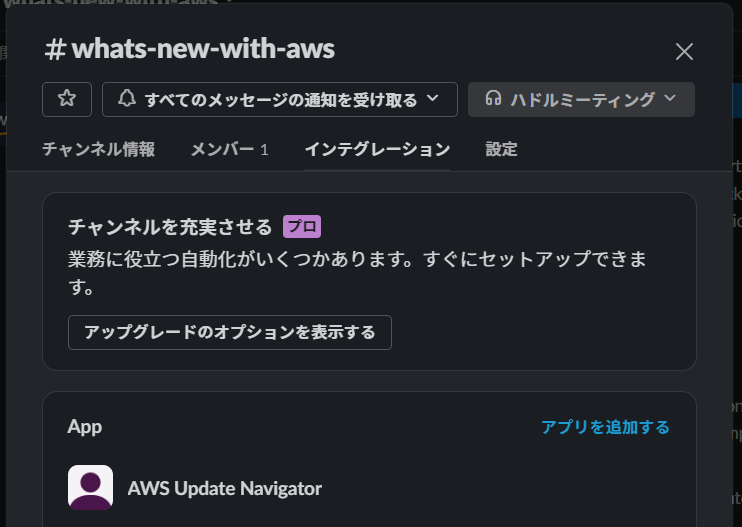
チャンネルのインテグレーションから作成したアップデート解説くんアプリを追加します。
これまで毎日アップデートの通知に解説が追記されるようになりました!
以上です。
参考になれば幸いです。