はじめに
先日、Step Functions Local が利用できるようになり、
ワークフローをローカルで開発、テストすることが可能になりました。
DynamoDB Localと同じようにJAR パッケージおよび Docker イメージが提供されています。
AWS Step Functions ワークフローをローカルで開発してテストする
https://aws.amazon.com/jp/about-aws/whats-new/2019/02/develop-and-test-aws-step-functions-workflows-locally/
早速触ってみたのですが、単体やSAMと連携した動作は確認できたものの、
DynamoDB Localとの連携がまだ上手くいっておらず、原因を調べています。
2019/2/27 追記
StepFunctions Local 側の不具合だったようで DockerイメージのVersion 1.0.1で解消されています。
手順を修正、追記しました。
事前準備
dockerのインストール方法や基本的な使用方法については割愛します。
またAWSCLIおよびAWS SAM CLIを使用します。
必要に応じてインストールまたはアップグレードしておきます。
# aws --version
aws-cli/1.16.101 Python/3.6.2 Linux/4.14.88-88.76.amzn2.x86_64 botocore/1.12.91

# sam --version
SAM CLI, version 0.11.0
Step Functions LocalのDockerイメージをダウンロードします。
DynamoDB Localとの連携を行うには Tag:1.0.1 以上 を指定してください。
# docker pull amazon/aws-stepfunctions-local:1.0.1
1.0.1: Pulling from amazon/aws-stepfunctions-local
d5b38b9f36c5: Pull complete
5847b146743b: Pull complete
e8f628b9bdda: Pull complete
Digest: sha256:d145710c336ff9754ee847fa2bc855193bd4a4a59d5fd7fb72ced3ab18e458a7
Status: Downloaded newer image for amazon/aws-stepfunctions-local:1.0.1
DynamoDB LocalのDockerイメージもダウンロードします。
# docker pull amazon/dynamodb-local:1.11.477
1.11.477: Pulling from amazon/dynamodb-local
638b75f800bf: Pull complete
7d727a2b79b4: Pull complete
c83cc16257dd: Pull complete
Digest: sha256:cbe14c530c08997a38da04efe3778242f5544e0cdb7e9002fbbc3682f2421c0c
Status: Downloaded newer image for amazon/dynamodb-local:1.11.477
まずは Hello World
Step Functions Localを起動します。
# docker run --name stepfunctions -p 8083:8083 -d amazon/aws-stepfunctions-local:1.0.0
050fe420af809354937caba0bd1cfd4bf200a79ec2d5af2e10dad7e39a2db132
# docker ps
CONTAINER ID        IMAGE                                  COMMAND                  CREATED             STATUS              PORTS                    NAMES
050fe420af80        amazon/aws-stepfunctions-local:1.0.0   "java -jar StepFunct…"   40 seconds ago      Up 38 seconds       0.0.0.0:8083->8083/tcp   stepfunctions
以下のようなシンプルなステートマシンを実行してみます。
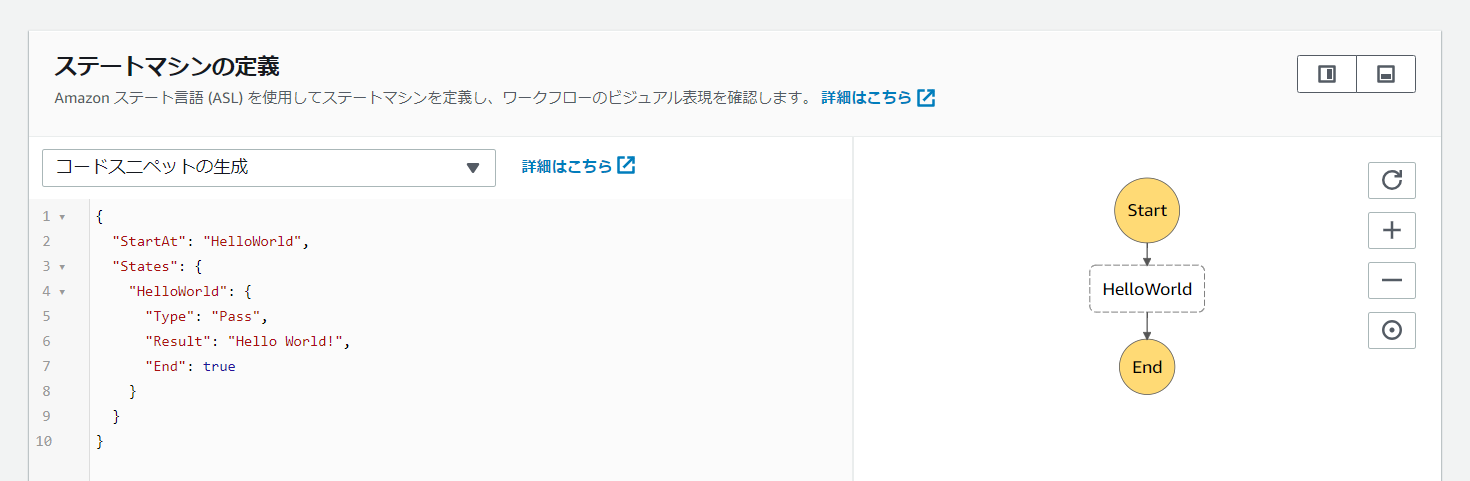
ASL定義は以下の内容です。
{
  "StartAt": "HelloWorld",
  "States": {
    "HelloWorld": {
      "Type": "Pass",
      "Result":"Hello World",
      "End": true
    }
  }
}
ローカルで実行されているStep Functionsにアクセスするには AWS CLIを実行する際に
エンドポイントとしてローカルホストを指定します。
# aws stepfunctions create-state-machine \
> --endpoint http://localhost:8083 --definition file://HelloWorld.json \
> --name "HelloWorld" --role-arn "arn:aws:iam::012345678901:role/DummyRole"

{
    "stateMachineArn": "arn:aws:states:us-east-1:123456789012:stateMachine:HelloWorld",
    "creationDate": 1549696926.307
}
作成したステートマシンのARNを指定して実行します。
# aws stepfunctions start-execution \
> --endpoint http://localhost:8083 \
> --state-machine-arn arn:aws:states:us-east-1:123456789012:stateMachine:HelloWorld \
> --name 01

{
    "executionArn": "arn:aws:states:us-east-1:123456789012:execution:HelloWorld:01,
    "startDate": 1549697048.004
}
executionArn を指定してステートマシンの状態を確認します。
"status": "SUCCEEDED" となっています。
# aws stepfunctions describe-execution \
> --endpoint http://localhost:8083 \
> --execution-arn arn:aws:states:us-east-1:123456789012:execution:HelloWorld:01

{
    "executionArn": "arn:aws:states:us-east-1:123456789012:execution:HelloWorld:01",
    "stateMachineArn": "arn:aws:states:us-east-1:123456789012:stateMachine:HelloWorld",
    "name": "01",
    "status": "SUCCEEDED",
    "startDate": 1549697048.004,
    "stopDate": 1549697048.074,
    "input": "{}",
    "output": "\"Hello World\""
}
SAMやDynamoDB Localと組み合わせて使う
コンテナの再作成
先ほどのHelloWorldで作成したコンテナを破棄します。
# docker stop stepfunctions && docker rm -v stepfunctions
stepfunctions
stepfunctions
他のサービスのローカルエンドポイントを使用するにはコンテナ起動時に環境変数を指定します。
# docker run --name stepfunctions -p 8083:8083 -d \
> -e LAMBDA_ENDPOINT=http://<host_ip>:3001 \
> -e DYNAMODB_ENDPOINT=http://<host_ip>:8000 \
> amazon/aws-stepfunctions-local:1.0.0
83c9f085bbb329ad83751344a2d583a17afd2023d900545e3bd2a2020d18db98
# docker ps
CONTAINER ID        IMAGE                                  COMMAND                  CREATED             STATUS              PORTS                    NAMES
83c9f085bbb3        amazon/aws-stepfunctions-local:1.0.0   "java -jar StepFunct…"   4 seconds ago       Up 4 seconds        0.0.0.0:8083->8083/tcp   stepfunctions
SAMとの連携
AWS SAM CLI を使用してHelloWorldFunctionを作成し、Local lambdaを起動します。
# sam init --runtime python
# cd sam-app
# sam local start-lambda
2019-02-09 08:20:01 Starting the Local Lambda Service. You can now invoke your Lambda Functions defined in your template through the endpoint.
2019-02-09 08:20:01  * Running on http://127.0.0.1:3001/ (Press CTRL+C to quit)
ローカルでLambda関数がinvokeできることを確認しておきます。
# aws lambda invoke \
> --endpoint http://localhost:3001 \
> --function-name HelloWorldFunction outputfile.txt
{
    "StatusCode": 200
}

# python -m json.tool < outputfile.txt
{
    "body": "{\"message\": \"hello world\"}",
    "statusCode": 200
}
以下のようなASL定義を用意します。
{
  "StartAt": "HelloWorld",
  "States": {
    "HelloWorld": {
      "Type": "Task",
      "Resource": "arn:aws:lambda:us-east-1:123456789012:function:HelloWorldFunction",
      "End": true
    }
  }
}
HelloWorldFunction.jsonをもとにステートマシンを作成します。
# aws stepfunctions create-state-machine \
> --endpoint http://localhost:8083 --definition file://HelloWorldFunction.json \
> --name "HelloWorldFunction" --role-arn "arn:aws:iam::012345678901:role/DummyRole"

{
    "stateMachineArn": "arn:aws:states:us-east-1:123456789012:stateMachine:HelloWorldFunction",
    "creationDate": 1549722746.87
}
起動しますが、失敗します。。。
# aws stepfunctions start-execution \
> --endpoint http://localhost:8083 \
> --state-machine-arn arn:aws:states:us-east-1:123456789012:stateMachine:HelloWorldFunction \
> --name 01

{
    "executionArn": "arn:aws:states:us-east-1:123456789012:execution:HelloWorldFunction:01",
    "startDate": 1549722930.414
}

# aws stepfunctions describe-execution \
> --endpoint http://localhost:8083 \
> --execution-arn arn:aws:states:us-east-1:123456789012:execution:HelloWorldFunction:01

{
    "executionArn": "arn:aws:states:us-east-1:123456789012:execution:HelloWorldFunction:01",
    "stateMachineArn": "arn:aws:states:us-east-1:123456789012:stateMachine:HelloWorldFunction",
    "name": "01",
    "status": "FAILED",
    "startDate": 1549722930.414,
    "stopDate": 1549722931.197,
    "input": "{}"
}
ログを確認すると、StepFunctionsコンテナから、SAMで起動しているLocal Lambdaに
アクセスする際にConnection refused になってしまいます。
# docker logs stepfunctions
2019-02-09 16:36:34.325: arn:aws:states:us-east-1:123456789012:execution:HelloWorldFunction:01
: {"Type":"LambdaFunctionFailed","PreviousEventId":4,"LambdaFunctionFailedEventDetails":
{"Error":"Lambda.SdkClientException","Cause":"Unable to execute HTTP request: Connect to
172.31.2.102:3001 [/172.31.2.102] failed: Connection refused (Connection refused)"}}
Dockerが稼働するホストOS上からは問題なくアクセスできるのですが、
コンテナのbridgeネットワーク経由だとダメなようです。(SAM CLI側の問題)
以下のようにStepFunctionsコンテナをhostネットワークで起動するとローカルホストで接続可能に
なりましたが、bridgeネットワークにも対応してほしいところ。
コンテナをhostネットワークで再作成し、
# docker stop stepfunctions && docker rm -v stepfunctions
stepfunctions
stepfunctions

# docker run --name stepfunctions -d --net host \
> -e LAMBDA_ENDPOINT=http://127.0.0.1:3001 \
> -e DYNAMODB_ENDPOINT=http://127.0.0.1:8000 \
> amazon/aws-stepfunctions-local:1.0.0
5043de7c67e990110caf4d708fd76a476f9866b3b95e52f07a678afdc13f6cc
同じようにステートマシンを作成&実行したところ今度は成功しました。
# aws stepfunctions create-state-machine \
> --endpoint http://localhost:8083 --definition file://HelloWorldFunction.json \
> --name "HelloWorldFunction" --role-arn "arn:aws:iam::012345678901:role/DummyRole"

{
    "stateMachineArn": "arn:aws:states:us-east-1:123456789012:stateMachine:HelloWorldFunction",
    "creationDate": 1549903075.235
}

# aws stepfunctions start-execution  \
> --endpoint http://localhost:8083 \
> --state-machine-arn arn:aws:states:us-east-1:123456789012:stateMachine:HelloWorldFunction \
> --name 01

{
    "executionArn": "arn:aws:states:us-east-1:123456789012:execution:HelloWorldFunction:01",
    "startDate": 1549903084.221
}

# aws stepfunctions describe-execution \
> --endpoint http://localhost:8083 \
> --execution-arn arn:aws:states:us-east-1:123456789012:execution:HelloWorldFunction:01

{
    "executionArn": "arn:aws:states:us-east-1:123456789012:execution:HelloWorldFunction:01",
    "stateMachineArn": "arn:aws:states:us-east-1:123456789012:stateMachine:HelloWorldFunction",
    "name": "01",
    "status": "SUCCEEDED",
    "startDate": 1549903084.221,
    "stopDate": 1549903087.51,
    "input": "{}",
    "output": "{\"statusCode\":200,\"body\":\"{\\\"message\\\": \\\"hello world\\\"}\"}"
}
ちなみにDocker Desktop(Windows/Mac、18.03以降)であれば
http://host.docker.internal を接続先(ローカルエンドポイント)として指定することで
bridgeネットワークであってもコンテナ内からSAM CLIのLocal Lambdaに接続できるようです。
host.docker.internalは内部IPを解決するための特殊なDNS名ですが、
Docker for Linuxでは今のところサポートされていません。
参考:
Container cannot be connected to host network #669
https://github.com/awslabs/aws-sam-cli/issues/669
Cannot connect to sam local from another docker container #196
https://github.com/awslabs/aws-sam-cli/issues/196
DynamoDB Localとの連携
続いてDynamoDB Localを起動します。起動時にsharedDbオプションを有効にしてください。
オプションが有効ではない場合、DynamoDB Localは認証情報とリージョンごとに別々のファイルを
利用します。そのためStep Functions Localからアクセスする際に認証情報が一致せず、
ResourceNotFoundExceptionが発生してしまいます。
-sharedDb — -sharedDb を指定した場合、DynamoDB では、認証情報やリージョンごとに別のファイルを使用せずに、単一のデータベースファイルを使用します。
# docker run --name dynamodb -p 8000:8000 -d \
> amazon/dynamodb-local:1.11.477 -jar DynamoDBLocal.jar -inMemory -sharedDb
14a5f4afa54287f67f68439a38da32d69bedaab2ad7ac71110c66e4bfc51c6d4

# docker logs dynamodb
Initializing DynamoDB Local with the following configuration:
Port:   8000
InMemory:       true
DbPath: null
SharedDb:       true
shouldDelayTransientStatuses:   false
ここではlocaltable というテーブルを作成しておきます。
# aws dynamodb create-table \
> --endpoint-url http://localhost:8000 --table-name localtable \
> --attribute-definitions AttributeName=id,AttributeType=S \
> --key-schema AttributeName=id,KeyType=HASH \
> --provisioned-throughput ReadCapacityUnits=5,WriteCapacityUnits=5
{
    "TableDescription": {
        "AttributeDefinitions": [
            {
                "AttributeName": "id",
                "AttributeType": "S"
            }
        ],
        "TableName": "localtable",
        "KeySchema": [
            {
                "AttributeName": "id",
                "KeyType": "HASH"
            }
        ],
        "TableStatus": "ACTIVE",
        "CreationDateTime": 1551229172.926,
        "ProvisionedThroughput": {
            "LastIncreaseDateTime": 0.0,
            "LastDecreaseDateTime": 0.0,
            "NumberOfDecreasesToday": 0,
            "ReadCapacityUnits": 5,
            "WriteCapacityUnits": 5
        },
        "TableSizeBytes": 0,
        "ItemCount": 0,
        "TableArn": "arn:aws:dynamodb:ddblocal:000000000000:table/localtable",
        "BillingModeSummary": {
            "BillingMode": "PROVISIONED",
            "LastUpdateToPayPerRequestDateTime": 0.0
        }
    }
}

# aws dynamodb --endpoint-url http://localhost:8000 list-tables
{
    "TableNames": [
        "localtable"
    ]
}
inputで指定した内容をDynamoDBに格納するだけのステートマシンを作ってみたいと思います。
以下のようなシンプルな内容です。
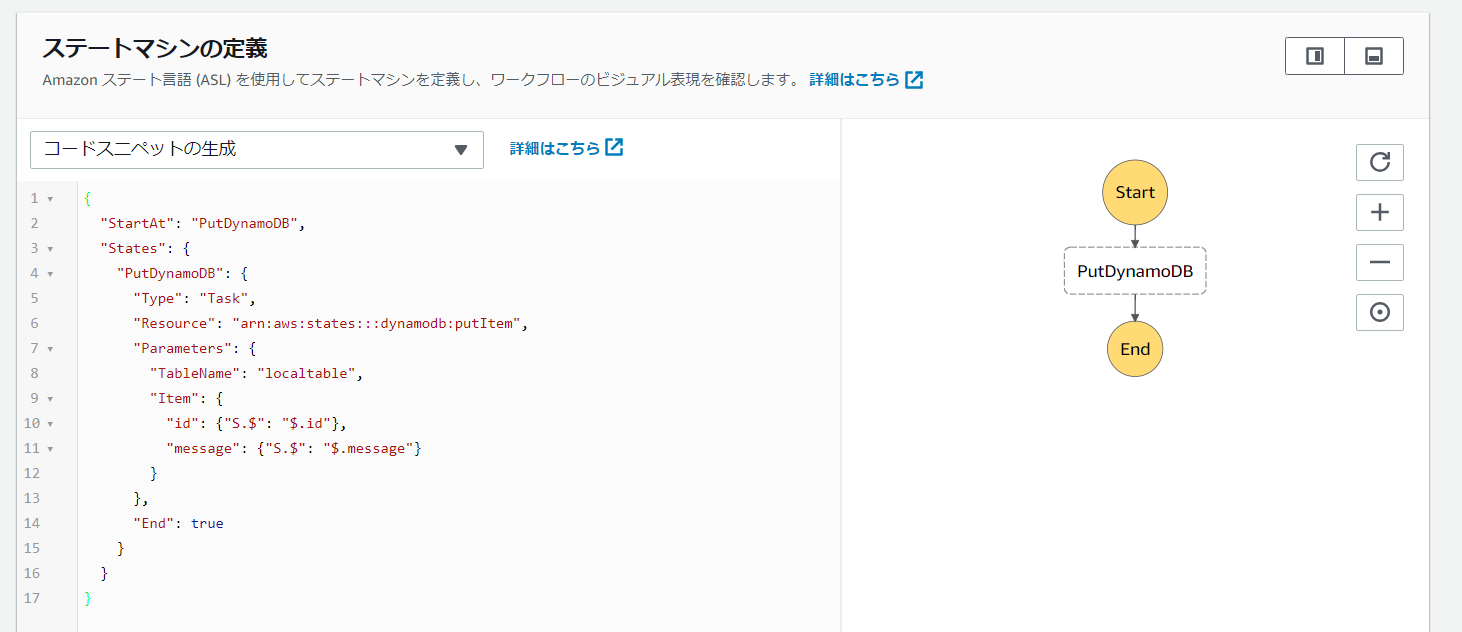
ASL定義は以下のようなものです。
{
  "StartAt": "PutDynamoDB",
  "States": {
    "PutDynamoDB": {
      "Type": "Task",
      "Resource": "arn:aws:states:::dynamodb:putItem",
      "Parameters": {
        "TableName": "localtable",
        "Item": {
          "id": {"S.$": "$.id"},
          "message": {"S.$": "$.message"}
        }
      },
      "End": true
    }
  }
}
ステートマシンを作成します。
# aws stepfunctions create-state-machine \
> --endpoint http://localhost:8083 --definition file://PutDynamoDB.json \
> --name "PutDynamoDB" --role-arn "arn:aws:iam::012345678901:role/DummyRole"

{
    "stateMachineArn": "arn:aws:states:us-east-1:123456789012:stateMachine:PutDynamoDB",
    "creationDate": 1551229257.741
}
input で以下を指定します。
{
    "id": "1",
    "message": "Hello World"
}
input.jsonを入力として、ステートマシーンを実行します。
# aws stepfunctions start-execution \
>  --endpoint http://localhost:8083 \
>  --state-machine-arn arn:aws:states:us-east-1:123456789012:stateMachine:PutDynamoDB \
>  --name 01 --input file://input.json

{
    "executionArn": "arn:aws:states:us-east-1:123456789012:execution:PutDynamoDB:01",
    "startDate": 1551229316.609
}
結果を確認すると、処理が成功しています。
# aws stepfunctions describe-execution \
> --endpoint http://localhost:8083 \
> --execution-arn arn:aws:states:us-east-1:123456789012:execution:PutDynamoDB:01

{
    "executionArn": "arn:aws:states:us-east-1:123456789012:execution:PutDynamoDB:01",
    "stateMachineArn": "arn:aws:states:us-east-1:123456789012:stateMachine:PutDynamoDB",
    "name": "01",
    "status": "SUCCEEDED",
    "startDate": 1551229316.609,
    "stopDate": 1551229317.12,
    "input": "{\n    \"id\": \"1\",\n    \"message\": \"HelloWorld\"\n}\n",
    "output": "{\"Attributes\":null,\"ConsumedCapacity\":null,\"ItemCollectionMetrics\":null}"
}
DynamoDB Localにもデータが格納されていることが確認できます。
# aws dynamodb scan --endpoint http://localhost:8000 --table-name localtable
{
    "Items": [
        {
            "message": {
                "S": "HelloWorld"
            },
            "id": {
                "S": "1"
            }
        }
    ],
    "Count": 1,
    "ScannedCount": 1,
    "ConsumedCapacity": null
}
以上です。
参考になれば幸いです
**参考情報: amazon/aws-stepfunctions-local:1.0.0 時の不具合内容**
ステートマシーンで処理を実行すると、FAILEDになります。
# aws stepfunctions --endpoint http://localhost:8083 start-execution \
> --state-machine-arn arn:aws:states:us-east-1:123456789012:stateMachine:PutDynamoDB \
> --name 01 --input file://input.json

{
    "executionArn": "arn:aws:states:us-east-1:123456789012:execution:PutDynamoDB:01",
    "startDate": 1549720800.303
}

# aws stepfunctions describe-execution \
> --endpoint http://localhost:8083 \
> --execution-arn arn:aws:states:us-east-1:123456789012:execution:PutDynamoDB:01

{
    "executionArn": "arn:aws:states:us-east-1:123456789012:execution:PutDynamoDB:01",
    "stateMachineArn": "arn:aws:states:us-east-1:123456789012:stateMachine:PutDynamoDB",
    "name": "01",
    "status": "FAILED",
    "startDate": 1549720800.303,
    "stopDate": 1549720801.464,
    "input": "{\n    \"id\": \"1\",\n    \"message\": \"HelloWorld\"\n}\n"
}
ログを確認すると、DynamoDB Localの方ではなく、実アカウントの方を見てしまっています。
# docker logs stepfunctions
2019-02-09 14:00:01.463: arn:aws:states:us-east-1:123456789012:execution:PutDynamoDB:01 :
{"Type":"ExecutionFailed","PreviousEventId":0,"ExecutionFailedEventDetails":
{"Error":"States.Runtime","Cause":"User: arn:aws:sts::<account_id>:assumed-role/<role_name>/
i-0fxxxxxxxxxxxx is not authorized to perform: dynamodb:PutItem on resource:
arn:aws:dynamodb:us-east-1:<account_id>:table/localtable (Service: AmazonDynamoDBv2; Status
Code: 400; Error Code: AccessDeniedException; Request ID:
OSIPIKBRVHMQ5R9A8OCKUD7TIFVV4KQNSO5AEMVJF66Q9ASUAAJG)"}}