TouchDesignerの学習のため、ReSpeakerを使って音カメラを作った。
ReSpeakerでSSL(Sound Source Localization)を行い、音の到来方向へエフェクトを入れることで、音を可視化したらおもしろいかもしれないと思って製作した。
これを音カメラと呼ぶことにした。
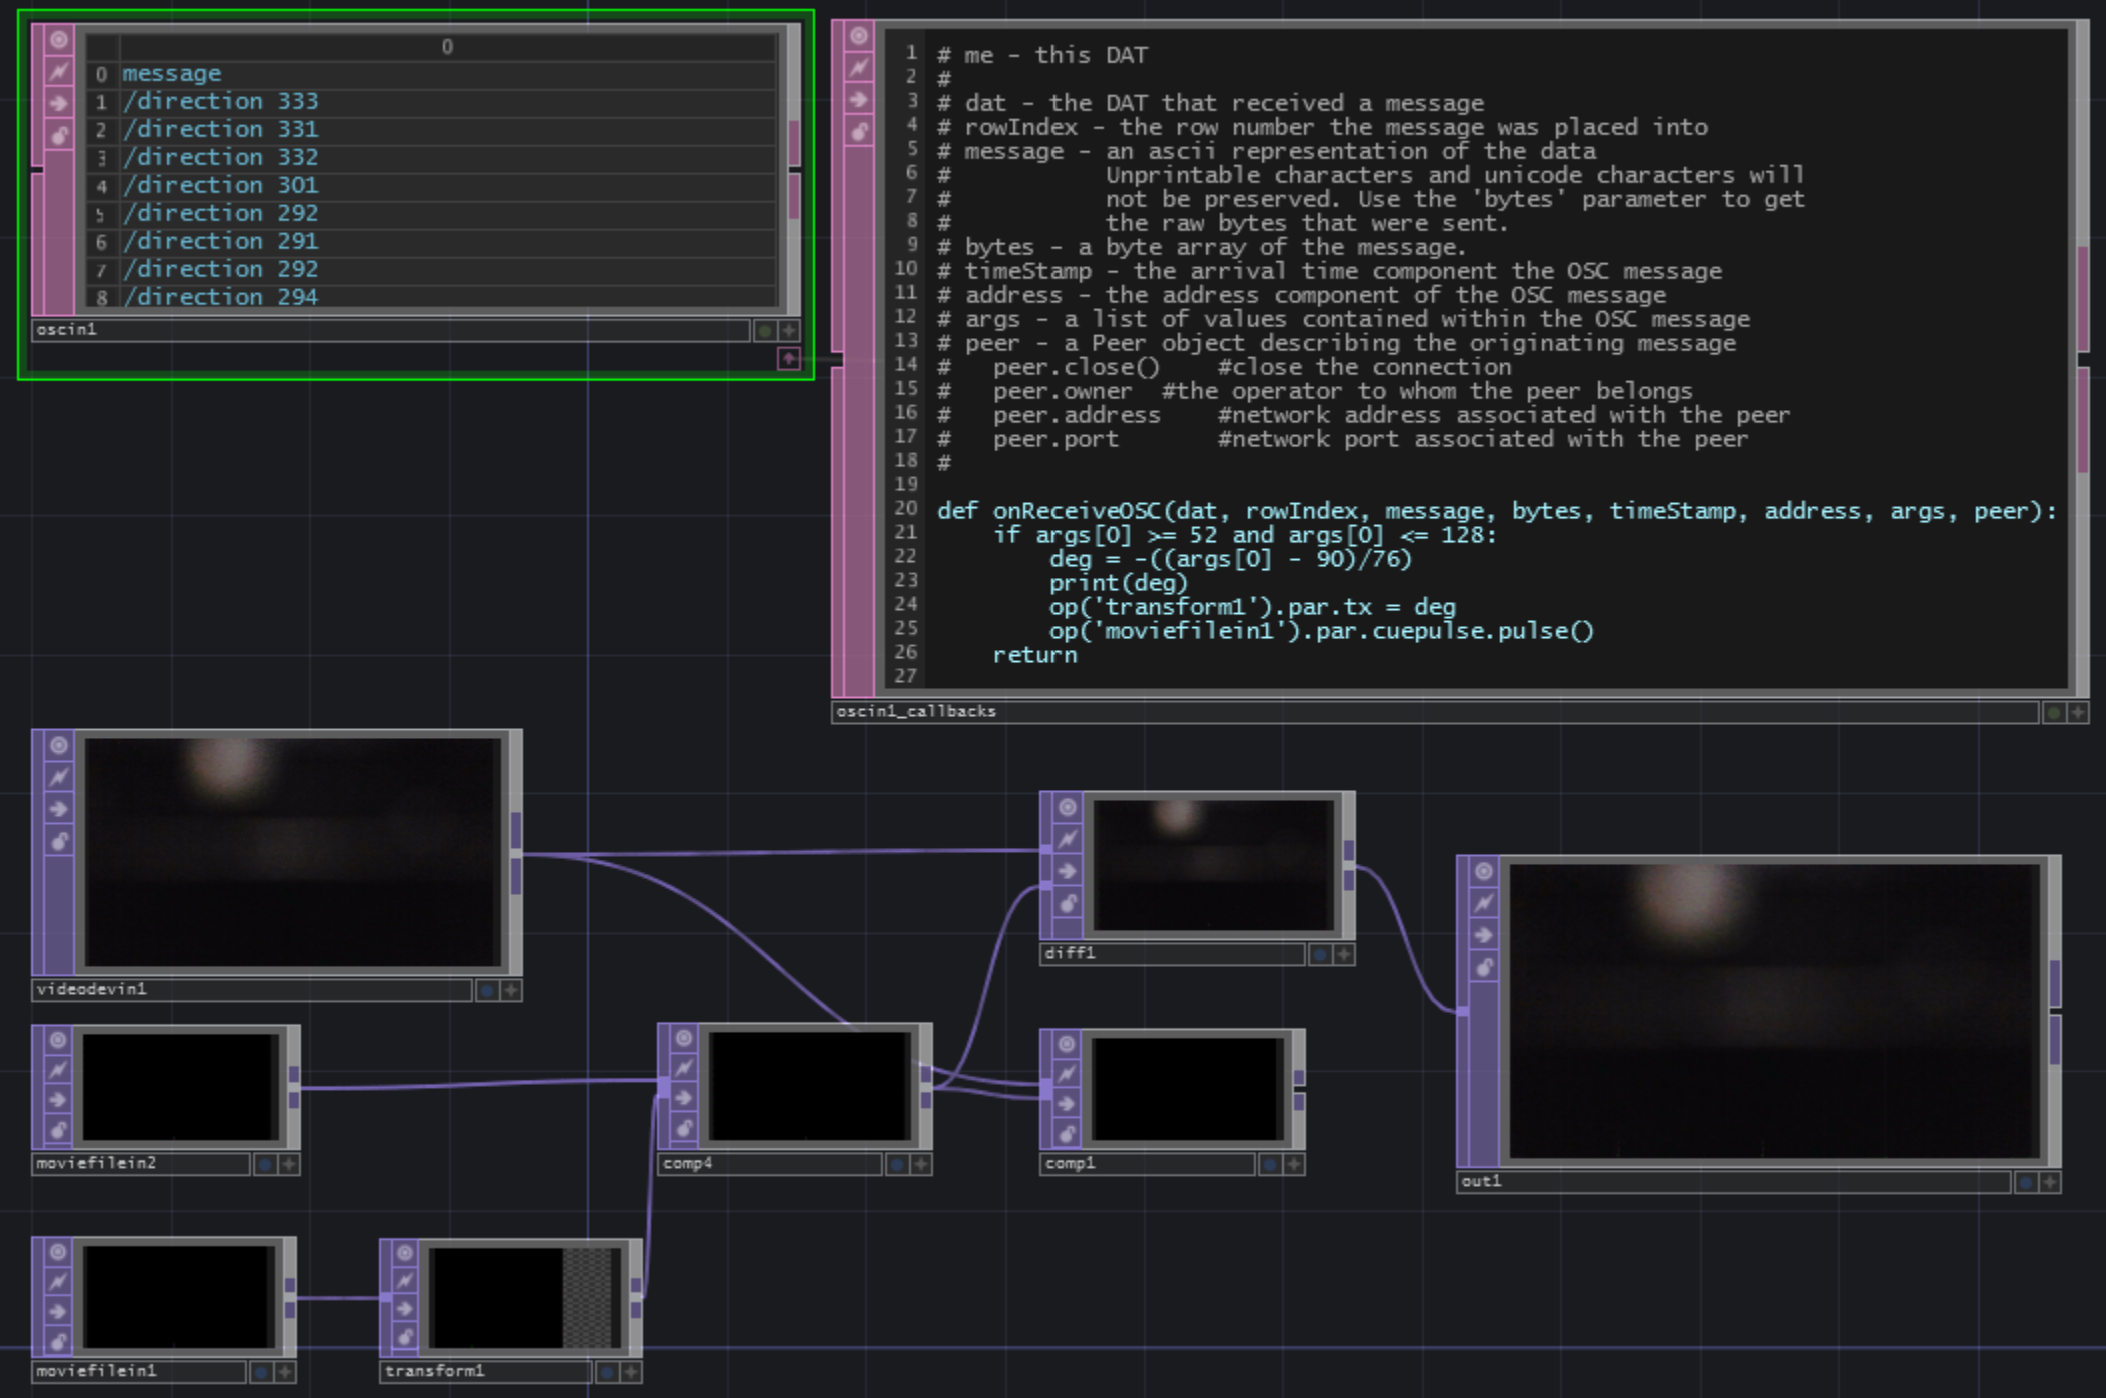
TouchDesigner側

これはずっと悩みだったんですが、こういうビジュアルプログラミング系の製作物って、Qiitaでどう共有したら見やすいんですかねぇ…?
とりあえず今回は画像で行きます。
内容はいたってシンプルです。
videodeviceinでカメラからの画像を読みこみ、そこに以下のようなgif画像を位置を指定して重ねているだけです。

SSLは生のPythonでやっているので、そのプロセスから結果をOSCで受けています。
ReSpeaker側
ReSpeakerはv2.0を使いました。1.0も持っていて、そっちの方が精度でそうなんですが、何故か手元のWindows10で接続できなかったため断念しました。以前はつながったのに…
ReSpeaker v2.0
https://github.com/respeaker/usb_4_mic_array
こちらのライブラリから、DoA(Direction of Arrival)というのを行っているところから、音源方向の値のみを抽出してOSCで送信します。
ファームウェアの書き込みとかで結構ハマるので注意。
因みに、今回はPython側でやっていますが、マイクアレイ単体でも音源方向のLEDが点灯するので、デバイス側でも音源方向の推定はやっている模様。
パッと見はこちらの方が精度がよさげなので、そのデータが吸い出せるならそっちを使った方がいいかもしれない。
from pythonosc import osc_message_builder
from pythonosc import udp_client
from tuning import Tuning
import usb.core
import usb.util
import time

osc_client = udp_client.SimpleUDPClient('127.0.0.1', 50000)

from infi.devicemanager import DeviceManager
dm = DeviceManager()
devices = dm.all_devices
for i in devices:
    try:
        print ('{} : address: {}, bus: {}, location: {}'.format(i.friendly_name, i.address, i.bus_number, i.location))
    except Exception:
        pass


import usb.backend.libusb1
backend = usb.backend.libusb1.get_backend(find_library=lambda x: "./libusb-1.0.dll")
dev = usb.core.find(idVendor=0x2886, idProduct=0x0018)
direction = 0

if dev:
    Mic_tuning = Tuning(dev)
    direction = Mic_tuning.direction
    print(Mic_tuning.direction)
    while True:
        try:
            if direction != Mic_tuning.direction:
                direction = Mic_tuning.direction
                osc_client.send_message("/direction", direction)
                print(direction)
            time.sleep(0.5)
        except KeyboardInterrupt:
            break
セッティング
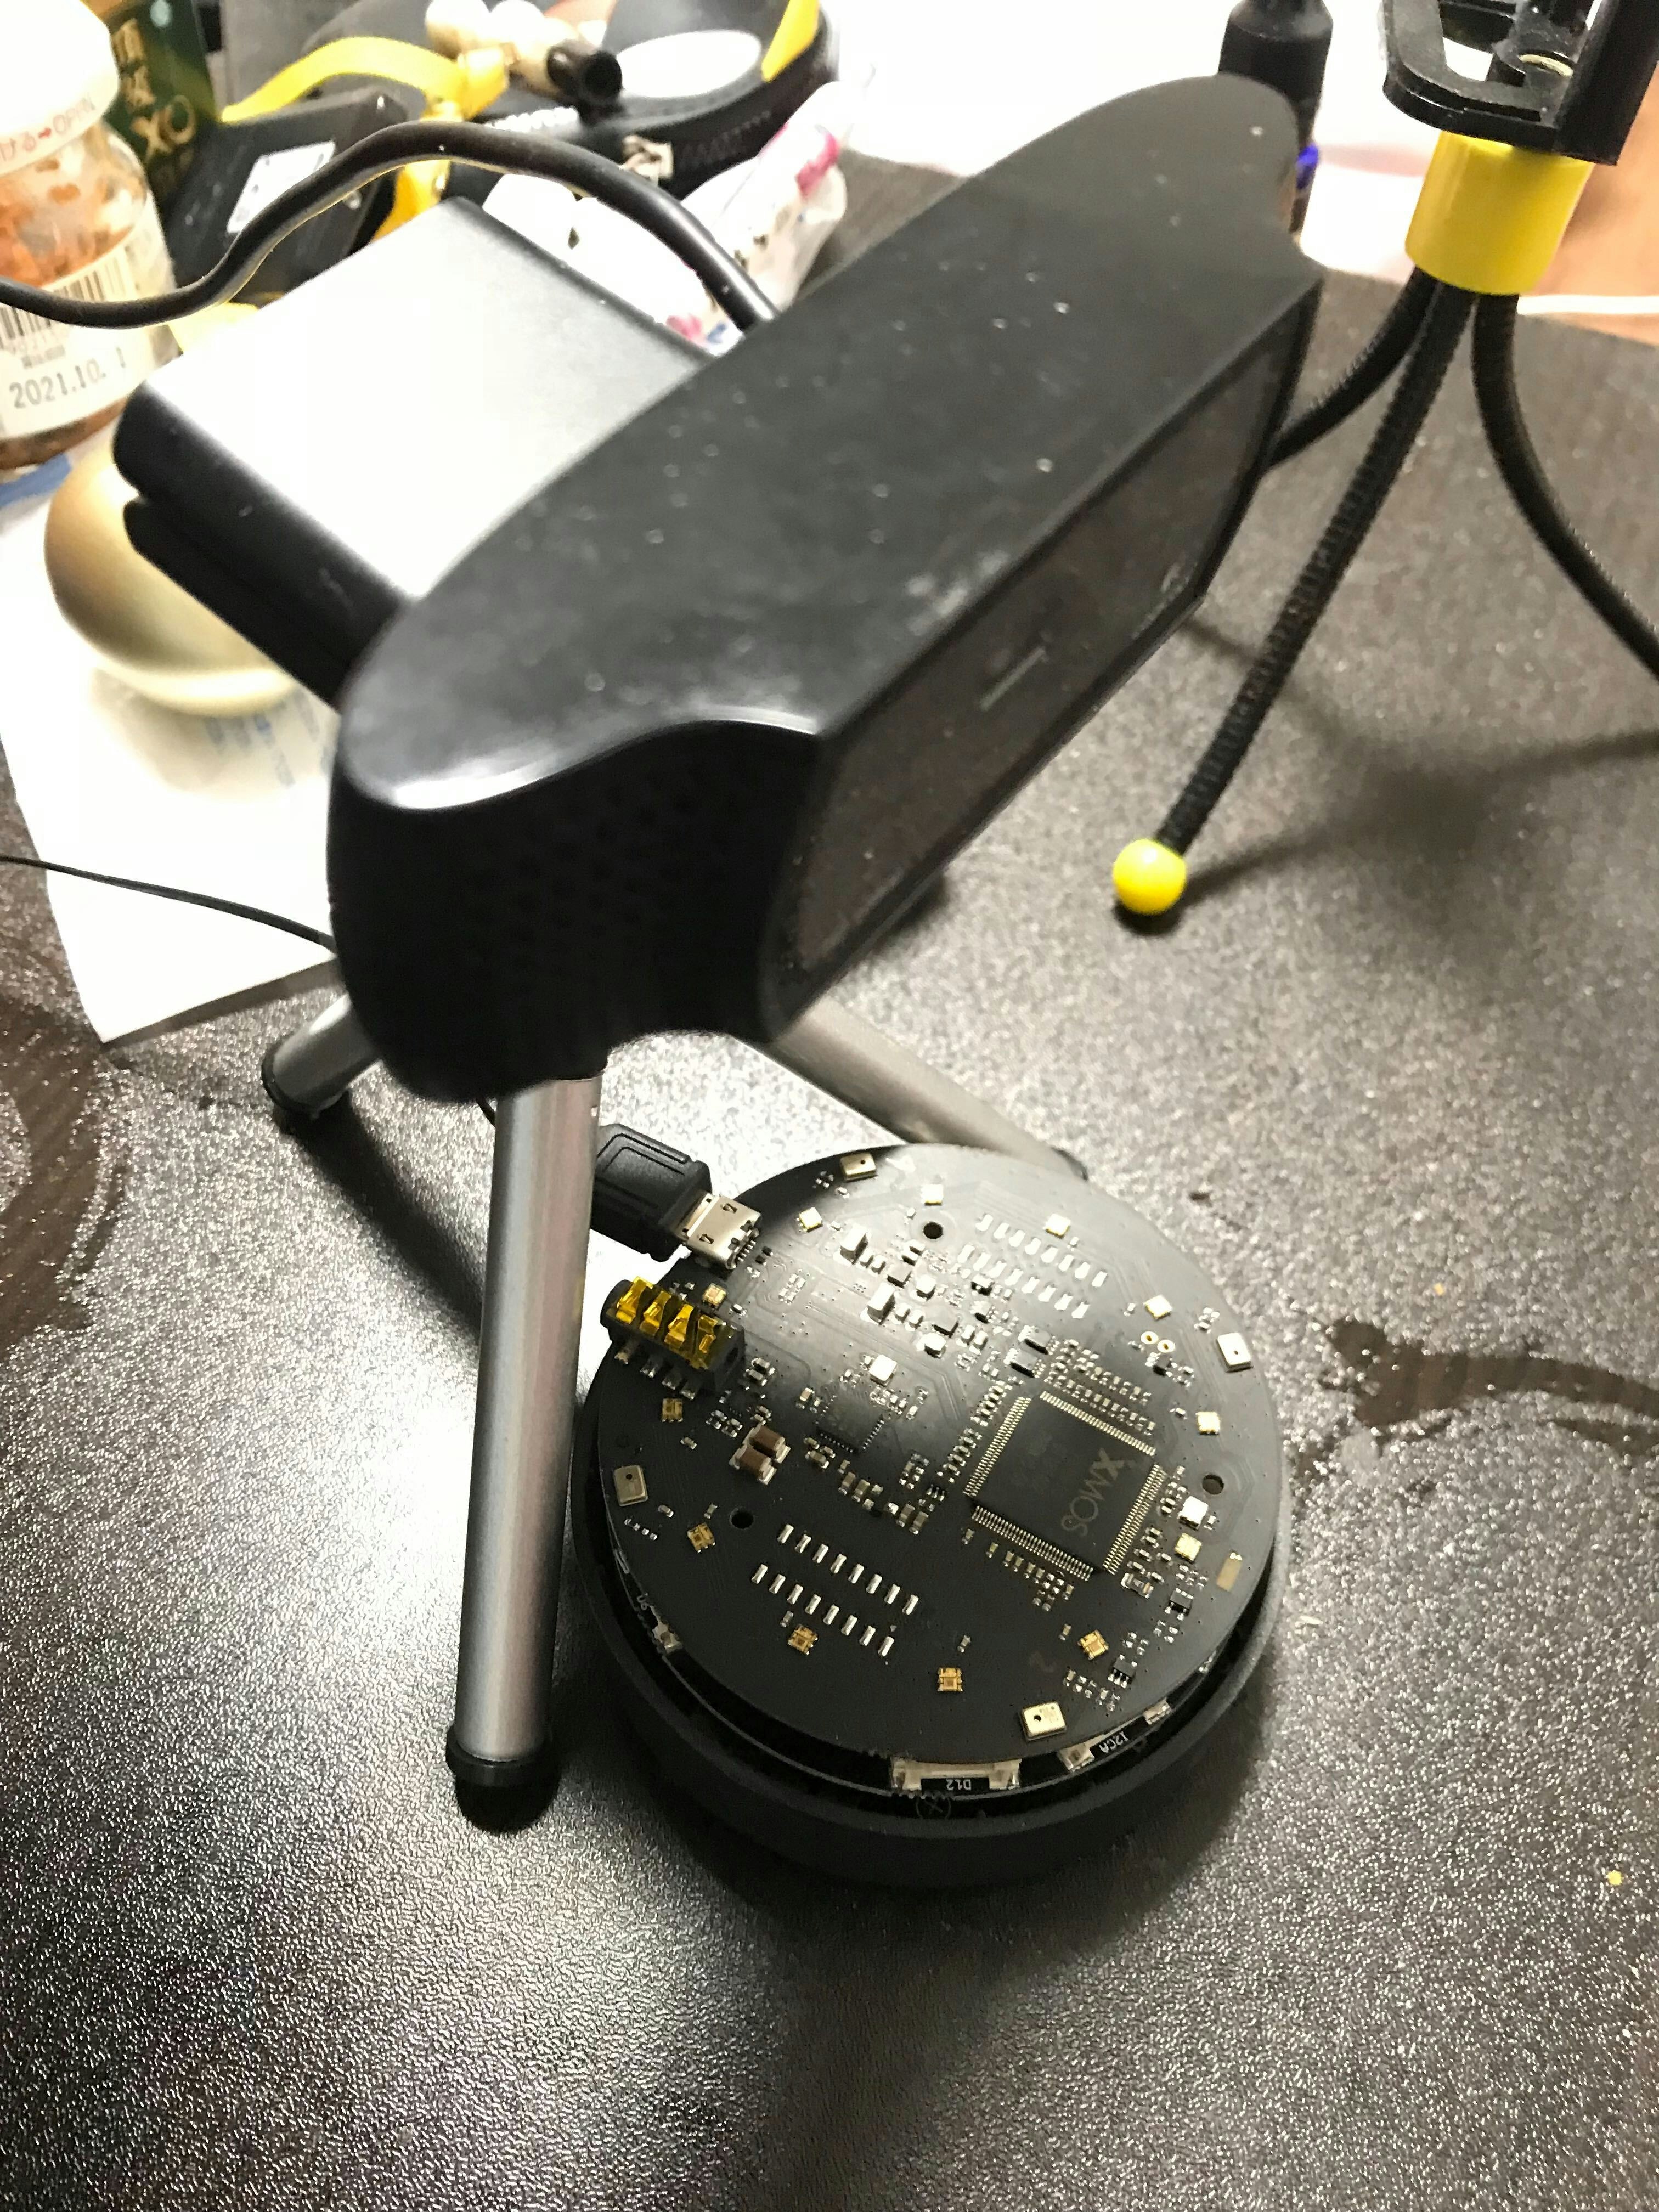
マイクアレイの原点と、カメラの原点が一致するように配置する。
カメラは今回はlogicoolのc920というwebカメラを使用した。
カメラの画角は事前に調べておくこと。
動作確認
動かしてみるとこんな感じ。
少しラグがあるが、スマホを追いかけてエフェクトが入るのがわかるだろうか。
— hatbot (@hatbot3) November 13, 2020
また、手近なところでホチキスをカチカチ鳴らした動画がこちら。
— hatbot (@hatbot3) November 13, 2020
今回はマイクアレイが平面的な配置だったため一次元的なエフェクトだが、マイクアレイを立体的に配置したり、ReSpeakerを二台使うなどすると、スポット的にエフェクトを入れることもできるはず。
