前回の記事で、RailsアプリケーションをFargateで動かすところまで解説しました。
本記事では、GithubActionsを利用してMasterにマージされたら自動で新しいバージョンがFargateにBlue/Greenデプロイされるようにしていきます。
GithubActionsの作成
.gitignoreの編集
pumaを起動する際に、puma.sockファイルが設置されるtmp/socketsフォルダをGithubにもあげたいので、
tmp/sockets/フォルダに.keepファイルを作ります。
touch tmp/sockets/.keep
ファイルを作ったら.gitignoreに以下を追加して、tmp/socketsフォルダをgit commit出来るようにします。
!/tmp/sockets
.github/workflows/deploy.yml の作成
↑こちらを利用していきます。
.github/workflows/deploy.yml は以下のようになります。
on:
push:
branches:
- master
name: Deploy to Amazon ECS
jobs:
deploy:
name: Deploy
runs-on: ubuntu-18.04
environment: production
steps:
- name: Checkout
uses: actions/checkout@v2
- name: Configure AWS credentials
uses: aws-actions/configure-aws-credentials@v1
with:
aws-access-key-id: ${{ secrets.AWS_ACCESS_KEY_ID }}
aws-secret-access-key: ${{ secrets.AWS_SECRET_ACCESS_KEY }}
aws-region: ap-northeast-1
- name: Login to Amazon ECR
id: login-ecr
uses: aws-actions/amazon-ecr-login@v1
- name: Build, tag, and push image to Amazon ECR
id: build-image
env:
DOCKER_BUILDKIT: 1
ECR_REGISTRY: ${{ steps.login-ecr.outputs.registry }}
ECR_REPOSITORY: fargate-test #ECRのリポジトリ名
IMAGE_TAG: ${{ github.sha }}
run: |
docker build \
-f docker/production/Dockerfile \
--cache-from=$ECR_REGISTRY/$ECR_REPOSITORY:latest \
--build-arg BUILDKIT_INLINE_CACHE=1 \
-t $ECR_REGISTRY/$ECR_REPOSITORY:$IMAGE_TAG \
-t $ECR_REGISTRY/$ECR_REPOSITORY:latest .
docker push $ECR_REGISTRY/$ECR_REPOSITORY:$IMAGE_TAG
docker push $ECR_REGISTRY/$ECR_REPOSITORY:latest
echo "::set-output name=image::$ECR_REGISTRY/$ECR_REPOSITORY:$IMAGE_TAG"
- name: 【Rails】 Fill in the new image ID in the Amazon ECS task definition
id: task-def-with-rails
uses: aws-actions/amazon-ecs-render-task-definition@v1
with:
task-definition: deploy/task-definition.json
container-name: fargate-test
image: ${{ steps.build-image.outputs.image }}
- name: Deploy Amazon ECS task definition
uses: aws-actions/amazon-ecs-deploy-task-definition@v1
with:
task-definition: ${{ steps.task-def-with-rails.outputs.task-definition }} # 上のid: task-def-with-railsを利用する
service: fargate-test # ECS Service名
cluster: fargate-test # ECS Cluster名
wait-for-service-stability: true
codedeploy-appspec: deploy/appspec.yml
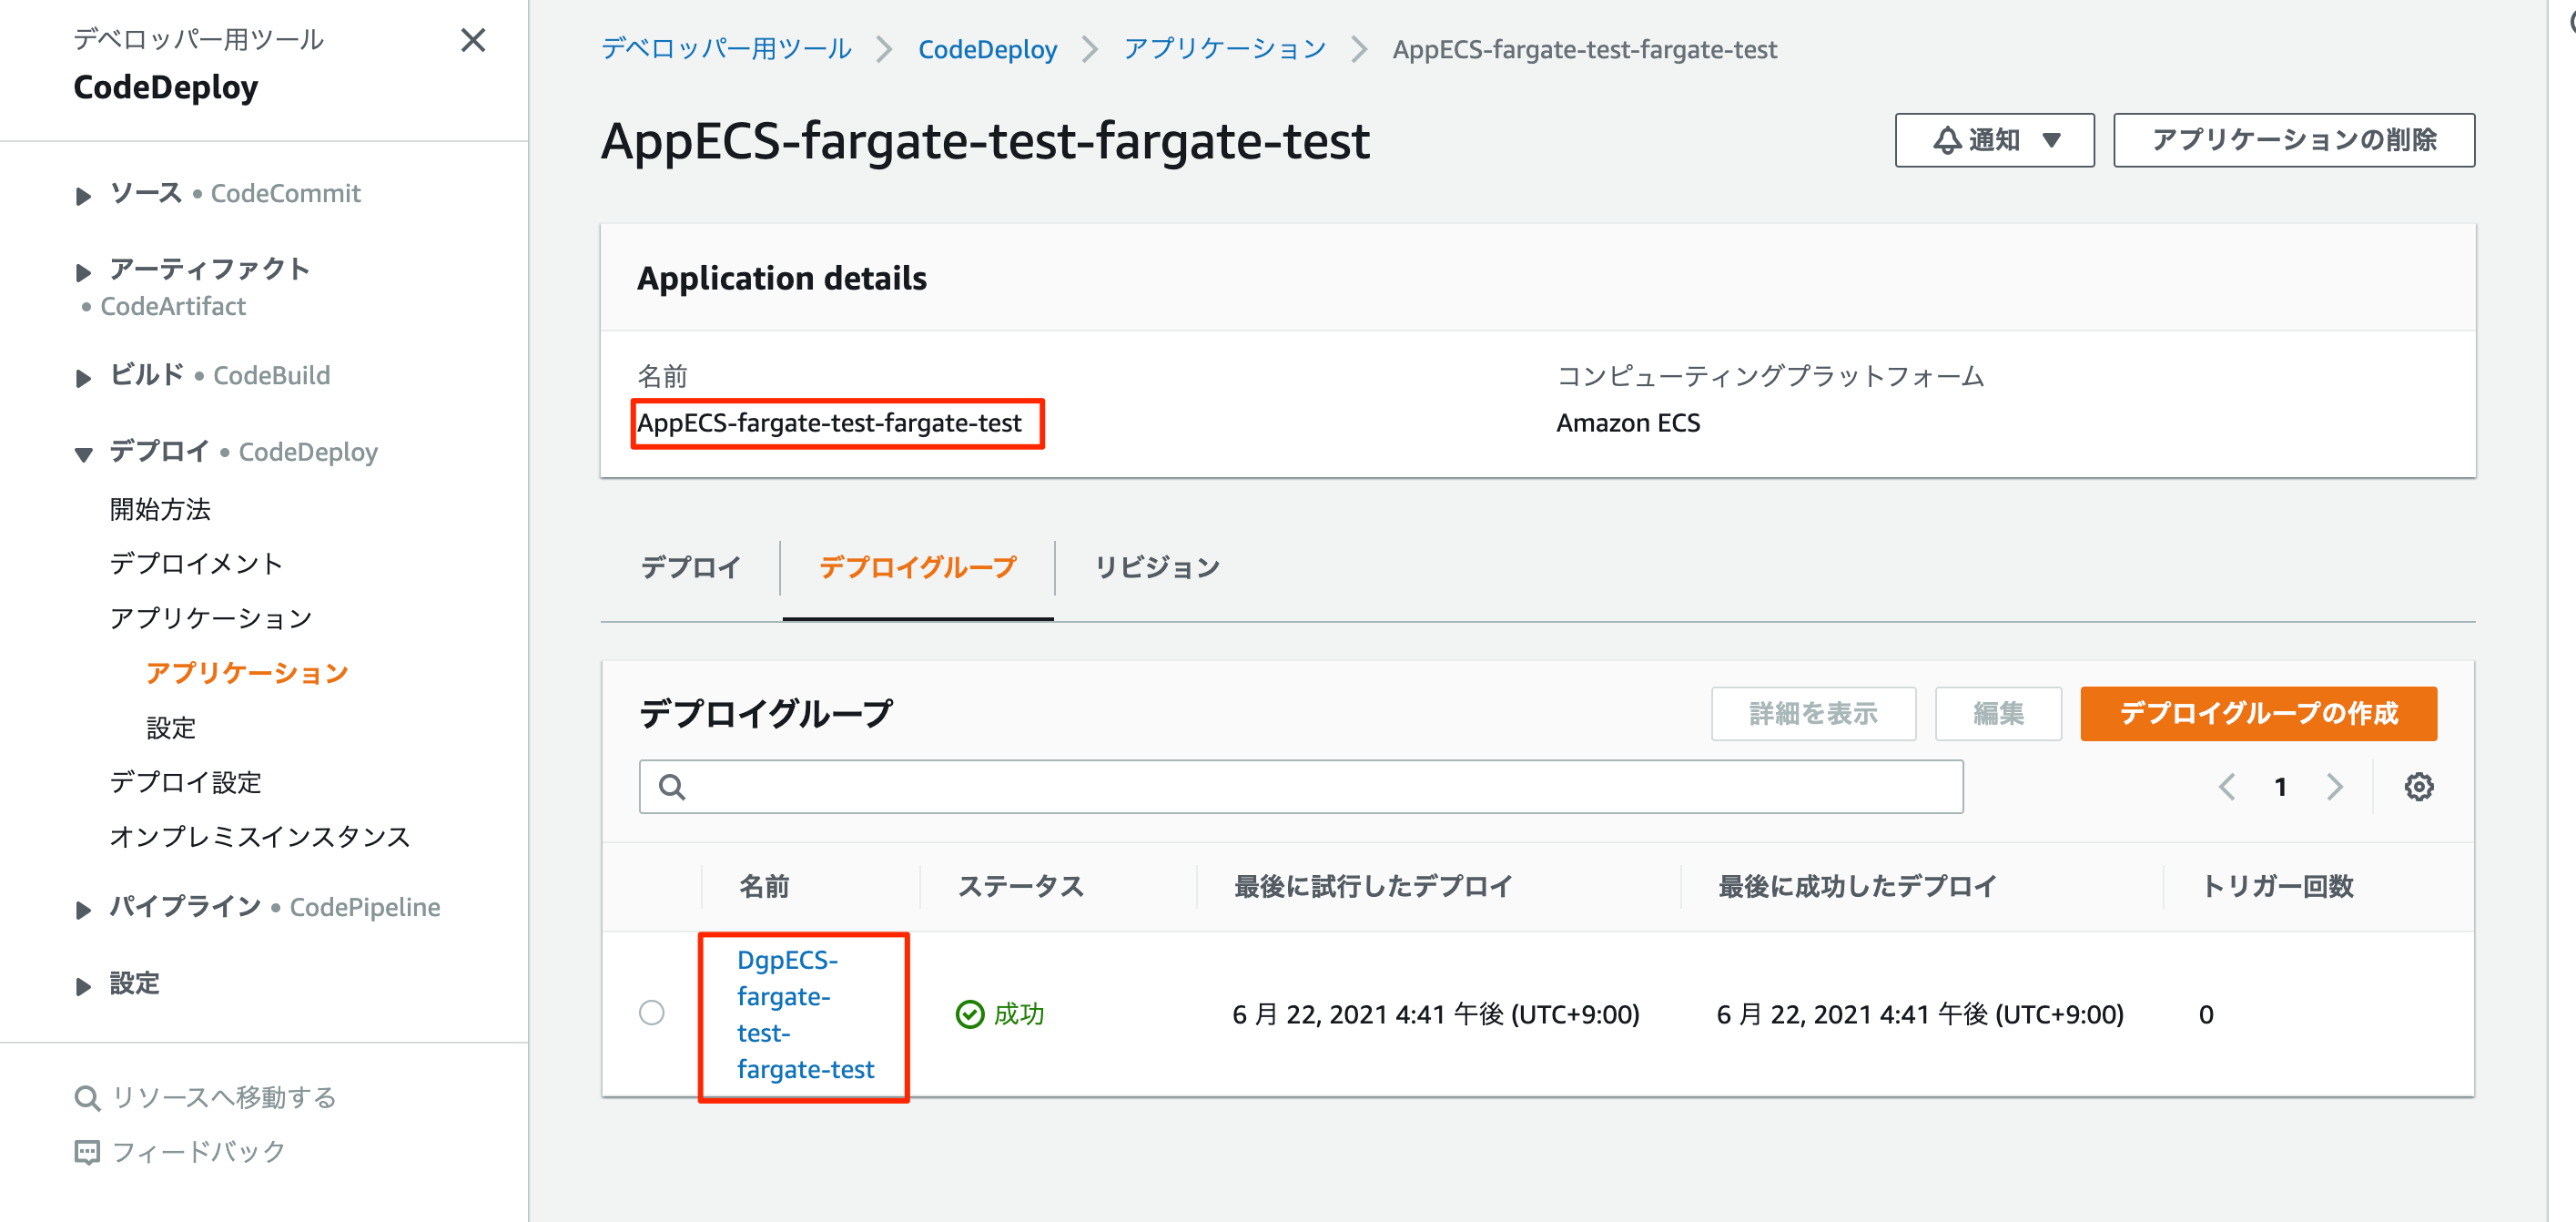
codedeploy-application: AppECS-fargate-test-fargate-test # Code Deployのアプリケーション名
codedeploy-deployment-group: DgpECS-fargate-test-fargate-test # Code Deployのデプロイグループ名
ECRのリポジトリ名はAWS管理画面のECRのページから確認できます。

クラスタ名、サービス名はAWS管理画面のECSページのこちらから確認ができます。

CodeDeployのアプリケーション名、デプロイグループ名はCodedeployページの以下から確認できます。
task-definition.jsonの作成
またdeployに必要なタスク定義を設置します。
今回はdeployフォルダを作成して、その中に task-definition.jsonファイルを作成しました。
mkdir deploy
touch deploy/task-definition.json
task-definition.jsonファイルの中身は、AWSコンソールのタスク定義のページにて、
最新のタスク定義のJson欄があるので、そちらをベースにして作ります。
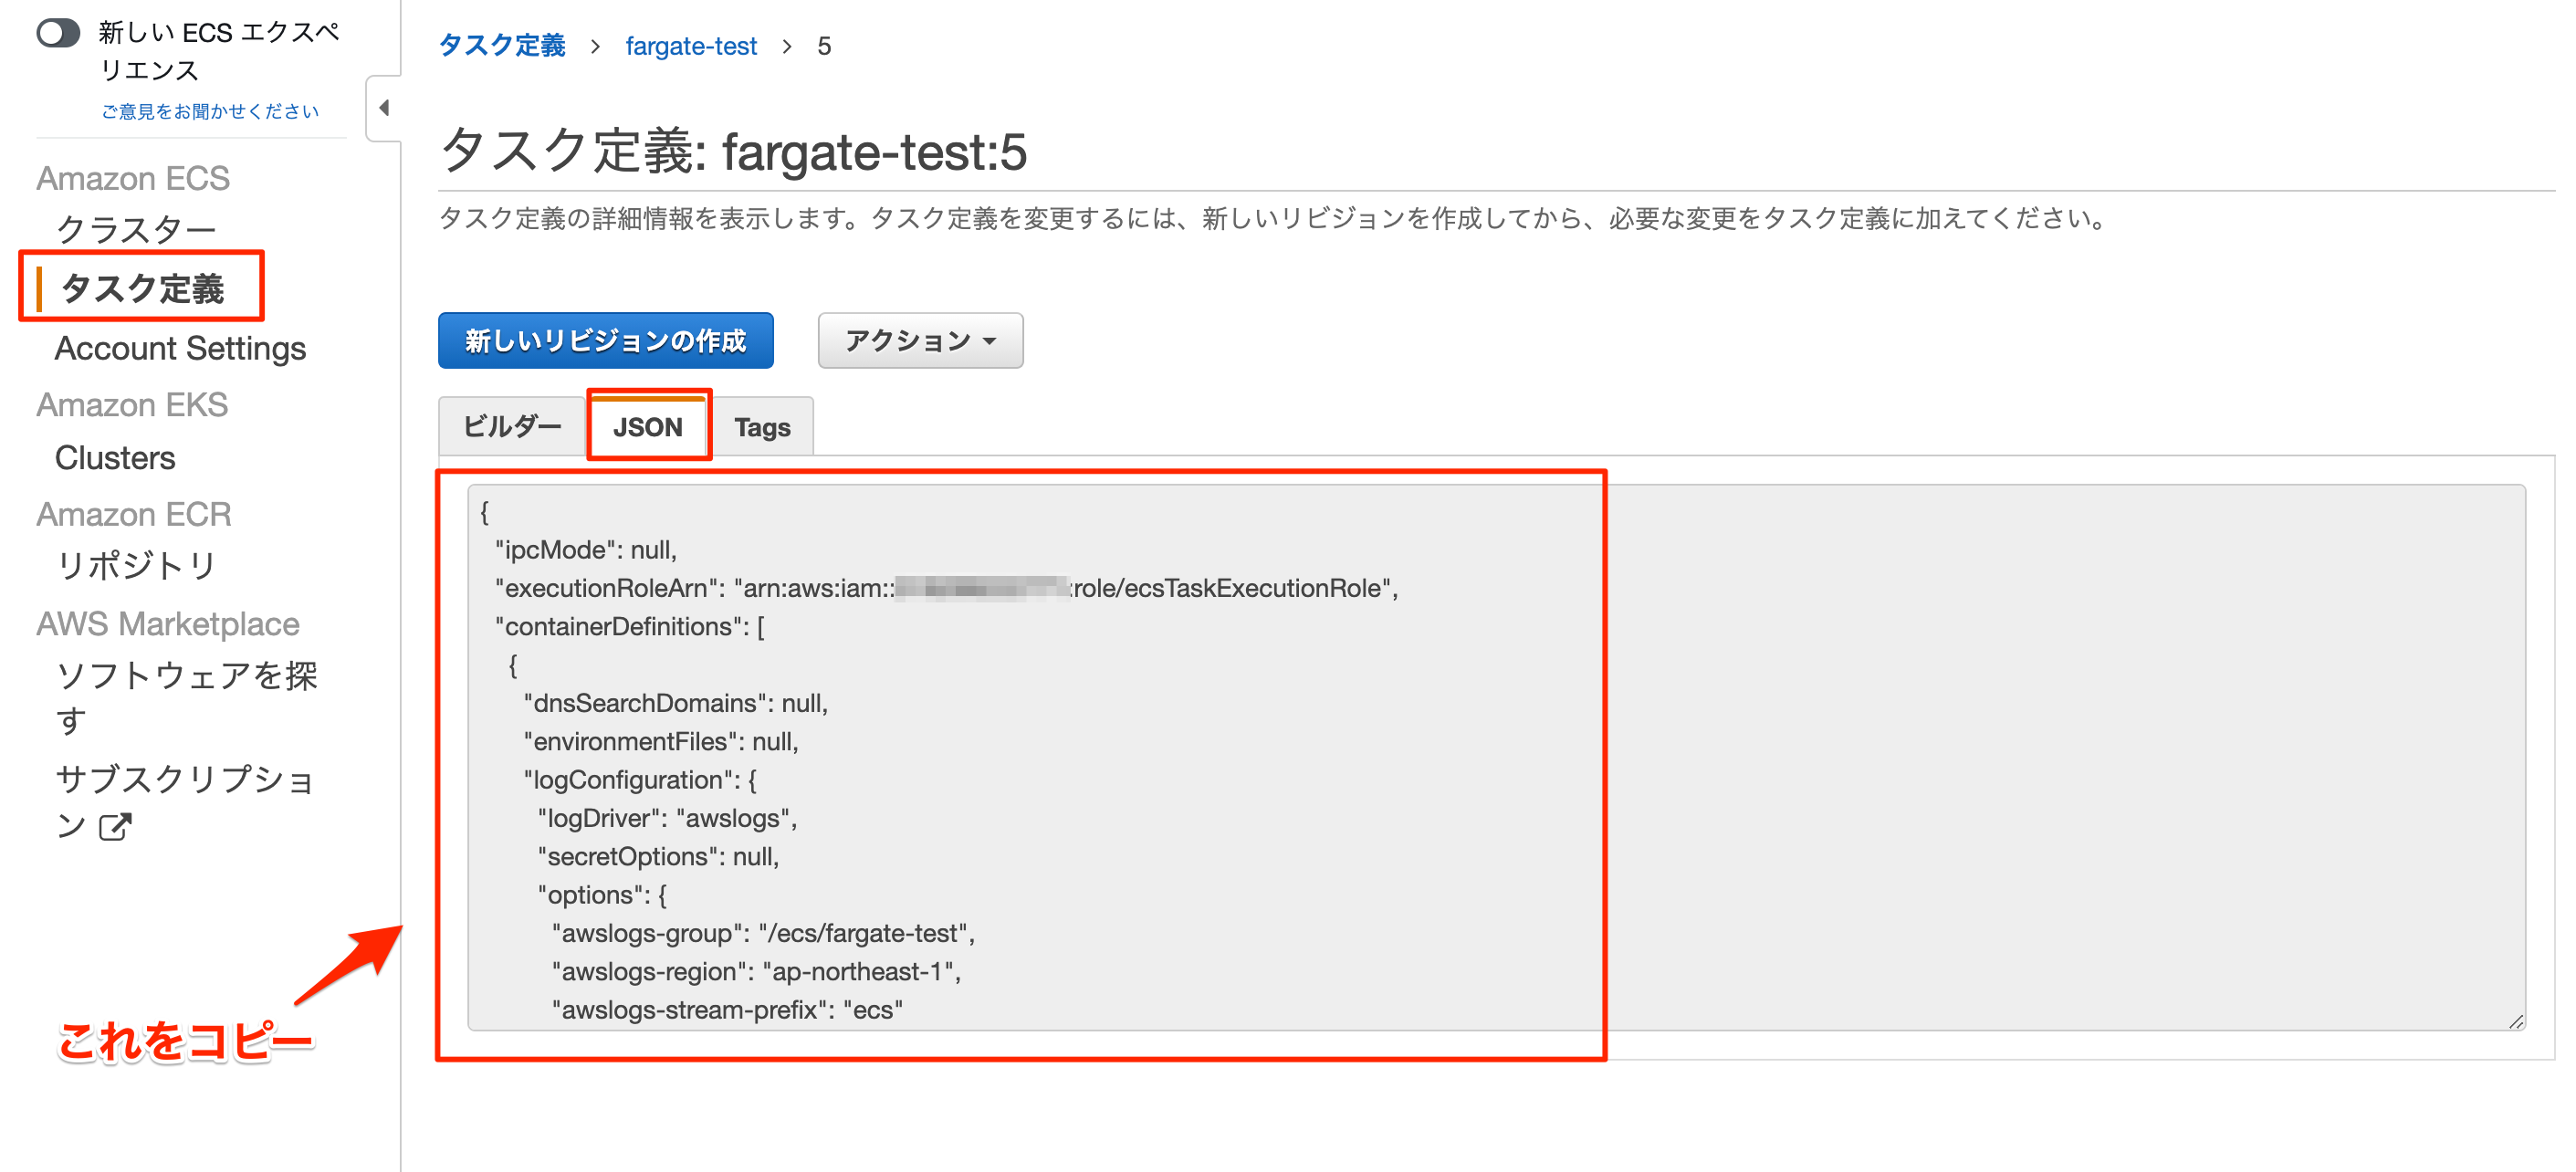
image: と書いてある行だけ変更を削除します。imageの値はdeploy.ymlで定義します。
deploy/task-definition.jsonファイル
{
  "ipcMode": null,
  "executionRoleArn": "arn:aws:iam::#####:role/ecsTaskExecutionRole",
  "containerDefinitions": [
    {
      "dnsSearchDomains": null,
      "environmentFiles": null,
      "logConfiguration": {
        "logDriver": "awslogs",
        "secretOptions": null,
        "options": {
          "awslogs-group": "/ecs/fargate-test",
          "awslogs-region": "ap-northeast-1",
          "awslogs-stream-prefix": "ecs"
        }
      },
      "entryPoint": [],
      "portMappings": [
        {
          "hostPort": 80,
          "protocol": "tcp",
          "containerPort": 80
        }
      ],
      "command": [
        "/app/entrypoint.sh"
      ],
      "linuxParameters": null,
      "cpu": 0,
      "environment": [
        {
          "name": "RAILS_ENV",
          "value": "production"
        },
        {
          "name": "RAILS_LOG_TO_STDOUT",
          "value": "true"
        },
        {
          "name": "RAILS_SERVE_STATIC_FILES",
          "value": "true"
        }
      ],
      "resourceRequirements": null,
      "ulimits": null,
      "dnsServers": null,
      "mountPoints": [],
      "workingDirectory": null,
      "secrets": [
        {
          "valueFrom": "/fargate-test/db-host",
          "name": "DB_HOST"
        },
        {
          "valueFrom": "/fargate-test/db-password",
          "name": "DB_PASSWORD"
        },
        {
          "valueFrom": "/fargate-test/db-username",
          "name": "DB_USERNAME"
        },
        {
          "valueFrom": "/fargate-test/rails-master-key",
          "name": "RAILS_MASTER_KEY"
        }
      ],
      "dockerSecurityOptions": null,
      "memory": null,
      "memoryReservation": null,
      "volumesFrom": [],
      "stopTimeout": null,
      // Imageは削除。CIからImageの値は渡します。
      // "image": "#####.dkr.ecr.ap-northeast-1.amazonaws.com/fargate-test:latest",
      "startTimeout": null,
      "firelensConfiguration": null,
      "dependsOn": null,
      "disableNetworking": null,
      "interactive": null,
      "healthCheck": null,
      "essential": true,
      "links": null,
      "hostname": null,
      "extraHosts": null,
      "pseudoTerminal": null,
      "user": null,
      "readonlyRootFilesystem": null,
      "dockerLabels": null,
      "systemControls": null,
      "privileged": null,
      "name": "fargate-test" // deploy.ymlの `container-name: fargate-test`と同じ値
    }
  ],
  "placementConstraints": [],
  "memory": "512",
  "taskRoleArn": "arn:aws:iam::#####:role/ecsTaskExecutionRole",
  "compatibilities": [
    "EC2",
    "FARGATE"
  ],
  "taskDefinitionArn": "arn:aws:ecs:ap-northeast-1:#####:task-definition/fargate-test:5",
  "family": "fargate-test",
  "requiresAttributes": [
    {
      "targetId": null,
      "targetType": null,
      "value": null,
      "name": "com.amazonaws.ecs.capability.logging-driver.awslogs"
    },
    {
      "targetId": null,
      "targetType": null,
      "value": null,
      "name": "ecs.capability.execution-role-awslogs"
    },
    {
      "targetId": null,
      "targetType": null,
      "value": null,
      "name": "com.amazonaws.ecs.capability.ecr-auth"
    },
    {
      "targetId": null,
      "targetType": null,
      "value": null,
      "name": "com.amazonaws.ecs.capability.docker-remote-api.1.19"
    },
    {
      "targetId": null,
      "targetType": null,
      "value": null,
      "name": "com.amazonaws.ecs.capability.task-iam-role"
    },
    {
      "targetId": null,
      "targetType": null,
      "value": null,
      "name": "ecs.capability.execution-role-ecr-pull"
    },
    {
      "targetId": null,
      "targetType": null,
      "value": null,
      "name": "ecs.capability.secrets.ssm.environment-variables"
    },
    {
      "targetId": null,
      "targetType": null,
      "value": null,
      "name": "com.amazonaws.ecs.capability.docker-remote-api.1.18"
    },
    {
      "targetId": null,
      "targetType": null,
      "value": null,
      "name": "ecs.capability.task-eni"
    }
  ],
  "pidMode": null,
  "requiresCompatibilities": [
    "FARGATE"
  ],
  "networkMode": "awsvpc",
  "cpu": "256",
  "revision": 5,
  "status": "ACTIVE",
  "inferenceAccelerators": null,
  "proxyConfiguration": null,
  "volumes": []
}
deploy/appspec.ymlの作成
CodeDeployによるBlue/Greenデプロイを行うので、appspec.ymlも用意しておきます。
touch deploy/appspec.yml
deploy/appspec.ymlの中身
version: 0.0
Resources:
  - TargetService:
      Type: AWS::ECS::Service
      Properties:
        TaskDefinition: "deploy/task-definition.json" # タスク定義ファイルのパス
        LoadBalancerInfo:
          ContainerName: "fargate-test" # ECRのコンテナ名
          ContainerPort: 80
Githubで環境変数を定義
AWSにログインするために、AWS_ACCESS_KEY_IDとAWS_SECRET_ACCESS_KEYの値をGithub上で定義します。
Githubのリポジトリページから、「Setting」→「Secrets」→「New Repository secret」を押します。
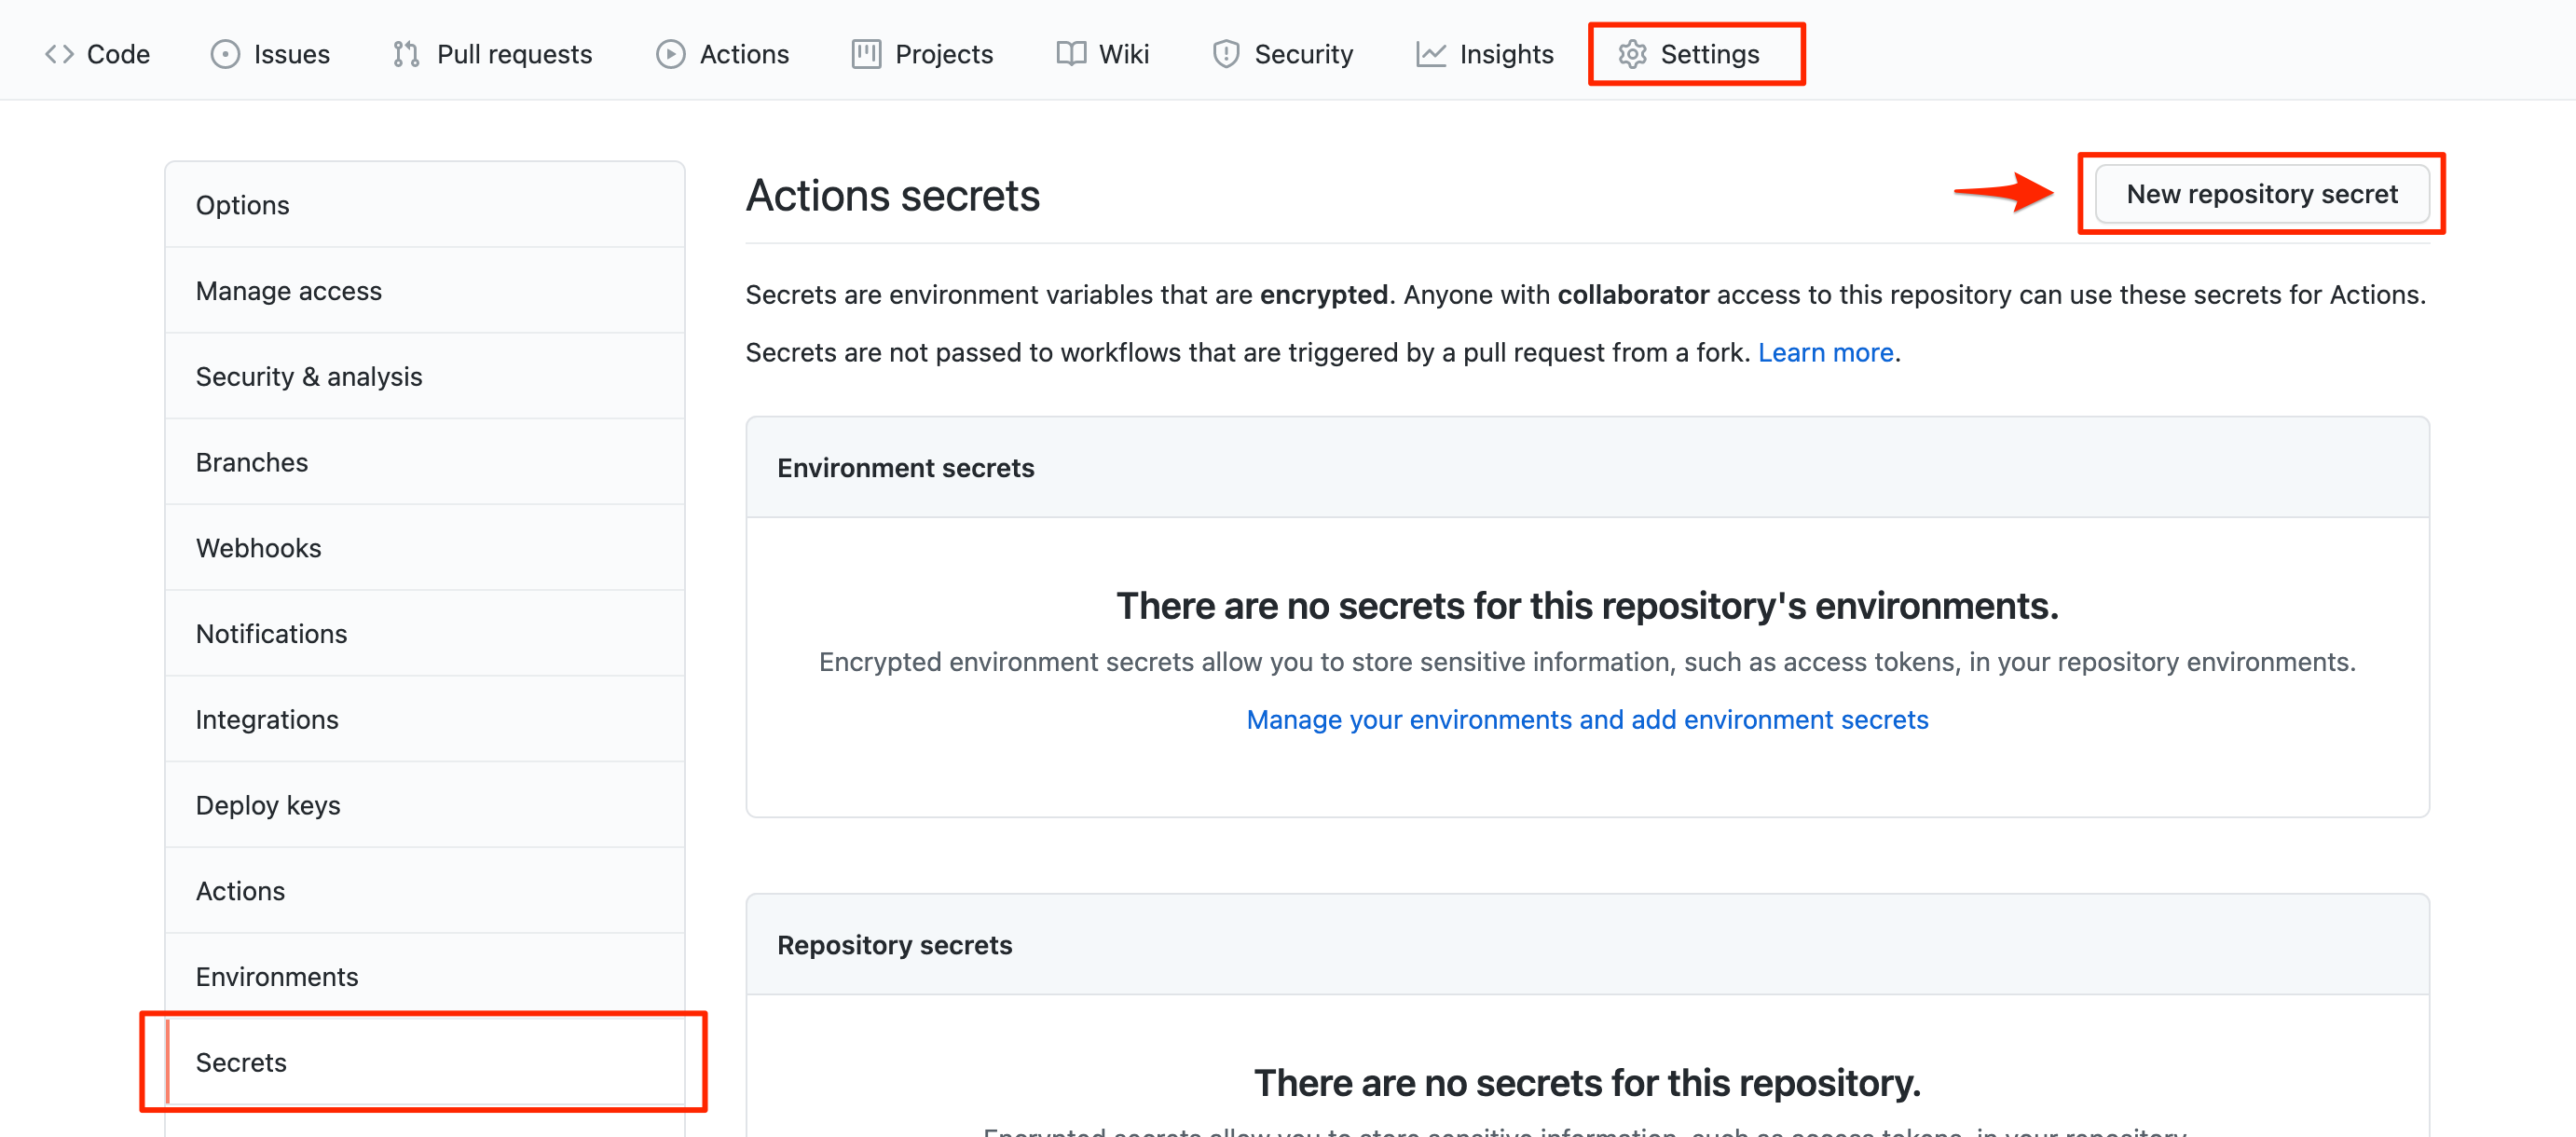
追加する秘匿の環境変数は、AWS_ACCESS_KEY_IDとAWS_SECRET_ACCESS_KEYの 2つです。

追加を行うと以下のように表示されます。

完成
ここまでできたら、完成です。
MasterブランチにPushすると以下のようにデプロイが走るかと思います。
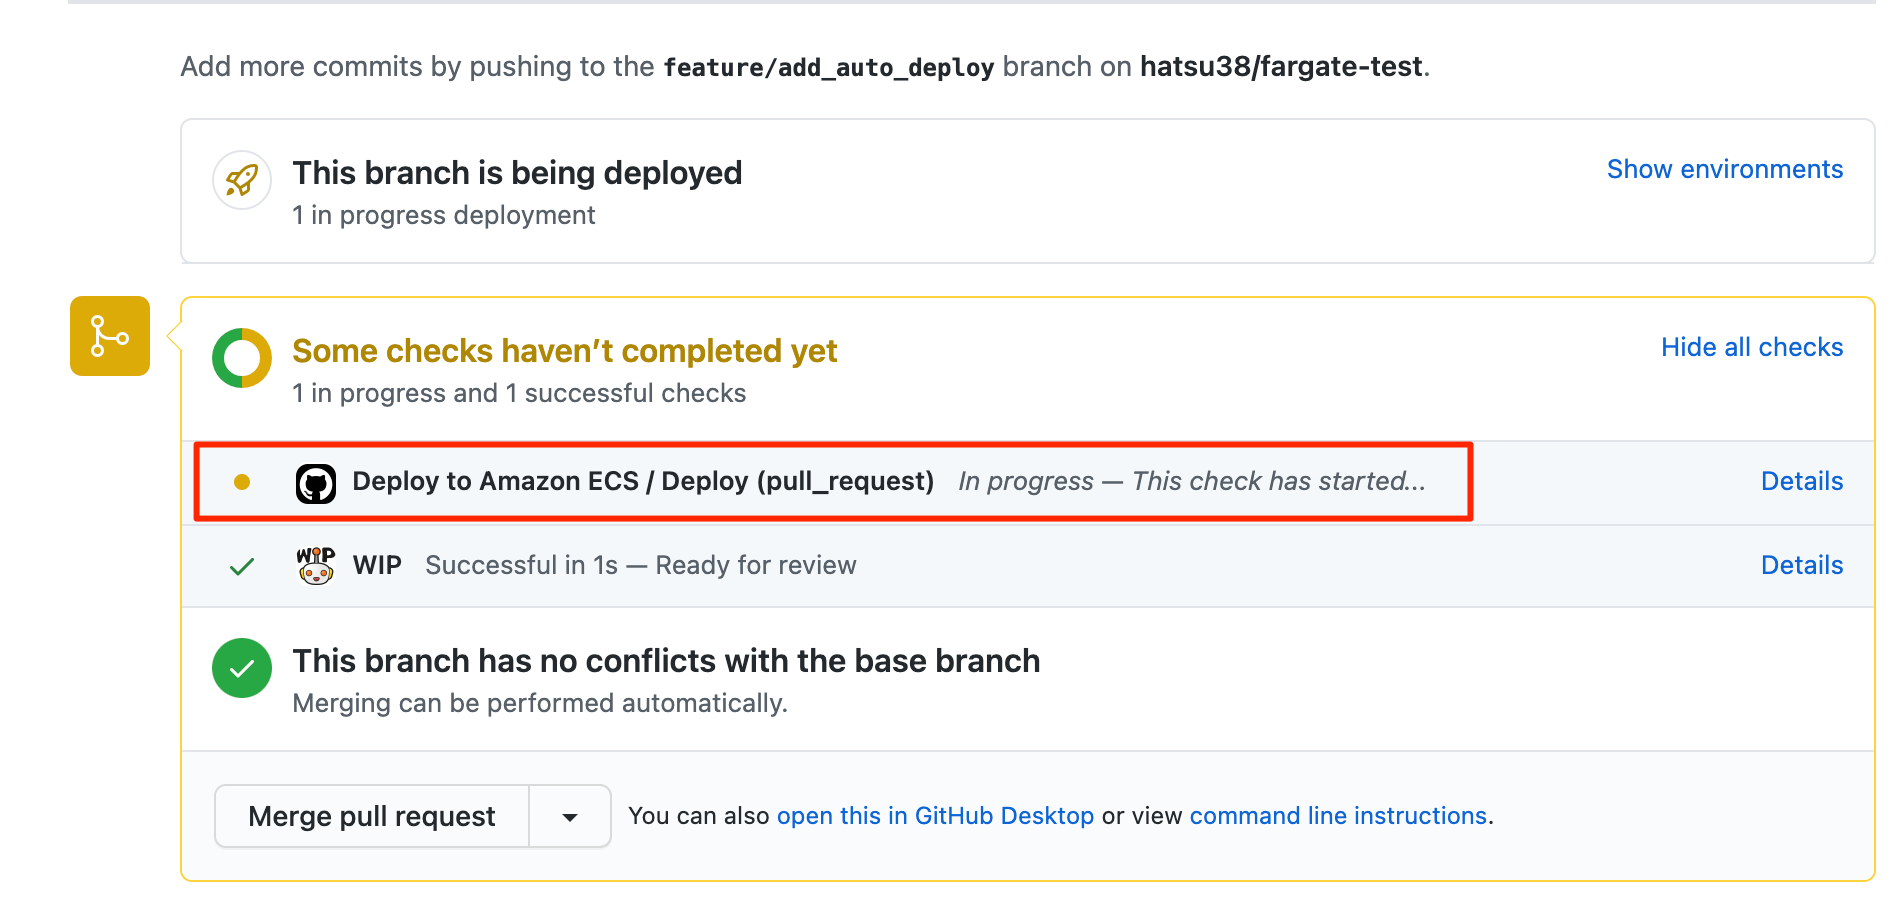
デプロイが完了すると、以下のよう緑色に変化します

終わりに
これでGithubActionsを利用して、RailsアプリケーションをFargateに自動デプロイすることまで出来るようになりました!
次は、FargateでRedis(ElastiCache)を利用してSidekiqを動かすところまでやっていきます。
↓Sidekiqの導入