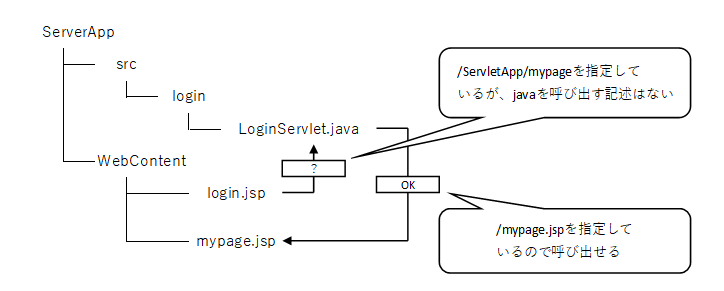
現在の進行状況
- 遷移元のjsp(login.jsp)
- 遷移先のjsp(mypage.jsp)
- サーブレットクラス(Login)
これだけだとまだ動きません
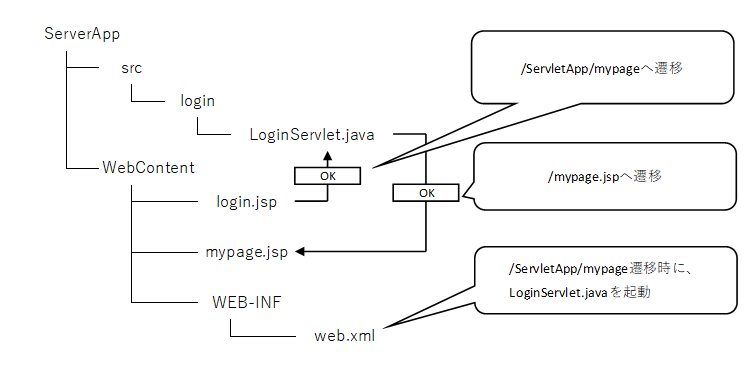
これから遷移元のjspと起動するサーブレットの紐づけを行っていきます

一歩目でプロジェクトを作成したときに、[web.xmlデプロイメント記述子を生成する]にチェックをつける事で、以下のようなファイルがWEB-INF配下に作られていると思います
<?xml version="1.0" encoding="UTF-8"?>
<web-app xmlns:xsi="http://www.w3.org/2001/XMLSchema-instance" xmlns="http://xmlns.jcp.org/xml/ns/javaee" xsi:schemaLocation="http://xmlns.jcp.org/xml/ns/javaee http://xmlns.jcp.org/xml/ns/javaee/web-app_3_1.xsd" id="WebApp_ID" version="3.1">
  <display-name>ServletApp</display-name>
  <welcome-file-list>
    <welcome-file>index.html</welcome-file>
    <welcome-file>index.htm</welcome-file>
    <welcome-file>index.jsp</welcome-file>
    <welcome-file>default.html</welcome-file>
    <welcome-file>default.htm</welcome-file>
    <welcome-file>default.jsp</welcome-file>
  </welcome-file-list>
</web-app>
おそらく上記のコードも自動で記述されているとは思いますが、一応解説
- <display-name>・・・プロジェクト名 今回は
ServletApp - <welcome-file>・・・
http://localhost:8080/ServletApp/のように、~/プロジェクト名/jspファイル名ではなく~/プロジェクト名/を指定した際に遷移させたいファイルを指定する
今はdefaultもindexも作っていないので、とりあえずlogin.jspを指定しておきましょう
それでは、<welcome-file-list>の下にいろいろ追加していきます
<servlet>
	<servlet-name>login</servlet-name>
	<servlet-class>login.LoginServlet</servlet-class>
</servlet>
<servlet-class>に、呼び出したいファイルの相対パスをプロジェクトフォルダ(ServletApp)を起点として指定する
上のように書くと~/ServletApp/login/LoginServlet.javaを呼び出せます
<servlet-name>に、このclassに一時的な名前を付けます(すぐ下で使います)
<servlet-mapping>
	<servlet-name>login</servlet-name>
	<url-pattern>/mypage</url-pattern>
</servlet-mapping>
<url-pattern>に、呼び出し元のjspのformタグのactionのパスを指定します
jsp側は/ServletApp/mypageですが、こちらはプロジェクトフォルダが起点なので、/mypageになります
<servlet-name>に、呼び出したい<servlet>の名前を指定します
これによって、画面遷移ができるようになりました

以上が一連の流れになります
実行しましょう
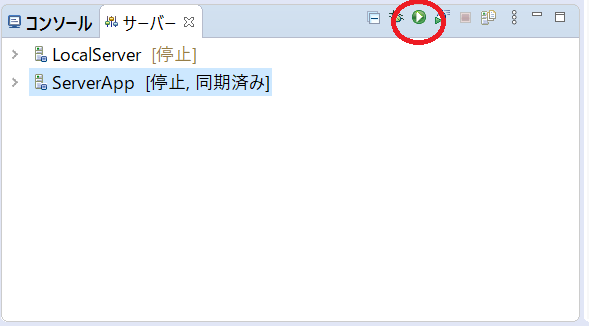
サーバーの緑のアイコンをクリックする

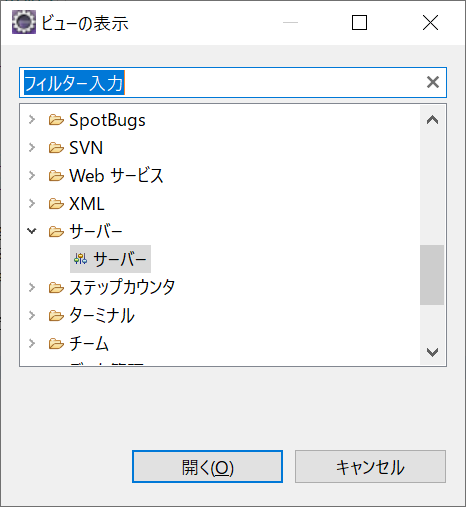
もしサーバーが出ていなかったらメニューバーの[ウィンドウ]-[ビューの表示]-[その他]でビューを開いて、[サーバー]を選択すると出てくるよ

↑こんな感じ
それではhttp://localhost:8080/ServletApp/login.jspを指定して画面を表示させてみましょう
(さきほど<welcome-file>でlogin.jspを指定していればhttp://localhost:8080/ServletApp/でも表示できるので試してみてね
あまりにも簡素ではありますが、画面が表示できました

試しにhatopoと入力してloginボタンを押してみると・・・

無事にパラメータの受け渡しができていますね!