はじめに
LinuxのコンソールをWEBブラウザから利用できるようにするCockpitがなかなか便利なので、その活用方法のひとつとしてシェアしたいと思います。
やりたいこと
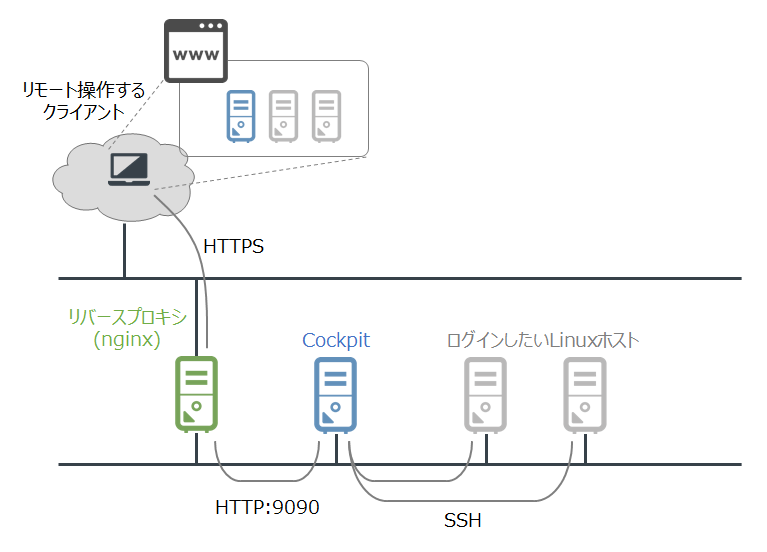
Cockpitを入れたLinuxホストを踏み台にして、別のLinuxホストにログインできるようにする。
ただし、今回は下図のようにリバースプロキシ配下にcockpitサーバーを配置し、Cockpit経由で別のサーバーにログインできるようにします。
環境
-
リバースプロキシ
- CentOS6.9 nginx/1.12.2
-
Cockpitサーバー
- CentOS7.4.1708
- Cockpit 160
- cockpit-system-160-1.el7.centos.noarch
- cockpit-dashboard-160-1.el7.centos.x86_64
- cockpit-bridge-160-1.el7.centos.x86_64
- cockpit-ws-160-1.el7.centos.x86_64
- cockpit-160-1.el7.centos.x86_64
-
最終的にログインしたいLinuxホスト
- CentOS7.4.1708
- Cockpit 160
- cockpit-system-160-1.el7.centos.noarch
- cockpit-bridge-160-1.el7.centos.x86_64
- cockpit-ws-160-1.el7.centos.x86_64
- cockpit-160-1.el7.centos.x86_64
やったこと
リバースプロキシ
リバースプロキシの設定を追加する。
upstreamディレクティブを使うので負荷分散先が1台しかないロードバランサ設定という印象。
map $http_upgrade $connection_upgrade {
    default upgrade;
    '' close;
}

upstream cockpit {
    server [an.ip.add.ress]:9090; ★環境に合わせて設定する
}

server {

    listen 443;

    server_name cockpit.domain.tld;

    access_log /var/log/nginx/ssl_access.log;

    ssl on;
    ssl_certificate /path/to/cert; ★環境に合わせて設定する
    ssl_certificate_key  /path/to/cert_key; ★環境に合わせて設定する

    proxy_http_version 1.1;
    proxy_buffering off;
    proxy_set_header Host $host;
    proxy_set_header X-Real-IP  $remote_addr;
    proxy_set_header X-Forwarded-For $remote_addr;

    # needed for websocket
    proxy_set_header Upgrade $http_upgrade;
    proxy_set_header Connection $connection_upgrade;

    # change scheme of "Origin" to http
    proxy_set_header Origin http://$host;

    # Pass ETag header from cockpit to clients.
    # See: https://github.com/cockpit-project/cockpit/issues/5239
    gzip off;

    location / {
        proxy_pass http://cockpit; ★upstreamディレクティブの設定に合わせる
}
Cockpitサーバー
yum で cockpit と cockpit-dashboard をインストールする。
~]#
~]# yum install cockpit cockpit-dashboard
~]#
~]# systemctl start cockpit
~]#
~]# systemctl enable cockpit
~]#
~]# ss -ant
 :
LISTEN     0      128          *:9090                     *:*
 :
~]#
cockpit は HTTP:9090 でも HTTPS:9090 でも接続ができるが、デフォルトでは HTTP:9090 に接続すると HTTPS:9090 にリダイレクトしてくれる。
http://cockpit-project.org/guide/latest/https.html
HTTPS Requirement
Cockpit listens for both HTTP and HTTPS connections on the same port, by default 9090. If an HTTP connection is made, Cockpit will redirect that connection to HTTPS.
今回はリバースプロキシで SSL をオフロードし、upstream に HTTP:9090 で接続したいので、CockpitでHTTPSにリダイレクトしない設定を追加する。
なお、デフォルトでは /etc/cockpit/cockpit.conf は存在しないので新規作成することになる。
[WebService]
AllowUnencrypted=true
最終的にログインしたいLinuxホスト
yum で cockpit をインストールして、起動する。
~]#
~]# yum install cockpit
~]#
~]# systemctl start cockpit
~]#
~]# systemctl enable cockpit
~]#
~]# ss -ant
 :
LISTEN     0      128          *:9090                     *:*
 :
~]#
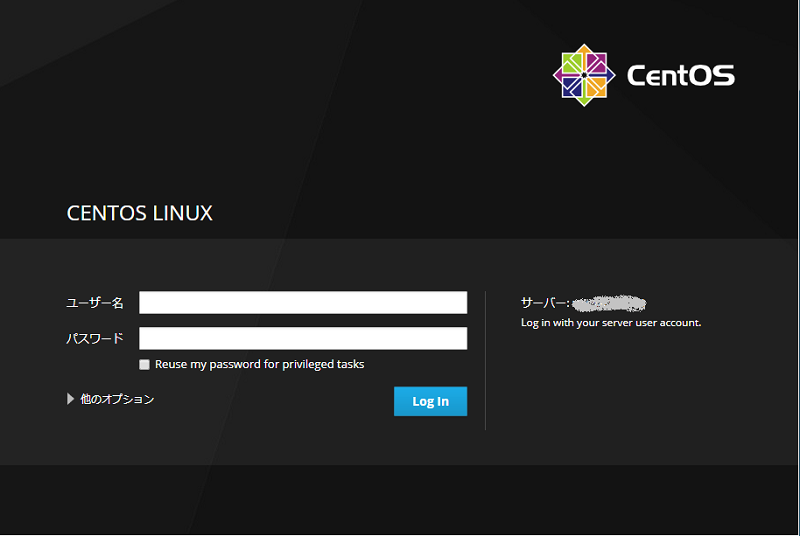
アクセスする
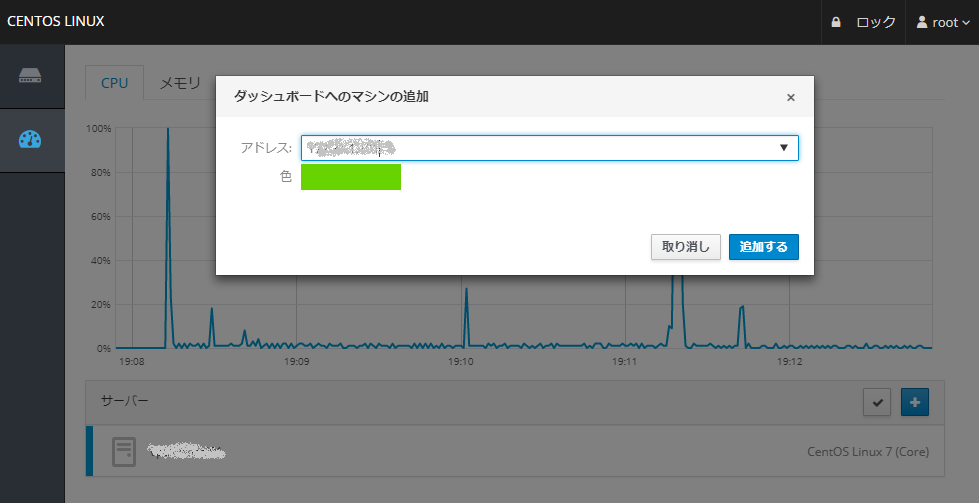
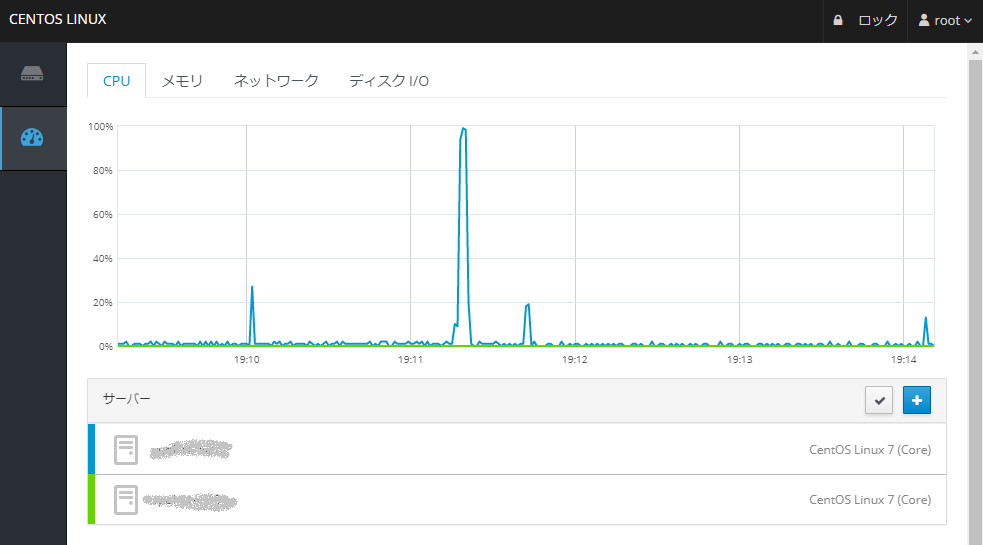
- ブラウザから https://cockpit.domain.tld にアクセスすると、Cockpitサーバーに接続されログイン画面が出るので、とりあえず root でログインしてみる
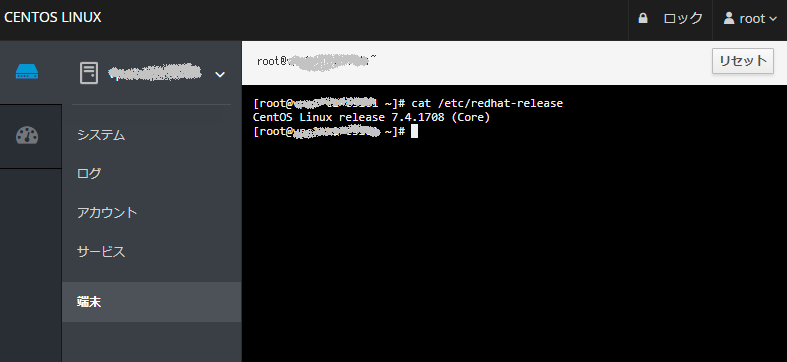
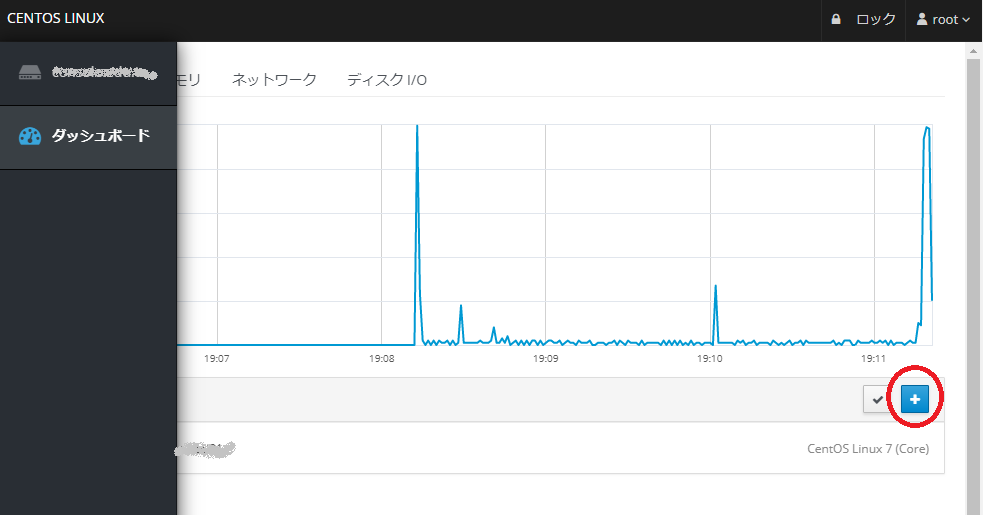
- ログイン後「ダッシュボード」から最終的にログインしたいLinuxホストを追加(IPアドレスで指定)をすると、裏でSSH接続が行われ追加したLinuxホストも同じWEBブラウザからコンソールログインが可能になる。
おわりに
- リバースプロキシ側で「Too Many Redirects」というエラーが解消できず苦労したが、原因は Cockpit のデフォルト動作が「HTTP:9090 を HTTPS:9090 にリダイレクトする」という部分で、こでに気がつくまでにかなり時間がかかってしまった。
- WEBブラウザからコンソールを使えるようになったのは嬉しいが、ターミナルへのコピー&ペーストができないところが惜しい・・・