この記事は KDDI Engineer&Designer Advent Calendar 2022 の10日目の記事です。
概要
今回は
- 「マルチクラウドを体感したい」
- 「でもうちのポンコツPCには荷が重そう。。。」
- 「IaC 入門したいけど準備が大変そう。。。」
という方に向けての記事です
Cloud9 は数分で IDE(統合開発環境)を用意できる AWS のサービスです
これを使って、Terraform を動かせる開発環境をサクッと作ってしまいましょう!というのが目的です
前置き
前準備について
以下のように、 AWS、Azure、GCP のリソースを作ろうと思えばいつでも作れる状態にあることを想定しています
- AWS の アカウント、IAM ユーザーが作成済み
- Microsoft、Azure のアカウントが作成済み
- Google アカウント、GCP のプロジェクトが作成済み
Terraform と各クラウドの認証処理について
Terraform から各クラウドにアクセスできるようにするには認証処理が必要ですが、その方法は複数存在します
例えば、Azure に限っても5種類の方法が公式ドキュメントに記載されています
- Azure CLI を使って認証する
- マネージド ID を使って認証する
- サービスプリンシパルとクライアント証明書を使って認証する
- サービスプリンシパルとクライアントシークレットを使って認証する
- OpenID Connect を使って認証する
この記事ではCloud9 から 「サクッとつくる」 ことを目的にしていますので、慣れてない人でもすぐにできる方法を記載しています
具体的には、 各クラウドの CLI を使った方法を記載しています
なお、CLI を使わない場合は、クラウド上で認証の主体になるリソースを作成する必要があったりするので少し面倒です
詳細は Terraform の公式ドキュメントに掲載されています
- AWS:https://registry.terraform.io/providers/hashicorp/aws/latest/docs#authentication-and-configuration
- Azure:https://registry.terraform.io/providers/hashicorp/azurerm/latest/docs#authenticating-to-azure
- GCP:https://registry.terraform.io/providers/hashicorp/google/latest/docs/guides/provider_reference#authentication
Cloud9 について
cloud9 の環境作成手順や使い方については、後日別の記事にまとめるので省略します
※2022/12/18 追記
アドベントカレンダー18日目の記事で「Cloud9とは?」という内容の記事を書きました
合わせて読んでいただけると嬉しいです
Terraform のインストール
まずは、Cloud9 のターミナル画面で Terraform のインストールをしていきます
公式ドキュメント掲載の手順のままコマンドを実行すればOK
$ sudo yum install -y yum-utils
$ sudo yum-config-manager --add-repo https://rpm.releases.hashicorp.com/AmazonLinux/hashicorp.repo
$ sudo yum -y install terraform
これで Cloud9 の上で Terraform を動かせるようになったので、AWS、Azure、GCPを触れるようにしていきます!
AWS編
Cloud9 は AWS のサービスなので、Terraform さえインストールすれば特に何もしなくてもOKです
何もせずとも terrraform init, plan, apply が実行できます
Cloud9 の認証情報について
少し補足すると、Cloud9 は AWS Managed Temporary Credentials(AMTC)という認証情報が自動的に付与されます
一部制約はあるものの、AMTC は Administrator に近い権限を保有しているため、デフォルトの設定のままでも Terraform でリソース作成ができます
なお、AMTCは結構強い権限を持っていますので、商用環境で Cloud9 を使う時は注意が必要です
AMTC をオフにしたうえで適切な IAM ロールを Cloud9(EC2インスタンス)に付与する方が、セキュリティ的には推奨されます
terraform ブロックと provider ブロックの例
コードの中に AWS プロバイダーを読み込む表記があれば準備完了です
terraform {
  required_providers {
    aws = {
      source  = "hashicorp/aws"
      version = "~> 4.0"
    }
  }
}

provider "aws" {
  region = "ap-northeast-1"
}
Azure編
Azure の場合は、Azure CLI をインストールと Azure へのログインを行っておく必要があります
Azure CLIのインストール
yum を使ってインストールしますが、リポジトリを追加してあげる必要があります
$ sudo rpm --import https://packages.microsoft.com/keys/microsoft.asc
$ sudo sh -c 'echo -e "[azure-cli]\nname=Azure CLI\nbaseurl=https://packages.microsoft.com/yumrepos/azure-cli\nenabled=1\ngpgcheck=1\ngpgkey=https://packages.microsoft.com/keys/microsoft.asc" > /etc/yum.repos.d/azure-cli.repo'
$ sudo yum install azure-cli
Microsoft の公式ドキュメントには yum でインストールする方法が記載されていなかったので、以下の記事を参考にしました
※参考記事では Python のインストールを実施していますが、Cloud9 は Python がプリインストールされているので不要です
Azureへのログイン
Azure CLI をインストール出来たら、az loginコマンドを使用してAzureにログインしていきます
コマンドを実行すると以下のような出力がされるので、9桁の文字列を控えたうえで URL にアクセスします
To sign in, use a web browser to open the page https://microsoft.com/devicelogin and enter the code xxxxxxxxx<9桁の文字列> to authenticate.
URL を開くとこんな画面が出てくるので、先ほど控えていた文字列を貼り付けます
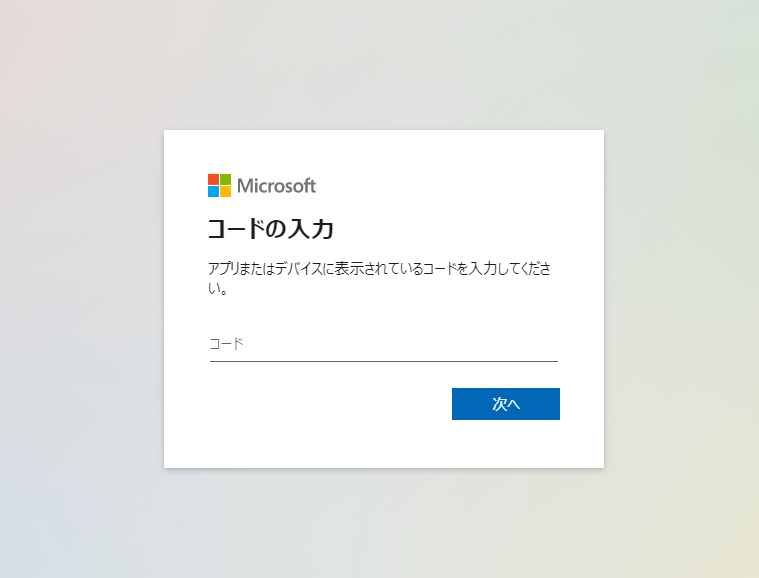
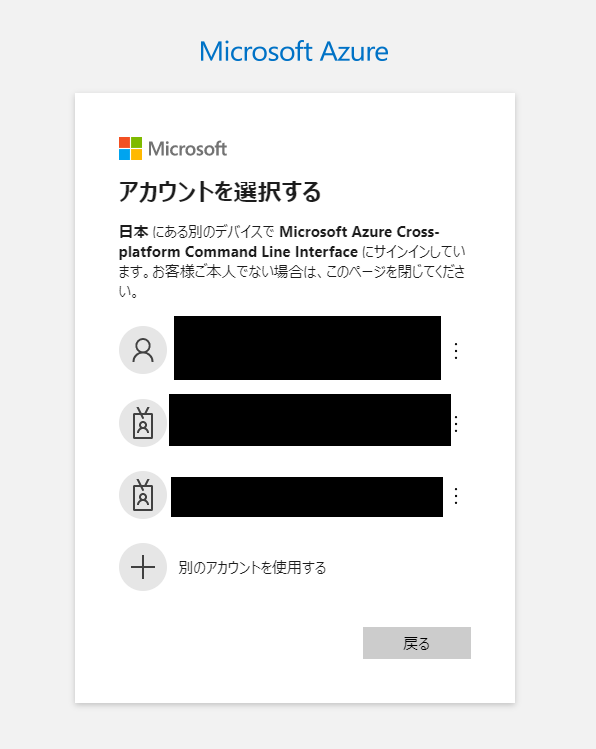
すると、Microsoft アカウントでログインするように促されるので、画面の通りにログイン処理を進めていきます
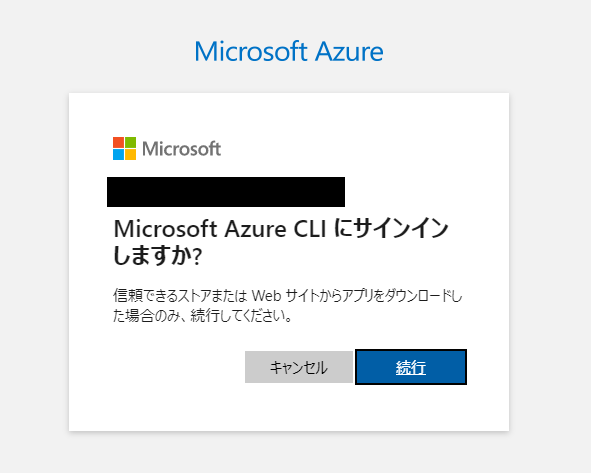
「Microsoft Azure CLI にサインインしますか?」と聞かれるので「続行」をクリックします
以下のようにウィンドウを閉じてよいという画面が出れば、ログイン完了です
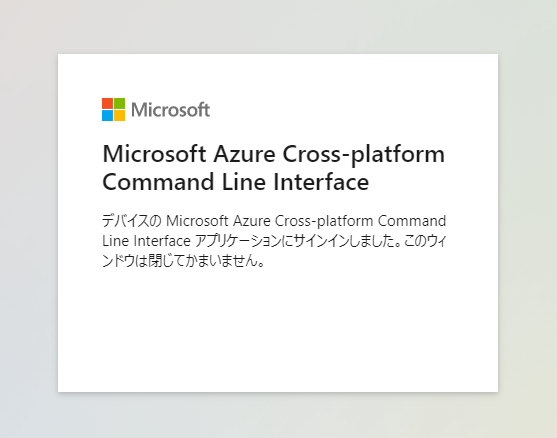
Cloud9 の画面に戻るとログインが完了しています
$ az login
To sign in, use a web browser to open the page https://microsoft.com/devicelogin and enter the code xxxxxxxxx to authenticate.
The following tenants don't contain accessible subscriptions. Use 'az login --allow-no-subscriptions' to have tenant level access.
xxxxxxxxx 'Contoso Marketing Company'
[
  {
    "cloudName": "AzureCloud",
    "homeTenantId": "xxxxxxxxxx",
    "id": "xxxxxxxxxx",
    "isDefault": true,
    "managedByTenants": [],
    "name": "xxxxxxxxxx",
    "state": "Enabled",
    "tenantId": "xxxxxxxxxx",
    "user": {
      "name": "xxxxxxxxxx",
      "type": "user"
    }
  }
]
terraform ブロックと provider ブロックの例
コードの中に Azure プロバイダー (azurerm) を読み込む表記があれば準備完了です
terraform {
  required_providers {
    azurerm = {
      source  = "hashicorp/azurerm"
      version = "~>3.0"
    }
}
}


provider "azurerm" {
  features {}
}
GCP編
Azure の時と同様に、gcloud CLI のインストールと GCP へのログインをする必要があります
gloud CLI のインストール
Azure編と若干似た手順になりますが、まずは gclud CLI をインストールします
公式ドキュメントのインストール手順に従えばOKですので、手順を説明していきます
まずは、インストーラーをダウンロードして解凍します
## 必要に応じて使用するディレクトリを変更しておく、ホームディレクトリが推奨されている
$ curl -O https://dl.google.com/dl/cloudsdk/channels/rapid/downloads/google-cloud-cli-410.0.0-linux-x86_64.tar.gz
$ tar -xf google-cloud-cli-410.0.0-linux-x86.tar.gz
ダウンロードしたらインストーラーを実行します
$ ./google-cloud-sdk/install.sh
Welcome to the Google Cloud CLI!

To help improve the quality of this product, we collect anonymized usage data
and anonymized stacktraces when crashes are encountered; additional information
is available at <https://cloud.google.com/sdk/usage-statistics>. This data is
handled in accordance with our privacy policy
<https://cloud.google.com/terms/cloud-privacy-notice>. You may choose to opt in this
collection now (by choosing 'Y' at the below prompt), or at any time in the
future by running the following command:

    gcloud config set disable_usage_reporting false

Do you want to help improve the Google Cloud CLI (y/N)?  y


Your current Google Cloud CLI version is: 410.0.0
The latest available version is: 410.0.0

┌────────────────────────────────────────────────────────────────────────────────────────────────────────────┐
│                                                 Components                                                 │
├───────────────┬──────────────────────────────────────────────────────┬──────────────────────────┬──────────┤
│     Status    │                         Name                         │            ID            │   Size   │
├───────────────┼──────────────────────────────────────────────────────┼──────────────────────────┼──────────┤
│ Not Installed │ App Engine Go Extensions                             │ app-engine-go            │  4.2 MiB │
                    (中略)
│ Not Installed │ kubectl                                              │ kubectl                  │  < 1 MiB │
│ Not Installed │ kubectl-oidc                                         │ kubectl-oidc             │ 20.4 MiB │
│ Not Installed │ pkg                                                  │ pkg                      │          │
│ Installed     │ BigQuery Command Line Tool                           │ bq                       │  1.6 MiB │
│ Installed     │ Bundled Python 3.9                                   │ bundled-python3-unix     │ 62.2 MiB │
│ Installed     │ Cloud Storage Command Line Tool                      │ gsutil                   │ 15.5 MiB │
│ Installed     │ Google Cloud CLI Core Libraries                      │ core                     │ 25.3 MiB │
│ Installed     │ Google Cloud CRC32C Hash Tool                        │ gcloud-crc32c            │  1.2 MiB │
└───────────────┴──────────────────────────────────────────────────────┴──────────────────────────┴──────────┘
To install or remove components at your current SDK version [410.0.0], run:
  $ gcloud components install COMPONENT_ID
  $ gcloud components remove COMPONENT_ID

To update your SDK installation to the latest version [410.0.0], run:
  $ gcloud components update


Modify profile to update your $PATH and enable shell command completion?

Do you want to continue (Y/n)?  y

The Google Cloud SDK installer will now prompt you to update an rc file to bring the Google Cloud CLIs into your environment.

Enter a path to an rc file to update, or leave blank to use [/home/ec2-user/.bashrc]:
Backing up [/home/ec2-user/.bashrc] to [/home/ec2-user/.bashrc.backup].
[/home/ec2-user/.bashrc] has been updated.

==> Start a new shell for the changes to take effect.


For more information on how to get started, please visit:
  https://cloud.google.com/sdk/docs/quickstarts
聞かれる項目は以下のようなものですが、すべて Yes もしくはデフォルトのままで問題ないと思います
- Google にデータを提供するかどうか
- インストールするコンポーネントの確認
- 追加するパス
インストールが完了したら、新しいターミナルを開いて gcloud CLI の初期化を行います
$ ./google-cloud-sdk/bin/gcloud init
Welcome! This command will take you through the configuration of gcloud.

Your current configuration has been set to: [default]

You can skip diagnostics next time by using the following flag:
  gcloud init --skip-diagnostics

Network diagnostic detects and fixes local network connection issues.
Checking network connection...done.
Reachability Check passed.
Network diagnostic passed (1/1 checks passed).

You must log in to continue. Would you like to log in (Y/n)?  Y
初期化を開始すると、Azure の時と同様にブラウザで URL を開くように促されるので URL にアクセスします
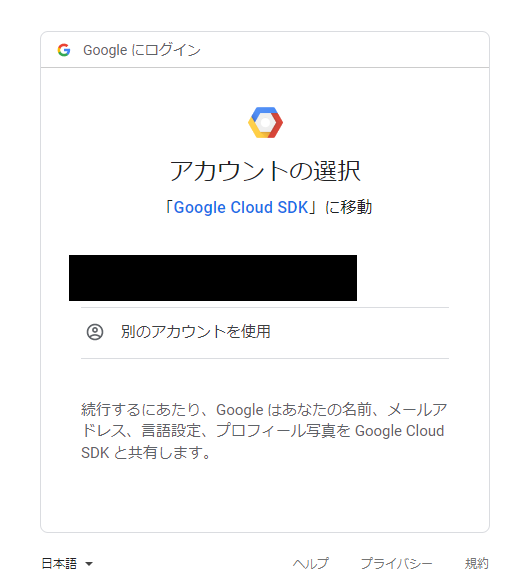
まずはログインする Google アカウントを選択
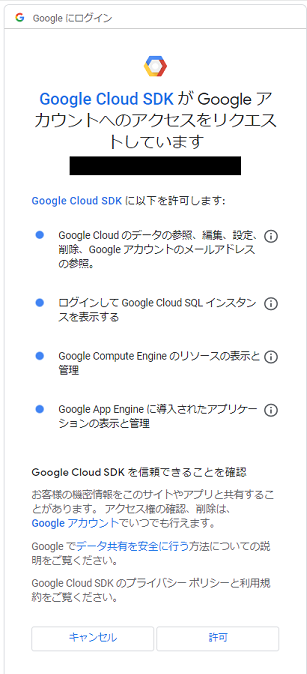
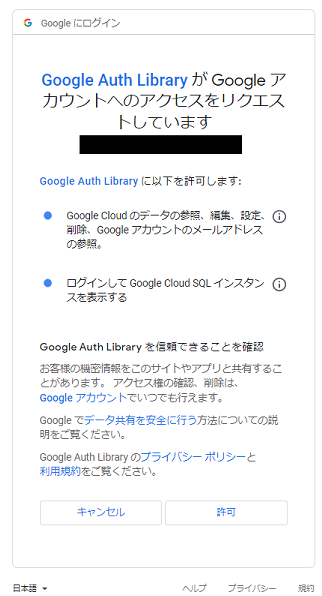
Google Cloud SDK のアクセスを許可するかどうか聞かれるので[許可]をクリックします
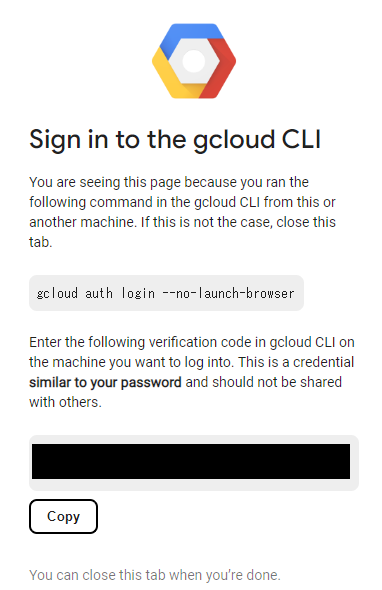
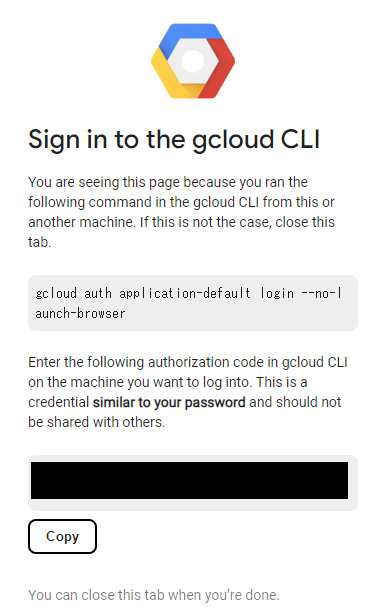
認証コードが表示されるので、コピーして Cloud9 のターミナルに貼り付けます
諸々のセットアップをするように促されるので、入力していきます
入力項目は以下のようなものです
- GCP で使うプロジェクト:用意していたものを選択しました
- デフォルトのリージョンとゾーンの設定:asia-northeast1-b(東京)を選択しました
You are logged in as: [xxxxx@gmail.com].

Pick cloud project to use:
 [1] terraform-practice-xxxxxx
 [2] Enter a project ID
 [3] Create a new project
Please enter numeric choice or text value (must exactly match list item):  1

Your current project has been set to: [terraform-practice-xxxxxx].

Do you want to configure a default Compute Region and Zone? (Y/n)?  Y

Which Google Compute Engine zone would you like to use as project default?
If you do not specify a zone via a command line flag while working with Compute Engine resources, the default is assumed.
 [1] us-east1-b
(中略)
 [32] asia-northeast1-b
(中略)
 [49] asia-northeast2-c
 [50] asia-northeast3-a
Did not print [57] options.
Too many options [107]. Enter "list" at prompt to print choices fully.
Please enter numeric choice or text value (must exactly match list item):  32

Your project default Compute Engine zone has been set to [asia-northeast1-b].
You can change it by running [gcloud config set compute/zone NAME].

Your project default Compute Engine region has been set to [asia-northeast1].
You can change it by running [gcloud config set compute/region NAME].

Created a default .boto configuration file at [/home/ec2-user/.boto]. See this file and
[https://cloud.google.com/storage/docs/gsutil/commands/config] for more
information about configuring Google Cloud Storage.
Your Google Cloud SDK is configured and ready to use!

* Commands that require authentication will use xxxxxx@gmail.com by default
* Commands will reference project `terraform-practice-xxxxxx` by default
* Compute Engine commands will use region `asia-northeast1` by default
* Compute Engine commands will use zone `asia-northeast1-b` by default

Run `gcloud help config` to learn how to change individual settings

This gcloud configuration is called [default]. You can create additional configurations if you work with multiple accounts and/or projects.
Run `gcloud topic configurations` to learn more.

Some things to try next:

* Run `gcloud --help` to see the Cloud Platform services you can interact with. And run `gcloud help COMMAND` to get help on any gcloud command.
* Run `gcloud topic --help` to learn about advanced features of the SDK like arg files and output formatting
* Run `gcloud cheat-sheet` to see a roster of go-to `gcloud` commands.
GCP へのログイン
GCP にログインするには、gcloud auth application-default loginコマンドを使用します
コマンドを実行すると、gcloud CLI のインストールの時と同様に URL へのアクセスを要求されるので、同じように操作していきます
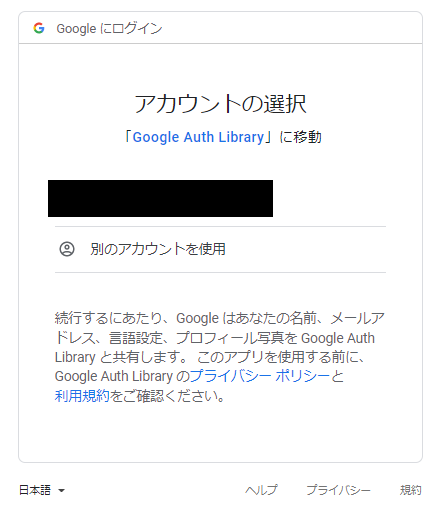
認証コードを入力すると、GCP へのログインが完了します
$ gcloud auth application-default login
Go to the following link in your browser:

    https://accounts.google.com/o/oauth2/auth?xxxxxxxxxx

Enter authorization code: xxxxxxxxxx

Credentials saved to file: [/home/ec2-user/.config/gcloud/application_default_credentials.json]

These credentials will be used by any library that requests Application Default Credentials (ADC).

Quota project "terraform-practice-xxxxxx" was added to ADC which can be used by Google client libraries for billing and quota. Note that some services may still bill the project owning the resource.
terraform ブロックと provider ブロックの例
コードの中に Google プロバイダーを読み込む表記があれば準備完了です
terraform {
  required_providers {
    google = {
      source = "hashicorp/google"
      version = "~>3.0.0"
    }
  }
}


provider "google" {
  project = "terraform-practice-370508"
  region  = "asia-northeast1"
}
まとめ
これでローカル環境を汚さずとも、マルチクラウドを扱う全能感に浸ることができます
ちなみに、最近はやりの ChatGPT に聞いてみたら簡潔かつ的確に手順を教えてくれました
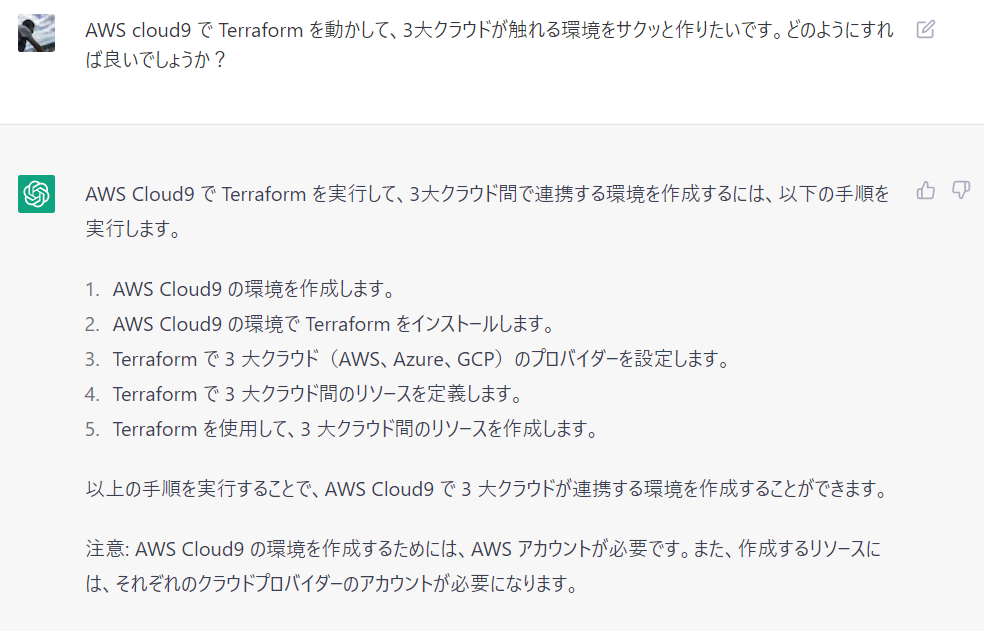
ChatGPTよりも良い情報を提供できたかはわかりませんが、この記事が誰かの助けになれば幸いです