はじめに
Unityでベンチマークをとるにあたり、以下の記事にあるPerformance Testing Extensionを試してみたので手順をメモしておく。
https://blogs.unity3d.com/jp/2018/09/25/performance-benchmarking-in-unity-how-to-get-started/
記事作成日(2020/10/28)時点で最新のドキュメントは以下の通り。(バージョン 2.3.1 preview)
https://docs.unity3d.com/Packages/com.unity.test-framework.performance@2.3/manual/index.html
手順
ドキュメント通りに設定すればいいが、わかりやすいようにキャプチャもつけてメモしておく。
manifest.jsonにパッケージを追加
パスは {Project}/Package/manifest.json にある。
{
  "dependencies": {
    "com.unity.test-framework.performance": "2.3.1-preview",
  }
}
TestRunnerの準備
使用するパッケージはドキュメントに書いてある通り、TestRunnerの拡張機能なため、TestRunnerの準備をする。
The Performance Testing Extension is intended to be used with, and complement, the Unity Test Runner framework.
TestRunnerについては以下の記事を参照するとわかりやすいため詳細は割愛する。
https://light11.hatenadiary.com/entry/2020/07/01/200253
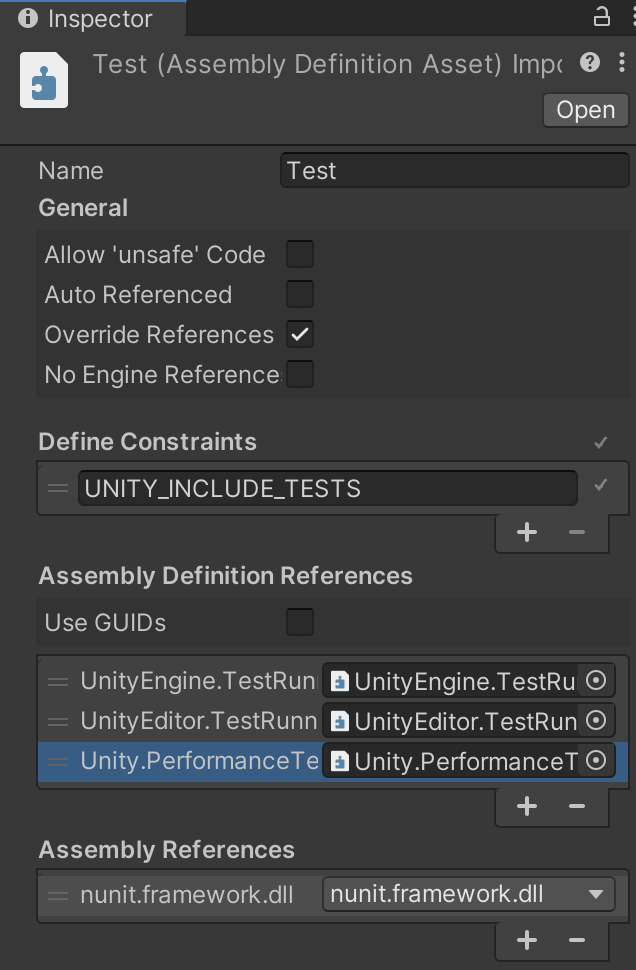
アセンブリに参照を追加
テスト用のAssembly Definition FileのAssembly Definition Referencesに Unity.PerformanceTesting を追加する。
Assembly Definitionについては以下の記事を参照するとわかりやすい。
https://qiita.com/toRisouP/items/d206af3029c7d80326ed
テストコードを書く
テストするメソッドに Performance 属性を追加する。
詳細はドキュメントのサンプルを参照のこと。
https://docs.unity3d.com/Packages/com.unity.test-framework.performance@2.3/manual/index.html#taking-measurements
[Test, Performance]
public void Test()
{
    Measure.Method(() => { ... }).Run();
}
テスト実行
TestRunnerを実行すると、TestReportでパフォーマンスの結果を確認することができる。
メニューの Window → Analysis → Performance Test Report からウィンドウを開くことができる。
テストの結果は以下のドキュメントのように表示される。
https://docs.unity3d.com/Packages/com.unity.test-framework.performance@2.3/manual/index.html#viewing-performance-test-report
詳細はドキュメントを参照のこと。
https://docs.unity3d.com/Packages/com.unity.test-framework.performance@2.3/manual/index.html#output
番外編
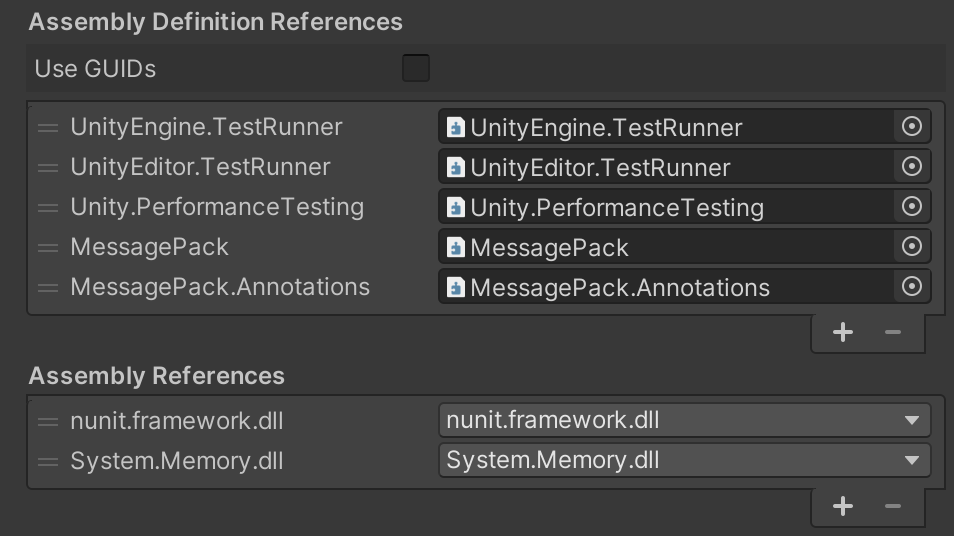
テスト用のアセンブリで MessagePack for C# を参照する時に必要なものをメモしておく。
必要なのは以下の3つ。
- Assembly Definition References
- MessagePack
- MessagePack.Annotations
- Assembly References
- System.Memory.dll

