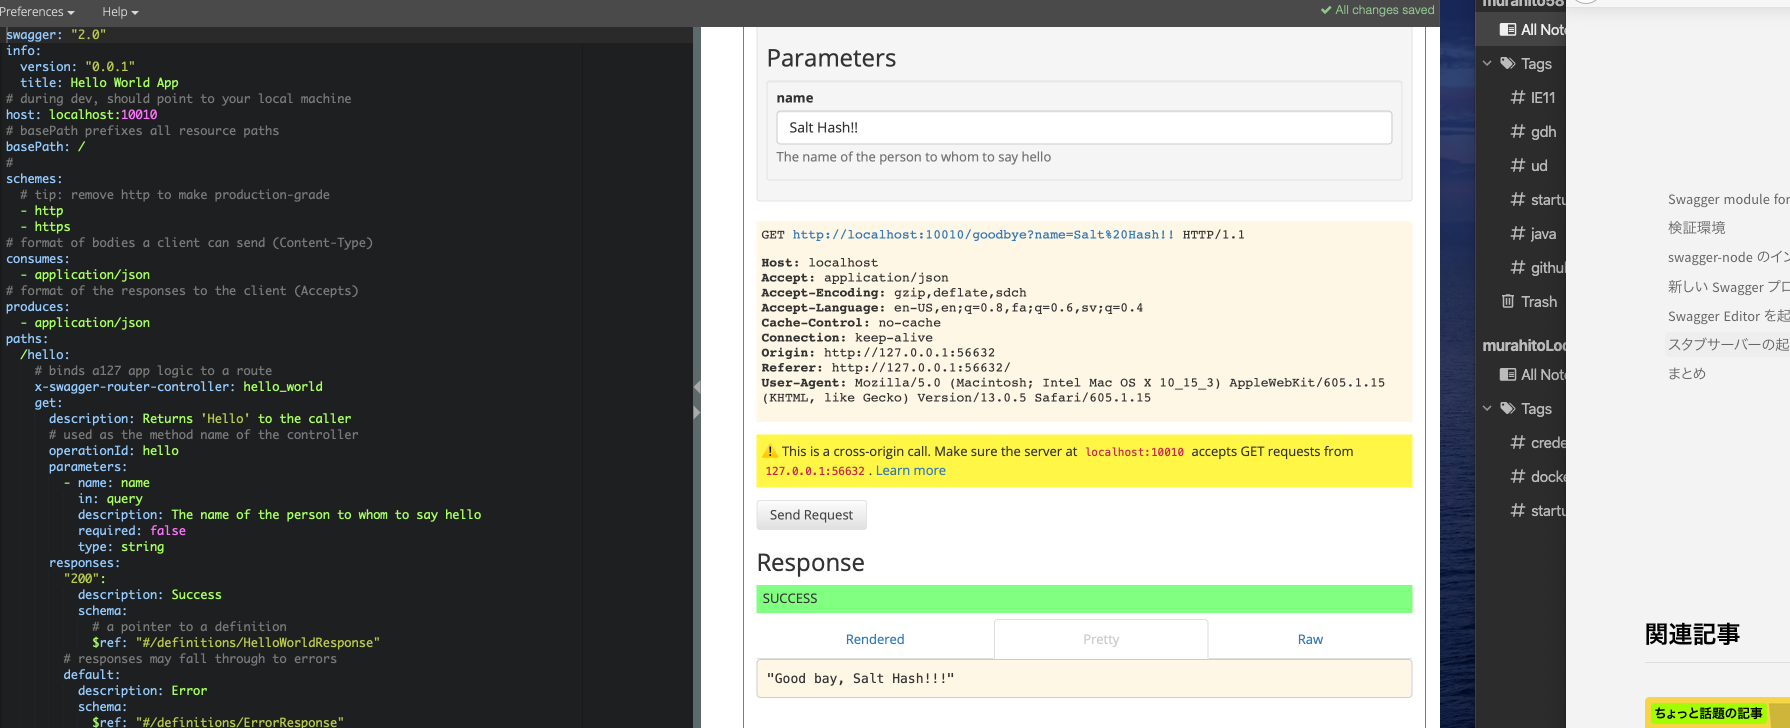
今回のゴール
APIの標準ドキュメントとして、またモックサーバーとしてSwaggerはとても便利です。
おそらく今やRESTful APIを利用するほとんどの開発現場におけるデファクトスタンダードではないでしょうか?
今回はそんなSwaggerを利用して、以下をやってみます
- Swaggerのローカルサーバーを立てる
- APIを追加する(モックです)
- APIをテストする
前提事項
npmやNodejsはインストールしておいてください。
今回は以下の環境で実施しました
node -v
v10.16.0

npm -v
6.9.0
Swagger環境のインストール
今回はNode.jsを利用して構築していきます
1. Swaggerモジュールをインストール
$ npm install -g swagger
2. Swaggerプロジェクトを構築
$ swagger project create hello-world
フレームワークを聞かれます。今回はNode.jsなのでexpressを選択
? Framework? (Use arrow keys)
  connect
❯ express
  hapi
  restify
  sails
$ cd cd hello-world

//依存性のあるモジュールをインストールします
$ npm install
サーバーを起動します
$ swagger project start
こんな感じでサーバーが立ち上がりました。ここまでで2分くらいでしょうか。
ここでhelloAPIを試してもいいです。私は5分でできると言っている手前、先に進みます🐱

3. APIを開発する
APIが入っている/controllers配下に簡単なモックAPIを作りましょう。
実はこちら元々あるhello.jsをコピーして、helloをgoodbyeに変えた簡単なものです🐱
'use strict';
/*
 'use strict' is not required but helpful for turning syntactical errors into true errors in the program flow
 https://developer.mozilla.org/en-US/docs/Web/JavaScript/Reference/Strict_mode
*/

/*
 Modules make it possible to import JavaScript files into your application.  Modules are imported
 using 'require' statements that give you a reference to the module.

  It is a good idea to list the modules that your application depends on in the package.json in the project root
 */
var util = require('util');

/*
 Once you 'require' a module you can reference the things that it exports.  These are defined in module.exports.

 For a controller in a127 (which this is) you should export the functions referenced in your Swagger document by name.

 Either:
  - The HTTP Verb of the corresponding operation (get, put, post, delete, etc)
  - Or the operationId associated with the operation in your Swagger document

  In the starter/skeleton project the 'get' operation on the '/hello' path has an operationId named 'hello'.  Here,
  we specify that in the exports of this module that 'hello' maps to the function named 'hello'
 */
module.exports = {
  goodbye: goodbye
};

/*
  Functions in a127 controllers used for operations should take two parameters:

  Param 1: a handle to the request object
  Param 2: a handle to the response object
 */
function goodbye(req, res) {
  // variables defined in the Swagger document can be referenced using req.swagger.params.{parameter_name}
  var name = req.swagger.params.name.value || 'stranger';
  var goodbye = util.format('Good bay, %s!', name);

  // this sends back a JSON response which is a single string
  res.json(goodbye);
}
続いてswaggerの定義ファイルであるswagger.yamlを更新しましょう。
追加する際はpaths:のhelloをコピーしてgoodbyeへ変更していきます。
これでGoodbyeAPIが画面に表示され、画面からテストすることができます。
paths:
  /hello:
    # binds a127 app logic to a route
    x-swagger-router-controller: hello_world
    get:
      description: Returns 'Hello' to the caller
      # used as the method name of the controller
      operationId: hello
      parameters:
        - name: name
          in: query
          description: The name of the person to whom to say hello
          required: false
          type: string
      responses:
        "200":
          description: Success
          schema:
            # a pointer to a definition
            $ref: "#/definitions/HelloWorldResponse"
        # responses may fall through to errors
        default:
          description: Error
          schema:
            $ref: "#/definitions/ErrorResponse"
  /goodbye:
    # binds a127 app logic to a route
    x-swagger-router-controller: goodbye
    get:
      description: Returns 'Good Bye' to the API Caller.
      # used as the method name of the controller
      operationId: goodbye
      parameters:
        - name: name
          in: query
          description: The name of the person to whom to say hello
          required: false
          type: string
      responses:
        "200":
          description: Success
          schema:
            # a pointer to a definition
            $ref: "#/definitions/HelloWorldResponse"
        # responses may fall through to errors
        default:
          description: Error
          schema:
            $ref: "#/definitions/ErrorResponse"
ここまでで4分24秒経過といったところでしょうか🐱
4. APIをテストする
Swaggerの表示しているブラウザをリフレッシュしてみましょう。
/goodbyeAPIが追加されたはずです✅

早速Try this operationから実行しましょう。
Parametersに適当な文字列を入れて、Send Request🐱
レスポンスにSUCCESSが返ってきました😄😄

いかがでしたでしょうか?
最も初歩的な使い方ですが、Swaggerの簡単さが伝わりましたら幸いです🐱
ソースコードも公開していますので、適宜ご利用ください
https://github.com/salthash329/swagger-sample
参考
https://github.com/swagger-api/swagger-node
https://github.com/swagger-api/swagger-node/blob/master/docs/quick-start.md