はじめに
DeepWiki-OpenはGithubリポジトリをRAG機能等で解析し,LLMで対話可能なWikiとしてまとめてくれるツールであるDeepWikiのオープンソース版です.
Ubuntu環境で構築します.
準備
Dockerコンテナで実装します.
- リポジトリのクローン
git clone https://github.com/AsyncFuncAI/deepwiki-open.git
cd deepwiki-open
- 環境変数の設定
- ダミーキーで大丈夫です.
Ollamaを使用する場合でも,OpenAIとGoogleのAPIキー設定はやっておいたほうが良い(らしい)
- ダミーキーで大丈夫です.
echo "GOOGLE_API_KEY=your_google_api_key" > .env
echo "OPENAI_API_KEY=your_openai_api_key" >> .env

# Optional: Add Ollama host if not local. defaults to http://localhost:11434
echo "OLLAMA_HOST=your_ollama_host" >> .env
- モデル変更
- 生成モデルと埋め込みモデルをollma対応のモデルに変更します.
generator.json
    "ollama": {
      "default_model": "qwen3:1.7b",
      "supportsCustomModel": true,
      "models": {
        "qwen3:1.7b": {
          "options": {
            "temperature": 0.7,
            "top_p": 0.8,
            "num_ctx": 32000
          }
        },
        "gemma3:12b": {
          "options": {
            "temperature": 0.7,
            "top_p": 0.8,
            "num_ctx": 8192
          }
        },
        "qwen3:8b": {
          "options": {
            "temperature": 0.7,
            "top_p": 0.8,
            "num_ctx": 32000
          }
        }
      }
    }
embedder.json
{
  "embedder": {
    "client_class": "OllamaClient",
    "model_kwargs": {
      "model": "nomic-embed-text"
    }
  },
  "embedder_ollama": {
    "client_class": "OllamaClient",
    "model_kwargs": {
      "model": "nomic-embed-text"
    }
  },
  "retriever": {
    "top_k": 20
  },
  "text_splitter": {
    "split_by": "word",
    "chunk_size": 200,
    "chunk_overlap": 50
  }
}
コンテナ生成時にqwen3:1.7bとnomic-embed-textのみダウンロードされるためモデルを追加する場合は手動でダウンロードが必要です.
docker exec -it deepwiki ollama pull 追加したいモデル
起動
Dockerfile-ollama-Localを使用してコンテナを起動します.
デフォルトでアーキテクチャがTARGETARCH=arm64に設定されているため,AMD64環境では明示的に指示が必要です
docker build -f Dockerfile-ollama-local --build-arg TARGETARCH=amd64 -t deepwiki:ollama-local .

docker run -p 3000:3000 -p 8001:8001 --name deepwiki -v ~/.adalflow:/root/.adalflow deepwiki:ollama-local
マウントしたディレクトリの権限変更(エラー回避のため)
sudo chmod -R 755 ~/.adalflow
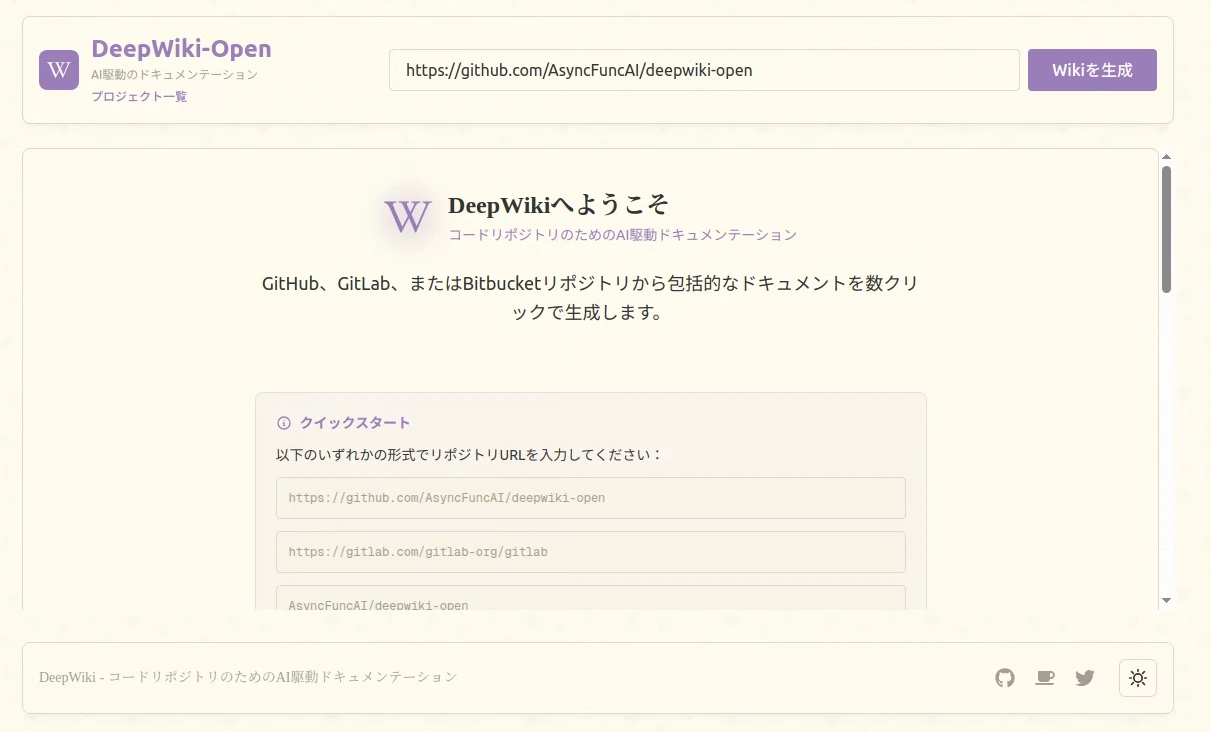
http://localhost:3000にアクセスし,次のような画面が出れば成功です.
リポジトリurlを変更し"Wikiを生成"を押すと設定画面になります.
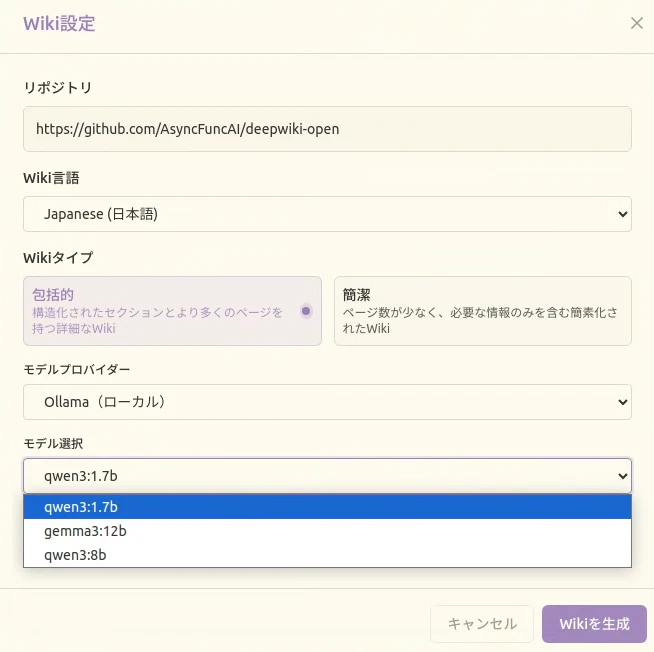
上記で設定したgemma3:12bが認識されています.
プライベートリポジトリで試してみる
wiki生成時に対象リポジトリがクローンされるため,アクセストークンを入力します.

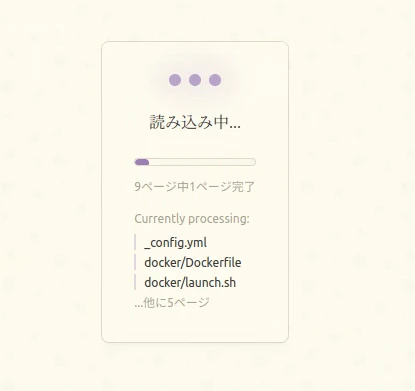
生成が始まると以下のような画面になるのでしばらく待ちます.
wiki生成が完了しました.
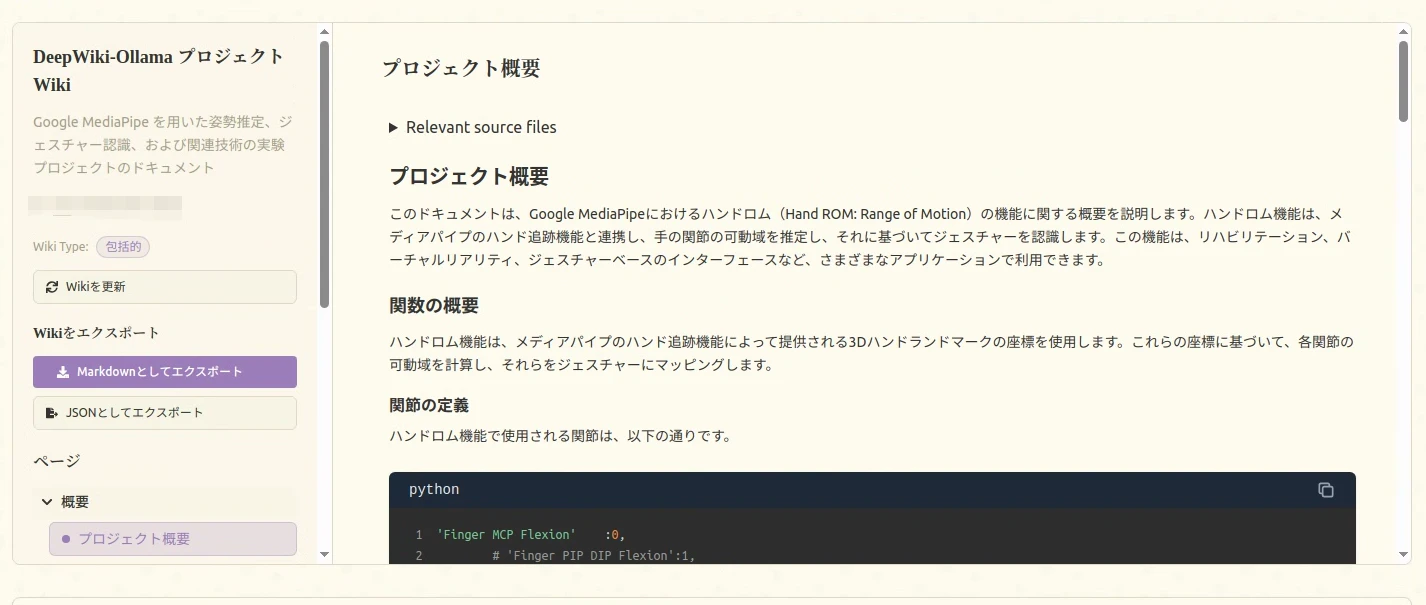
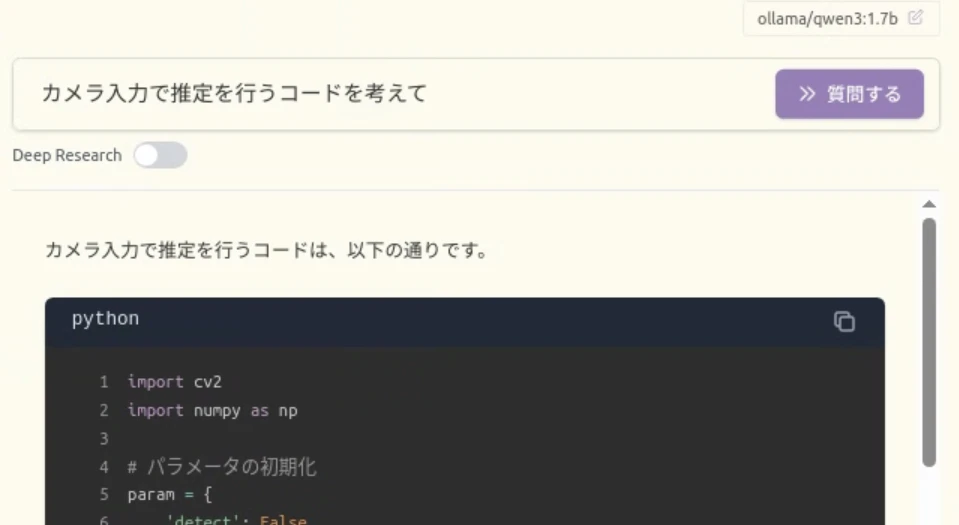
質問を行うとwikiの内容に沿って回答してくれます.
まとめ
モデルによってはwiki生成に時間がかかりますが,学習されたくないデータを使用して対話できるのは良いと思います