業務でプロキシサーバーが必要になったのでその時のメモ書き。
Squidのインストールコマンド
yum install -y squid
Squidの設定ファイル操作
vi /etc/squid/squid.conf
Squidの設定変更箇所(2箇所)
1) 設定のコメントアウト
コメントアウトする前
# And finally deny all other access to this proxy
http_access deny all
コメントアウトする後
# And finally deny all other access to this proxy
# http_access deny all
2) 設定の追記(最終行)
以下のxxx.xxx.xxx.xxxは、グローバルIPアドレス。
http://www.ugtop.com/spill.shtml のあなたのIPアドレス(IPv4)が該当箇所。
最終行に追記
acl myacl src xxx.xxx.xxx.xxx/255.255.255.255
http_access allow myacl
http_access deny all
#  ↑ http_access deny all より上の部分でマッチしていれば接続OKになる

forwarded_for off
header_access X-Forwarded-For deny all
header_access Via deny all
header_access Cache-Control deny all
Squidのキャッシュクリア
squid -z
Squidの起動
service squid start
ファイヤーウォールの設定:ポート開放
ポート番号は、3128(初期設定)
sudo firewall-cmd --add-port=3128/tcp --zone=public --permanent
ファイヤーウォールの設定:IP開放
sudo firewall-cmd --add-source=xxx.xxx.xxx.xxx/32--zone=public
ファイヤーウォールを再起動
sudo firewall-cmd --reload
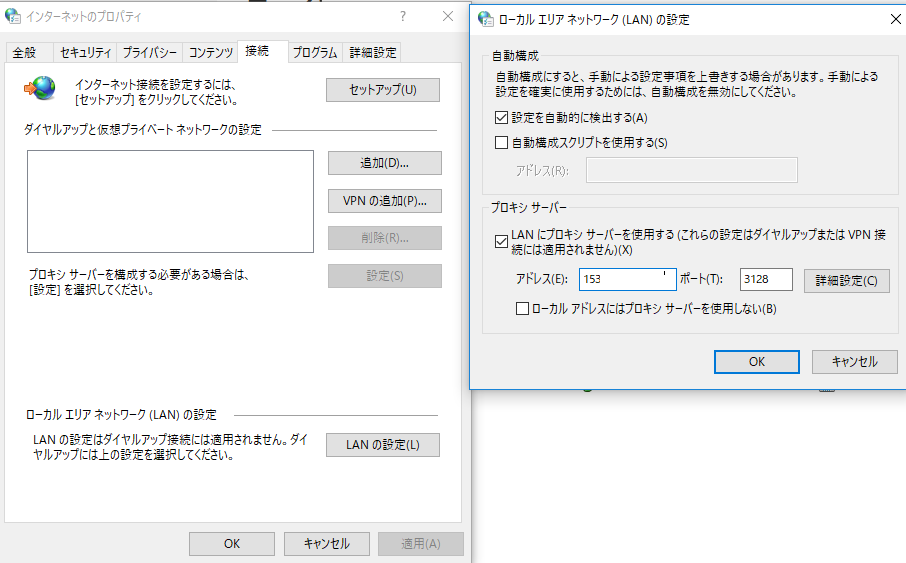
プロキシサーバ経由で接続するためのWindowsの設定
プロキシサーバーのアクセスログ確認
sudo tail -10 /var/log/squid/access.log