CentOS8+Dockerな環境で整理しなおしました。
docker-composeでcacti1.2.8+グラフを日本語化
はじめに
このエントリはCentOS7にcactiをインストールする手順を記載します。
更新
2020/1/20 CentOS、cacti、ともに最新版で更新しています。
対象機器および環境
- CentOS7(7.7.1908)
- cacti/spine(1.2.8)
- MariaDB(10.4)
関連するエントリ
cactiとは
サーバや通信機器のグラフレポーティングツール。
基本的な機能はSNMPにより情報を取得しグラフ化する。
データの収集はrrdtoolによる。
自作スクリプトを利用すればあらゆる数値情報をグラフ化できる。
インストール手順
SELinux
-----8<-----snip-----8<-----
# SELINUX=enforced
SELINUX=disabled
-----8<-----snip-----8<-----
再起動して設定を適用する。
# shutdown -r now
# getenforce
Disabled
#
MariaDB用リポジトリ準備
手順は公式サイトを参照
[mariadb]
name = MariaDB
baseurl = http://yum.mariadb.org/10.4/centos7-amd64
gpgkey=https://yum.mariadb.org/RPM-GPG-KEY-MariaDB
gpgcheck=1
mariadb-libsを事前に削除しておく
# yum remove mariadb-libs
パッケージインストール
cactiはepelに含まれるので、リポジトリをインストールする。
cactiと付随するソフトウェアは依存関係で自動的にインストールされる。
日本語フォントも入れておくので、明示的に指定する。
# yum install epel-release
# yum update
# yum install mariadb-server cacti-spine php ipa-*-fonts
ファイアウォール設定(firewalld)
必要なポートに穴あけ
# firewall-cmd --add-service=http --zone=public --permanent
# firewall-cmd --add-service=snmp --zone=public --permanent
# firewall-cmd --add-service=snmptrap --zone=public --permanent
# firewall-cmd --reload
apache設定
日本語対応
-----8<-----snip-----8<-----
# LANG=C
HTTPD_LANG=ja_JP.UTF-8
-----8<-----snip-----8<-----
サービス自動起動の設定
# systemctl enable httpd
# systemctl start httpd
# systemctl status httpd
php環境設定
-----8<-----snip-----8<-----
;max_execution_time = 30
max_execution_time = 60
;memory_limit = 128M
memory_limit = 800M
date.timezone = 'Asia/Tokyo'
-----8<-----snip-----8<-----
MariaDBの設定
MariaDBの設定はcacti利用時にチェックされる下記の設定を追加する。
-----8<-----snip-----8<-----
[server]
collation_server=utf8mb4_unicode_ci
character-set-server=utf8mb4
character_set_client=utf8mb4
max_heap_table_size=32M
tmp_table_size=32M
join_buffer_size=64M
innodb_file_format=Barracuda
innodb_large_prefix=1
innodb_buffer_pool_size=1024M
innodb_flush_log_at_timeout=3
innodb_read_io_threads=32
innodb_write_io_threads=16
innodb_buffer_pool_instances=11
innodb_io_capacity=5000
-----8<-----snip-----8<-----
サービス自動起動の設定
# systemctl enable mariadb
# systemctl status mariadb
# systemctl start  mariadb
初回設定スクリプトの実行
# mysql_secure_installation

NOTE: RUNNING ALL PARTS OF THIS SCRIPT IS RECOMMENDED FOR ALL MariaDB
      SERVERS IN PRODUCTION USE!  PLEASE READ EACH STEP CAREFULLY!

In order to log into MariaDB to secure it, we'll need the current
password for the root user. If you've just installed MariaDB, and
haven't set the root password yet, you should just press enter here.

Enter current password for root (enter for none):
OK, successfully used password, moving on...

Setting the root password or using the unix_socket ensures that nobody
can log into the MariaDB root user without the proper authorisation.

You already have your root account protected, so you can safely answer 'n'.

Switch to unix_socket authentication [Y/n]
Enabled successfully!
Reloading privilege tables..
 ... Success!


You already have your root account protected, so you can safely answer 'n'.

Change the root password? [Y/n]
New password:
Re-enter new password:
Password updated successfully!
Reloading privilege tables..
 ... Success!


By default, a MariaDB installation has an anonymous user, allowing anyone
to log into MariaDB without having to have a user account created for
them.  This is intended only for testing, and to make the installation
go a bit smoother.  You should remove them before moving into a
production environment.

Remove anonymous users? [Y/n]
 ... Success!

Normally, root should only be allowed to connect from 'localhost'.  This
ensures that someone cannot guess at the root password from the network.

Disallow root login remotely? [Y/n]
 ... Success!

By default, MariaDB comes with a database named 'test' that anyone can
access.  This is also intended only for testing, and should be removed
before moving into a production environment.

Remove test database and access to it? [Y/n]
 - Dropping test database...
 ... Success!
 - Removing privileges on test database...
 ... Success!

Reloading the privilege tables will ensure that all changes made so far
will take effect immediately.

Reload privilege tables now? [Y/n]
 ... Success!

Cleaning up...

All done!  If you've completed all of the above steps, your MariaDB
installation should now be secure.

Thanks for using MariaDB!
#
タイムゾーン設定
# mysql_tzinfo_to_sql /usr/share/zoneinfo | mysql -u root -p mysql
cacti用データベースの作成
# mysql -u root -p
MariaDB> create database cacti;
MariaDB> GRANT ALL ON cacti.* TO cactiuser@localhost IDENTIFIED BY 'cactipwd';
MariaDB> grant select on mysql.time_zone_name to cactiuser@localhost identified by 'cactipwd';
MariaDB> flush privileges;
MariaDB> quit;

# mysql -u cactiuser -pcactipwd cacti < /usr/share/doc/cacti-1.2.*/cacti.sql
cacti環境設定
cron有効化(デフォルトで設定されているもののコメントアウトを解除)
*/5 * * * * apache /usr/bin/php /usr/share/cacti/poller.php > /dev/null 2>&1
cactiで利用するデータベース設定
-----8<-----snip-----8<-----
$database_default  = 'cacti';
$database_username = 'cactiuser';
$database_password = 'cactipwd';
-----8<-----snip-----8<-----
spine用の設定ファイルをバックアップしてから編集
cp /etc/spine.conf /etc/spine.conf.orig
-----8<-----snip-----8<-----
DB_Host                 localhost
DB_Database             cacti
DB_User                 cactiuser
DB_Pass                 cactipwd
DB_Port                 3306

RDB_Host                localhost
RDB_Database            cacti
RDB_User                cactiuser
RDB_Pass                cactipwd
RDB_Port                3306
-----8<-----snip-----8<-----
apache用の設定ファイル修正
-----8<-----snip-----8<-----
<Directory /usr/share/cacti/>
        <IfModule mod_authz_core.c>
                # httpd 2.4
                Require host localhost
                Require all granted        # <--- 追加
        </IfModule>
        <IfModule !mod_authz_core.c>
                # httpd 2.2
                Order deny,allow
                Deny from all
                Allow from localhost
        </IfModule>
</Directory>
-----8<-----snip-----8<-----
apacheを再起動する
systemctl restart httpd
web上での初期設定
ブラウザで
http://[IPアドレス]/cacti/
にアクセスする。
初期アカウントは admin/admin でログイン

直後に変更を促されるので、パスワードを変更する。

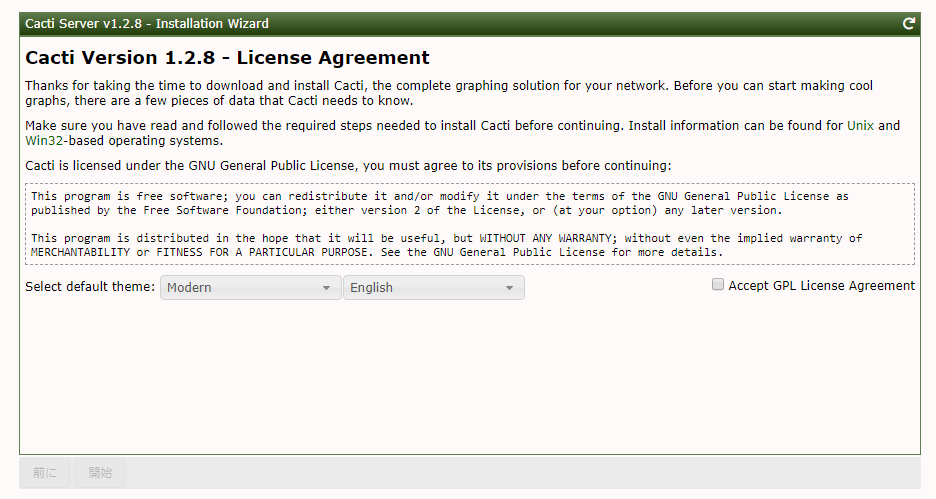
ライセンスに同意して次へ進む
環境変数などの確認
(問題がある箇所は Passed以外になったり、赤字で表示。適宜修正して右上のリロードマークをクリックしながらチェック)
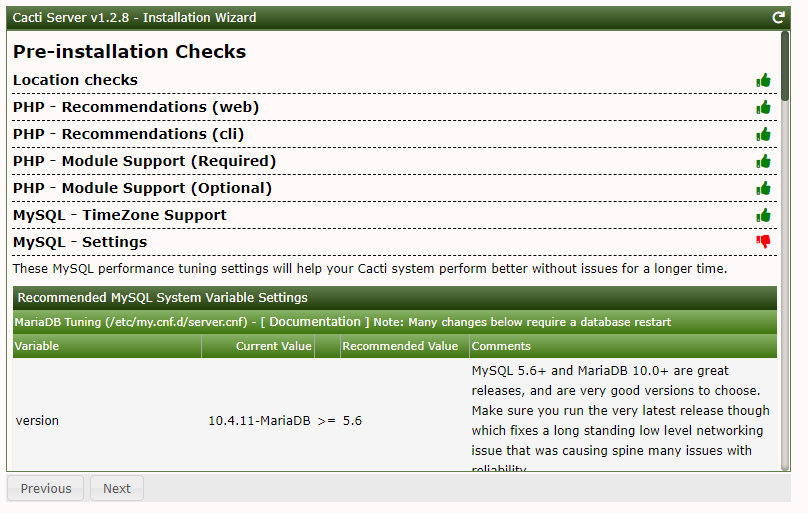
(問題がない状態となれば、緑のいいねマークになる)
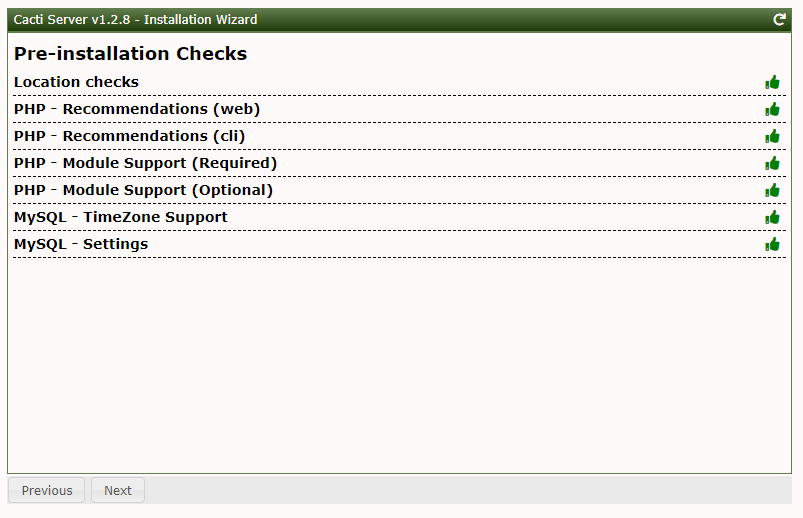
確認に問題なければ、最下部の「Next」がクリックできる状態になるので、クリックする。
(問題がある場合には、確認結果が赤文字になり、「Next」がクリックできない状態になる)
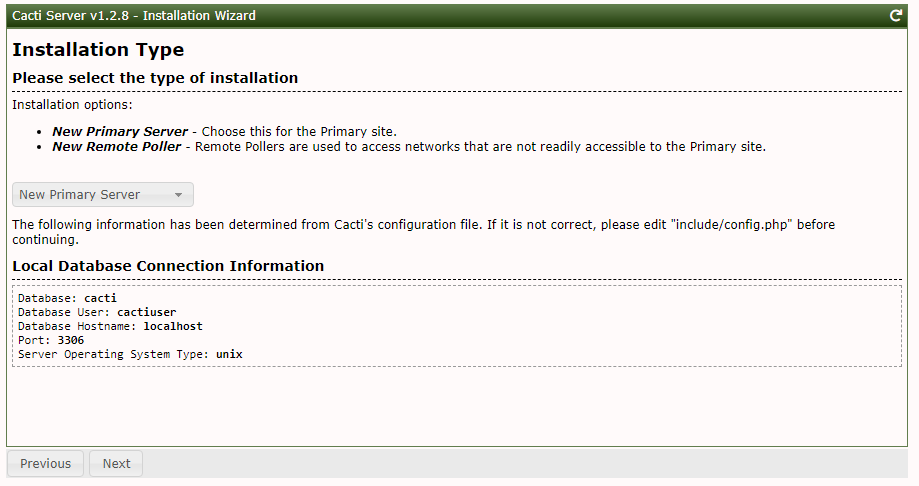
今回はスタンドアロンでの構築なので、「New Primary Server」(デフォルト)を選択して「Next」をクリック
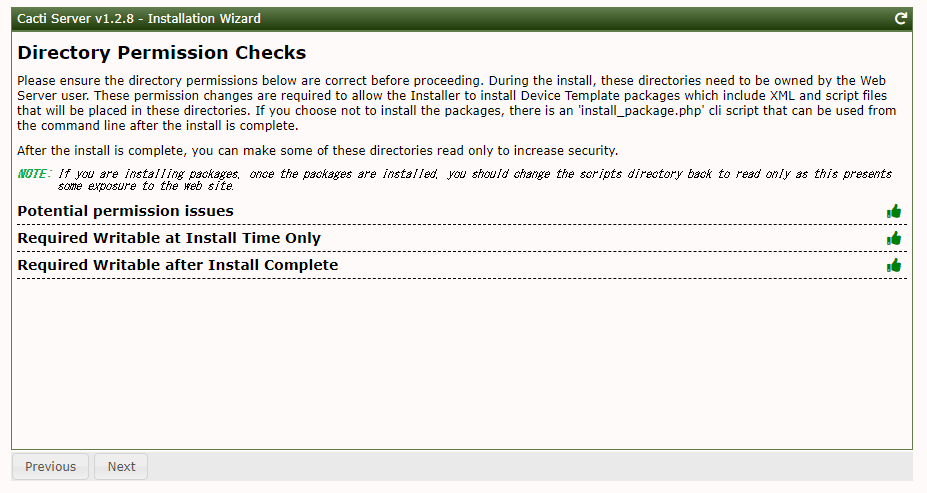
ディレクトリのパーミッション確認に問題なければ、最下部の「Next」がクリックできる状態になるので、クリックする。
(問題がある場合には、確認結果が赤文字になり、「Next」がクリックできない状態になる)
その他のソフトウェア確認に問題なければ、最下部の「Next」がクリックできる状態になるので、クリックする。
(問題がある場合には、確認結果が赤文字になり、「Next」がクリックできない状態になる)

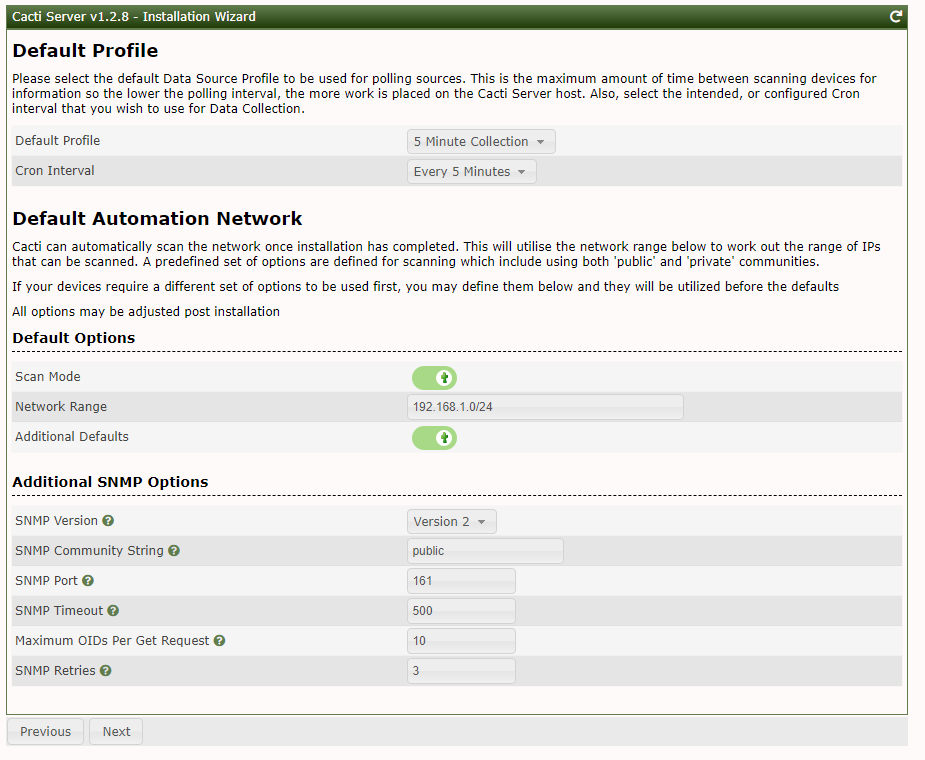
デフォルトのプロファイルを選択。今回はCron設定を5分おきのポーリングを5分で選択。
ScanModeをオン(ボタンが右側になり薄い緑がON状態:ちょっとわかりにくい)にすると、スキャンしてくれる。
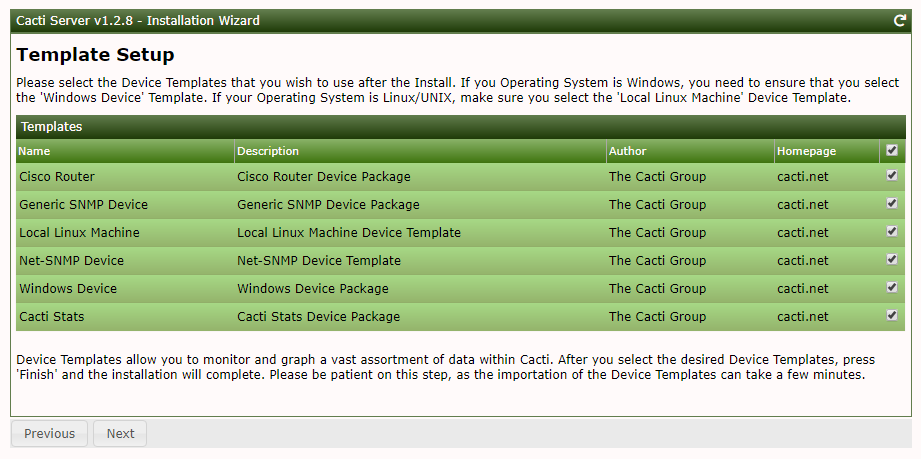
必要なテンプレートを選択して「Next」をクリック
(とりあえず全部選択しといてよいです)
文字コードのチェックで問題なければ、そのまま「Next」をクリック
(文字コードを変えろという指令がでる場合は指示に従う。 )

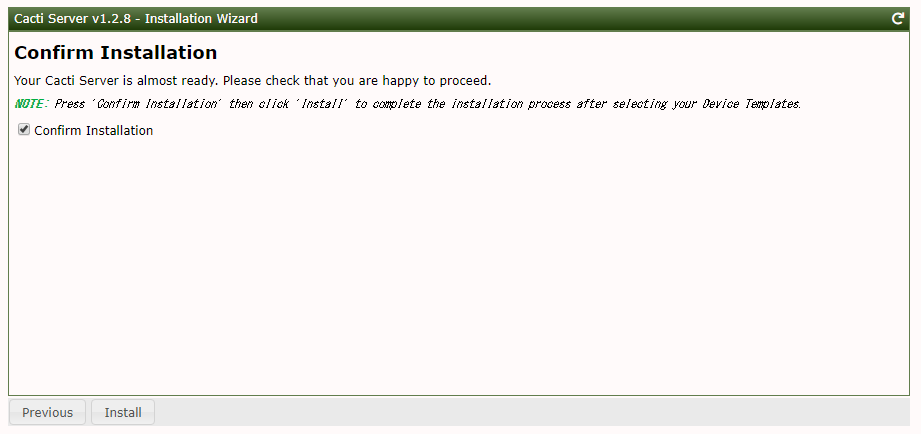
Confirm Installation にチェックを入れて、「Install」をクリック
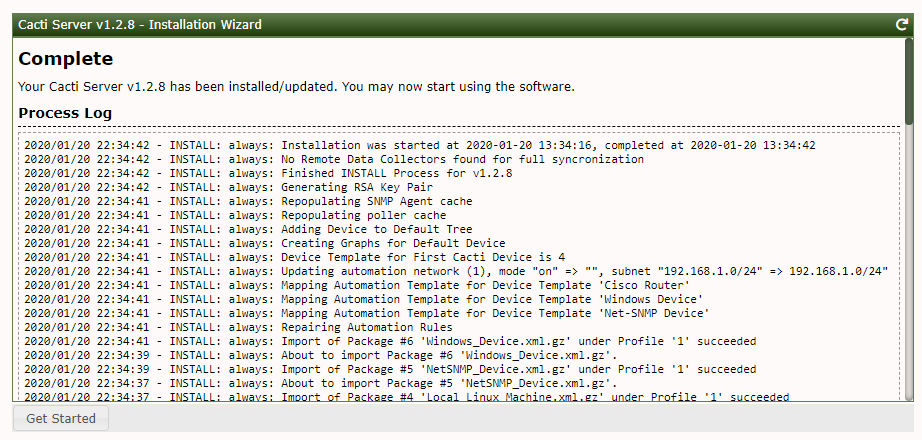
インストールログが表示されれば完了。「Get Started」をクリック
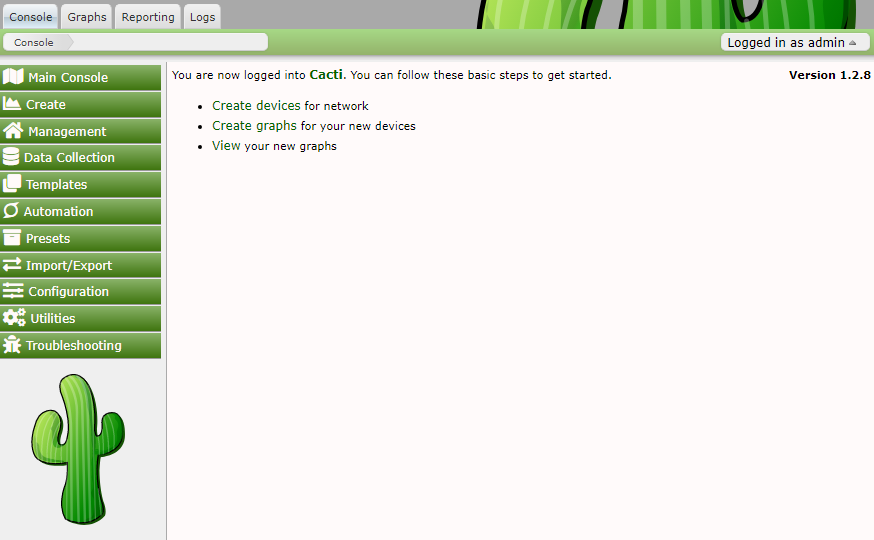
全部終わると、トップページに遷移します。
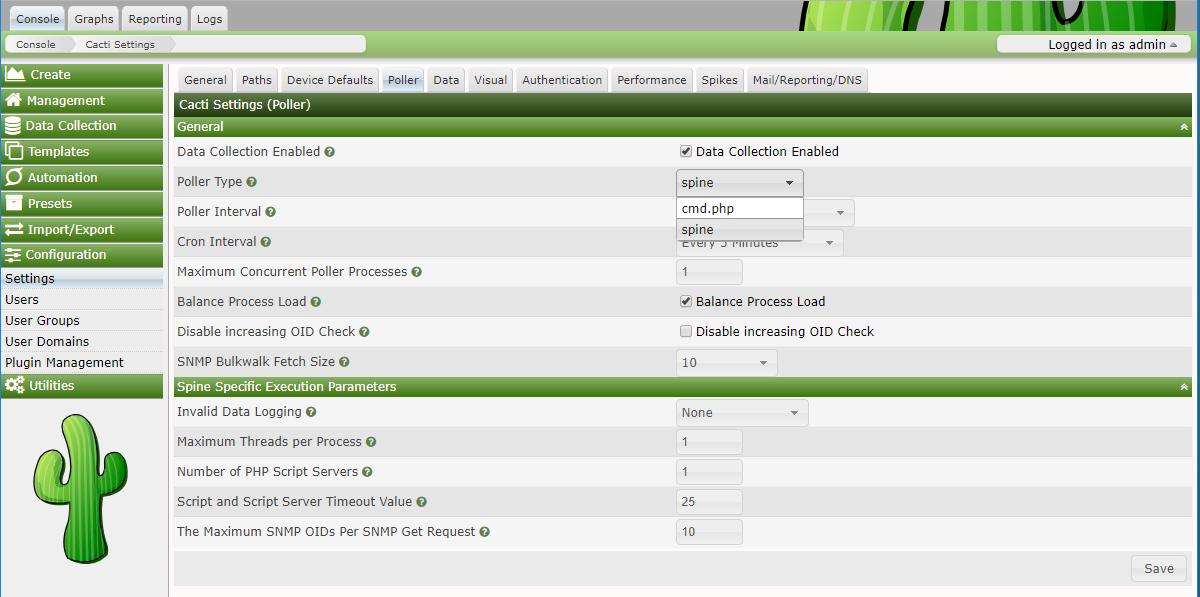
spineの設定
標準のPollerよりも高速なSpineでポーリングできるようにする。
上部メニュ「Console」→サイドメニュ「Configuration」→「Settings」→「Poller」タブのPollerTypeを "cmd.php" から "spine" に変更して、右下の「Save」をクリックする。
もし、うまく値が取得できない場合は、コマンドラインで動作確認してみる
# spine -V=3 -R
SPINE: Using spine config file [/etc/spine.conf]
SPINE: Version 1.1.38 starting
2019/01/09 23:07:24 - SPINE: Poller[1] NOTE: Spine will support multithread device polling.
2019/01/09 23:07:24 - SPINE: Poller[1] DEBUG: Initial Value of Active Threads is 0
2019/01/09 23:07:24 - SPINE: Poller[1] SPINE: Active Threads is 1, Pending is 1
2019/01/09 23:07:24 - SPINE: Poller[1] Device[1] TH[1] NOTE: There are '5' Polling Items for this Device
2019/01/09 23:07:24 - SPINE: Poller[1] Device[1] TH[1] DS[1] SCRIPT: perl /usr/share/cacti/scripts/unix_processes.pl, output: 184
2019/01/09 23:07:24 - SPINE: Poller[1] Device[1] TH[1] DS[2] SCRIPT: perl /usr/share/cacti/scripts/loadavg_multi.pl, output: 1min:0.00 5min:0.02 10min:0.09
2019/01/09 23:07:24 - SPINE: Poller[1] Device[1] TH[1] DS[3] SCRIPT: perl /usr/share/cacti/scripts/unix_users.pl '', output: 1
2019/01/09 23:07:24 - SPINE: Poller[1] Device[1] TH[1] DS[4] SCRIPT: perl /usr/share/cacti/scripts/linux_memory.pl 'MemFree:', output: 793572
2019/01/09 23:07:24 - SPINE: Poller[1] Device[1] TH[1] DS[5] SCRIPT: perl /usr/share/cacti/scripts/linux_memory.pl 'SwapFree:', output: 2097148
2019/01/09 23:07:24 - SPINE: Poller[1] Device[1] TH[1] Total Time: 0.058 Seconds
2019/01/09 23:07:24 - SPINE: Poller[1] POLLR: Active Threads is 0, Pending is 0
2019/01/09 23:07:25 - SPINE: Poller[1] SPINE: The Final Value of Threads is 0
2019/01/09 23:07:25 - SPINE: Poller[1] Time: 1.0277 s, Threads: 1, Devices: 1
#
outputにそれっぽい数字が取得できていることが確認できれば、取得できているはず。
動作確認
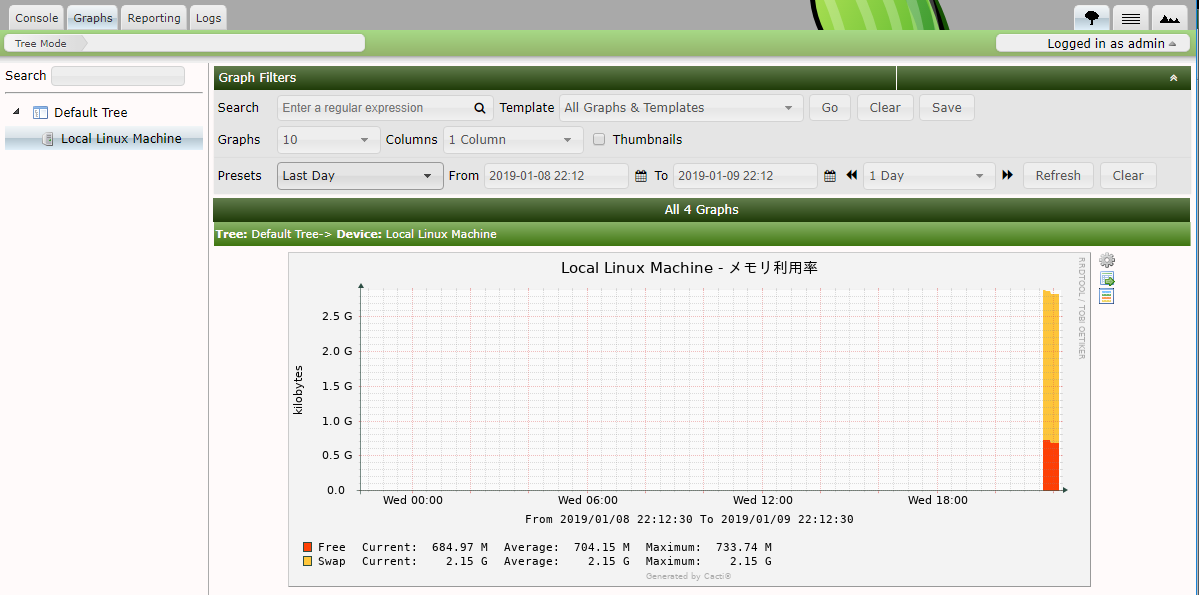
適当なグラフのタイトルを日本語にしてみると、きちんと日本語化もできています。
その他の設定
過去グラフの参照
インストール直後のデフォルト設定のままでは、3日以上前のデータは平均化され、取得した値が消えてしまいます。
以下参照して、長期間データを細かく取得できるようにしておくとよいです。
https化
自営CAでのサーバ証明書発行は こちら を参照してください。
# yum install mod_ssl
# systemctl restart httpd
# firewall-cmd --add-service=https --zone=public --permanent
# firewall-cmd --reload
さいごに
感想
0.8.8の頃に比べると格段にインストールしやくすなったと思います。
1.xになってUIもスタイリッシュになったのですが、動作がもっさりしてしまったような。。。