やったこと
AVFoundation.frameworkを使用したQRコードの読み取り
開発環境
- X-code10.1
- 言語:objective-c
早速ですが補足
コードには自信ないです。
とりあえず動いたよ!レベルを記載していますので、ご注意ください(´・ω・`)
※もちろん動作確認はしてます。
ご指摘等ございましたら、コメント欄にいただけると幸いです。
実装内容
HomeViewControllerのボタンを押下→QrCodeReaderViewControllerを起動して
QRコードのURLをログ出力
実装内容
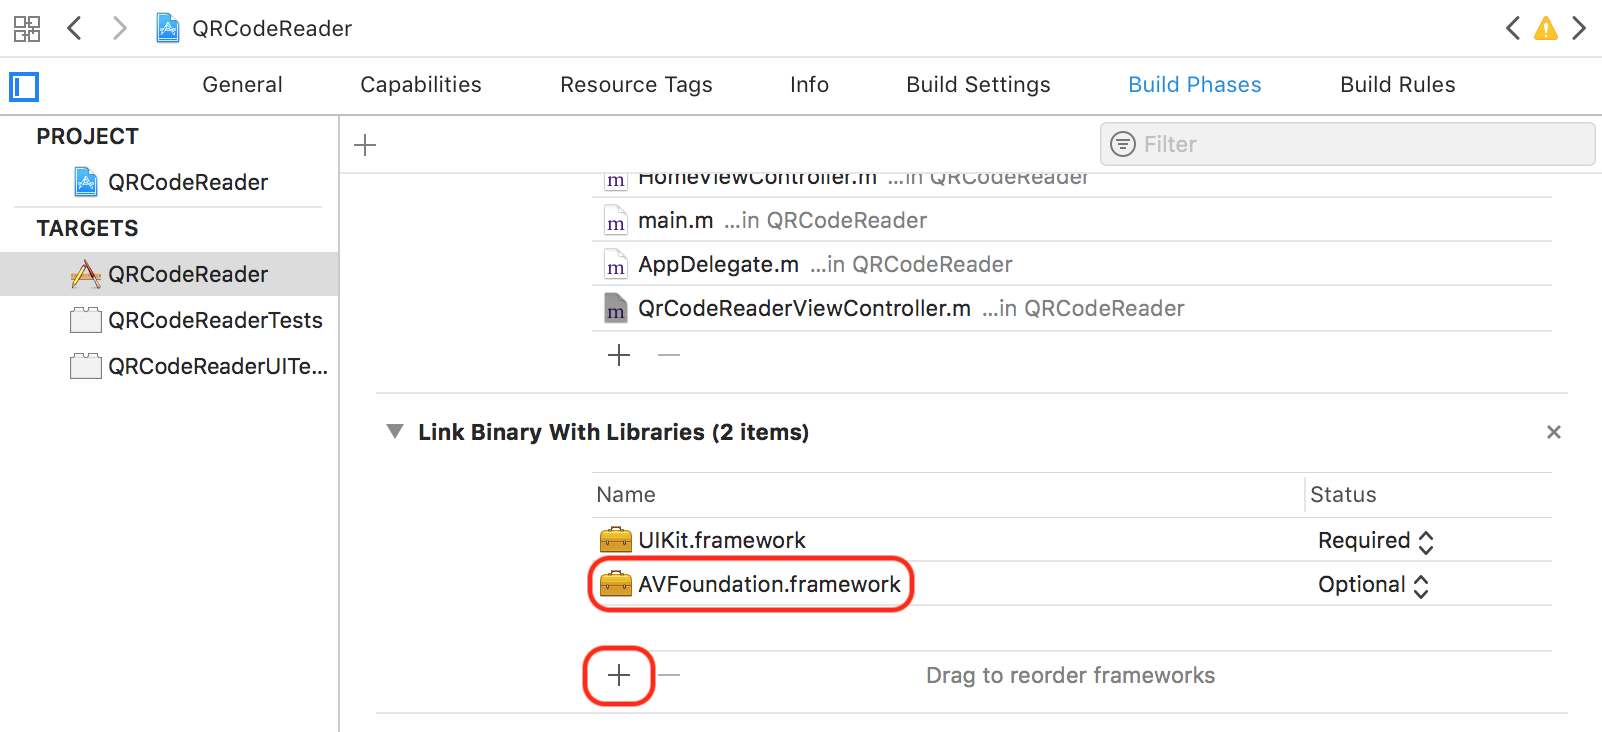
「+」ボタンから、AVFoundation.frameworkを追加
HomeViewControllerにstoryBord上にボタンを設置する。
ボタンを押したら、QrCodeReaderViewControllerに遷移するようにする。
HomeViewController.m
- (IBAction)pushQRCodeReaderButton:(UIButton *)sender {
    // QRコード読み取り画面を起動
    UIStoryboard *storyboard = [UIStoryboard storyboardWithName:@"Main" bundle:nil];
    QrCodeReaderViewController *qrCodeReaderViewController = [storyboard instantiateViewControllerWithIdentifier:@"QrCodeReaderViewController"];
    UINavigationController *navigationController = [[UINavigationController alloc] initWithRootViewController:qrCodeReaderViewController];
    [self presentViewController:navigationController animated:YES completion:nil];
}
QrCodeReaderViewController.m
# import "QrCodeReaderViewController.h"
# import <AVFoundation/AVFoundation.h>

@interface QrCodeReaderViewController () <AVCaptureMetadataOutputObjectsDelegate>

/// カメラのセッション
@property (strong, nonatomic) AVCaptureSession* session;

@end

@implementation QrCodeReaderViewController

- (void)viewDidLoad {
    [super viewDidLoad];
    // 閉じるボタン
    UIBarButtonItem * closeButtonItem = [[UIBarButtonItem alloc] initWithBarButtonSystemItem:UIBarButtonSystemItemStop target:self action:@selector(cancel:)];
    self.navigationItem.rightBarButtonItem = closeButtonItem;
    // カメラを起動する
    [self startCameraSession];
}
/// カメラを起動する
-(void)startCameraSession {
    // カメラを取得→AVMediaTypeVideoを使用
    AVCaptureDevice *device = [AVCaptureDevice defaultDeviceWithMediaType:AVMediaTypeVideo];
    // セッション作成
    self.session = [[AVCaptureSession alloc] init];
    // 入力
    AVCaptureDeviceInput *input = [AVCaptureDeviceInput deviceInputWithDevice:device error:nil];

    if (input) {
        // セッションにAVCaptureDeviceInputオブジェクトを追加
        [self.session addInput:input];
        // 出力
        AVCaptureMetadataOutput *output = [[AVCaptureMetadataOutput alloc] init];
        // セッションにAVCaptureMetadataOutputオブジェクトを追加
        [self.session addOutput:output];
        // 読み取りたいバーコードの種類を指定
        [output setMetadataObjectsDelegate:self queue:dispatch_get_main_queue()];
        [output setMetadataObjectTypes:@[AVMetadataObjectTypeQRCode, AVMetadataObjectTypeEAN13Code]];
        // プレビュー用のAVCaptureVideoPreviewLayerを生成してViewControllerにサブレイヤとして追加する
        AVCaptureVideoPreviewLayer *preview = [AVCaptureVideoPreviewLayer layerWithSession:self.session];
        // カメラを縦いっぱいに表示
        preview.videoGravity = AVLayerVideoGravityResizeAspectFill;
        preview.frame = CGRectMake(0, 0, self.view.frame.size.width, self.view.frame.size.height);
        [self.view.layer insertSublayer:preview atIndex:0];

        // セッションの動作を開始する→実際にデータが取得できるようになる
        [self.session startRunning];
    } else {
        // カメラの使用が未許可の(初回に表示されるアラートで「許可しない」を選択した)時
        UIAlertController *alertCntrl = [UIAlertController alertControllerWithTitle:@"確認"
                                                                            message:[@"端末の設定画面からカメラの使用を許可してください。" stringByReplacingOccurrencesOfString:@"\\n" withString:@"\n"]
                                                                     preferredStyle:UIAlertControllerStyleAlert];
        // ボタン追加
        [alertCntrl addAction:[UIAlertAction actionWithTitle:@"OK"
                                                       style:UIAlertActionStyleCancel handler:^(UIAlertAction *action) {
                                                           [self dismissViewControllerAnimated:YES completion:nil];
                                                       }]];
        [self presentViewController:alertCntrl animated:YES completion:nil];
    }
}

/// 閉じるボタン
- (void)cancel:(UIBarButtonItem *)barButtonItem {
    [self dismissViewControllerAnimated:YES completion:nil];
}

/// QRコード読み取り時に呼ばれる
- (void)captureOutput:(AVCaptureOutput *)captureOutput
didOutputMetadataObjects:(NSArray *)metadataObjects
       fromConnection:(AVCaptureConnection *)connection {
    for (AVMetadataObject *data in metadataObjects) {
        if (![data isKindOfClass:[AVMetadataMachineReadableCodeObject class]]) continue;
        // QRコードデータの時
        NSString *qrCodeDataStr = [(AVMetadataMachineReadableCodeObject *)data stringValue];
        if ([data.type isEqualToString:AVMetadataObjectTypeQRCode]) {
            NSURL *url = [NSURL URLWithString:qrCodeDataStr];
            if ([[UIApplication sharedApplication] canOpenURL:url]) {
                NSLog(@"%@",url);
            }
        }
    }
    // 画面を閉じる
    [self dismissViewControllerAnimated:YES completion:nil];
}

@end
最後にinfo.plistの編集

info.plistにPrivacy - Camera Usage Descriptionを追加し忘れると
以下のエラーでアプリがクラッシュしますので、注意しましょう。
[access] This app has crashed because it attempted to access privacy-sensitive data without a usage description. The app's Info.plist must contain an NSCameraUsageDescription key with a string value explaining to the user how the app uses this data.