0.概要
これまでRaspberryPi同士を通信させたい時はインフラストラクチャーもしくはアドホックによるワイヤレス通信によって行うことが多かった。
しかし、無線が使えない環境では物理結線で通信させるしかない。この時、最も簡単であろうUARTによる通信の方法を説明したい。
1. UART機能を使う
RaspberryPiではシリアル通信が1チャンネルのためUART通信を使う場合、
ターミナル用に用いていたUSBシリアルをつぶす必要がある。
まずsudo vi /boot/config.txtでファイルを開き以下を追記
/boot/config.txt
...
enable_uart=1
次にUSBシリアルを無効化
$ sudo systemctl disable serial-getty@ttyS0.service
起動時にONにならないよう設定
$ sudo vim /boot/cmdline.txt
-> 削除: console=serial0,115200
ここで一度再起動
$ sudo reboot
これを2台のRaspberryPiで設定する
2. 通信テスト
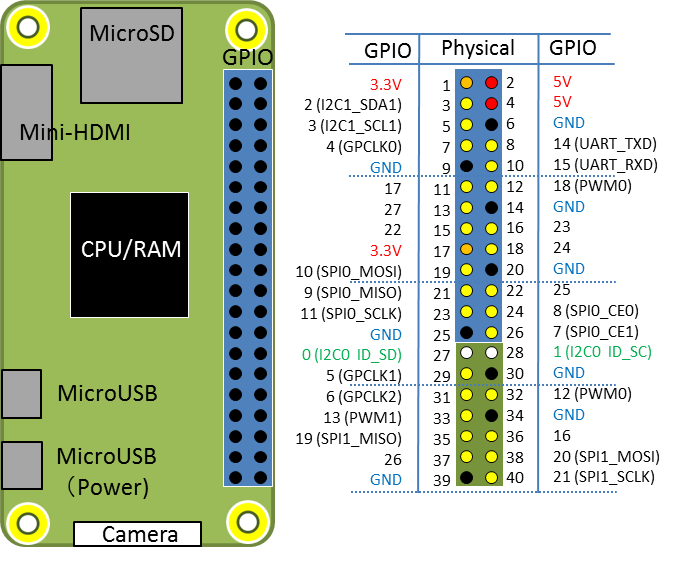
RaspberryPiのヘッダを以下の組み合わせでジャンパで接続する
- TX-RX
- RX-TX
- GND-GND
次に通信ソフトウェアをインストール
$ sudo apt-get install minicom -y
以下で通信
$ minicom -b 115200 -o -D /dev/ttyS0