はじめに
情報系の学生やエンジニアがよく使用するエディタ Visual Stdio Code
今回はその拡張機能を開発していきたいと思います。vscode の拡張機能を作れると制作物のアイデアの幅が広がる、エンジニア向けサービスが作りやすいといった利点があります。ちなみにこれは勉強会で使用した資料です。
前提条件
vscode,Node.jsがインストールされている
拡張機能の雛形を作る
npm パッケージ yo,generator-code をグローバルインストールします
npm
npm install -g yo generator-code
yarn
yarn global add yo generator-code
インストールできたら拡張機能の雛形を作ります。
yo code
What type of extension do you want to create?
ここでは TypeScript を選択します。
What's the name of your extension? ()
拡張機能の名前を入力します。ここでは famous-saying-k19074(好きな名前) にします
What's the identifier of your extension?
そのまま enter
What's the description of your extension?
そのまま enter
Initialize a git repository?
Yes
Bundle the source code with webpack?
No
? Which package manager to use?
npm
作成が終わったら(自分が作った名前)に移動
cd vscode-study
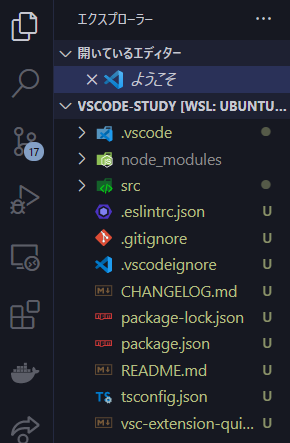
vscode を開きます
code .
下記の画像のようになっていれば OK
※ワークスペースに追加する方法だとデバッグできないケースがあるので $code .で開くこと
デバッグする
作られた時点で Hello world を表示する機能が既に書かれているのでこれをデバッグする。左にあるサイドバーにあるデバッグボタンを押してデバッグすると新しい vscode のウィンドウが表示される。
新しく開かれた vscode ウィンドウで control+shift+P でコマンドパレットを開き Hello world と入力します。右下にメッセージが表示されればデバッグ成功

簡単なコード解説
// The module 'vscode' contains the VS Code extensibility API
// Import the module and reference it with the alias vscode in your code below
import * as vscode from "vscode";

// this method is called when your extension is activated
// your extension is activated the very first time the command is executed
export function activate(context: vscode.ExtensionContext) {
  //拡張機能開発側vscodeのデバッグコンソールに表示される
  console.log('Congratulations, your extension "vscode-study" is now active!');

  //registerCommand(コマンド名,実行する関数)
  //コマンド名とpackage.jsonのコマンド名を一致させる必要がある
  let disposable = vscode.commands.registerCommand(
    "vscode-study.helloWorld",
    () => {
      //vscodeのAPI showInformationMessageを使用してパネルにメッセージを表示
      vscode.window.showInformationMessage("Hello World from vscode-study!");
    }
  );
  //コマンドの登録
  context.subscriptions.push(disposable);
}

// this method is called when your extension is deactivated
//拡張機能を終了した時の処理
//自動的に終わらてくれるものが多いため書くことは少ない
export function deactivate() {}
		"contributes": {
		"commands": [
			{
                //extension.tsのregsiterCommandで登録した名前
				"command": "vscode-study.helloWorld",
                //実際に拡張機能を呼び出す時の名前
				"title": "Hello World"
			}
		]
	},
簡単な拡張機能を作ってみよう
機能を実行したら次は VSCode 勉強会と表示する拡張機能を作ってみよう
export function activate(context: vscode.ExtensionContext) {
	  //拡張機能開発側vscodeのデバッグコンソールに表示される
	console.log('Congratulations, your extension "vscode-study" is now active!');

  ...
  //メソッドの登録
	context.subscriptions.push(disposable);


//追記
    let helloOriginal = vscode.commands.registerCommand("hello.Original", () => {
    vscode.window.showInformationMessage("helloOriginal");
  });
  context.subscriptions.push(helloOriginal);
}
package.json に以下を追加
 "activationEvents": [
    "onCommand:vscode-study.helloWorld",
     //追記
    "onCommand:hello.Original"
  ],
  "main": "./out/extension.js",
  "contributes": {
    "commands": [
      {
        "command": "vscode-study.helloWorld",
        "title": "Hello World"
      },
      //追記
      {
        "command": "hello.Original",
        "title": "call Original"
      }
    ]
  },

本番:一定以上の文字数を打ち込むと名言をターミナルに出力する拡張機能を作る
axios をインストール
npm install axios
npm install -D @types/axios
extension.ts に以下を記述
// The module 'vscode' contains the VS Code extensibility API
// Import the module and reference it with the alias vscode in your code below
import * as vscode from "vscode";
import axios, { AxiosResponse } from "axios";
import { type } from "os";

type FamousSaying = {
  auther: string;
  meigen: string;
};

export function activate(context: vscode.ExtensionContext) {
  console.log('Congratulations, your extension "vscode-study" is now active!');

  let famousSaying = vscode.commands.registerCommand(
    "famousSaying",
    async () => {
      let activeText = vscode.window.activeTextEditor;
      //初期文字数
      let firstWordCount = activeText?.document.getText().length;
      //初期閾値
      let threshold = 20;
      //閾値一覧
      let thresholdList = ["10", "20", "30", "40", "50", "100", "200"];

      //非同期処理なのでawaitで入力を待たせる必要がある
      threshold = Number(await vscode.window.showQuickPick(thresholdList));
      vscode.window.showInformationMessage("Start");

      // 編集しているファイルの変更を検知
      vscode.window.onDidChangeVisibleTextEditors(() => {
        activeText = vscode.window.activeTextEditor;
        firstWordCount = activeText?.document.getText().length;
      });

      //ファイルの書き換えを検知
      vscode.workspace.onDidChangeTextDocument(() => {
        //現在の文字数を取得
        let currentWordCount = activeText?.document.getText().length;
        //初期の文字数との差
        let diff = (currentWordCount as number) - (firstWordCount as number);

        //関数式を使う場合巻き上げはないので処理前に定義する必要がある
        const sendTerminalFamousSaying = async () => {
          try {
            const resposeData: AxiosResponse<FamousSaying[]> = await axios.get(
              "https://meigen.doodlenote.net/api/json.php"
            );
            // console.log(resposeData);

            vscode.window.activeTerminal?.sendText(
              "echo" + " " + resposeData["data"][0]["meigen"] + " > nul"
            );
          } catch {
            console.log("error");
          }
        };

        //一定の閾値を超えたら処理を実行
        if (diff > threshold) {
          sendTerminalFamousSaying();
          firstWordCount = (firstWordCount as number) + threshold;
        }

        //ファイルの文字数が初期文字数より少なくなった時に対応
        if (diff < 0) {
          firstWordCount = (firstWordCount as number) + diff;
        }
      });
    }
  );
  context.subscriptions.push(famousSaying);
}

// this method is called when your extension is deactivated
export function deactivate() {}
コード解説
vscode.window.showQuickPick(thresholdList)でユーザが用意したリストから選択できる機能
vscode.window.activeTextEditor;で現在編集しているファイルを取得
activeText?.document.getText().lengthでファイルのテキスト文字数を取得
vscode.window.onDidChangeVisibleTextEditorsは編集しているファイルが変わった時に起こるイベント。この時にアクティブテキストを再代入する。これをしないと編集しているファイルを切り替えた時に正常に機能しない。
vscode.workspace.onDidChangeTextDocumentこれはファイルの内容が変更された(文字を追加、文字を削除など)時に起こるイベント。この時activeText?.document.getText().lengthファイルテキストの文字数を取得する。ファイルを開いた時に取得したfirstWordCountと差をとる。
sendTerminalFamouSayingに api を叩いて返ってきたデータからターミナルに名言を出力する処理を書く
TypeScript の場合 response 型定義を行う必要がある。↓response の中身

header,status などを自分で定義するのは手間がかかるので axios が提供している AxiosResponse 型のジェネリクスに response.data を流し込む。(ジェネリクスとは C#や Java にもある型を抽象化して実際に利用する時に型を確定させる機能。)
↓axios が提供している型
export interface AxiosResponse<T = unknown, D = any> {
  //ここにデータを定義する
  data: T;
  status: number;
  statusText: string;
  headers: AxiosResponseHeaders;
  config: AxiosRequestConfig<D>;
  request?: any;
}
こちらで定義する型
type FamousSaying = {
  auther: string;
  meigen: string;
};
const resposeData: AxiosResponse<FamousSaying[]>でそれを行う
async~await で同期処理を行なっている。await で書かれた部分はその処理が終わるまでそれ以降の処理がされない。
vscode.window.activeTerminal?.sendTextでターミナルに文字を出力できる。
最後にsendTerminalFamousSaying を呼び出すタイミングを指定する
thresholdListから選択された閾値以上の文字を入力すると実行される。
GUIとして追加
今回の拡張機能ではコマンドに加えて GUI でコマンドを叩けるようにする。
GUI にアイコンボタンを追加するには menus にプロパティを追加する必要がある。
imgディレクトリを作成する。
mkdir img
この中に
https://github.com/happy663/vscode-study/blob/main/img/head.svg
にあるSVGファイルをこの中に入れる
package.json
  "activationEvents": [
    "onCommand:vscode-study.helloWorld",
    "onCommand:hello.Original",
    //追記
    "onCommand:famousSaying"
  ],
  "main": "./out/extension.js",
  "contributes": {
    "commands": [
      {
        "command": "vscode-study.helloWorld",
        "title": "Hello World"
      },
      {
        "command": "hello.Original",
        "title": "call Original"
      },
      {
        //追記
        "command": "famousSaying",
        "title": "call famousSaying",
        "icon": {
          "dark": "./img/head.svg",
          "light": "./img/head.svg"
        }
      }
    ],
    //追記
    "menus": {
      "editor/title": [
        {
          "when": "",
          "command": "famousSaying",
          "group": "navigation"
        }
      ]
    }
  },

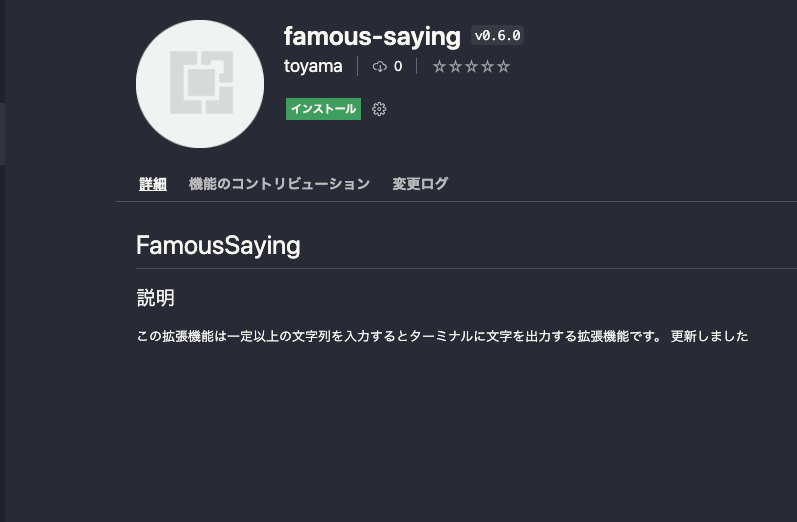
拡張機能の公開
README.md を書き換える
# FamousSaying

## 説明

この拡張機能は一定以上の文字列を入力するとターミナルに文字を出力する拡張機能です。
vsce をインストールする
npm install -g vsce
Azure DevOps にログインする
https://dev.azure.com/
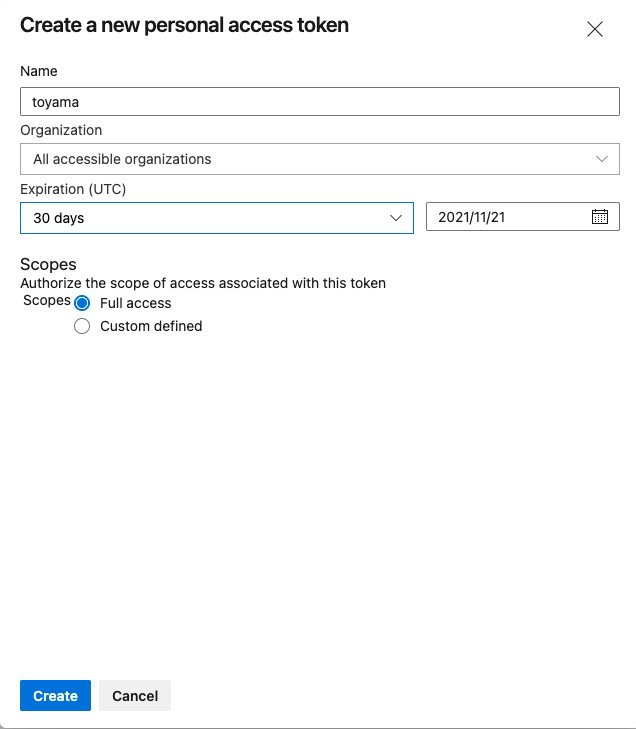
トークンの発行
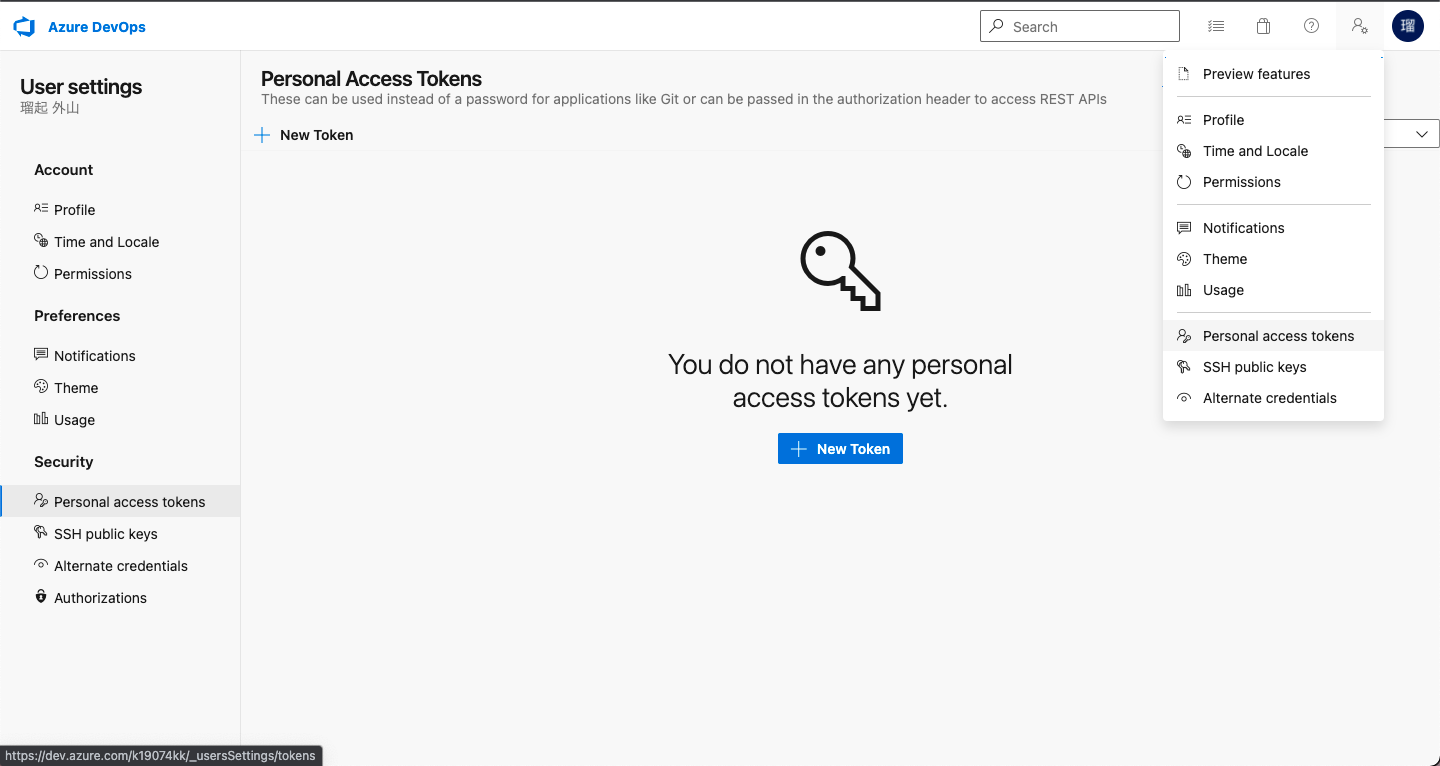
Name のところは自分の名前
pulisher の作成
https://marketplace.visualstudio.com/manage/
create puslisher を選ぶ
Name と ID を入力して作成する。トークンをコピペする。
package.json に publisher の項目を追記、拡張機能の名前変更することも可能
  "name": "famous-saying-k19074",
  //追記
  "publisher": "toyama",
  "displayName": "famous-saying-k19074",
  "description": "",
  "version": "0.0.1",
ターミナルでvsce publishをする
事前環境で以下のエラーが出た。
93   signal?: AbortSignal;
              ~~~~~~~~~~~

Found 1 error.

 ERROR  npm failed with exit code 2
エラーを修正する。tsconfig.json を書き換える。
{
  "compilerOptions": {
    "module": "commonjs",
    "target": "es6",
    "outDir": "out",
    //domを追加
    "lib": ["es6", "dom"],
    "sourceMap": true,
    "rootDir": "src",
    "strict": true /* enable all strict type-checking options
  },
  "exclude": ["node_modules", ".vscode-test"]
}
修正したらもう一度 vsce publishをする。
トークンを求められるのでさっきコピペしたトークンを貼り付ける。
The Personal Access Token verification succeeded とでれば成功
おまけ
vsce publish minor
バージョンを更新してデプロイできる
この資料のgithubリポジトリ
(よければスターお願いします)
参考
https://code.visualstudio.com/api/references/vscode-api
https://qiita.com/hakua-doublemoon/items/cfb638fe1ab43ca42cb8
https://blog.yucchiy.com/2021/05/vscode-quickinput-inputbox/