Cocoa Bindingあんまり使わないから、つかう度に設定方法を忘れてしまいます。
StoryBoardやnib上でガシガシいじるので、ビルドエラーも起きないしログ読んでも原因すぐわからないし、Bindingについての書籍もなかなかないしっていうことで、未来の自分がまたBindingいじる時の備忘録です。
あと、AppkitにはUICollectionViewDataSourceみたいなDataSourceはないのでNSCollectionViewつかうときは割とBindingはつかうのかなとかって思っています。(もっと簡単でいいやり方あれば知りたいです。)
今回サンプルアプリを作りながらBindの設定を思い出します。
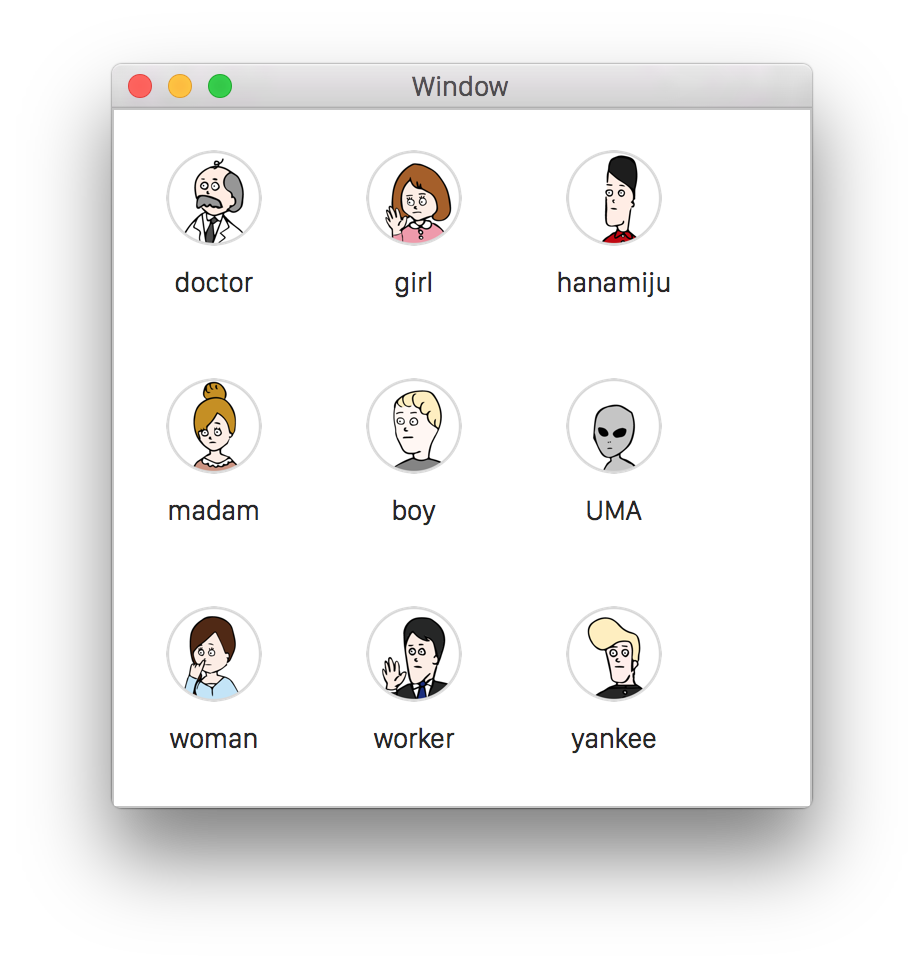
つくるもの
作り方
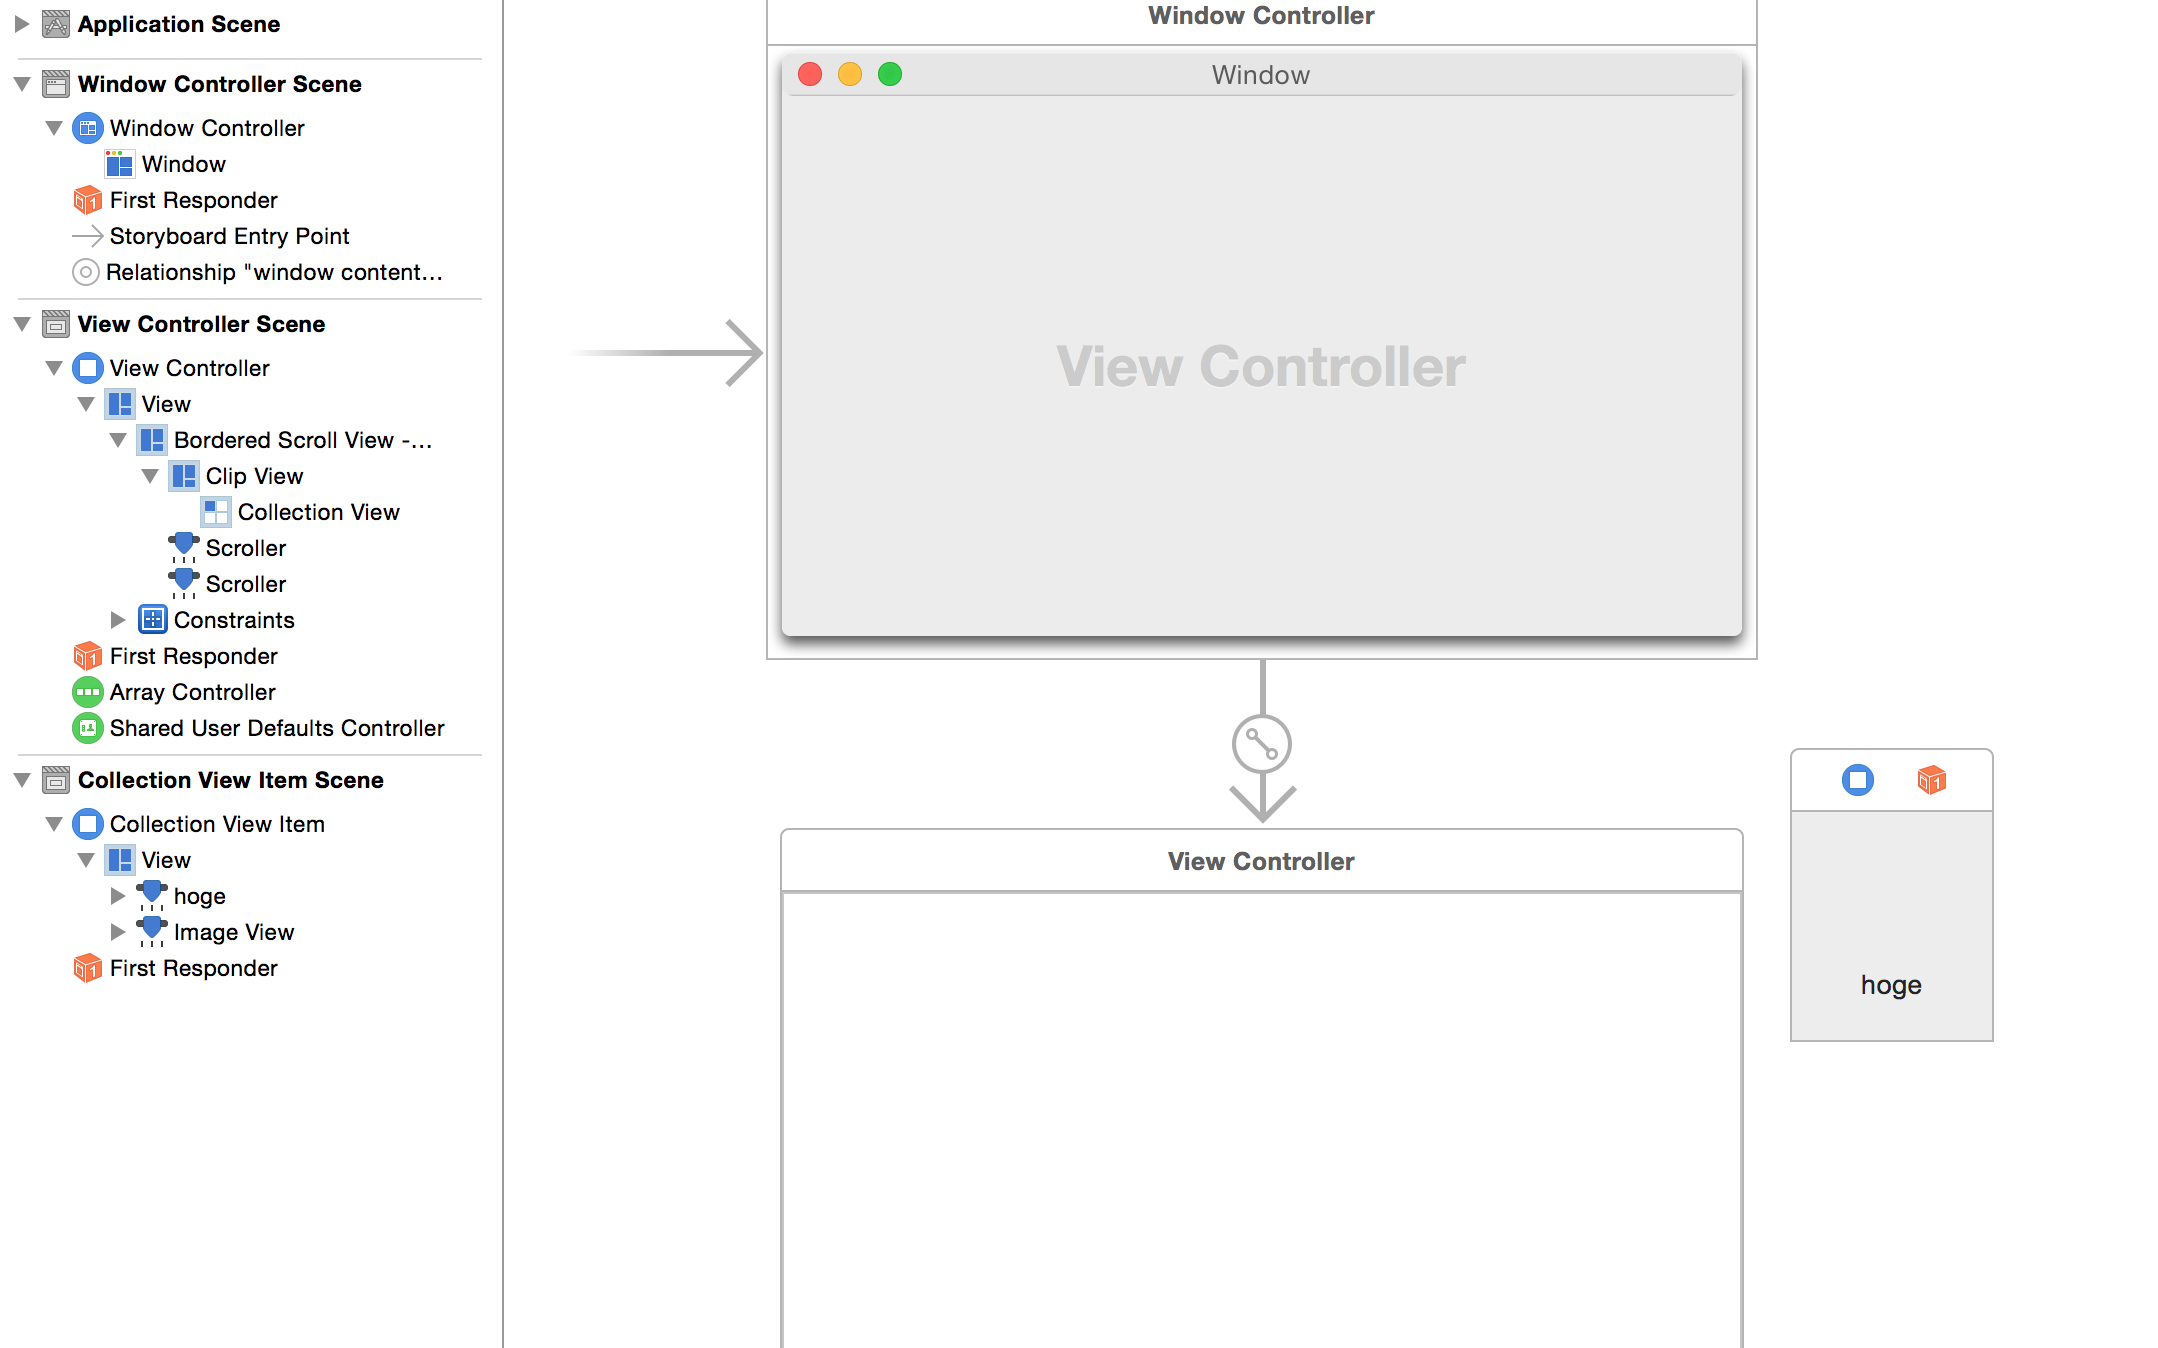
Storyboardを用意する
- ViewControllerにCollectionViewを貼り付ける
- CollectionViewItemの中身を用意する
- CollectionViewItemにStoryboardID振る
画像を用意する
コーディング
Modelクラス
- テキストとイメージを持つクラスを作成
hoge.swift
import Cocoa
import Foundation

class Hoge : NSObject {
    var _name: String = ""
    var _image: NSImage

    init(name: String) {
        _name = name
        _image = NSImage(named:name)!

        super.init()
    }
}
ViewControllerクラス
- WindowにならべるCollectionViewItemをCollectionViewに設定
- さっきつくったHogeクラスを配列にしてCollectionViewに設定
ViewController.swift
import Cocoa

class ViewController: NSViewController {

    var hogeArray = NSMutableArray()
    var nameArray = ["doctor","girl","hanamiju","madam","boy","UMA","woman","worker","yankee"]

    @IBOutlet weak var hogeCollectionView: NSCollectionView!

    override func viewDidLoad() {
        super.viewDidLoad()

        let itemPrototype = self.storyboard?.instantiateControllerWithIdentifier("collectionViewItem") as! NSCollectionViewItem
        hogeCollectionView.itemPrototype = itemPrototype

        for name in nameArray {
            var hoge = Hoge(name: name)
            hogeArray.addObject(hoge)
        }

        hogeCollectionView.content = hogeArray as [AnyObject]
    }
}
Binding
上記まででコーディングは終わり。
InterfaceBuilderにもどってバインドしていきます。
ArrayControllerの設定
- ArrayControllerをViewControllerのSceneに追加
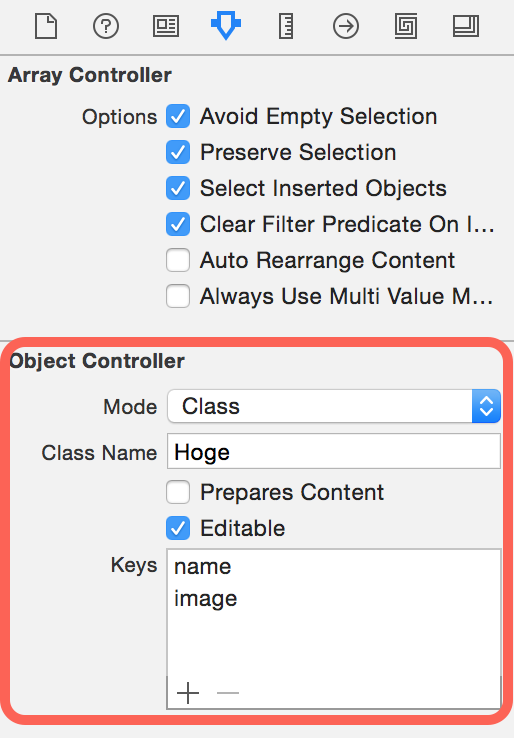
- 追加したArrayControllerを選択し、Attribute InspectorからArrayとして取り込むModelを設定(下図)
CollectionViewの設定
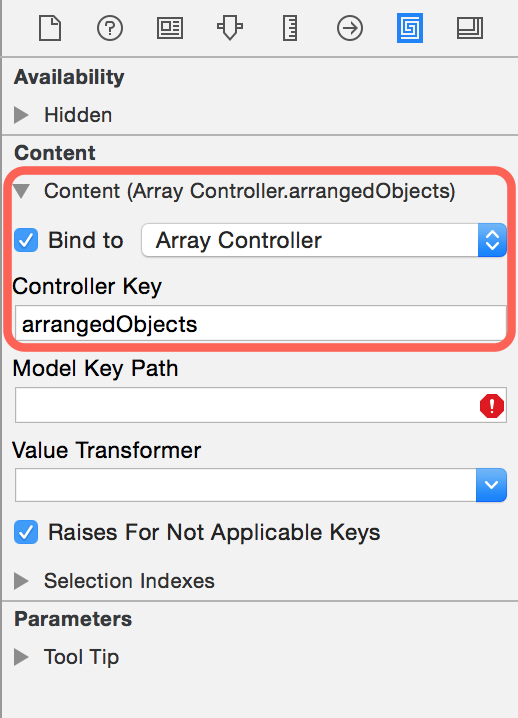
CollectionViewのバインド先をArrayControllerに設定
- CollectionViewを選択し、Binding InspectorからContentを設定。(下図)
CollectionViewItemの設定
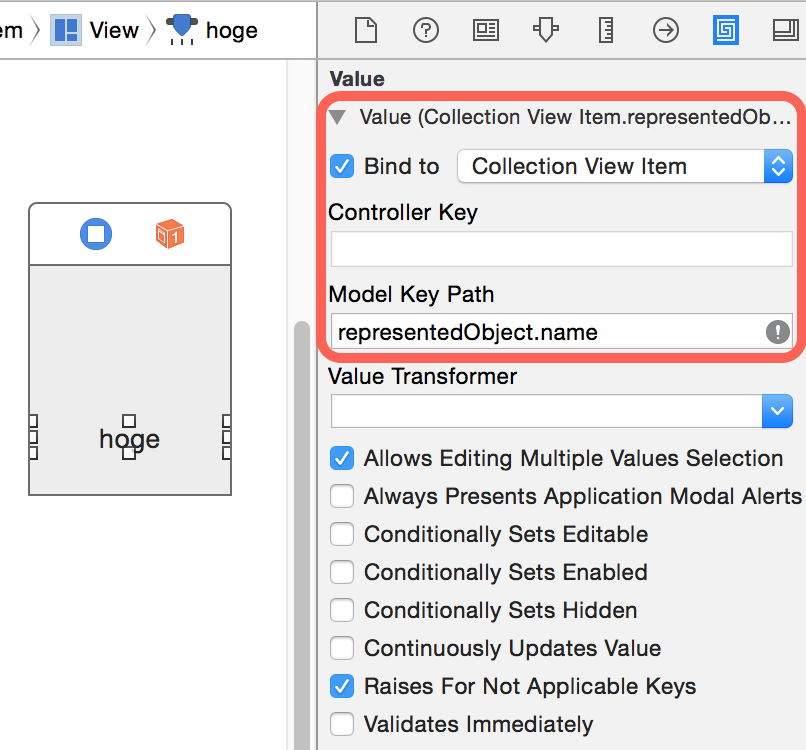
各コントロール(今回はImageとLabel)のBind先をCollectionViewItemに設定する
- CollectionViewの各コントロールを選択
- bind先をCollectionViewItemに設定
- Model Key Pathを「representedObject.プロパティ」に設定
これでうまく表示できるかと。
まとめ
- Array Controllerにモデルを設定
- CollectionViewをArray Controllerにバインド
- CollectionViewItemをCollectionViewのitemProtorypeに設定
- CollectionViewItemに内包されているControlsをCollectionViewItemにバインド
